Film cameras
Minolta RIVA Zoom 90EX Minolta Freedom Zoom 90EX User manual
User manual for Minolta RIVA Zoom 90EX Minolta Freedom Zoom 90EX. 20 pages in English. Read the original PDF, download or print a copy without registration.
20 pagesEnglish8.1 MB PDF
Loading your manual…Open PDF directly
Document details
- Brand
- Minolta
- Model / document
- Minolta RIVA Zoom 90EX Minolta Freedom Zoom 90EX
- Document type
- User manual
- Language
- English
- Pages
- 20
- File size
- 8.1 MB
- Category
- Film cameras
- Document date
- Not specified in catalog
Search available document text
Find a term, then jump to its page in the original PDF. Image-only pages may not be searchable; check the PDF for exact wording and diagrams.
Page 1 · Read text
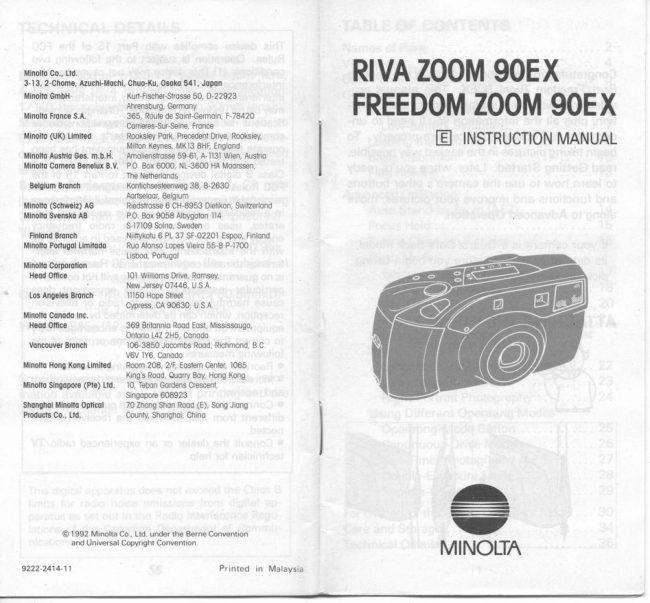
Minollo Co., [td.                           gOEX 3-13,2-Chome, Azuchi-Mochi, Chuo-Ku, Osoko 541, J0D0n          RIVA ZOOM
 Mlnollo GmbH                  Kurt-Fi$hetrSlrosse 50, D-22923
                                 Ahrensburg,  Germony                                 gOEX Minolto Froncs S.A.           365, Route de SoinlGermoin, F-78420      FREEDOM ZOOM
                              Corieres-SuFSeine, Fronce
                                             Pork,                                                Precedent                                                                    Drive,                                                                   Rooksiey, Minollo (UK) Limilod           Rooksley                                                        ITSTnuCTION MANUAL                                                        [,lK13                                                  8HF,                                                         Englond                                               lllilton Keynes,                      E
 Minollo Ausfio Ces. m.b.li.    Amolienslrosse 59-61, A-ll3l Wien, Austrio
 Minollo Comsto Bsnelux B.V  P0 Box 6000, NL-3600 HA Moorssen,
                            The Netherlonds
  Bslglum Bronch             Kontichseslenweg  38, 8-2630
                                 Aortseloot Belgium
 Minollo (Schweiz) A0          Riedslro$e 6 CH-8953  Dietikon, Switerlond
 Mlnollo Svonslo AB          P0. Box 9058 Albygoton ll4
                          Sl7l09 Solno, Sweden
   Flnlond Bronch                    Niittykolu 6 PL 37 SF-02201 Espoo, Finlond
 Minotlo Ponugol Llmllodo     Ruo Afonso Lopes Vieiro 55-B PITOO
                                Lisboo, Porlugol
 Mlnollo Corporollon
  Hsod offce                  l0l Willioms Drive, Romsey,
                        New Jersey 07446, U.S A.
  los Anoeles Eronch           lll50 Hope Street
                                 Cypress, CA 90630, U S.A
 Minollo Conodo lnc.
  Hsod offics              369 Eritonnio Rood Eost, Mississougo,
                                  oniorio L4Z 2H5, Conodo
  Voncouver  Bronch           106-3850 Jocombs Rood Rrchmond. B.C
                       V6V lY6, Conodo
 Minollo Hong Kong Limiled    R@m208,2lF, Eostern Cenlet 1065
                                 King's Rood, Quorry Boy, Hong Kong
Minolh Slngopole (Ple) Ltd.    10, Tebon Gordens Crescenl,
                                Singopore 608923
Shonghoi  Mlnollo Opflcol 70 Zhong Shon Rood (E), Song Jiong
 Producfs Co., [ld.             Counly, Shonghoi, Chino


      @ 1992 Minolta Co., Ltd. under the Berne Convention             and Universal Copyright Convention     +
                                     MINOLTA
9222 2414-11                                 Printed in Malaysia                     -
View original page 1Page 4 · Read text
VIEWFINDER                               DATA PANEL
                                o   o   o @
                @
    oa       Qo                  otl                                 fl,^

    @          Qo

$ Focus frame                       O Flash-mode indicator
   Carnera focuses within this frame.                                                                        : Auto-switchover flash
O Close-framing guides                                                        oulo                                                                                                                                 : Manual fill-flash  When using tele zoom positions 6Omm                            |
  90mm and camera-to-subject  distances less                 $): Flash cancel
   than 1.4m, the picture should be composed                   €) ASZ indicator
   within this frame.                     @ Low-battery symbol
@ Focus lamp: Activated when shutter-release         @ Frame counter
button is pressed partway down.                @ Mode pointers
   Glowing: Focus and exposure settings are         @ Film-transport signals
              locked.                      @ Film-cartridge mark
   Blinking: Subject is too close.                @ Pre-flash indicator
@ Flash lamp: Activated by the eyepiece sensor
and when shutter-release button is pressed
partway down.
   Off: Flash is not needed.
   Glowing: Flash will fire with next picture.
   Blinking slowly: Camera-shake warning.
   Blinking quickly: Flash is charging.
   Blinking at varying intervals: Pre-flash will fire.
View original page 4Page 5 · Read text
GETTING STARTED
INSERTING THE BATTERY

                      Your camera uses a 6-volt lithium           Low-Battery Symbol
                        battery rcR-W or DLQQ3A) that
                       supplies power for all camera
                         operations.                                                              [ -p,.  =F_=$

                                                                                                           lf the blinking low-battery symbol appears in the
                                                       data panel with the other indicators, you can still
F          F                          use the camera, but the battery will have to be
                                                        replaced soon.


                                                                                                                  lf the blinking low battery symbol appears alone,
  Open the battery cover by sliding the bat-         you cannot use the camera until you replace thell
tery-cover lock.                                               battery.
pf fnsert the battery with the +/- end first,
then snap the cover closed.                      Auto Power Off
                                                 To save power, your camera automatically turns
                                                                      itself off if not operated for more than three
                                                         minutes.

  Battery Cautions
  . Read and follow all warnings and instruc-
  tions supplied by the battery manufacturer.
 rKeep batteries away from children.
 oDo not attempt to disassemble, recharge, or
 short out the battery, or subject it to high
 temperatures or fire.
View original page 5Page 6 · Read text
LOADING THE FILM

                    You should only u* DX-coded,
               35mm film with ISO ratinqs 95 to
              3W.


                         www.butkus.us

                                                                                           flat between the guide rails andI  Open the back cover by sliding the back-     E t V the film
cover release down.                                 extend the film to the "FILM TlP" mark.
p etace the film cartridge, bottom first, into                olf the film extends too far, gently push the
the film chamber as shown.                             excess back into the cartridge.

                                                Snap the back cover closed.                                                                    !l                                        The film automatically advances to the first
                                                  frame and 1 appears in the data panel.


                                                                                                                      \nt
                                                               gi-{=  . Polaroid instant 35mm films cannot
  used.                                                                         lf O blinks in the data panel, the film was
 o Always load your film in the shade or at             incorrectly loaded. Open the back cover
  least away from direct sunlight.                      and re-load the film.
View original page 6Page 9 · Read text
ADVANCED OPERATION
AUTO STAND.BY ZOOM (@}        FOCUS HOLD


                ASZ sets a z@m position the                                   Hold focus on your subjed
                  moment you look through the                                       vvhen you don'twant  it in he
                        viewfinder.                                                            center of the pidure.


                         Press the ASZ button
                  to select or cancel
              ASZ. When it   is
                  selected, " ASZ"
                     appears in the data
                          panel.


                                                                                                   subject,o After ASZ is activated, you can change the             ll Center the focus frame on your
zoom position by pressing the zoom button.             then press and hold the shutter-release button
                                                                    lamp glows.  lf. When the subject distance  is greater than 8m        partway down so the focus
                                                    your subject is behind glass, use focus hold on(26ft.1, zoom will be set to telephoto (9Omm).
                                                    something of equal distance from the camera.
                                                        pl Wittrout lifting your finger, recompose theA sensor located above the viewfinder eyepiece
activates zoom when  it detects something closer        frame and press the shutter-release button all-
than approximately 6 to 8 cm l2-3/B to 3-1/B        the-way down to take the picture.
in.).
View original page 9Page 12 · Read text
PRE.FLASH(@}


                    Reduce red-qe by using pre-                                         Don't use flash fq twilight scenes
                               flash!                                                                                                                                                                          ,u"'       and distant subje&.
                                                                                    .o


                   Press the pre-flash
                  button so that @
                     appears in the data
                 panel. When the
                       flash is charged, the                                                       Flash should be canceled when you are photo-                          flash lamp will blink atwww.butkus.us                                          graphing subjects like sunsets or city skylines at                       varying intervals indi-                                                           night which do not include people. When your                         cating it is o.k. to take                                                       subjects are far away, landscape mode should                        the picture.                                                           also be selected (see p.23).  lf the scene includes
                                                      people that you want to photograph, use night-Warn the people you are photographing that                                                              partrait mode (see p.24) When the flash isthe flash will fire a small burst before the                                                canceled, shutter speeds are slower andpicture is taken.                                                  sometimes the flash lamp will blink slowly, so to
                                                        avoid blurry pictures, use a tripod.
w*m*wWhen you press the shutter-release button all-
the-way down, first, the pre-flash burst fires,
then the self-timer,/remote-control lamp blinks
until the main flash fires with the shutter re-
lease.
View original page 12Page 13 · Read text
LAN D$CAFE/NIGHT.PORTRAIT BUTTON      LANDSCAPE PHSTOG*AP|{Y   I          I                                                        [J

                   Each time the land-                                                              lf you're photographing  distant
                          scape,/ n ig ht-portra it                          s0bje6 through a window, ure
                       button is pressed, the                              landscape mode to set focus at
                 modes change suc-                                                infinity.
                          cessively as shown in
                          the table below.            -In
                                       -_JE
         Mode          When to Use
                      When photo-
                                graphing distant               Landscape
                                 subjects through    +n  l-                     a window
   off   *             When your sub-         Press the landscape,/night-portrait button
                 Night           ject is placed in            until the mode pointer appears next to the                   Portrait         front of a night   E                                                 landscape mark. lf you are taking pictures at
                             scene                       night, select flash canceland use a tripod. L
o The mode pointer appears in the data panel                                                        After you press the shutter-release button all-
next to the mark of the selected mode. lf no        the-way down to take the picture, landscape
mode is selected,  it does not appear.                                          mode is automatically canceled.
o These modes can be used at the same time as
the operating modes.
View original page 13Page 14 · Read text
N|cHT- poRTRAfF r,Hoffi G friffiiHttt,'hffi  I     oruRAnNG-Mor}E nurroru                                                                  if{,t

                 When you re posirg nmeone in                               Each time the operat-
                          front of a n$ht scene, ure night-                             ing-mode button  is
                    wrtait mode.                                              pressed, the modes
                                                                cha.nge successively
                                                                    as shown in the table
                                                                               below.


                                                           Operating Mode      When to Use
                                                                                               photo-                                                  )     Continuous    With action
                                                              EJt  Drive         graphy for
                                                                         sequence shots
                                                       +   Self-Timer    To include yourself
                                                ,U                     in group pictures
                                                       +   Two-Shot    To include yourselfPress the landscape,/night-portrait button     I        Self-Timer      in group pictures                                                           offuntil the mode pointer appears next to the                               and have an extra                                          'UJnight-portrait mark. Auto-switchover flash is                                      surprise shot
automatically selected.  lf a bright object is near                                                             Double        For superimposing
the camera, the flash may not fire and the flash                                                           +EI  Exposure     two pictureslamp will not blink to indicate so. Therefore, in                                                       +   Remote        For releasing thecases such as this, select manual fill-flash.                                                   gt  Control        shutter by remoteIn this mode, shutter speeds are slow; please     L                                                                                            controluse a tripod and warn your subjects to remain
still.                                         o The mode pointer appears in the data panel
After you press the shutter-release button all-        next to the mark of the selected mode. lf no
the-way down to take the picture, night-portrait       mode is selected,  it does not appear.
mode is canceled.                               o These modes can be used at the same time as
                                                    landscape and night-portrait modes.

                                                                           25
View original page 14Page 15 · Read text
SELF.TIMER PHOTOGRAPHY (t) .S9}CONTINUOUS.DRIVE MODE ( &  }

                             \Yhen you' re photograph-                                      lnclude yourself in the pidure
                                  ing moving subjects, take                                       with self-timer.
                           a sequence of shots.


                                                    Set up the picture.I   Press the operating-mode button until the         Imode pointer appears in the data panel above     p Press the operating-mode button until the
the continuous-drive mark.                    mode pointer appears in the data panelabove
p Wtren you're ready to take pictures, press        the self-timer or two-shot self-timer mark.
the shutter-release button all-the-way down     p Wtren you're ready to take the picture,
and hold. The shutter will continue to release        press the shutter-release button all-the-way
as long as the shutter-release button is held       down.
down. When taking flash pictures, the shutter       o The mode pointer and the red self-timer lamp
will release after the flash has charged.                    blink to show that self-timer is operating.
                                                  There is a 1O sec. delay for the first picture and a
This mode remains selected until the camera is     4 sec. delay for the second in the two-shot
turned off.                                          mode.
                                              Both self-timer modes are canceled after the
                                                        selected number of pictures are taken. To stop
                                                            self-timer operation before the picture is taken,
                                                          turn off the camera.

                                                                           27
View original page 15Page 16 · Read text
DOUBLE-EXPO$URE MODE ( Eb }      REMOTE:CqHTHS,!1 USbr (*/)


                       Superimpore two images
                         with double dposure.


                                                     Optional accessory lR Remote Control RC-2 is
                                                      required for the use of remote-control mode.
                                                    Please refer to the remote control's manual for
                                                         operating instructions.


www.butkus.us

   Press the operating-mode button until theI
mode pointer appears in the data panel above
the double-exposure mark.
p Press the shutter-release button all-the-way
down to take the first picture.
o The mode pointer and film-transport mark
blink to show that one picture has been taken.  lf
the camera is turned off at this time, these will
continue blinking when it is turned on again.
p Recompose your picture and take the sec-
ond shot.
After this, double-exposure mode is canceled.
lf you have a OD back model, select "No im-
printing" (see p.31).
trr t"r, r"d"',r, rrt
                      28
View original page 16Page 17 · Read text
FOR OWNERS OF THE
OUARTZ DATA BACK MODEL
The data back enables you to record the date, in      Names of Parts
                                                or                                    formats,a choice          of three year/month/day
     (day,/hour,/minute)directlytime                               onto                                                                                  lt                                                                                         fMM-;        o                                     the film.
features a quartz clock and automatic calendar                      tEEEEjEgl
through the year 2019, and automatically con-
trols the imprint exposure according to the cam-                    MoDE sELEcr ADJUST
era's film-speed setting. With the camera held     e print indicator
horizontally, the data is recorded onto the lower     €)MoDEbutton CO-OQ)right portion of the picture; in the vertical format,     O SELECT button -l-l-[
                                              @imprinting occurs on the lower left portion of the     €)ADJUSTbutton O.O
picture.
                                      Mode Selection
                                                  Use the MODE button to change the data display
                                                     as shown.

                                                                                                             Time imprinting    No imprinting
                                                                    I                dftffil+@+Er
 The data back is powered by the camera's               L-'*@;ffi,tJday, month, year,       month, day, year  battery, therefore data must be set before you
  begin taking pictures.
View original page 17Page 18 · Read text
Setting Data                                  Data lmprinting
                                                    Press the MODE button to select the desired
                                                      data type, then take the picture.
                                                         Following exposure, the print indicator blinks in
                                                                         tfre data panel for approximately two seconds to
     IVIODE SELECT ADJUST       MODE SELECT ADJUST           confirm imprinting.
                                             o The imprinted data may be difficult to read if
                                                         the subject area over which  it is superimposed  is
                                                            bright or non-uniform.
                                        o Legibility of the imprinted data may vary         SELECT button to move betweenI Use the                                            somewhat with film type.different parts of the displayed data.
o With the date displayed, pressing the SELECT                                              Care and Storagebutton in succession causes the settings for                                                  This unit is designed for use between 40 andyear, month, and then day to blink.
. In time mode, pressing the SELECT button       0'C (104 and 32"F). At temperatures above or                                                below this range, LCD and imprinted date maysuccessively causes the hour, minute, and then                                             become difficult to read. Even higher temper-the colon to blink.                                              atures may cause the LCD to temporarilyI  Press the ADJUST button to change the          blacken.
blinking display.
. In time mode, pressing the ADJUST button
while the colon is blinking synchronizes the
seconds counter to OO.
View original page 18Page 19 · Read text
CARE AND STORAGE

o  lf the lens becomes dirty, clean  it gently with a        a When not in use, keep the camera in a cool;
lens brush.  lf necessary, moisten a sheet of lens         dry place away from dust and chemicals. For
tissue with one drop of lens- cleaning fluid and         extended storage we recommend that you place
gently wipe the lens. Never touch the lens          the camera in an airtight container with a drying
surface with your fingers.                              agent such as silica gel.
. Never use alcohol or chemical solvents on the        o This camera contains high-voltage  iircuits.
camera body. lf it is dirty, wipe it gently with a       Do not attempt to disassemble or repair it your-
soft, clean, dry cloth.                                                  self   .
o Never subject the camera to shock, high heat,       o lf you have questions about your camera,
or humidity. Be particularly careful not to leave          contact your local camera dealer. For more in-
it in the glove compartment or other places in        formation write to the Minolta distributor or
motor vehicles where it may be subjected to         subsidiary in your area (addresses listed at the
high temperatures.                                     back of this manual).
. Entry of sand, salt, or other grit may cause        o To assure prompt service, please contact an
costly or irrdparable damage to the camera. Use         authorized Minolta Service Center before ship-
extra care when taking pictures at the beach.             ping your camera for repairs.
o This camera is designed for use between -10
and 4OoC (14 to 1O4'F).
o Using the camera at very low temperatures
impairs its performance.  In cold weather, carry
the camera inside your coat to keep it warm. Do
not transfer the camera directly from an ex-
tremely cold to warm area, since condensation
may form inside and prevent normal operation.
. Do not let the camera get wet. Water seepage
could result in costly or irreparable damage to
internal parts.
View original page 19
Page 20 · Read text
TECHNICAL DETAILS
                                                           This device complies with Part 15 of the FCC
                                                           Rules. Operation is subject to the following two
 Lens: 35-9Omm t/3.5-7.7 power zoom lens;              conditions: (1)This device may not cause harmful
 4 elements in 4 groups; max. magnification:              interference, and (2) this device must accept any                                                                   interference received, including interference that
 1/lOX (for subjects at O.9m with 90mm lens)            may cause undesired operation. Changes or modi-
 Metering Range: 38mm: EV4 and EV6 to             fications not approved by the party responsible for
 EY17;9Omm: EV6 and EV8 to EY17; in flash-          compliance could void the user's authority to
 cancel and night-portrait modes, shutter speed            operate the equipment. This equipment has been                                                                 tested and found to comply with the limits for a
  is set up to 1 sec                                            Class B digital device, pursuant to Part 15 of the
 Battery Performance: Approximately 22 rolls         FCC Rules. These limits are designed to provide
 (based on Minolta's standard test method using            reasonable protection against harmful interference
 24 exposure film with flash 5Oo/o oI exposures)               in a residential installation. This equipment gen-                                                                erates, uses and can radiate radio frequency Viewfinder
.   Magnification: 38mm: O.45x;9Omm: 0.95x            withenergytheand,instructions,if not installedmayandcauseused harmfulin accordanceinter-
   lmage Area: 85% coverage (for subject at            ference to radio communications. However, there
                  3ml9.8ft.)                                                   is no guarantee that interference will not occur in a
                                                                                                  does Dimensions: 149.5(W) x 76.5(H) x 6O.5mm(D)               particular installation.  lf this equipment                                                        cause harmful interference to radio or television              l5-7/8 x3 x2-3/8 in.)                           reception, which can be determined by turning the
 Weight: 3459 (12-1 /8oz.l                                 equipment off and on, the user is encouraged to try
      OD model: 35Og (12-3/8oz.l                         to correct the interference by one or more of the
                                                                     following measures:
                                                                                 . Reorient or relocate the receiving antenna.
 Specifications are based on the latest infor-               . Increase the separation between the eqrripment
 mation available at the time of printing and are           and receiver.                                                                                 . Connect the equipment  into an outlet on a circuit subject to'change without notice.                                                                          different from that to which the receiver is con-
                                                                        nected.
                                                  o Consult the dealer or an experienced radio/-lY
                                                                      technician for help.

   This digital apparatus does not exceed the Class B
    limits for radio noise emissions from digital ap-
   paratus as set out in the Radio Interference Regu-
   lations of the Canadian Department of Commu-
    nications.

                       36
View original page 20From the M. Butkus archive. Original publisher and archive notices are retained.
Check the model and edition against your equipment.
PDF verified 2026-10-10.