Film cameras
Minolta Spotmeter F User manual
User manual for Minolta Spotmeter F. 98 pages in French. Read the original PDF, download or print a copy without registration.
98 pagesFrench7.4 MB PDF
Loading your manual…Open PDF directly
Document details
- Brand
- Minolta
- Model / document
- Minolta Spotmeter F
- Document type
- User manual
- Language
- French
- Pages
- 98
- File size
- 7.4 MB
- Category
- Film cameras
- Document date
- Not specified in catalog
Search available document text
Find a term, then jump to its page in the original PDF. Image-only pages may not be searchable; check the PDF for exact wording and diagrams.
Page 3 · Read text
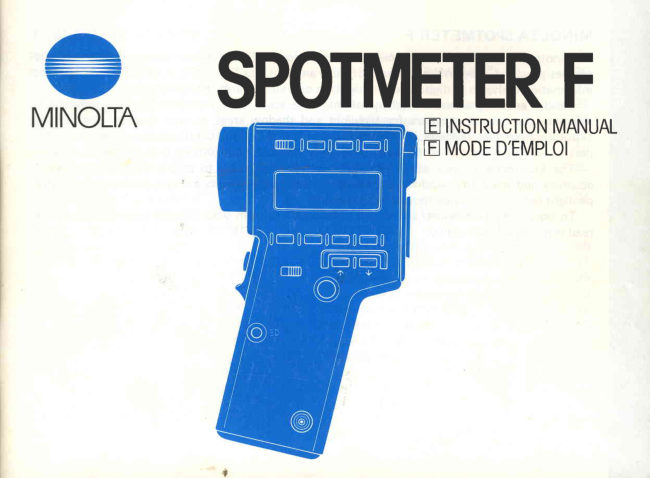
MINOLTASPOTMETERF
   Minolta's Spotmeter F is designed specifically for professionalsand advanced amateurs and
enablesprecise 1" spot measurementsof both ambient and flash light. A full rangeof exposure
information is shown in digital and analog form on external and viewfinder displays.
   Besides enabling accurate readings of mid-tone areas, the Spotmeter F can automatically
calculate the correct exposure for  highlight and shadow areas, as well calculate the average
exposure from two readings.To monitor contrast and lighting conditions, the relative bright-
nessof various parts of the scenecan be quickly checked while looking through the viewfinder.
  The Spotmeter F uses advanced micro-electronic circuitry to assure the highest possible
accuracy and reliability. And  its low power consumption permits a single,inexpensiveAA-size
penlight battery to provide thousands of readings.
  To obtain the best results and to get maximum use from your Minolta Spotmeter F, please
read this manual thoroughly.


                        www.orphancameras.com
  "! : {:;i.i;:ria9l:{r:",.,
View original page 3Page 4 · Read text
TABLEOF CONTENTS
PREPARATION                 OPERATION
NAMESOF PARTS                 2  GENERALINFORMNTIOru       20
INSTALLINGTHE BATTERY         6     Mid-tone readings                2 1
ADJUSTINGTHE EYEPIECE         8     Ambient light measurements       22
DISPLAYS                                 F lash measurements             24
  E x t e r n ad li g i t adl i s p l a y         . . . . . . 1 0    EXPOSURE CALCULATION MODES .  . 26
  Analogdisplay                            Using the memory function         28
  Viewfinderdisplay                12      Highlightreadings               30
  Over-rangeand under-rahgewarnings  13    Shadow readings                32
S E T T I N GT H E F I L M S P E E D          1 4     Average readings                34
SETTINGTHE SHUTTERSPEED     16  M O N I T O RI N G T H E L I G H T I N G
SELECTINGFNo./EVDISPLAYMODE. 18  C O ND I T I O N S
                                           Checkingdifferencesin brightness .  .  . 36
                                             Taking brightness-differencereading.  . 37
                                           Determ ing contrast ratios           39
                                          Luminance measurements          40
                                   C I N E M E A S U R E M E N T S . . .           42
                                   CALIBRATION                     43
                                CARE AND STORAGE               44
                                  TECHNICAL DETAILS  .  .             45


                                                                                                                ,ibul1ij",eiry*,:-.-!'                     . -l*,lr
View original page 4Page 6 · Read text
Eyepiece                            Power switch
                                         Use to  switch  off  the meter to  prevent
                                               battery drain from accidental readings.Even
                                      when  switched  off ,  the  meter retains the
                                              film-speed and shutter-speed settings, along
                                               with  any  memorized/calculated exposure
                                            readi ngs.
                                      Shadow key
                                          To bias exposure for a dark shadow area,
                                       measurethe dark area,then pressshadow key.
                                       The  meter   will   automatically  calculate
                                          exposure  setting  to   correctly  reproduce
                                       shadow areasof scene.
                                             Averaging key
                                          To  calculate the average exposure of  a
                                           scene, measure and memorize readings for
                                            both bright and dark areas,then pressaverag-
                                                 ing key. The meter will automatically calcu-
Battery cover                                        late a median exposurepoint.

Strap eyelet


Tripod socket
View original page 6Page 7 · Read text
Highlight key                                   .1   ISO/TIME key
   To bias exposurefor bright, highlight areas,     Press to display or select film-speed set-
 measure the  bright  area, then  press high-   tings from ISO 12 to 6400 or shutter-speed
 light key. The meter will automaticallycalcu-   settings from 1/8000 sec. to 30 min. (plus
 late exposure setting to correctly reproduce   1l5O sec. cine  setting) in  ambient mode
 highlight areasof scene.                    and 1/1000 sec.to 1 sec.in flash mode.
 Lens                                            Recall key
   Fixed focus for readings from about 1.3      Press to  recall memorized exposure read-
 metersto infinity.      ,                         ingsto the digital display.
 External display                              Metering mode switch
   Refer to page 10.                             Set to "AMBI"  mode for ambient light
Measuringbutton                              readings. Set to  "FLASH"  mode for flash
   Pressto make an exposure reading. ln am-   readings. Memorized and displayed readings
bient mode, meter will make continuous read-   are clearedwhen the switch is moved to either                                                                                                                                  ' s e t t i n g .ings when button  is held in. In flash mode,
pressing button  triggers flash unit that has   Increase and decrease keys
been connectedto meter's sync terminal.        When "TlME"   is displayed, the shutter
Memory clear key                          speed is changed by one stop each time a key
   Pressto clear any memorized readings.         is pressed. When "lSO"  is displayed, these
FNo./EV key                                keys are used to change the film-speed setting
  Press to  select either f-number (FNo.)     in   1/3-stop  increments. Settings change
or exposurevalue (EV) digital display.          continuously when a key is held down.


                         www.orphancameras.com
                                                                                                                                                 :.;{:,e:1,:,:r.;                    ;.r:L..i;:;1.ir..,;l:::!r.r::;lCli*,:r::
View original page 7Page 8 · Read text
Eyepiece                                   Strap eyelet
   Built-in eyepieceis adjustablefrom -2.5 to      Attach neckstrap.asshownhere.
+1.2 diopters.
Memory key
   Press to  enter  exposure  reading  into
memory.'Up  to two readingscan be stored,
and will remain displayedon the analogscale.
Display illumination button
   Press to  illuminate viewfinder display for
viewing digital readout in low light.
Sync terminal                            Measuring-level adiustment screw
  To take flash readings;insert flash's sync     Use to  re-calibratethe meter reading
cord into sync terminal. Terminal is threaded   match that of another meter.
to secureoptional Sync Cord ll.
Battery cover
   Meter is powered by one AA-size penlight
battery.
Tripod socket
   Standard  114-20 thread  rnatches most
tripod-mountin g screws.
View original page 8
Page 9 · Read text
INSTALLINGTHE BATTERY


  The Spotmeter F  is powered by a single   3. Insert the battery, positioning it as marked
AA-size   battery.  A    1.S-volt  alkaline-  insidethe battery chamber.
manganeseor carbon-zinc battery or 1.2-volt   4. Replacethe cover and slide it back into its
nickel-cadmium battery can be  used. To    originalposition.
installthe battery:
1 . Check  that  the power sw itch  is set to, , O F F " .
2. Remove the battery cover by pressing it
down and sliding it to the left.


                         www.orphancameras.com
View original page 9Page 11 · Read text
ADJUSTINGTHE EYEPIECE
NOTE
o   lf the battery is not installedproperly, the
meter will not operate.
o To  prevent accidental measuring, switch
off the meter when you are f inished using it.
o    lf  the meter  will  not  be used for  two
weeks  or  more,  the  battery  should  be
removed.


                                            T h e S p o t m e t e r F h a s a f i x e d - f o c u s
                                                objective lens that provides correct focus from
                                               1.3 metersto infinity.
                                          To  compensate for  individual eyesight
                                                variations, the meter's eyepiece is adjustable
                                           through a range of -2.5  to +1.2 diopters. To
                                    make  this  adjustment, look  through  the
                                          eyepiece and turn the eyepiece guard to the
                                                    right or left until the 1o spot circle appearsin
                                            sharp focus.


                       www.orphancameras.com
View original page 11Page 12 · Read text
NOTE
o  Light entering the eyepiece may cause
incorrect readings. When taking a  reading
without looking through the eyepiece,cover it
with your hand or other opaque object.


                                              Optional close-up lens
                                        An  optional close-up lens is availablefor
                                                the Spotmeter F. This lens attaches to  the
                                                     front, of the meter and permits measurements
                                                     of subjectsfrom 0.6 to 1.4 meters.
View original page 12Page 13 · Read text
DISPLAYS
 Externaldisplay

 o
 o


QCalculation modesi'       OFNo./EV  display mode indi- @Film/shutter  speed  indica-
   g-  shadow                  catlons                        ttgns
     [        - average                                                                     ttg" -  sgconds
   g  -  highlisht           @Analog scale;',                   "1y1" -  minutes
   El mark appearswith S, A,            |  - Analog-Scalepointers
  and H calculation-modeindi-
  cators. Indicatesthat the cal-  dicators
  culated reading will be used   "1.4to 45 - F-number scale
  as the standard for monitor-
  ing the brightness of  other
  areasof the scene.
  B  Ftastrmode indicator


                        www.orphancameras.com
View original page 13Page 15 · Read text
Viewfinderdisplay


       In addition to the iTreter'sexternal display,     The viewfinder display can be illuminated
   there is also a digital display in the viewfinder    for easierreading in low light by pressingthe
   that lets you to monitor the exposure infor-   display illumination button  located on the
   mation while taking a reading.The f-number,   meter's grip.
  EV number, and brightnessdifferencesare dis-
   played with tenth-stop accuracy.The measur-
   ing spot def ines the  meter's 1o angle of
   acceptance.


1 2
                          www.orphancameras.com
View original page 15Page 16 · Read text
Over-rangeand under-rangewarnings
    In  f-number mode, the  meter's digital
f-number display range is from  f /0.7 to f/90e.
When the letter "E" and a triangular pointer            {                                                             1,.42 2.8 t+,5,6 I  ,1,| 16 2?.32 45on the analog scale appear, the reading is
outsideof this range.lf this occurs in ambient-                     FNo     rrMElight mode, you can change the shutter-speed                                        Ltr    E  ilsetting to obtain a readout without having to
take another measurement. ln   f lash mode,
you will need to take a new reading.
  When the reading is over or under the
                                               t'E"meter's measurement range, the  letter
appears without a triangular pointer. In this
case,take another reading of a different area.


                                                                                         1 3
View original page 16Page 17 · Read text
SETTINGTHE FILM SPEED


1. Pressthe ISO/TIMEkey to displaythe ISO   2. Press the increase key to  set higher film
film-speedsetting.lf the batteryhasjust been  speeds; press the decrease key to  set lower
installed,"100" (lSO 100)will be displayed.   film speeds.The setting changesby 1/3 stop
                                        each time  either key  is pressed and con-
                                             tinuously when a key is held down. Any film
                                         speed from ISO 12 to ISO 6400 can be set.


                         www.orphancameras.com
View original page 17Page 18 · Read text
N E
                                                                                .  The third and fourth digits of . tXe ISO
                                          display can only show zeros.ThutE'120 "
                                   and "12O0"aredisplayedfor the ISO 125 and
                                   ISO 1250 settings,respectively.The meter is
                                            correctlycalibratedfor the actualsettings.
                                                                                .  IN THE ISO-DISPLAYMODE,MEASURE-
                             MENTS CANNOT BE TAKEN; only, .the
                                          increase,decrease,and ISO/TIME t<eys4friitt
                                          operate.
                                        o The meter can only be set for ISO film
3. After setting the film  speed, press the   speeds.To find the equivalentISO ratingfor
ISO/TIMEkey to return to the time-display  DIN-ratedfilms, consultthe conversiontable
mode.                                    located on the back of the battery-chamber
                                           cover.


                                                                                        1 5
View original page 18Page 19 · Read text
SETTINGTHE SHUTTERSPEED


   After  setting thd  film  speed, press the     To  change the  shutter speed, press the
ISO/TIME key  to  put  the meter  in time-   increase or  decrease key  until the desired
display mode. The display will show the most   speed is displayed. Each time either key  is
recently set shutter speed. lf the battery has   pressed,the display will change by one full
just been installed, "60"  (1/60 sec.) will be   stop. The speed changescontinuously when
displayed.                                      either key is held down.


                        www.orphancameras.com
View original page 19Page 20 · Read text
In flash metering.mode,the shutterspeed
                                      can be set from 1/1000+o 1 seco.nd-When
                                          switchingfrom ambientto flash m68b, if the
                                           shutteris setto speedsshorterthan 1/1000or
                                          longerthan 1 sec.,the speedwill be resetas
                                            follows:
                                   A M B I E N TM O D E      4   F LASH MOpF
                                         1/2OOOto 1/8000 sec. +     1/1000sec.
                                        30 min. to 2 sec.     +          1 sec.
                                                                                                        +       1/60 sec.                       'mode,                    1/50 sec.   In ambient metering        the shutter
speed can be set from  1/8000  sec. to 30                                NOTE
minutes,plus 1/50 sec. (which comes after the                                                                                          .  The third and fourth digit of the shutter-
30 min. when pressingthe decreasekey) for                                        speed display can show only  zeros. Thus,
taking cine readingsat 24 fps.                                         "12O" is displayed for the 1 1125 sec. setting.
     lf  the  displayed shutter-speed f igure  is                                        The  meter  is correctly  calibrated for  the
followed by a small letter "s", this denotes a                                                actual setting.
speed in  full seconds; a small "m"  denoted
speedsin minutes. lf there is no letter designa-
tion, the shutter speed is the reciprocal in
secondsof the number displayed (e.9., "30"
represents1/30 sec.).
View original page 20Page 21 · Read text
SELECTINGFNo.lEVDISPLAYMODE


   The Spotmeter F has two display/measure-      In f-number mode, a digital aperture figure
ment modes, f-number (FNo.) and exposure   will appear next to the "FNo." indication in
value (EV). Pressthe FNo./EV key to display   the display panel. Next to this figure is a small
the desired mode on the external LCD display   one-place decimal display that shows the
panel.                                     necessary exposure decrease in  1/10 stops.
  You  can  alternate between these two    For example, if the aperturedisplay is f/8.00,
modes when  "TlME"    is  displayed and    the lens should be set at exactly t18. lf the dis-
"AMBI" mode is selected.When "FLASH"    play shows f/8.05, then the exposure should
mode  is set the f-number mode will be se-   be decreased by 5/10  ("1/21 stop. The lens
lected automatically.                           aperture should be set halfway between f/8
                                       and f/11.


                        www.orphancameras.com
View original page 21Page 22 · Read text
When taking ambient-lightreadings,chang-    The EV displaymode is usefulfor checking
ing the  ISO  or  shutter-speed setting will   contrast ratios (p. 39), luminance(p.40), and
changethe f-number displayed.                other lighting conditions. In this mode, the
                                              display readout will be in EV steps,and only
                                       changesin the ISO setting will affect the EV
                                             d isplay.
View original page 22Page 23 · Read text
GENERALINFORMATION
      To  realize the  full  potential of--your Spotmeter F, some basic information about  it and
    spotmeters in general should be understood.                                                                                                                                           -"l
     A spotmeter is basically a reflected-light meter, much like the built-in metffof  a camera.
   The advantageof a spotmeter is its ability to measurean extremely smalland precisearea of a
   scenewithout reflected light from other areasinfluencingthe reading.This permits metering of
    the most important areasof a scene.
       Like all reflected-lightmeters, the Spotmeter F is calibrated to give a reading that falls on
    the mid-point of the film's characteristiccurve, and will be reproducedas a mid-tone (r,trddium)
    density on the film. In other words, the meter gives a reading that will result in "normal',
   exposure for an "average" subject. An averagesubject is generally defined as one that reflects
   about 18o/oof the light that strikes it.


                                                                             ;
                                                                $


20                           www.orphancameras.com
                        l*I*ii;**tr,r                     ;::s***iiL*'              .4wffi                                 **-',,   ;..-*a*oi4udkb**.*-.                                                 :.,",,,rr'i,r,-,*'a;i;i,li;r;-ii,.:.:;:*"JJi;,..],r :rl:idd
View original page 23Page 24 · Read text
Mid-tone readings
  The  simplest and  quickest  meg5uring
method for using the Spotmeter F isto take a
reading of a mid-tone area in the most im-
portant  part of the scene and ignore darker
and lighter areas.Using this method, you are
most concerned with a single area and only
one reading is needed. Best results will,pe
obtained when  the  point  being meas#'ed
correspondsvery closely to a mid-tone value.


                                           2 1
View original page 24From the M. Butkus archive. Original publisher and archive notices are retained.
Check the model and edition against your equipment.
PDF verified 2026-10-10.