Film cameras
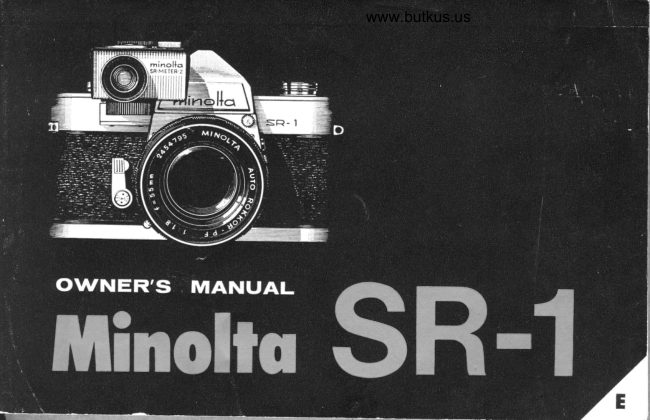
Minolta SR-1 User manual
User manual for Minolta SR-1. 60 pages in English. Read the original PDF, download or print a copy without registration.
60 pagesEnglish8.0 MB PDF
Loading your manual…Open PDF directly
Document details
- Brand
- Minolta
- Model / document
- Minolta SR-1
- Document type
- User manual
- Language
- English
- Pages
- 60
- File size
- 8.0 MB
- Category
- Film cameras
- Document date
- Not specified in catalog
Search available document text
Find a term, then jump to its page in the original PDF. Image-only pages may not be searchable; check the PDF for exact wording and diagrams.
Page 3 · Read text
Congratulations! You now own an exceptionally precise camera that far exceeds the demands
of the average photographer. The elements contained within    it will meet any photographic
situation on a professional level.
          All cbout your Minolto sR-t   IO                            OI
Your   Minolta   SR-l   features  the  world-famous  Rokkor   F1.8/55mm,  F2.0/55mm  or
F2.0/53mm  lens treated with  an exclusive Achromatic  coating  to  give you high   fidelity
sharpness particularly  in color photography. The camera contains an extremely bright penta
prism viewing system and a completely automatic pre-set diaphragm. Please read this manual
carefully so that you may effectively  utilize the full potential of your new Minolta SR-1. (All
illustrations used  in  this  booklet  are  with   the  Fl.S  lens.  There   is no  fundamental
difference  in usage between the F1.8 and F2.0 lenses.)
View original page 3Page 5 · Read text
Minoltn SR- t  Specificntions


              Film Rewind and
           Back Opening Knob
       Penta Prism Viewfinder
Film Advance and Shutter Cock
                 Shutter Release
              Shutter SPeed Dial
                  Film Counter


Fl ash Synchronization Terminal s
                    Lens Lock
                    Meter Shoe
          Aperture Setting Ring
                Focusing Ring
                 Distance Scale
           Depth of Field Scale
                 Standard Lens
        Depth of Field Pre-view
                        Self-timer
View original page 5Page 8 · Read text
www.butkus.us


                                              5. Focus and Frame       (Eoch step  is exploined  in detqil on
4. Set Aperture                            6. Press shutter             the following poges.)
View original page 8Page 9 · Read text
Filmloadi"rV,


t To  open  the camera  back,   pull  out
  the  rewind knob  until   it stops. Then
  with  a  slight  extra  pull,  the back
  will  snap open.
  Exposure  counter  will   automatically
  return  to start posrtron.
                                                                2Insert     film    magazine   3 Push  the  rewind  knob
                                                                          into   the  chamber   so     down.     If   you  should
                                                                       that  the   axis   of   the     have any  difficulty,  turn
                                                           magazine    is   on    the       the  knob   slightly   and
                                                           bottom   side    of    the     pusb down  again.
                                                          chamber.
View original page 9Page 12 · Read text
Emutsionspeed indiccrr"V        g www.butkus.us


 As   a  convenient   reminder,   set  the  indicator  located     number  of  your  film  speed.  For  color   film   use
 on  the  back   of   the  camera    to  the  emulsion  speed      the red  figures.
number  (ASA    or  DI N  )  of  the    f i lm  you  have  just
 loaded.   Simply    turn   the   dial   to  the  corresponding


Film speed  chcrrf

                                       F i l m s        ASA  i  Emulsion  speed numbers (AsA)  are listed above
 ILFORD HPS            400 Kodacolor X             64    for your convenience. They  are also found on the
 Ansco Super Hypan         500 Ektachrome X            64   instruction  sheet contained with  each  film.
 AGFA ISOPAN RECORD   650  (daylight type)
 AGFA ISOPAN  ISS        200 Kodachrome   II           10                                      (daylight type) AGF'A ISOPAN  IF-        100                              Kodachrome                                       X                                                   64 Kodak       Panatomic               X                         50                               Ektachrome                                            High                                            Speed  160 Kodak PIus          X                          125                                      (daylight type)
 Kodak Tir X              400 Anscochrome            32
View original page 12Page 13 · Read text
Advnncing  rhe  film


The shutter cannot be  released
until  the  film  advancing  lever
is completely wound.   If,  after
advancing the lever, the  shutter
release is  still  locked, advance
the  lever  again  until    it  stops.
When winding the film  advance
lever,  you   wi ll      f eel  some
resistance just  before  the end
of the stroke. This   is  normal
mechanical   resistance.   Keep
winding   until      it  stops  com-
pletely.
Caution:At  slow shutter  speeds
such  as   1   second  or     I  I 2
second, do  not  advance   f ilm
while  shutter  is  in  motion.
                                The    f ilm  advance lever  perf orms     1 .Advances the  film
                                                                        t h e    f o l l o w i n g f i v e   actions simul-     2 .Advances the  film  counter
                                       taneously:                            3.Cocks  the shutter
                                                                            4 .Sets the quick  return  mirror
                                                                            5 .Opens the diaphragm  fully
                                                                 You can turu  the lever either with
                                                                               several short  strokes  or  one  180
                                                                       degree stroke.
View original page 13Page 14 · Read text
shutter ro""o{rn        www.butkus.us


The  shutter  speed dial   is  markecl with   f igures  1
to 500 plus B and X.
The  figures   l,   2,  4,  B, 15,  etc.,  indicate shutter
speeds  of   1  second,     I 12  second,      I l4   second
up to 1/500 second.
The B  position, or  bulb, enables you  to  keep the
shutter  open  as  long  as  the  shutter  button   is
pressecl down.  This  position  is  usecl when  more
than one second exposure ls  requlrecl.
'fhe    X  position corresponcls to  about 1/50 seconcl
speecl. This  speeri is  userl with   electronic    f lash
equlpment.


                                         Sening   the   shuttcr
                                                     Turn  the  dial  to the desired speed, lining    it up  with
                                                            the  center  red  line.
View original page 14Page 15 · Read text
sertins the dioph."r{t


   The  diaphragm  ring  has  aperture  f igures   f rom  1.8       through  the lens. For example,  &t  f 16 the diaphragm
    to  16. Turn  the  diaphragm  ring so that the  desired          is closed down  to a pin-point opening; at  f 1.8 the  lens
   aperture figure coincides with  the white  dot.                       is  wide  open. The  relationship between aperture and
   The click stops enable you to use intermediate aperture         light volume  is shown on the scale below.
   openings between  any  two    f /stops. The  larger   the       Diaphragm can be set either before or  after advancing
   aperture   f igure,  the  less  light  volume  is  permitted        the film  lever.

An..,ur"


Lightvolume  O


                                                                                                                                               {
View original page 15Page 16 · Read text
Whor  is q completely  qutomqtic  pre-set           www.butkus.us
dicphrcgm?


  One of  the superb   f eatures of  the  Minolta  SR- 1  is       the shuttter is released. Consequently,  focusing can be
    its   completely  automatic  pre-set  diaphragm.   In  a       quickly determined through  the extra bright  viewfinder
   conventional single lens reflex camera, when the lens      no matter what aperture you have preselected.
    is  stopped down  the  visual    f ield  of  view  becomes    When  the shutter  is released, the diaphragm closes to
   darker  thus  making    it   dif f icult   to  focus.  In  the       pre-set aperture, the mirror  clears, the picture  is taken
   Minolta  SR- 1, the  lens  is  completely  automatic  ancl      the mirror  returns,  the diaphragm re-opens to maximum
   pre-set;aperture is  always  at maximun  opening  unti I       aperture...all simultaneously, all automatically.

            E]Eilril
     $$$
View original page 16Page 17 · Read text
Depth  of  ,,",{r,


            The depth of  fielcl of a lens
                   is  the  range   of   clistance
               within  which   all   subjects
              are    in    relatively    sharp
                           f ocus.   This   range  varies
               with  the  aperture  opening.
                       It    is  greatest  when   the
              lens  is  stoppecl down   ( f 16)
               anrl  least when   it   is   f ul ly
             opern( f l.B ).  Tht: photographs
                sirle  illustrate  relation-ship.
                  'l'he
               same subject was taken
 -.             at rlifferent aperture settings.
t|W:::
,,)     :tW
View original page 17Page 18 · Read text
The principles goyerning depth of field         www.butkus.us
              (lr
                                                                                 D e p t h

        B o c k g r o u n d
                     F o r e g r o u n
               e p t h o f   f i e l d

1. The  depth of  field   is  greater as the  distance is  increased or the aperture is stopped down.  $
2. The  depth of  field grows  less as the  distance  is
  decreased or the aperture is enlarged.
ll. The  depth  extends greater  into  the background
  than into the foregrouncl.
4. The depth of   f ield  is greater with a shorter focal
  length  lens and  shallower  with  a  longer  focal
  length lens.
Because the depth of  field can be controlled by the
aperture  stops, you can  either  bring   to  sharpness
both  bac,kgrouncl and   f oreground  or  emphasize the
subject  sharpness only  by  purposely  making  the
background out of focus.
View original page 18Page 19 · Read text
How  ro use rhe  pre-view   ,,r*o{t,


                    You may  pre-view  depth  of    f ield,   if  you  wish  by
                        pressing the  pre-view  button  which  manually  closes
                         the  diaphragm   to   its  pre-set aperture.  When  you
                      do  this  you  can  inspect  through   the  viewer   the
                         precise effect of depth of  field.
View original page 19Page 22 · Read text
Hishryerccurqrecds rishr merervt        www.butkus.us


Your  Minolta  SR-l should  be  used with  the  highly       receiving angle  is  only  30o. Hence, you measure the
accurate detachable CdS   light  meter.  It's  powered               l ight    ref lected  by   the   subj ect  only.   Extraneous
by  a  mercury   battery   and  extremely    sensitive,            I ight  does not upset exposure  readings.  The  meter
covers  an   extensive  range   from   candlelight    to         is coupled  to the  shutter  and, as you  will  read on
bright   outdoors   (0.56-37,000cd/m2).   The    light       the fol lowing pages, very easy to use.


                          Toble shows relotionship between operture ond shutter speeds.
               "lrT"'"lralzslalsolslulrol |   |   |   ;                    Shutter                                                            ( s e c .A"..)                                                                                                                                                                                         l
View original page 22Page 23 · Read text
How to use the Minoltcl SR -"r"rJrn
                                                                                  V


lJsed  correctly,  this CdS  light  meter  will  give  you       There   are  two    I ight-measuring  scales  on  the  top
correct  exposure  every   time.     It  measures outdoor          of the meter. One  is for  general outdoor photography,
light   and  indoor   light   as  well.     It's  extremely        the other  is  for  dimly    lit  situations. In  such  situa-
versatile,  every   bit  as  reliable  as  the  hand-held        tions  switch  to  low   sensitivity    l ight  and  read the
types  the  professionals  use.    It   will  measure  the       corresponding  aperture   f igures on  the  meter  scale.
reflecetd  light  of anything  that can be photographed.
View original page 23Page 25 · Read text
Immediately  after loading  film,  set the ASA   film  speed
rating on the top of the meter. Rotate the aperture  dial (A)
until the speed rating  of  the film  you are using lines up
with the ASA mark (B).
DIN  speed ratings are also marked on the dial. (C)
(D)...Battery checking mark. See page 24.
View original page 25
Page 26 · Read text
-
  Selecting shuffer speed or qperlure    J     ZZwww.butkus.us

 You may set either  shutter speed or aperture  first.  If  you set shutter
 speed first, measure the light and the meter needle will  indicate the
 correct aperture for  that speed.  If you  set aperture first, adjust the
 shutter dial, while measuring the light, until the meter needle coincides
 with the aperture you have pre-selected.
 Shutter speed is  usually determined by  the motion  of  the subject.
 If you are compelled to use a fast shutter speed, 1/500  for example,
set it on the shutter dial.
The dial  is coupled to the meter and automaically adjusts the meter's
light value scale to coincide with  the shutter speeds. In other words,                     1/500 sec. for  fast moving  objects.
the meter  will  indicate  corretc  aper-
ture   for  any  one   of   a  variety   of
shutter   speecls.
View original page 26
Page 27 · Read text
Reodinsrhe -"n"rlru


                          When  determining  aperture  setting, read  along  the
                                 guide line of the light  meter scale. The meter needle
                                            will  indicate the correct diaphragm opening.  It  will
                                       not, however, always point directly  to a  f /stop number.
                                                          It  may   f al l  between  or   of f  to  the  side  of  guide
                                       lines   in  which  case an  intermecliate  f /stop  shoulcl
                               be set on the aperture ring  of the  lens barrel.


                                         1/30 sec. or slower  in                 I/L25 sec. for  slow
                                         dark  places.                       moving  objects.
View original page 27Page 29 · Read text
Low sENsrrvrrYswrrc"v,


When  the meter needle does not register
due  to  inadequate  light,  use the  low
sensitivity   shift  dial.  Rotate  the  dial
          ((L"to  the        position.  This   shifts  the               ffi
meter to  low  sensitivity  light  and gives
a  correct exposure reading  even under
adverse  lighting   conditions.   In  some
cases the  low  sensitivity  reading may
be one f/stop  lower than  the high  sen-
sitivity  reading.  IJse  the  lower   light
value.
(In  the low  position,  read  the  orange
colored   f numbers. )


                                                                              *klt
                                                    O F F
                                                         When  the camera is  not  in use, switch
                                                                              the meter  dial  to  the" OFF"   position.
                                                                           This  will  insure longer battery  life.
View original page 29Page 30 · Read text
Determlnlng   reflected   lighl           www.butkus.us


Bcckllghtlng                    Photogrophing   People        Londscope Photogrophlng
In the case of  backlighting,  move      When photographing a person, the       For  landscape photographing,  the
close to  the  subject  and  measure         light   reflected   by   the   subject        subject,    of   course  cannot   be
the  light   ref lected  from     it.  Be       and   the   light   reflected   by  the      approched  and  exposure must be
particularly  careful  that  the  back-       background   may   be    at   wide       measured  at  the  camera position.
                                            variance,  particularly   in  snow,  atlight  does  not   strike   the  light-                                                                                        Special  care  shoulcl  be taken  so                                            the beach or  in  other bright  back-receiving  surface  of  the  exposure                                           grounds.  In  such cases move  the        that  direct   light  from  the sky  is
meter. Otherwise  the  result   will       camera  close  to  the  subject and       not measured. Measure the general
be a silhouette.                        measure  the   ref lected   light.    If         lighting  conditions  of  the area and
                                        you  cannot  approach  the  subject,       take  the  average reading.
                                                        light  can be measured by extending
                                            the palm   of  your  hand  in  front
                                                  of the meter.
View original page 30Related documents and language editions

From the M. Butkus archive. Original publisher and archive notices are retained.
Check the model and edition against your equipment.
PDF verified 2026-10-10.