Film cameras
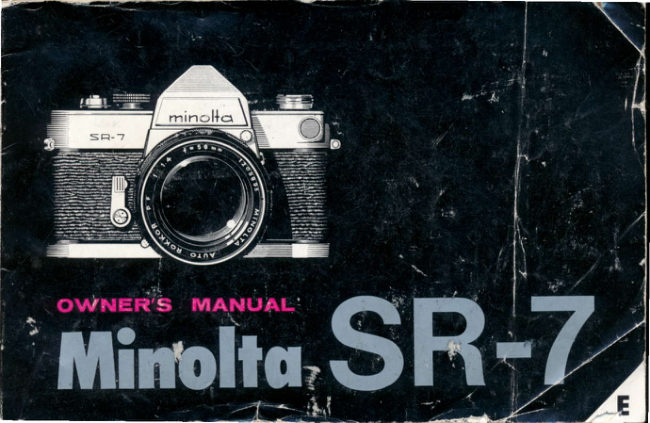
Minolta SR-7 User manual
User manual for Minolta SR-7. 60 pages in English. Read the original PDF, download or print a copy without registration.
60 pagesEnglish8.5 MB PDF
Loading your manual…Open PDF directly
Document details
- Brand
- Minolta
- Model / document
- Minolta SR-7
- Document type
- User manual
- Language
- English
- Pages
- 60
- File size
- 8.5 MB
- Category
- Film cameras
- Document date
- Not specified in catalog
Search available document text
Find a term, then jump to its page in the original PDF. Image-only pages may not be searchable; check the PDF for exact wording and diagrams.
Page 2 · Read text
a


                      Alt obout your Minolro SR-7 OI
                     Congratulationsl You now own one of the finest cameras in the world. The precision
                   elements contained within it are more than aclequate to meet any photographic situation
                on a professional level.
                Your Minolta SR-7 features the world-famous Rokkor F1.4/58mm, Fl.8/55mm lens
                    treated with an exclusive achromatic coating to give you l-righ fidelity sharpness,
                      particularly in color photography. The camera contains an extremely bright penta prism
                   viewing system and a completely automatic pre-set diaphragm. It is also equipped with
             a highly sensitive CdS-light meter coupled to the shutter. Please read this manual
                      carefully so that you may effectively  utilize the full potential of your new Minolta SR-7.
                    (All illustrations used in this booklet are with the F1.4 lens. There is no fundamental
                     difference in usage between the Fl.4 and F1.8 lenses.)
View original page 2Page 4 · Read text
tllnoltq SR-7 Speclflcotlons


                                                      Mike Butkus   DigitallyDN:org,Date:cn=Mikeemail=mike@butkus.org,2026.06.23signedButkus,by15:11:30Mikeo, ou=Butkus.Butkus-04'00'c=US


\
View original page 4Page 10 · Read text
www.butkus.us


                               il       !:

        s
4.                   5.                 6.
Turn the knurle<l base of     Insert the   f ilm  lea<ler    Aclvance the  f ilm lever
the   f ilm take-up spool     into the take-up spool.     until both sirles of  the
                                                                                                   en-until the film  catching    Make sure the sprocket     film perforations are
clip faces upwzrr<|.          gear teeth are engagecl    gaged properly with the                                                            sprocket gear. When the                              with the  f ilm perforations.                                                 advance lever stops. re-
                                                           lease the shutter so you
                                                     can advance further.
View original page 10Page 11 · Read text
www.butkus.us
7.                           8.                         9.                                                                          stoPs      The     f ilm  counter    winclowPlease make sure the film is          Aclvance the lever until it
parallel to the camera bodY          ancl then release the shutter.            inclicates when the  first film                                                                                            an<l                        f rame is in position  reacly tobefore closing the camera back.         Repeat this action twice
                                   you are reacly to shoot.               be exposetl.
View original page 11Page 12 · Read text
www.butkus.us                  Advonclng lhe fllm


The shutter cannot be releasecl
 until the film arlvancing lever is
completely woun<|. If.   after
arlvancing the lever. tl-re shutter
release is still locke<I. arlvance the
lever again until it stops.
When win<ling the film arlvance
lever. you will feel some resistance
just before the en<l of the stroke.
This is normal mechanical resis-
tance. Keep win<ling until  it stops
completely.
                              The film arlvance lever  perf orms          1. Arlvances the filmCaution: At slow shutter spee<ls                                                  tl-re  following         f ive    actions         2. A<lvances the film countersuch as I seconrl or Il2  seconrl,                                          simultaneously:                           3. Cocks the shutterclo not a<lvance film while shutter                                                  4. Sets the quick return mirror
is in motion.                                                                           5. Opens the rliaphragm fulli'
                                                     You can turn the lever either
                                                                          with several short strokes or one
                                                                           180 degree stroke.
View original page 12Page 13 · Read text
shunert               'r""ryF


                                    The shutter speed dial is marked with figures I to 1000 plus B and X.
                                  The figures l, 2,4, 8, 15, etc., indicate shutter speeds of I second, Llz
                                               second, 1/4 second up to 1/1000 second.
                                    The B position, or bulb, enables you to keep the shutter open as long as
                                             the shutter button is pressed down. This position is used when more
                                             than one second exposure is required.
                                    The X position corresponds to about 1/50 second speecl. This speed is
                                              used with electronic flash equipment.

      Settlng the shutter
       Turn the dial to the desired speed,
        lining it up with the center red
          line.
View original page 13Page 14 · Read text
www.butkus.us
              Senlng the dlcphrcgm


The cliaphragm ring has aperture figures  f rom 1.4  t<l
                                                                  Aperture 16. Turn the diaphragm ring so that the <lesirerl
aperture figure coincides with the white clot.                                                                (:) @ c) dY Az tz AP                                                       l:r,lt" (lThe click stops enable you to use interme<liate aperture                  2   1   12   r{   18  116 r32  t61
openings between any two  f /stops. The larger the
aperture figure. the less light volume is permitted
through the lens. For example, at fl6 the cliaphragm
is closed down to a pin-point opening; at fl.4  it  is
wirle open. The relationship between aperture anrl
light volume is shown on tl-re scale above.
Diaphragm can be set either before or after a<lvancing
the film lever.
View original page 14Page 15 · Read text
Whqt is cr complefely qutomotic
       pre-set dlophrogm?


One of the superb features of the Minolta SR-7 is its     viewfinder no matter what aperture you have
completely automatic pre-set diaphragm. In   a       pre-selected.
conventional single lens reflex camera, when the lens    When the shutter is released, the diaphragm closes to
is stopped down the visual field of view becomes       pre-set aperture, the mirror clears, the picture is taken,
darker thus making it difficult to focus.                     the mirror returns, the diaphragm re-opens to maximum
In the Minolta SR-7, the lens is completely automatic       aperture...all simultaneously, all automatically.
and pre-set; aperture is always at maximun opening
until the shutter is released. Consequently, focusing
can be quickly determined through the extra bright
             5F {"'       $                            l-r          ^-rA,
  [o'LIl.
           EE]HEflilil
View original page 15Page 16 · Read text
www.butkus.us                      Deprh of fleld


                                                                                ;l
                                        J


The rlepth of field of a lens is the range of clistance             It is greatest when the lens is stopperl <lown  (f 16) an<l
within which al I  subjects are in relatively sharp             least when it is fully open  (f l.4or  f l.U). The photographs
focus. This range varies with the aperture opening.         above illustrate relationship. The same subject was
                                                          taken at clifferent aperture settings.
View original page 16Page 17 · Read text
t      The prlnctples governlns deprh  *i'ry[ir                                             "r


                                                        or eground


              1. The depth of field is greater as the distance is
           increased or the aperture is stopped down.
            2. The depth of field grows less as the distance is        $     ""---l
           decreased or the aperture is enlarged.
        The depth extends greater into the background than
                                                                                                                                      the           into the foreground.                                    B".uu"" ,n" a"n,fr of field can be controlled by
        The depth of field is greater with a shorter focal        aperture stops, you can either bring to sharpness both
                                                                                                                                     subject          length lens and shallower with a longer focal        background and foreground or emphasize the
          length lens.                                             sharpness only by purposely making the background
                                                                out of focus.
L
View original page 17Page 18 · Read text
www.butkus.us           Deprh of fleld pre-vlew


                                         You ma)' pre-view clepth of field. if you wish. by
                                                             pressing the pre-view button which manually closes
                                                          the cliaphragm to its pre-set aperture. When you clo
                                                                  this you can inspect through the viewer the precise
                                                               effect of clepth of field.
O*
View original page 18Page 22 · Read text
How to use rhe CdS-llghr meler             www.butkus.us             7,

Used correctly, the CdS- light meter wi ll  give you
correct exposure every time. lt measures outdoor light
ancl incloor light as well. It's extremely versatile. If
the meter neeclle rea<ls off the scale; cloes not inclicate
aperture. shift to a lower shutter speerl. If no aperture
is inclicatecl. shift to low sensitivity light. If the meter
sti ll cloes not responrl. then light is inaclequate for
exposure ancl you must use  f lash.                                            rninol


                                                              Immecliately after loacling film, set the ASA film
                                                            speed rating on the shutter clial. Pull the outer ring
                                                           of the dial upwards and rotate to the ASA rating of
                                                           the film you are using. This action sets the meter in
                                                           tune with the speed of your film.
View original page 22Page 24 · Read text
Selecrlng shutter speed or             www.butkus.us
           cperture


You may set either shutter spee<l or aperture first.
If you set shutter spee'rl first, measure the light anrl
the meter neerlle will  inrlicate tl're correct aperture
for that speecl. If you set aperture first, adjust the
shutter dial, while measuring the light. until  the
meter neeclle coincicles with the aperture you have
pre-selected.
View original page 24Page 26 · Read text
Low sensltiviry switch               www.butkus.us


Reoding the meter
                                 MINOLTA
When   rletermining   aperture            CAMERA
setting. relr<l along the <lotterl linc                    co.. LTo.
of the  light  value scale.  -I'he
meter nc'e<lle n'ill   in<licate thc
correct <liaphragm opcning.   lt
rvill not. horvever. alu'ays point
rlirectll' to a    f /sto1r number.  lt
rnav fall bet*'cen trvo tkrttctl lines
in rvhich ('irse an intc,rrne<liute  f/
stop shoul<l be set <ln tht' irpt,rturc.                                             \\'hcn thc nretcr neerlle rloes notring of  tl.re lcns barrcl.                                             register <lue to  ina<lerluate light.
                                                               r.rsc the low sensitivitl'shift button.                                                                                                                        l1                                                 ]'rcss tlte br,rtton on the bat'k  <lf                               1t
                                      the nrt'ter.
                                                         'l'his   shif ts  the  meter to  Iorv
                                              scnsitivity   light   anrl gives    ir
                                         corrcet  exl)osure rea<ling ever-t
                                             un<ler a<lverse lighting conrlitions.
                                           In s<lrne cases the. lorv sensitivitr'
                                             rearling may l>e one f/stop lower
                                       than the higl'r sensitivity reatling.
                                          lJse the lower light  valr-re.
View original page 26Page 27 · Read text
Determinlng rdflected

Photogrophing People               Bocklightingfu-pt    Londscope Photogrophing
When photographing a person, the    In the case of backlighting, move   For landscape photographing,  the
light reflected by the subject and     close to the subject and measure the    subject, of  course, cannot be
the light ref lected by the background     light    ref lected from   it.  Be    approached and exposure must be
may be at wide variance, particularly     particularly careful that the back    measured at the camera position.
in snow, at the beach or in other     Iight does not strike the light-     Special care should be taken so that
bright backgrounds. In such cases     receiving surface of the exposure    direct light from the sky is not
move the camera close to the subject     meter. Otherwise the result will be   measured. Measure the  general
and measure the reflected light. If    a silhouette.                            lighting conditions of the area and
you cannot approach the subject,                                           take the average reading.
light can be measured by extending
the palm of your hand in front of
the meter.
View original page 27
Page 28 · Read text
www.butkus.usEmulslon speed indicator


              As a convenient remincler. set the
                      inrlicator locaterl on the back of the
               camera to  the  emulsion  spee<l
               number (ASA or I)lN)  of the film
                you have just  loa<lecl. Simply turn
                     the clial to the corresponrling number
                   of your film  speerl. For color film
                 use tite retl figures.
View original page 28Page 29 · Read text
Replcclng ?he bottery
    E


                                                                                        IF

The average life of the mercury battery is two years.       "Coution in hondling the mercury boltery"
When the meter does not responcl to light, the battery      Do not leave finger prints on the mercury battery as
is cleacl ancl must be replaced. This is a conventional                               these cause it to rust or corrocle.
mercury battery available throughout the world.                          Wipe with a soft cloth ancl keep
Remove the battery cover on the bottom of the camera                              battery clean. Do not <lisassemble
by turning the cover with your thumb counter-clockwise.                           the mercury battery. Do not throw
Take out the olcl battery. When replacing the new                         any usecl mercury battery into a
battery, be sure the plus ( + ) sicle is facing up towarcls                               fire or where chilclren can get
you.      @      holcl of  it.
View original page 29Page 31 · Read text
Focuslng ond frcmlng


            Look through the viewfinder ancl
                rotate the focusing ring on the
                lens barrel. Diagonally arrangecl
              microprisms converge to form
          a bright sharp image. At  the
               sharpest point you are in focus
              and ready to shoot. You see exactly
              the same image that will appear
            on the film negative. This is one
                of the aclvantages of the single lens
                      ref lex syst€m. More important.
              because you focus through the
             lens there is never a  parallax                                       of focus
             problem no matter how close you
               get to the subject. This system
               also permits you to see the real
              relationship between subject.
               backgrouncl ancl  f oregrounrl  ancl
               the actual color conclition when
              using filters.
View original page 31Page 32 · Read text
www.butkus.us


lnfrored fllm indlcolor                        Fllm poslrlon lndlcqtor
If you use infraretl film, focus as                  On the top of the camera there is
you woulrl orclinarily. Then mcve                     a red circle with a line through
the clistance scale to corresponcl                                        it. This mark indicates the exact
with the recl letter R which appears                               position of the film in the camera.
on the depth of fielcl scale. For                       Precise clistance there is the
example, if your focus scale tells                             distance from the subject to this
you the subject is 15 feet from the                            line. With the aid of a tape
camera. move tl-re focusing ring                            measure, this line can be used for
so that the number 15 lines up                         extremely critical focusing. For
with the rerl letter R.                                        general photography such focusing
                                                                        is not necessary.
View original page 32Page 33 · Read text
Holdlng the ccrmerq-
releoslng rhe shutter


                              The camera may be helcl horizontally or vertically. It
                                           is best to press the camera firmly against your face
                                             ancl release the shutter with a slow pressure in order
                                       to avoicl all movements antl insure sharp negatives. You
                             may focus with whichever eye is convenient for you,
                                      although for sequence shots it is aclvisable to use the
                                          right eye to permit free use of the rapicl wind lever.
                            The lever contains a double exposure prevention device;
                                       the shutter locks after each picture.
View original page 33Related documents and language editions
From the M. Butkus archive. Original publisher and archive notices are retained.
Check the model and edition against your equipment.
PDF verified 2026-10-10.