Camera accessories
Minolta SR DeLuxe Extension Bellows User manual
User manual for Minolta SR DeLuxe Extension Bellows. 20 pages in English. Read the original PDF, download or print a copy without registration.
20 pagesEnglish2.5 MB PDF
Loading your manual…Open PDF directly
Document details
- Brand
- Minolta
- Model / document
- Minolta SR DeLuxe Extension Bellows
- Document type
- User manual
- Language
- English
- Pages
- 20
- File size
- 2.5 MB
- Category
- Camera accessories
- Document date
- Not specified in catalog
Search available document text
Find a term, then jump to its page in the original PDF. Image-only pages may not be searchable; check the PDF for exact wording and diagrams.
Page 1 · Read text
www.butkus.us
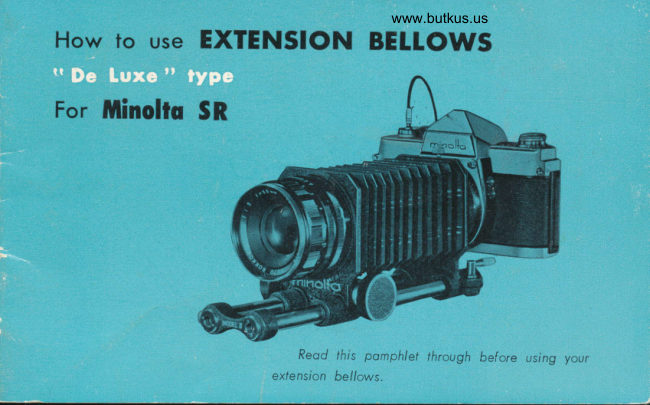
How to use EXTENSION BEIIOWS

For lhinolto SR


                              Reod this ponphlet through before using
                                  exlension be//ows.
View original page 1Page 2 · Read text
HOW TO USE EXTENSION BELLOWS
                                t'tt  t                              \  oe LuxeLuxe Typetypg ")
      Close-up shots from a distance of 50cm (1.6 feet; cover area 16.5 x24.8crn;
6.32x9.97 inch magnification approximately 1.17x) are possible with MINoLTA sR
equipped with standard lens.
     For close-up shots from a closer distance,  it is required to use an extension
bellows or extension tubes.
    The outstanding feature of the extension bellows is that with the extension
bellows folded to its shortest length, there is a thickness of 55 mm between the
body mound and the lens mount. With standard lens (55 mm F 1.8 or F2) it  is             -j
possible to take continuous shots of life size to three times magnification.
      Moreover, since this SR extension bellows " de Luxe " is equipped with side copy-
ing attachment which makes  it possible to reproduce slides, get positive prints from
negative prints or negatives from positive prints. Also a number of interesting trick                      i
photographic shots are possible.
View original page 2Page 13 · Read text
DESCRIPTION OI- EXTENSION BELLOWS
   AND NAMES OF VARIOUS PARTS


                                                               Digitally signed by Mike Butkus
                                               DN: cn=Mike Butkus, o=Butkus camera manuals,
                                                     ou=butkus.org, email=mike@butkus.org, c=USMike Butkus   Date: 2024.01.13 14:17:17 -05'00'
View original page 13Page 14 · Read text
www.butkus.us


To ottoch exlension bellows io comero
     First tighten adjusting screw to fix
  rotation.
    Remove camera lens and move red
 dot on camera to be in line with red dot
 on side of camera attachment ring. Insert
 in bayonet mount and turn  counter-
 clockwise until  it  clicks in and stops
 (approximately one eight turn).
   To remove camera, press down on
 camera release button and turn clockwise
 until camera stops.
    After extension bellows is attached
 to camera, the mounting ring can be
 rotated freely by  loosening adjusting
 screw. Adjust position and fix by tight-
 ening screw.
    (Camera may be set up in horizontal
 or vertical position; however, it may be
 difficult to fix it in vertical position due
 to the position of extension bellows.)                                                                                                   t2
View original page 14Page 15 · Read text
ATTACHING THE LENS
       Match the red dot on side of lens
     barrel with red dot on side of extension
     bellows to which lens are to be attached
    and fix into bayonet mount. Support lens
     barrel and move in clockwise direction
      until it stops with click (about one eight
      turn).
      To remove, press release button on
     ring side of extension bellows and turn
    lens counter-clockwise. Lens will  be
     released when red dots meet.
      When using Leica type mount lens,
    use SR Leica-type mount adapter ring
     directly on lens ring of the extension
     bellows. Leica-type mount rings are easy
    to attach. Follow the same directions
    as when attaching lens barrel.


IJ
View original page 15Page 16 · Read text
www.butkus.us


To insert slide (or film)
   The slide (or film) plate can be easily
drawn out or inserted because it moves
on rails.
   Pull button on top of slide plate
straight up to remove slide plate.
   Loosen screw at bottom of slide plate
by turning in counter-clockwise  direction
and press spring button and slide (or
film) plate will open. Then insert slide
(or film).
   Tighten by turning screw, and slide
is fixed in olace


                                                                                         T4
View original page 16Page 17 · Read text
To use extension bellows lens hood,

     The extension bellows lens hood can
  be used as lens hood for close-up shots.
  This lens hood can also be used with the
   slide copying equipment for  removing
   harmfnl   liohtq
        First, remove clasp holding extension
  bellows lens hood, extend bellows and
   attach ring to lens frame.
     Turn screw on top of attachment
  ring in clockwise direction, and lens and
  bellows lens hood will be fixed in place.

                                                     www.butkus.us


l5
View original page 17Page 19 · Read text
FOR GOOD CLOSE-UP

*  The clepth of the subject field becomes very shallow in close-up shots; therefore,
it is best to make aperature opening as small as possible. For accurate focusing,
it is best to use the magnifier for the sR camera.
*  There must be no moving of the subject or camera when taking close-up
shots. To prevent vibration or shaking of the camera, use tripod or a cable release.
When taking clo:e-up shots of animals, flowers or insects in the open, use faster
shutter speels to avoi:i shaking by winds or other elements.
*  When using exposure meter for small subjects, better results can be obtained
by using the refle:tio;r systern than the incident light system.
*  A better view of the subje:t can be obtaineC by using the SR angle finder.
*  The preset diaphragm system cannot be used with the extension bellows.
View original page 19
Page 20 · Read text
www.butkus.us


*   In some instances when the extension bellows is extended to its ful length or
when exchangeable lens with long focal distance is used, the upper section of the
finder view is darkened so that the entire field cannot be viewed clearly. This is
seen when the aperature opening is small. This is a common phenomenon seen in
all small size single lens reflex cameras. In this instance, the area viewed on the
focusing screen does not show the actual photographic area. Therefore, the central
circular section appearing on the focusing screen should be used as the center for
judging the photographic area.


                                                                                               18
View original page 20From the M. Butkus archive. Original publisher and archive notices are retained.
Check the model and edition against your equipment.
PDF verified 2026-10-10.