Film cameras
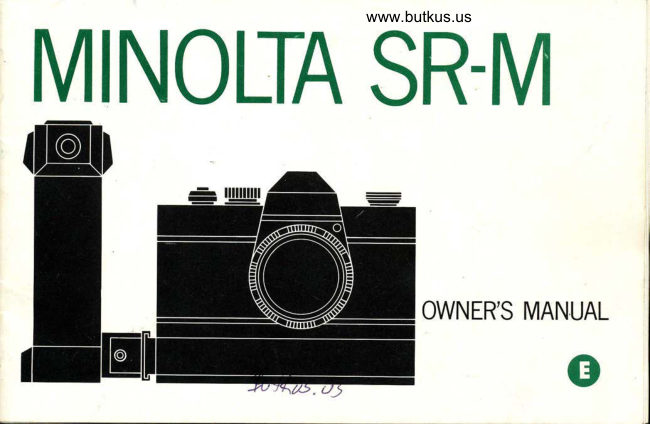
Minolta SR-M User manual
User manual for Minolta SR-M. 28 pages in English. Read the original PDF, download or print a copy without registration.
28 pagesEnglish2.1 MB PDF
Loading your manual…Open PDF directly
Document details
- Brand
- Minolta
- Model / document
- Minolta SR-M
- Document type
- User manual
- Language
- English
- Pages
- 28
- File size
- 2.1 MB
- Category
- Film cameras
- Document date
- Not specified in catalog
Search available document text
Find a term, then jump to its page in the original PDF. Image-only pages may not be searchable; check the PDF for exact wording and diagrams.
Page 7 · Read text
SPECIFICATIONS

         Type: 35mm Single Lens Reflex with motorized film advance
Standard Lens: MC Rokkor 55mm FL.7, 6 elements in 5 groups
               Angle of view: 43'
               Diaphragm: Fully automatic
              Diaphragm scale:- L.7,2,2.8,4,5.6, B, 11 and 16 with intermediate click stops
                   Filter mount: 52mm screw-in
              Lens shade mount: 52mm screw-in
                  .  Lens mount: SR bayonet               Synch. contact: FP and X (up to 1/60)
       Shutter: Focal plane shutter. Speeds: T-8, 1 through 1/1OO0 sec.
 Film Advance: Motorized, or manually controlled. Three frames per second maximum
Frame counter: Presetting exposures number
              Automatic stopping when exposures are completed
              Automatic resetting when camera back is opened
  Film Rewind: Motorized rewind. Automatic stopping at preset exposure number
  .  Viewf inder: Fixed eye level pentaprism
               Groundglass with microprism focusing
                    Visibility: 94/o of actual image on film
 Power Source: Eight 1.5v penlight, AA-size batteries (12v) buitt into battery grip
  Battery Grip: Cordless contact. ContinLrous, single operation and OFF selection dial
       Others: Built-in accessory shoe. Built-in mirror lock. Removable camera back
 Size & Weight: 1"45x 1.2Ox47.5 (531x4Vix 1?( in.)
              1560g (55 oz.) (with F1.7 lens without battries)
View original page 7Page 8 · Read text
www.butkus.us

 BATTERY GRIP

  Installing batteries
1.Take out battery container by turning bat-
  tery container lock at the bottom of battery
  grip to either direction. Battery container  2.Twist the battery container and it opens
  will slide out of battery grip.                    at the middle.
View original page 8
Page 9 · Read text
4.Then replace both units together to form
3.Install batteries in accordance (+) (-)   in-    single container. Reinstall in battery grip
  dication on insides of the batterv con-    with printed Minolta Japan  f acing you, and
   ta   i n ers.                                          lock it.
View original page 9
Page 10 · Read text
www.butkus.us


Attaching battery grip to camera body

   Slide battery contact shoe over battery
 contact bracket on camera. Secure contact
by tightening battery grip lock, (knurled
 knob). Press motor drive switch (setting S.C.
 selector dial at either S or C) to insure pro-
 per contact has been made.

    WW
View original page 10Page 11 · Read text
FILM LOADING


                        up to open
                                              2. Place film magazine into film chamber.
View original page 11Page 12 · Read text
www.butkus.us


                                                 5. To set frame counter, pull outer ring,
                                                   turn to bring short red line indicator to
3. Insert  f ilm leader into any one of the slits      the same number exposures of your film.
  on the take-up spool shown.                Then advance three frames either manu.
4. Close camera back.                                   ally or using the motor film advance.


                                                                       *
                                                                                                                                      I
View original page 12Page 14 · Read text
www.butkus.us

SHUTTER SPEED SETT]NG

 1. At S (single) setting on S.C. setector dial
   of battery grip, shutter speed can be set
   at any speed including T. At T setting,
   shutter is kept open, once switch is ac-   2. At C (continuous) setting, shutter speed
   tivated, until shutter dial is turned     should be set at 1i30th of a second or
   manually away from T position toward              f aster and the motor advances the  f ilm
   second mark on shutter speed dial.            at three frames per second.
View original page 14
Page 15 · Read text
3. Manual-The camera can be used as a
                                                 regular camera without the battery grip.
Speeds less than 1/3oth of a second
should not be used on continuous set'   N OTE:
ting. At either operation the motor will    .At T-B setting, shutter is kept open while
stop O position on the frame counter     shutter release button is depressed.when all expsures are completed.                              . Camera can be set to operate in short                                            film of 4, B, t2 etc. frames. However,
                                        read instruction for correct film rewind
                                                 ing, described in  f ilm unloading section.
View original page 15Page 16 · Read text
www.butkus.us

     FILM UNLOADING

     A unique feature of the SR-M is the mo-
        torized  f ilm rewind. When rewinding, the  f ilm
       leader is nof rewound into the magazine.
        Film can be rewound automatically or
       manually regardless of the position of the
      frame counter.
         For automatic motor rewind, simply push
      power film rewind switch to right as indi-
       cated by white arrow, and the counter stops
        at the number originally set when loading
       the film.
         For manual rewind, set S.C. selector dial
       at OFF and rewind by mean of film rewind
        crank, holding manual film rewind lever in
        direction of white arrow.
      NOTE:
      .To rewind film completely by motor, do
        not at any time change setting of frame
I'I       counter from its original position. lf
 I       counter is changed rewinding film have
        to be completed manually.


i
View original page 16Page 17 · Read text
HOW TO CHANGE LENS

  To take lens off camera body, push lens
release button down and turn lens counter-
clockwise.
  To mount lens, line up red dot on lens
with red dot on, camera and turn lens clock-
wise until it clicks.
View original page 17
Page 18 · Read text
www.butkus.us

MIRROR LOCK

  For special occasion such as photomicro-
graphy that requires the least vibration of
camera, you may lock up the mirror.
.Simply turn mirror lock-up control down-
 ward (clockwise) until it stpos.
 . Mirror will return to its usual operation
 when lock is returned to original position.
NOTE:
.Mirror lock operates independently of
 shutter release and film advance and can
 be activated anytime without the loss of
  f ilm.
View original page 18
Page 19 · Read text
FLASH SYNCHRONIZATION

  Camera is equipped with both FP and X
synchron ization term inals.
 . FP bulb is synchronized to any shutter
 speed using FP terminal.
.X terminal allows to fire electronic flash
 (strobe) at r/,,uth of a second or slower.
 . M class bulb is synchronized at 1/trth of
 a second or slower.
N OTE:
 .S setting on S.C. selector dial or manual
 operation is recomended for flash photo-
 graphy.
View original page 19
Page 20 · Read text
www.butkus.us

OPTIONAL ACCESSORIES

Battey Checker                                                                                                    t7
                                               2. After turning it counterclockwise as far
How to check batteries                          as it will go, remove the battery grip from
1. Loosen the battery grip lock by turning it      the camera body by sliding  it off the
   cou nterclockwise.                         mounting bracket toward the rear.
View original page 20Page 21 · Read text
4. Slide the battery checker bracket all the
3. Make sure the S.C. selector of battery grip     way into the shoe of the battery grip as
   is not in the OFF position.                 shown and hold it there.
View original page 21
Page 22 · Read text
www.butkus.us


5. At this point, test lamp will light if bat-
   teries are still capable of transporting
  film at 2.5 frames per second. lf test
  lamp does not light, fresh batteries
  should be inserted.
CAUTI ON:
.Be sure to slide battery checker into the
 shoe of battery grip all the way.
.Do not leave battey checker in position for
 more than 5 continuous seconds, as this
 will weaken batteries.
.Be caref ul not to touch terminals.
View original page 22
Page 23 · Read text
Remote control cord-S and-L
  These remote control cords are designed
to operate the SR-M from a distance. The
remote control cord-S is L00cm (40 in.) in
length the remote control cord-L, 5OO cm
(16 ft. 6 in.) With these, you can take re-
mote pictures of wildlife, squeeze off ex-
posures easily and smoothly while panning
on a tripod, and so on.
How to use
1. Insert the plug of remote control cord-S
   (or-L) into the accessory jack on the front
   of part of the battery grip near the
   camera-attach ment shoe.
2. Be sure the S.C. selector dial is not in the
  OFF position.
3. Push the release button on remonte-con-
   trol cord to actuate shutter and film
   transport.
N OTE:
.Camera can still be operated with the
 release button located on the battery
 grip even while a release cord is attached.
View original page 23
Page 24 · Read text
www.butkus.us


25O exp. film back

Featu res:
.Double-magazine type 35mm film back.
.Maximum loadable length of film: LO me-
 ters (33 ft.).
. Manual/electric motor   f ilm  transporta-
 tion possible.
.Backward-counting:  Automatically stops
 when exposures are completed (manual
 counter resetting required).
.Built-in film cutter for quick obtaining of
 res u  I ts.
.Built-in tripod sockets U)( and U)1.
.Removable back cover with safety lock.
.Battery grip attachable for  hand-held
 operation.
. Saf ety camera lock to  prevent camera
 from dropping.
.Size: 295x71x 1O4mm (n%x23/ x4)(
  in.).
.Weight: Body-950g (33.5 oz), two cartriges-
 26Oe (9.2o2), grip attaching bracket-1OOg
 (3.5 oz.), total weight-13LOg (46.2 oz.).
View original page 24
Page 25 · Read text
Film loader                              Connection cord-S and -l-
.Designed to load up to 250 exp. length     Designed to connect Intervalometer-PM
 of film into cartridge for 25O exp. film   or Intervalometer-S with the SR-M's battery
 back.                                       grip. Connecting cord-S is 5Ocm (20 in.)
 . Manual loading with automatic stop at   in Iength; connecting cord-L, 250cm (L00
 present number of frame you want to             i n.).
 load, (i.e. 5O, 1O0, L5O, 2OO, 25O, and
 any intermediate numbers in dot).
 . Can be used  f or N ikon 250 exp. mag-
  azi n es.
View original page 25
Page 26 · Read text
www.butkus.us


AC power supply cord                                                                            I ntervalometer-S                                                23
 AC power supply cord is designed to fit    This is a versatile high-quality timer capable
into SR-M's battery grip in place of battey    of actuating exposure   f or adjustable periods
container. This cord is used with DC rectifier.    at broad range of intervals from 0.2 second
                                            to LO minutes.
                                        More versatile than the Intervalometer-
                                       PM, this unit can be used for sampling (a
                                                 series of continuous sequences taken dur-
                                         ing a certain period at regular intervals),
                                 and indent sampling (a series of single-
                                          frame exposure taken during a certain period
                                          at regular intervals), as well as ordinary
                                               time-lapse work and motion analyses, nature
                                             studies of animals and plants, traffic and
                                               meteorological studies, etc.
View original page 26Page 27 · Read text
lntervalorneter-PM
  The Intervalometer-PM  is a kind of repeat-
ing timer. This one enables you to take pic-
tures at intervals of from 0.5 to 60 seconds
between (single-frame) exposures.
 Time setting  Usable shutter speed
View original page 27
From the M. Butkus archive. Original publisher and archive notices are retained.
Check the model and edition against your equipment.
PDF verified 2026-10-10.