Film cameras
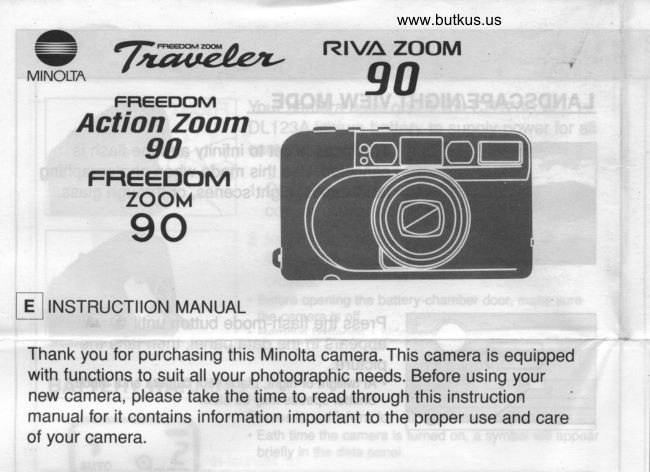
Minolta Traveler Minolta RIVA Zoom 90 Minolta Action Zoom 90 Minolta Freedom Zoom 90 User manual
User manual for Minolta Traveler Minolta RIVA Zoom 90 Minolta Action Zoom 90 Minolta Freedom Zoom 90. 18 pages in English. Read the original PDF, download or print a copy without registration.
18 pagesEnglish6.5 MB PDF
Loading your manual…Open PDF directly
Document details
- Brand
- Minolta
- Model / document
- Minolta Traveler Minolta RIVA Zoom 90 Minolta Action Zoom 90 Minolta Freedom Zoom 90
- Document type
- User manual
- Language
- English
- Pages
- 18
- File size
- 6.5 MB
- Category
- Film cameras
- Document date
- Not specified in catalog
Search available document text
Find a term, then jump to its page in the original PDF. Image-only pages may not be searchable; check the PDF for exact wording and diagrams.
Page 1 · Read text
www.butkus.us
                         Rt\lA zooM
 MINOLTA-  -  ru         FFlEED(]M      90
    Action Zoom
       90
    FREEDOM
       zooM
    90


    NSTRUCTT tON MAN UALLE__j  I

 Thank you for purchasing this Minolta camera. This camera is equipped
  with functions to suit all your photographic needs. Before using your
 new camera, please take the time to read through this instruction
 manual for it contains information important to the proper use and care
  of your camera.
View original page 1Page 2 · Read text
PROPER CARE AND USE

   . Do not fire the flash if your subject is closer than the minimum flash
    distance stated in the manual.
   . Do not subject the camera to shock, extreme heat or hlgh humidity.
   . Do not let the camera get wet.
   . Do not let the camera come in contact with sand, salt, or other grit.
    . This camera is designed for use between -10 and 40 'C (14 to
   104 F).
   . At colder temperatures, the data panel response time may be slow.
   At higher temperatures the display may temporarily darken.  lt will
    restore when the temperatuie normalizes.
   .  lf the lens becomes dirty, clean it with a lens brush.  lf necessary,
   moisten a sheet of lens tissue with one drop of lens-cleaning fluid
   and gently wipe the lens. Never touch the lens surface with your
    fingers.
   . Never use alcohol or chemical solvents on the camera body. lf it is
     dirty, clean it with a soft, dry cloth.
    . When not in use, keep the camera in a cool, dry place away from
   dust and chemicals. For extended storage, place the camera in an
                                                                      #    airtight container with a drying agent such as silica gel.
   . For more information about your camera, contact your local camera
   dealer or the Minolta distributor in your area.
View original page 2Page 3 · Read text
www.butkus.us
TECH NICAL SPECIFICATIONS
 Lens:         38-90mm t14.8 - 10.8 Construction: 4 elements, 4 groups
 Focus:          Active AF
                                        (3.3 ft. -""), Telephoto:  1 .1m - "" (3.6 ft.--) Focusing range: Wide: 1m - "o
 Exposure:    Programmed Autoexposure, Average metering;Metering
                  range (lSO 100): wide: EV 6.5-12.5, tele: EV 8.9 - 15;
 Film speed setting: Automatic for DX-coded negative film.Non-DX coded film set
                     to 100.
 Film speed range: ISO 1OO, 200 or 400
 Film transport: Auto advance to first frame, auto rewind, manual start of
                    rewind possible.
  Flash:                 Built-in flash, Recycling time: approx.8 sec.; Range (lSO
                    100):Wide: 1.0 - 4.5m (3.3 - 14.8 ft.), Telephoto:1.1 - 2.0rn
                       (3.6 - 6.6 ft.)
  Viewfinder:        Albada zoom finder with bright frame; Diopter: -1 diopter
  Battery:         One 3-volt CR123A or DL123A lithium battery; Battery
                    performance: Approx. 12 rolls (24 exp. roll M 50% flash use)
 Dimensions:        120.5 x71 x 48.5mm (4.7 x 2.8 x 1.9 in.)
 Weight (without batteries): 2259 (7.9 oz.), Date model: 2359 (8.3 oz.)
  Specifications are based on the latest information available at the time of
  printing and are subject to change without notice.
View original page 3Page 4 · Read text
Venmo @mike-butkus-camera  Ph. 2083
PayPal Name  Lynn@butkus.org      www.PayPal.me/lynnbutkus
View original page 4
Page 5 · Read text
FOR OWNERS OFTHE DATE MOT}f;L
This feature lets you to record the date or time onto the lower-right
portion of the picture.  lt has an automatic calendar through the year
2049.
. lmprinted data may be difficult to read  if the area over which it is superimposed is bright
  or non-uniform.
. Do not use the data back when temperatures exceed the operating range of 0" to 40"C
  (32" to 104"F).

                               1. MODE button
                             2. SELECT button
                               3. ADJUST button
   w$wsffiLAms  ffi

    12     3
IMPRINTING THE DATE AND TIME
                                              button to choose the data    rffih          1 Press the MODE                               imprinting format.
                                              . The display will change as shown.    ilrrH    trl|i
                                                              is displayed in the data panel, no data will  wswLA&$           . When
             n          be printed on the print.   r-\n
  r$E ?

F;#l+F,*'-'l+E

                    [-- i+  r-     _t                           lee'e5:t      i'eel_       <-                                                                                                                                                                                            |   laP                                         |
View original page 5Page 6 · Read text
www.butkus.us
SETTING THE TIME AND DATE
                   1 Use the SELECT button to move between
                                 different parts of the displayed data. The
                           selected part will blink indicating that it is
   h4CD€ gEg-AMJ         the data to be changed.m
  ffi€s

                 2 Press the ADJUST button to change the
                           data to the correct value. Data continues
                        changing as long as you hold down the
   ftfoDg s€L&tut          button. ffi                                         . In Time mode, pressing the ADJUST button while the
                               colon is blinking resets the second counter to 00.  ffi$€..

                  3 When all data is correct, press the SELECT        ffi[f          M                            button until the data stops blinking.
                                                                             -l]                                         . Reset the time and date after changing the battery. rE#  WS€ E€LAEJ
  ffi€$
View original page 6Page 8 · Read text
www.butkus.us
                            DATA PANEL


1. Flash-mode indicators
2. Self-timer indicator
3. Remote-control indicator**
4. Battery-condition indicator
5. Frame counter
6. Film-transport signals
7. Cartridge mark


    VIEWFINDER
   12
                                                 1. lmage frame
                                              2. Focus frame
                                              3. Flash lamp (green)
                                         Glows: Flash is ready
                                                  Blinks: Flash charging
View original page 8Page 10 · Read text
stsp?                                   www.butkus.us
        INSERTING THE BATTERY

                          Your camera uses one 3-volt CR123A or
                     DL123A lithium battery to supply power for all
                       camera operations.

                     1 Open the battery-chamber door using a
                             coin or similar object.
                                                  side first as shown,                  2 Insert the battery -
                           then snap the battery-chamber door
                               closed.
                                            . Before opening the battery-chamber  door, make sure
                                  the camera is off.
                                            . Remove batteries + side first.

 BATTERY WARNING
                         Power is sufficient for all the camera operations.
          ,          4=a              . Eath time the camera is turned on, a symbol will appear
                                          briefly in the data panel.   oto o--L:


                                                         lf the blinking low-battery symbol appears in the               +.::=:d,s
                                  panel with the other indicators, you can still           rytz$*      data
         o__Iil"      replaceduse the camera,soon.  but the battery will have to be


                                                         lf the blinking low-battery symbol appears alone,
                          you cannot use the camera until you replace the
                                Sattery. The shutter cannot be released.

  '  lf all indicators blink in the data panel or the camera will not function with a fresh battery,
   remove the battery then reinsert it. lf normal operation does not resume, or the camera
   malfunctions repeatedly, contact an authorized Minolta Service Facility.

 AUTO POWER OFF:
  To conserve power, the camera will shut down and the lens will relracl  if it is
  not operated for rnore than 8 minutes. Fress the main switch to reslore power.
   . Do not obstruct the lens while it is retracting.
View original page 10Page 11 · Read text
Steqf
        LOADING THE FILM

                        Use only 35mm, negative film rated ISO 100, 200,
                                or 400. Non DX-coded film is set to ISO 100.
          ?ou.H,of"F,,n,, EX         . Do not use Polaroid instant 35mm film. Winding
                                 problems may occur.
               136=*p.I
           E-

                    1 Slide the back-cover release down to open
                            the back cover and place the film cartridge
                                  into the film chamber.

                                                . Always load and unload the film in subdued  light.

                  2 Extend the film tip to the "FILM TlP" mark,
                          making sure it lays flat.
                                         .  lf the film tip extends past the mark, gently push the
                                excess film back into the film cartridge.


                   3 Close the back cover.        ffiN

                                                 . The film automatically advances to the first
                               frame and o--i. appears in the data panel.
                  www.butkus.us

                                           .  lf the film has been loaded improperly, cartridge mark o
                                appears and _ 0 will blink in the data panel and the                                          'J-d
                                                                                 l\          shutter will remain locked. Open the back cover and
                                   repeat the loading procedure.
View original page 11Page 12 · Read text
www.butkus.us
                                                                                                  '1,
        TAKING PICTURES

                    1 Press the Main switch to turn the camera
                               on.


                    2 Align your subject within the focus frame
                       and press the W side of the zoom lever to
                      move toward wide angle or the T side to
                      move toward telephoto.
                                                              . Your subject must be at least 1m (3.3 ft.) away from the
                                    lens in Wide and 1.1m (3.6 ft.) away in Telephoto.
                                             . Do not hold the lens barrel;focus may not be accurate.

                  3 Press the shutter-release button partway
                         down.
                                           . For vertically framed pictures, hold the camera so the
                                     flash is on top.
@ffi  4 When the green flash lamp glows, gently
                            press the shutter-release button all the way
                       down to take the picture.
                                                      . The flash will automatically  fire in low light.
                                                      . The film is automatically advanced to the next frame.
                                                   . After the number of frames specified on the film
                                    cartridge have been taken (ex. 24 or 36), additional
                                 exposures may overlap.
View original page 12Page 13 · Read text
FOCUS HOLD

                      When your subject is located outside the focus
                                frame, you can first lock focus on your subject, then
                           recompose the picture as desired.
                      1 Align the subject within the focus frame and
                              press the shutter-release button partway
                           down.

                            Without lifting your finger, recompose the
                                  picture then press the shutter-release button
                                           all the way down to take the picture.
                                                     Lift your finger from the shutter-release button to cancel
                                   focus hold.


StepS
        REW]NDING THE FILM

                      The film will rewind automatically after the last
                         frame has been exposed.
                   When  lll appears and O blinks in the data
                              panel, open the back cover and remove the
                                    film.


      lf rewind stops before the film has been completely rewound, all
    indicators blink. DO NOT OPEN THE BACK COVER. Insert a fresh
    battery then press the manual-rewind button.
 MANUAL REWIND

                        To begin rewind before the end of the roll,
                              turn the camera on and gently press the
                           manual-rewind button.

                                 ol't./oFF      Q.. @D
  www.butkus.us-\"                \-
View original page 13Page 14 · Read text
+    USING THE BUIL$.I}.I FLASHwww.butkus.us
Autoflash mode, fill-flash mode, Flash cancel mode, night portrait mode or
landscape/night view mode can be selected.

                    Press the flash-mode button until the
           +
                     desired indicator appears in the data
  @(ou'o-q       panel.
   )"--€i       The sequence is as shown.

RED-EYE REDUCTION FEATURE
The red-eye reduction lamp on the front of the camera will glow while the
shutter-release button is pressed part-way down to help reduce the red-eye
effect in flash pictures.
AUTOFLASH MODE
When you turn the camera on, the built-in flash is set to autoflash.
The flash will fire automatically when necessary, such as low-light
situations.
                           Press the flash-mode button until t. appears in
                            the data panel, then take the picture.
View original page 14Page 15 · Read text
FILL-FLASH MODE

                     The flash will fire regardless of lighting. This
                      can be used to reduce harsh shadows or
                              illuminate back-lit subjects.


                         Press the flash-mode button until I appears
                                 in the data panel, then take the picture.


 FLASH CANCEL MODE


                         With flash-cancel, the flash will not fire. Use
                               this mode when photographing  twilight
                        scenes, subjects beyond the flash range, or
                    when flash photography  is prohibited.


                         Press the flash-mode button until €J appears
                                 in the data panel, then take the picture.
                                                . Shutter speeds may be slow. Use of a tripod is
                              recommended.

www.butkus.us
View original page 15Page 16 · Read text
www.butkus.us
NIGHT PORTRAIT MODE

                    The camera balances the flash and existing
                                 light exposure so you can take beautiful
                            pictures of people at sunset or at night.


                        Press the flash-mode button until t EI
                      appears in the data panel, then take the
                              picture.
                                            . Shutter speeds may be slow. Use of a tripod is
                             recommended.
View original page 16Page 17 · Read text
LANDSCAPE/NIGHT VIEW MODE

                     The focus is set to infinity and the flash is
                          canceled. Use this mode when photographing
                          landscapes, night scenes, or through glass.


                         Press the flash-mode button until 0 A
                       appears in the data panel, then take the
                               picture.
                                                . At twilight or night, place your camera on a tripod.
                  www.butkus.us    Shutter speeds may be slow.


 POINTS TO REMEMBER WHEN TAKING FLASH PICTURES
FLASH LAMP
While pressing the shutter-release button partway down:
. The green flash lamp will glow when the flash is charged and ready.
. When the green flash lamp blinks, the flash is charging. Wait until it glows steadily, then
  take the picture.


FLASH RANGE
Make sure your subject is positioned within the flash range listed below.

                    Focal Length         Flash Range
    tso 100      Wide (W)                 1 .0 - 4.5m (3.3 - 14.8 ft.)
                    Tele (T)              1.1 - 2.0m (3.6 - 6.6 ft.)

    tso 400      Wide (W)                 1 .0 - 9.0m (3.3 - 29.6 ft.)
                    Tele (T)              1.1 - 4.0m (3.6 - 13.2 ft.)
View original page 17Page 18 · Read text
www.butkus.us
      SFLF-TI[il$R
The self-timer delays release of the shutter for approximately
seconds after the shutter-release button is pressed.

                   1 Place the camera on a tripod and press the
                                self-timer button until ,S appears in the
                           data panel.


                    2 Align your subject within the focus frame,
                           then press the shutter-release button.

                                                . The self-timer indicator in the data panel will blink and
                                  the self-timer lamp will blink slowly during the
                                 countdown, then rapidly, then glow just before the
                                    shutter releases.
                                            . Self-timer mode is automatically canceled after the
                                    shutter is released.
                                                . To stop the self-timer, press the self-timer button until
                                    disappears from the data panel or turn the camera    AUTOs                    '9
                                                    off.     "s::
View original page 18From the M. Butkus archive. Original publisher and archive notices are retained.
Check the model and edition against your equipment.
PDF verified 2026-10-10.