Film cameras
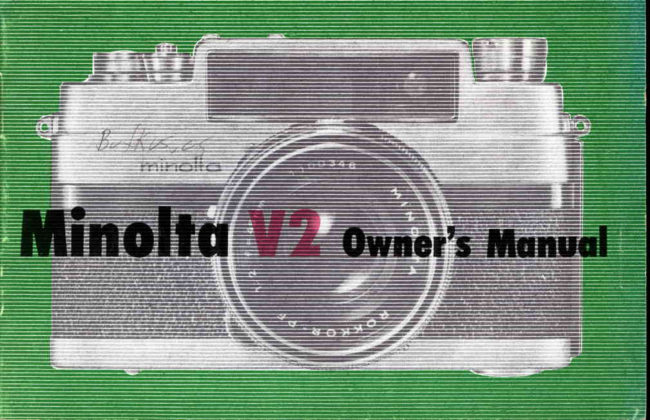
Minolta V2 User manual
User manual for Minolta V2. 23 pages in English. Read the original PDF, download or print a copy without registration.
23 pagesEnglish1.8 MB PDF
Loading your manual…Open PDF directly
Document details
- Brand
- Minolta
- Model / document
- Minolta V2
- Document type
- User manual
- Language
- English
- Pages
- 23
- File size
- 1.8 MB
- Category
- Film cameras
- Document date
- Not specified in catalog
Search available document text
Find a term, then jump to its page in the original PDF. Image-only pages may not be searchable; check the PDF for exact wording and diagrams.
Page 3 · Read text
t/zooo     Second I


       This  1/2000 second  is the speed at which  you can shoot pictures  of even a jet  air plane
        in flight without  blurring.
      Think  of the many objects around you that  you would  like  to photograph  with   this
      super-speed shutter.
       At baseball stadiums, golf links and at auto races, you will be able to take  interesting
      photos which  you can  take  with  no  other  camera  but  your  Minolta  V2.  You  will
       certainly  be enthusiastic  about  this  new  possibility   in  picture  taking  and you  will
       love your Minolta  V2.
View original page 3Page 7 · Read text
Each step  is explained  in  detail on the  following  pages.


Advance film with  lever  -               Focus and compose picture.           Press shutter release.
this also cocks shutter.                                                     To take next picture,
                                                                                            follow steps 4, 5 and 6.
View original page 7Page 8 · Read text
Looding  Film


Pull out back lock-            Pull uprewindknob                Insert a roll  of film.              Pull out enoughfilm
ing  tab  (A)  and             (B) as f ar as it goes.                                                       .to insert   it  in  slit
swingcameraback                                                                      (c).
wide open.
View original page 8
Page 9 · Read text
Turn  film advance      6     Close back  cover,      7     Advance  film lever          The  arrow  in  film
Iever  (D)  2 com-             then push in back               twice, pressing shu-          counter   (G)  now
plete turns (press-             Iocking tab (A).                    tter   release each           points at "1".  You
ing shutter release                                                time.    Advance           can take your  first
(E) each time).                                                           film once more.               picture by pressing
Make sure sprock-                                                                              shutter  release.
ets   (F)   project
through  film  slits.
View original page 9
Page 10 · Read text
I
I  Senlng  Fllm Speed (ASA or DtN rcflngs)                                                                                                                                                                        I*I                                                                                                                                                                     ;
                                                                            J    Set the film speed indicator  on the camera back  to the  film  speed of
    the film you have just loaded  in  your  V2.  For  epample,   if  the  film
    spe.:d is ASA 100 (DIN  21), Iou  simply  set the indicator  to  the figure
    100.  In case th'e film sp'eed is ASA 80, which  is not  listed on the  dial,
    you set the indicator  pointer   to a spot between 100 and 50.


                          I  Whor  ore  Fllm Speedr ond ASA or Dln Rorlngr ?
                      Film  speeds or ASA  (American   Standards  Association)   or DIN   ratings   are a means
                          of  classifying   film  according   to  their   light   sensitivity.   The  higher  the  numerical
                          rating,   the more  sensitive  the fitm  is  to  light.  A film  with  an ASA  of 200  is more
                        sensitive  to  light  than a film  rated ASA  80. You need less light  to take a picture  with
                     a film  rated  at 200 than you would  with  a film  rated  at 80.

                          !  Where  ro  flnd  rhc ASA  or DIN  rctlng   of  rhe  fllm  you're  udng
                  Inside every box of film you buy is a sheetgiving information about the film. On this
                 sheet you'll find the ASA or DIN rating.
View original page 10Page 11 · Read text
S u l t e r h i g h s l t e e d s h u t t e r  o f   ) ' o r r r V 2 c a n  c a t c h  o l t j e c t s m o v i n g   a t  e x t r e m e   h i g h  s p e e d
f r o r n   ; l v e r ! '  s h o r t  < l i s t ; r n c e , o r  c a n   t a k e  e x t r e r n e    t t r i g h t  o b j e c t s   f r e e l y  e v e n o n a s u l ) e r -
s c n s i t  i v c   l i l m .  A t t t n t i o r r     !  Itlc:rsi: sLre p'(lge 10, l>erfore vou Lrse t r i g h s p e e c l s l t u t t e r  s r r c l r
                                                        ' l ( X X )  i r s 1 2 ( ) ( . X: )r n l l  I         s L r ( ' .
View original page 11Page 12 · Read text
2  Seffing  Shutter Speed
                                 H>      Turn  the  shutter  speed setting  ring  (H)  and  set the
      speed you need to the mark   v.                      t>
 3  Serring fens Aperlvre
      You just set  the F stop  figure  you want  to use  to  the
      A mark, by turning  the lens aperture  setting  ring  (I).


                      1 77;,1l
          ?000                               *--t ooiusltloo'r-!,j;-l
                                   IiIPORTANT
                                         Remember   to set the  lens  aperture   to  an F stop  figure
                                                       larger  than  f4  in case you  are shooting with  the  shutter                                             speed of 1/IOOO  second. This means you  just  use lens        i
                                                                           , t            apertures  within  the blue  line.
                  3 - -                                                Another  reminder    .  .  . Please set the lens aperture  to an                                   J
                                              F stop figure  larger  than  fB  in  case you  shoot with   the
                                                     shutter speed of I/2OOO second. That  is, you just use the
                                                      lens aperture  within  the red  line.


t o
View original page 12Page 13 · Read text
A word  obout exposure

  O r d i n a r i l y , w h e n e v e r y o u  t a k e a p i c t u r e , y o u m u s t s e t  t h e e x p o s u r e . E x p o s u r e i s b a s e d p r i m a r i l y o n
  2 factors: The size of  the lens opening  (F stop) and  the shutter speed. Roth  are determined  by
   existing lighting conditions.
(-tf . : 2                 f . : 2 . 8               f . z 4                f : 5 . 6    $      {jl  $
       %      %      %


     I f    i t    i s v e r y  b r i g h t  o u t ,  y o u w i l l   r e q u i r e     l e s s   l i g h t  a n d ,   t h e r e f o r e ,  u s e a s m a l l e r       l e n s o p e n i n g .   I f    i t    i s
   c l o u d y ,  y o u w i l l  n e e d m o r e     l i g h t  a n d u s e a w i d e r     l e n s o l t e n r n g .
       ' I ' he
         s m a l l e r    t h e   " F "  n u n tb e r,   th e  la rg e r  th e  o p e n in s.   F 2  lneans  a  lar ger  opening  and m or e   light
     t lran   f 2 . 8 ,  f , 1 , f 5 . 6 ,  f 8 ,  .  .  .  . f2 2 , e tc.  Size o f  le n s o p e n ing  doubles  with  each succeeCing  stop.
       ' l ' h e         s h u t t e r   s p e : d  d e t e r m i n e s      t h e      l e n g t h  o f    t i m . : : 1 ' o u w i l l      l e t     l i g h t     t h r o u g h      t h e     l e n s .      ' l ' h e V 2
   s h u t t e r      i s  t i m e d    f r o m    I   t o 1 , , 2 0 0 0 s e c . ' l ' h e r e     i s a l s o a B   ( R u l b )  s e t t i n g   r v h i c h   r v i l l  k e e p    t h e  s h u t t e r
                                                                                                                                                                                               ' l ' h e  o p e n w h i l e    t h c  s h u t t e r    r e l e a s e b u t t o n      i s  d e p r e s s e d .        s h u t t e r   s p e e d  n u m b e r s   a r e n o t  s h o w n    i n
     f r a c t i o n s .  3 ( ) r e p r e s e n t s  1 , i 3 0 o f a s e c o n c l ; 1 2 5  i s   l , r 1 2 5 o f a s e c o n r l , e t c .
View original page 13Page 14 · Read text
I  When  you own  o  llghr  value exPosure  meler


    Setting  exposure  is  this  simple  :  you read  the  light
    value on the meter and set  it to the light value indicator
      (J). That  is all. You can get  a correct  light  value by
     turning  either the shutter speed setting ring (H) or  the
    lens aperture setting ring  (I) separately until the select-
    ed  light  value appears in the  light  value window  (K)-
        If you turn  the shutter speed setting  ring, the figures on
     the light value window  (K) move, while  the  pointer  (J)
    moves as the lens aperture setting ring  is turned.


    Once you have set the correct exposure' you simply turn
    both the shutter speed setting ring and the lens aperture
     setting  ring  at  the same  tlme  to  select  the  shutter
    speed-F stop combination  you want  to use.
View original page 14Page 15 · Read text
4  Advoncing  Film


       This single-stroke film advance action  automatically  advances the film, cocks  the shutter  and
      counts the exposure, all at the same time.
      You can  turn  the  lever either  at one  full  stroke  or  in several short strokes. You may   if
      you wish  advance the  film  before  setting  the  exposure. You  will  not  experience  any hard
       turning when setting the shutter at high speeds after the shutter  is cocked.
View original page 15Page 16 · Read text
5  Focusing ond Composing


                                     +


As you look through  the       The  MinoltaY2   finder  is
combination   range-view'         specially designed to cor-
finder  window  you  will         rect automaticallY Paral-
note a yellow lumi-frame         lax so that the lens takes
near the outer edge. The        what  you  see  through
actual picture  you  take         the  lumi-frame  at all dis-
will be inside this frame.        tances.  Parallax   is  the
Make sure your  picture         difference  between  what
will  be composed  inside         the  viewfinder  "see"  and
the Iumi-frame.                 what  the  lens  "see"  at
                                 close distances.
View original page 16Page 17 · Read text
t  Deprh  of  Fleld


   In the center of the frame  is a rectangular           Take  a  glance  at
   yellow area. You will notice the part of your             the  depth  of  field
   subject which  appears in this yellow area is            scale (M) when you
   double.  As you turn  the  focusing lever  (L)           have   focused  on
   you will note the double image  will become            your  subject.   'l'he
  one  and  then  double  again.  When   your             indicating  Iine   in
   subject becomes one in this yellow area, you             the center  of the scale shows the camera-
   are properly focused.                                      to-object distance.  Then  read  the F stop
                                                              Iines for the F stop you are using on each
Out of focus                      In focus                    side of  the  indicating  line and they will
                                                  show you on the  distance  scale (N)  the
                                                           distance  in  front  and behind your  object
                                                                                                                                                             (                                                       which  is also in sharp focus. The   *   indi-
                                                        cates that you can get sharp pictures in the
                                                           distance which  is shown or formed bv ''2).
View original page 17Page 19 · Read text
'fake                                                       'I'he          the examples of the photo shown  here.
    camera-to-object  distance  is 5  feet.     If  the  lens
    aperture  is   f  11, everything  between about 4 and
    6.5 feet  is also in sharp focus.

                           The depth  of  field  table
                           shows you  the range of
                                 hypercritical   focus  for
                              every F stop from  f2 to
                                     t22.

r 6
View original page 19Page 20 · Read text
6  Pressing Sh utter Releose


                                                                                 *x
                                                                                                                                      t
                                                                                                                                 r
                       n
    There are basically two ways to hold your \t2 while taking  pictures   :  Vertical  and horizontal.  As
    long as you anchor the camera to your forehead and squeeze the  trigger,  ndt  jerk   it, you can use
    whichever grip or format  is a most comfortable  for  you,  It's  always a good  idea  to  brace  your
    camera  if you can, Even when you are shooting  at  faster  than  1/30  of  a second where  you can
     safely handhold a camera, make use of any available support.  It  is advisable that you use a  tripod
    when you shoot with  the shutter speed less than 1/30 of a sec. At such slow speeds there  is almost
    always some camera movement  while the shutter  is open which blurrs your picture,
View original page 20Page 21 · Read text
Unlooding  Film

      I   After you have taken your  last picture, the film counter  will show 2O or  36-depending on whether
      you are using a 2O or 36-exposure roll.
   2  Depress rewind  release button  (O). You  will  note  that  the button  remains  in the "pushed  in"
      position.
   3   Lift  the crank  (P) attached  to the rewind knob, and turn crank clockwise  until  you feel  all resist-
     ance gone and  it turns  freely.  Then, open the camera and take the film magazine out  of camera.

                                                                                                                                                 /


            Note     :   S h o u l d    t h e    I t e w i n d  R e l e a s e B u t t o n  inadver tently   pop out  while   r ewinding,  m ove
                                                       t h e   f r l m w i n d i n g     l e v e r  a    l i t t l e ,     t h e n  push  the  button    in  again  and  continue   as
                        be fo re .
View original page 21Page 22 · Read text
' l h e                                                                                                                          hrF      s e l f - t i m e r      i s a d e v i c e   r v t r i c h   : r l l o w s   t i m e     t o
e l r r l r s e b e f o r c   t h e  s h u t t c . r o [ ) e n s s o   t h i i t    \ o u m a ] '
t a k e   t ' o L r r o w n  p i c t u r e s .
I r i r s t  p u s h   t h e  s c l f  t i r n e r   I e v e r   ( ( ) )   t o w a r c l    t h e  V
n l i l r k ,  a n d  v o u  rvill b e a b le  tcl d e la y   th e  ca mcr a,
: r p p r o x i m a t e l t '  9 s e c o n d s ,  f r o m    t h e   t i m e  v o r r p r e s s
t h e  r e l e a s e  t o   t h e   t i m e    t h e  s h u t t e r     i s  r e l e a s e d .
Y o u  c a n a l s o a r r a n g e    t h e    l e n g t h  o f  d e l a y  a c c o r d -
i n g   t o   t h e p o s i t i o n    t h a t  y o u   " c h a r g e "      t h e     l e v e r .
H a l f  w a y  d o w n  me a n s   a b o u t  ,l%  se co n d s,  two-
t h i r d s  d o w n : i b o u t   6 s e c o n d s . e t c .
View original page 22
From the M. Butkus archive. Original publisher and archive notices are retained.
Check the model and edition against your equipment.
PDF verified 2026-10-10.