Film cameras
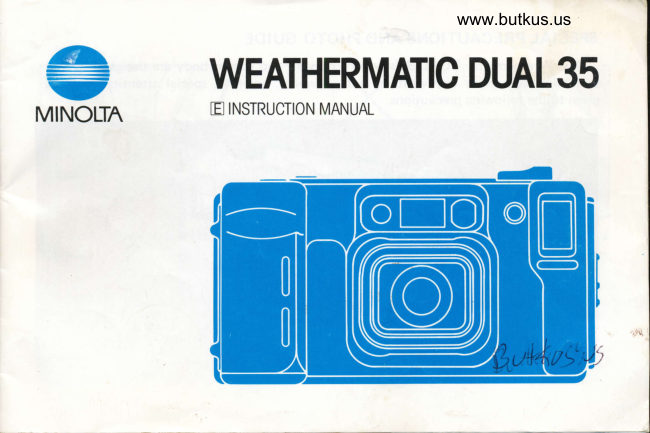
Minolta WEATHERMATIC DUAL 35 User manual
User manual for Minolta WEATHERMATIC DUAL 35. 35 pages in English. Read the original PDF, download or print a copy without registration.
35 pagesEnglish8.0 MB PDF
Loading your manual…Open PDF directly
Document details
- Brand
- Minolta
- Model / document
- Minolta WEATHERMATIC DUAL 35
- Document type
- User manual
- Language
- English
- Pages
- 35
- File size
- 8.0 MB
- Category
- Film cameras
- Document date
- Not specified in catalog
Search available document text
Find a term, then jump to its page in the original PDF. Image-only pages may not be searchable; check the PDF for exact wording and diagrams.
Page 1 · Read text
www.butkus.us


   H ^4,         WEATHERMATIC DUAL35
                             tr INSTRUCTION MANUALMINOLTA
 -
View original page 1Page 3 · Read text
www.butkus.us
SPECIAL PRECAUTIONS AND PHOTO GUIDE
  The Weathermatic DUAL 35's watertight seals and rugged body are designed to that
you take pictures in any weather and anywhere; however, special attention must be
given to the following precautions:

                                      *                                 .**
                                     n,
              w
View original page 3Page 4 · Read text
o Always clean and dry the camera before o Never open the camera where there is
opening.                                 blowing sand, dust, etc.
View original page 4
Page 5 · Read text
www.butkus.us


o Never let water or sand get into the open  o Never use compressed air or a hair dryer
camera.                                        to dry the camera.
View original page 5
Page 6 · Read text
set the main switcho  lf the gasket or O-ring ls damaged,    .  After taking pictures,
contact an Authorized Minolta Service   to "OFF".
Center.
View original page 6
Page 7 · Read text
www.butkus.us
In or near the water


.  Do not jump or dive into the water while o Never throw the camera.
holding the camera.
View original page 7
Page 8 · Read text
a When using the camera above water, a  o Never use the camera at depths greater
clean, dry lens-cover glass will produce   than approx. 16 ft. (5m)
sharper pictures and better colors.
View original page 8
Page 9 · Read text
www.butkus.us
In cold weather


. When bringing the camera from outdoors   .  When taking the camera from indoors to
to indoors, let the camera warm up before   outdoors, make sure camera is completely
opening the back cover. This will help   dry.
prevent condensation from forming inside
the camera.
View original page 9
Page 10 · Read text
Your Minolta Weathermatic DUAL 35 is a fully waterproof 35mm camera that is
designed so that you can take pictures anywhere you go. lts housing is sealed to prevent
entry of moisture or dust, so that you can enjoy taking pictures on snowy ski slopes, at
the beach, or even approx. 16 ft. (5m) underwater.
  The Weathermatic DUAL 35 is the world's first waterproof camera that lets you select
either standard or tele lenses at the touch of a button. lt also features autofocusing on
land, Focus-Free operation underwater, automatic exposure, automatic switchover flash,
automatic film transport, and the option of using either a lithium battery or four AAA-
size alkaline batteries.
  To learn how to operate your camera properly and obtain satisfying results right from
the start, please read the instructions and cautions carefully before taking pictures.
    lf you have any questions about your camera, contact the Authorized Minolta Service
Center in your area.
View original page 10Page 11 · Read text
www.butkus.us
NAMES OF PARTS
                                                  Main switch
             Underwater close-up button     Viewfinder
                                     window*               Lens select button


 Shutter-release
        button


Strap eyelets


Handgrip

                                Lens Lens-cover glass*
                            Frame counter
View original page 11Page 13 · Read text
www.butkus.us
STRAP                      POWER
Attach strap as shown.                         Battery types
                             The Weathermatic DUAL 35 can be
                                    powered by either four AAA-size alkaline
                                                 batteries, or a 6V lithium battery pack
                                            (Duracefl DL223A, Panasonic BR-P2P) for
                                                longer life and faster flash recycling.


 Set the end here.
View original page 13Page 14 · Read text
Installing battery                           2. lnsert lithium pack or AAA batteries into
                                                                                   +1. Using a coin (or similar object), turn   battery chamber as shown, making sure
battery-cover release to "OPEN" position.     and - contacts face in correct direction.
View original page 14Page 15 · Read text
www.butkus.us

                               o When loading the battery, always inspect
                                        the O-ring and edge of battery chamber.
                                            Gently wipe surfaces with a clean, dry cloth
                                         to remove any dirt, sand, and moisture. lf
                                     the O-ring is damaged, do not use the
                                       camera; contact an Authorized Minolta
                                                  Service Center.

                                                  Battery cautions
                               o Keep batteries away from children
   3. Close battery cover and turn battery-  o Keep battery contacts clean
   cover release to "CLOSE" position until it  o Do not mix batteries of different brands
    stops.                                        or ages


12
View original page 15Page 16 · Read text
*.                             FILM
Low power indications                    You can use ISO 100 to 1000 DX-coded
Install fresh batteries in the following cases:   35mm color negative film and ISO 100 or
o Shutter will not release.                  400 color reversal film in your camera. ("DX"
.  Film winding or rewinding stops during     is printed on the cartridges).
operation.                       o  lf you use films that are not DX-coded,
o  Flash charging exceeds 5 sec. with lithium   the camera sets the film speed to ISO 100.
                                                                              ISOpack, or 10 sec. with AAA-size alkaline  o The camera sets the film speed to
batteries.                              100 if you use DX-coded film rated below
                                      ISO 400, and sets the speed to ISO 400 if
                                              the DX-coded speed is ISO 400 or higher.
                                                          .  72-exposure cartridges and Polaroid in-
                                                  stant 35mm films cannot be used.


                                                                                                13
View original page 16Page 17 · Read text
www.butkus.us
HOW TO LOAD FILM


1. Check that frame  counter shows "O",   2. Flip up the film-pressure  plate. Do not
then press back-cover release downward to    lift   f ilm-pressure plate by  pulling on its
open the back cover.                              spring.
                                          3. Place the film cartridge  into the film
                                         chamber as shown above.


                                 CAUTION
                          o Load film in subdued light; keep the
                                         camera and film shaded from direct sunlight.
View original page 17Page 18 · Read text
Film tip position mark


4. Lav film flat between the guide rails and  o  lf the film is not loaded correctly, the
extend the tip of the film over the take-up   camera's motor will run for about between 5
drum to the film tip position mark. lf the  and 10 seconds and then stop; the frame
film extends too far, gently push the excess   counter will continue to show "0". Open the
back into the cartridge.                       back cover and reload the film correctly.
5. Snap the pressure plate down to  its  o  lf the back-cover release doesn't return to
normal position.                                     its original position, push it up with your
6. Close the back cover. To securely close      fi nger.
the back cover, use both hands to squeeze  it
closed and check that the back-cover release
has returned to its original position.                                                                15
View original page 18
Page 19 · Read text
www.butkus.us
                            MAIN SWITCH
 . When the back cover is closed, the film
 will advance automatically to the  f irst  f rame.
                                                                                                                                                                                                              ,,i:,When "1" appears in the frame counter, you                                    ::.:^)d    o
 are ready to start taking pictures.
o Before closing the back cover, always
 inspect the rubber gasket on the camera and
the V-shaped ridge on the back cover.
Gently wipe surfaces with a clean, dry cloth
to remove any dirt, sand, and moisture. lf
the gasket is damaged, do not use the
camera; contact an Authorized Minolta    When the main switch is "OFF", the
Service Center.                                  shutter cannot be released. To take pictures,
o Make sure film is under film-pressure   move the switch to "ON". When you are
plate before closing back cover.                finished taking pictures, switch the camera
                                                                         accidental exposures..  Since this camera is airtight, it may be   to "OFF" to prevent
difficult to open the back cover. lf so, after
opening the battery cover, open the back
cover.
View original page 19Page 20 · Read text
LENS SE LECTION              HOLDING THE CAMERA


  When the camera is switched ofl, the     For greater stability when taking pictures,
35mm lens is set automatically. To select the  hold camera as shown above. Make sure that
50mm lens, push the lens selection button.   lens, flash, autofocus windows, and meter
To reselect the 35mm lens, push the button   cell are not obstructed by your hands,
again, Viewfinder magnification is adjusted  camera strap, etc. For vertical pictures,
automatically to show the proper framing   the  f lash should be on top.
for the lens in use.
View original page 20
Page 21 · Read text
www.butkus.us
  FRAM ING                    TAKING PICTURES


     Frame subjects according to  distance   Subiect in center of frame
    indicated:                                Frame picture so subject fills autofocus
   a. Subjects beyond 2.6 ft. (0.8m) with  zone, then press the shutter-release button
    35mm lens, 3.9 ft. (1.2m) with 50mm    all the way down to take the picture. ln low
        lens                                               light, the flash fires automatically to ensure
    b. Subjects from 1.7 to 2.6 ft. (0.52 to   correct exposure. After the exposure, release
     0.8m) with 35mm lens, 2.0 to 3.9 ft.  your finger from the button.
       (0.62 to 1.2m) with 50mm lens


18
View original page 21Page 23 · Read text
www.butkus.us

  NOTE                                                  .  When taking flash pictures, your subject's
    .  Flash charging time depends on condition   eyes may appear red. This "red-eye" effect
   of the batteries.                               occurs when flash light is reflected from the
  o Flash range varies according to the ISO   retinas in your subjects eyes back to the
   film speed. Consult the flash-range table to  camera. This effect is most noticeable
   check the flash range for ISO 100 and ISO  when the subject has blue eyes, and in low
   400 film.                                            light. To help minimize "red-eye", turn on
  o When the red light is oo, the shutter   additional lights in the room, and ask your
   cannot be released.                            subject to look at the lights just before you
  o  lf film stops advancing and the shutter   take the picture.
   locks before the end of the roll, replace the
   batteries. DO NOT OPEN THE BACK
  COVER.
  o When taking pictures above water, always
   make sure that lens-cover glass, AF windows,
   meter cell and flash are clean and dry' Use a
    clean, dry cloth to remove any dirt, sand, or
    moistu re.


20
View original page 23Related documents and language editions

From the M. Butkus archive. Original publisher and archive notices are retained.
Check the model and edition against your equipment.
PDF verified 2026-10-10.