Film cameras
Minolta Zoom 160C User manual
User manual for Minolta Zoom 160C. 64 pages in English. Read the original PDF, download or print a copy without registration.
64 pagesEnglish8.3 MB PDF
Loading your manual…Open PDF directly
Document details
- Brand
- Minolta
- Model / document
- Minolta Zoom 160C
- Document type
- User manual
- Language
- English
- Pages
- 64
- File size
- 8.3 MB
- Category
- Film cameras
- Document date
- Not specified in catalog
Search available document text
Find a term, then jump to its page in the original PDF. Image-only pages may not be searchable; check the PDF for exact wording and diagrams.
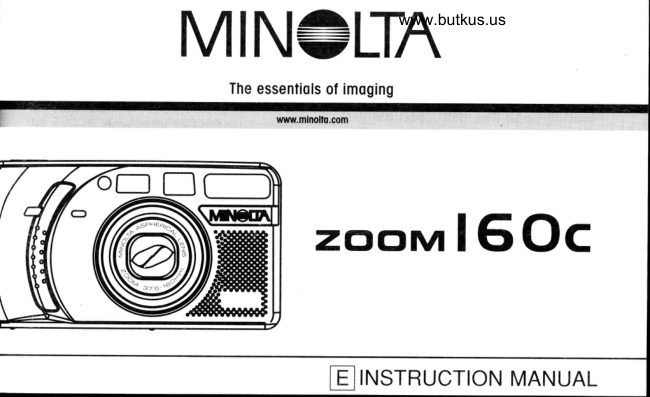
Page 1 · Read text
www.butkus.us
MIN+LTN
      The essentiqls of imoging

     zooM        l50c


               rrusrRUCTtoN MANUAL               f,
View original page 1Page 2 · Read text
Thank you for your purchasing this        For Proper and Safe Use .......... .-...... 4
Minolta camera. Before using your
new camera, please take the time to    GETTING STARTED
read through this instruction manual      Names of Parts             ............... 10
for it contains important information         Attaching the Camera Strap ............ 14                                                 lnserting the Battery           ....... 15on the use and care of your camera.
                                              Battery-condition Indicator ..............  1 6
                                           Loading the Fitm             ............. 17
                                 BASIC OPERATION
                                                   Fully Automatic Operation  ......... .....20
                                     Focus Lock.........         ............ 24
                                        Focusing Range......       .........25
                                           Special Focusing Situations  ............ 26
                                           For Closer Subjects
View original page 2Page 3 · Read text
:tilR::                                       www.butkus.us

ADVANCED OPERATION            APPENDIX
  Selecting the Flash Mode................ 32     Care and Storage           ........... 55   Flash Range            ................. 34      Technical Specifications .................. 60
  Autoflash                             .... 35
   Autoflash with Red-eye Reduction 36
  Fill-flash                     ......37
   Flash cancel            ................. 38
   Night Portrait ...........       ....39
 Self-timer ,i................    ......40
 Continuous Advance...     ....42
 For Owners of the Quartz-date model..
                                        .....44
  Date and Time lmprinting  ..............44
  Remote Control Operation  ............ 50
View original page 3Page 4 · Read text
Venmo @mike-butkus-camera  Ph. 2083
PayPal Name  Lynn@butkus.org      www.PayPal.me/lynnbutkus
View original page 4
Page 5 · Read text
:Ni:.                                                                    ;1,;q\r.;                           :,:i:l                                                                                 i:,.\. "
$ s.ryj Is Ic n{s.l ll H Is:{ s I x&*Y:t x rN$rtf N
Read and understand  all warnings and cautions before using this product.
         A wnnNrNG
 Using batteries improperly can cause them to leak harmful solutions, overheat,
 or explode which may damage property or cause personal injury. Do not ignore
the following warnings:
 . Only use the batteries specified in this instruction manual.
 . Do not install the batteries with the polarity (+l-) reversed.
 . Do not use batteries which show wear or damage.
 . Do not expose batteries to fire, high temperatures, water, or moisture.
 . Do not attempt to recharge, short, or disassemble batteries.
 . Do not store batteries near or in metallic products.
  Do not use leaking batteries. lf fluid from the batteries enters your eye,
  immediately rinse the eye with plenty of fresh water and contact a doctor. lf
   fluid from the batteries makes contact with your skin or clothing, wash the area
  thoroughly with water.
View original page 5Page 6 · Read text
\$!l
                                           www.butkus.usi$s

Tape over lithium battery contacts to avoid short-circuiting during disposal;
always follow local regulations for battery disposal.

Do not disassemble  this product. Electric shock may cause injury  if a high
voltage circuit inside the product is touched. Take the product to a Minolta
Service Facility when repairs are required.
lmmediately remove the batteries and discontinue use if the camera is
dropped or subjected to an impact in which the interior, especially the flash
unit, is exposed. The flash has a high voltage circuit which may cause an
electric shock resulting in injury. The continued use of a damaged product or
part may cause injuries.
Keep batteries or small parts that could be swallowed away from infants.
Contact a doctor immediately if an object is swallowed.
Store this product out of reach of children. Be careful when around children,
not to harm them with the product or parts.

                                                 Continued on next page.
View original page 6Page 7 · Read text
:'"\i:
                                                                                                                                                                                                                                   .:s\i\\N;                                                                                  ffi
                                                                         .Ni
 Do not fire the flash directly into the eyes. rt may damage eyesight.'
 Do not fire the flash at vehicle operators.  lt may cause a distraction or'
  temporary blindness which may lead to an accident.
 Do not look directly at the sun or strong light sources through the viewfinder. lt'
 may damage your eyesight or cause blindness.
 Do not expose this product to liquids or operate this product with wet hands. lf'
  liquid enters the product, immediately remove the batteries and discontinue
  use. The continued use of a product exposed to liquids may cause damage or
  inquiry through fire or electric shock.
 Do not use the product near inflammable gases or liquids such as gasoline,
  benzine, or paint thinner. Do not use inflammable products such aJalcohol,
  benzine, or paint thinner to clean the product. The use of inflammable cleaners
 and solvents may cause an explosion or fire.
   lf the product emits a strange odor, heat, or smoke, discontinue use.
  lmmediately remove the batteries taking care not to burn yourself. The
 continued use of a damaged product or part may cause injuries.
View original page 7Page 8 · Read text
www.butkus.us
           i
  Take the product to a Minolta Service Facility when repairs are required.

                  CAUT|ON         a Do not use or store the product in a hot or humid environment such as the'
  glove compartment or trunk of a car. lt may damage the product and batteries
  which may result in burns or injuries caused by heat, fire, explosion, or leaking
  battery fluid.
.  lf batteries are leaking, discontinue use of the product.
       lens retracts when the camera is turned off or the auto-power-off function' The
  is activated. Touching the lens barrel while it is retracting may cause injury.
 Do not fire the flash while it is in contact with people or objects. The flash unit'
  discharges a large amount of energy which may cause burns.


                                                     Continued on next page.
View original page 8Page 10 · Read text
www.butkus.us

 lf this equipment does cause harmful interference to radio or television
reception, which can be determined by turning the equipment  off and on, the
user is encouraged to try to correct the interference by one or more of the
following measures:
. Reorient or relocate the receiving antenna.
. Increase the separation between the equipment and the receiver.
. Connect the equipment to an outlet on a circuit different from that to which the
  receiver is connected.
. Consult the dealer or an experienced radio/Tv technician for help.

This Class B digital apparatus complies with Canadian ICES-003.

              This mark on your camera certifies that this camera meets the
              requirements  of the EU (European Union) concerning interference
             causing equipment regulations. CE stands for Conformit6C€   Europ6enne (European Conformity).
View original page 10Page 11 · Read text
AF window.                                        Viewfinder window*
  Meter window.

                                                               Flash* (p. 32)   Remote-control
   receiver* (p. 50)                                                          Lens*(Quartz-date model only)
                                                            Back-cover release (p. 17)

                                 Mike Butkus  Digitally                                                                                                                                                                                                  DN:ou=butkus.org,Date:cn=Mike2024.03.09signedButkus,email=mike@butkus.org,by00:44:59Mikeo=ButkusButkus-05'00'camera manuals,c=US


                                                               Tripod socket  Self  -ti mer/Remote-control
         lamp* (p. 41,52)                                  Manual-rewind button (p. 31)
. This camera is a sophisticated optical instrument. Care should be taken to keep these
surfaces clean. Refer to the care and storage section at the back of this manual (p. 55).
10
View original page 11Page 13 · Read text
AF window.                                        Viewfinder window*
  Meter window*

                                                              Flash. (p. 32)    Remote-control
   receiver* (p. 50)                                                          Lens*(Quartz-date model only)
                                                            Back-cover release (p. 17)


                                            www.butkus.us


                                                               Tripod socket
         lamp* (p. 41, 52)                                Manual-rewind button (p. 31)
.  This camera is a sophisticated optical instrument. Care should be taken to keep these
surfaces clean. Refer to the care and storage section at the back of this manual (p. 55).
10
View original page 13Page 15 · Read text
DATA PANEL    All indicators are displayed for clarity.
    Date/Time display (p. 44)
     (Quartz-Date model only)                                 Battery-condition indicator (p. 1 6)
                                                        Remote-control  indicator (p. 51)
                                                                        (Quartz-date model onlY)

                                                    Frame counter (p. 19)
                                                                   Film-transport signals 1p. 19)
                                                             Cartridge mark (p. 30)
Flash-mode indicators (p. 32)
    Autoflash
    Autottash with red-eye reduction  ^"!";l
  t  FillJlash                                     Continuous-advance indicator (p. 42)
 0 Flash cancel                                       Self-timer indicator 1p. a0) f"  Night Portrait  (with red-eye reduction)

12
View original page 15Page 16 · Read text
www.butkus.us           Ws%
 VIEWFINDER
                           Focus lamp (green)
Close-framing guides (p. 28)          With the shutter-release button pressed partway down -
                                  Glows: focus confirmed
                                     Blinks rapidly: subject is too close
                                       Blinks slowly: focus not confirmed (p. 26)


                              Flash lamp (orange)
                                 With the shutter-release button pressed partway down -
       Focus frames                 Glows: flash is charged and ready
                                    Blinks rapidly: flash charging
                                       Blinks slowly: camera-shake warning

                                                                  13
View original page 16Page 17 · Read text
?t-2           1. strapPass throughthe smalltheloopstrapof the
                  eyelet on the camera.
                 2. Pass the the other end of
                 the strap through the
                 small loop and tighten.
 . Button keys are attached to the strap. Use the
   larger key to open the battery-chamber door, and
   the smaller key to push the manual-rewind  button.
View original page 17Page 18 · Read text
www.butkus.us                                    ffi                          The camera uses one 3-volt CR123A or
                               DL1 23A lithium battery.
                                        1. Open the battery-chamber door
                             using the larger button key on the
                         camera strap.

                             2.Insert the battery. The positive and
                             negative battery terminals should
                          be orientated as illustrated on the
                          diagram in the battery chamber.
                         Snap the door closed.

Quartz-date model: after installing the battery, the date and time must be set,
see page 46.
When changing batteries, always turn the camera off.
                                                                 15
View original page 18Page 19 · Read text
Each time the camera is turned on, an indicator will appear on the data panel to
indicate the power status of the battery.

                     The indicator briefly appears. Power is
                             sufficient for all camera operations.

                     The indicator blinks. Power is sufficient                  '1 l=e,t2                              for camera operation, but the battery  +-'frT
                                                                                                                                                         I AUTO                      must be replaced soon.           o_i-l-E"l\
                     The indicator blinks and no other
                           indicators are displayed on the data
                            panel. The shutter will not release.
                        Replace the battery immediately.
16
View original page 19Page 20 · Read text
www.butkus.us
                                                   _Wgiimffif*r;rr*-+
                                            1. Slide the back-cover release
                          down to open the back cover.
                                            . Before opening the back cover, look
                                     through the film window to confirm that
                                              film is not currently loaded.


   lf the back cover does not open, turn the camera off and on to release the film-'
 chamber lock.
 Use only DX-coded 35mm film rated between ISO 25 and 3200.
 Do not use Polaroid instant 35mm film. Winding problems may result.
 ISO 400 film is recommended  for best results.
  Always load and unload the film in subdued light.


                                                      Continued on next page.     17
View original page 20Page 21 · Read text
2.Place the film cartridge into the film
                        chamber


                                   3. Extend the film leader to the film-tip
                            mark. The film must lay flat.
                                   .  lf the film tip extends beyond the index mark,
                              push the excess film back into the cartridge.
     WM

18
View original page 21Page 22 · Read text
www.butkus.us

                        4. Close the back cover.
                           . The film automatically advances to the first frame
                  and ,,1" appears in the data-panel frame counter.          \)                        .  lf the film has been loaded improperly, "0" will
                         blink on the frame counter and the shutter will---*--,-*;
                      not release. Open the back cover and repeat the
                        loading procedure.
                           . Once the film is loaded, the battery-chamber lock
                             will engage preventing the back cover from being
                       accidentally opened until the film is rewound.


                                                           19
View original page 22Page 23 · Read text
1. Press the main switch to turn the
 re-f-Fi,-Ifrtuna-l}e         @fSai                camera on.
             riil                           . To conserve battery power, the auto-power-
                                             off function will turn the camera off eight
                               minutes after the last operation.
             www.butkus.us      . Do not obstruct or hold the lens barrel.
                          2. Hold the camera steadily. Do not cover the
                         flash, lenso AF windoq or Meter window
                      with your fingers.
                           . For vertically framed pictures, turn the camera so the
                            flash is to the top.


20
View original page 23From the M. Butkus archive. Original publisher and archive notices are retained.
Check the model and edition against your equipment.
PDF verified 2026-10-10.