Film cameras
Minolta Zoom 80 User manual
User manual for Minolta Zoom 80. 22 pages in English. Read the original PDF, download or print a copy without registration.
22 pagesEnglish5.5 MB PDF
Loading your manual…Open PDF directly
Document details
- Brand
- Minolta
- Model / document
- Minolta Zoom 80
- Document type
- User manual
- Language
- English
- Pages
- 22
- File size
- 5.5 MB
- Category
- Film cameras
- Document date
- Not specified in catalog
Search available document text
Find a term, then jump to its page in the original PDF. Image-only pages may not be searchable; check the PDF for exact wording and diagrams.
Page 1 · Read text
www.butkus.us


          zooM
         BO
         @ rrrrsrRucTroN MANUAL


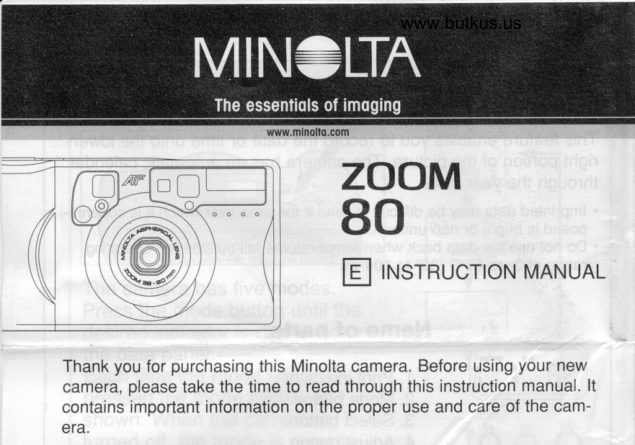
Thank you for purchasing this Minolta camera. Before using your new
camera, please take the time to read through this instruction manual.  lt
contains important information on the proper use and care of the cam-
era.
View original page 1Page 2 · Read text
NAMES OF PARTS
*Keep      these surfaces clean. Please read the care
and storage section in this manual.           FRONT
  1 . Remote-control receiver*
    (Quartz-date model only)
  2. AF windows*
  3. Meter window*
 4. Viewfinder window*
  5. Red-eye reduction/
    Self-timer lamp
                                                                                    1  6. Flash.
  7. Tripod socket
                                                   Mike Butkus                                                                 DigitallyDN:Date:cn=Mike2024.03.10signedButkus,by09:52:39Mikeo=ButkusButkus-04'00'camera manuals, ou=butkus.org, email=mike@butkus.org, c=US
  9. Battery-ehamber door
 10. Strap eyelets

11 . Data panel
12. Mode button
13. Main switch
1 4. Shutter-release button
1 5. Manual-rewind button
16. Zoom lever
17. Film window
18. Viewfinder*
19. lndicator lamp
20. Data back
   (Quartz-date model only)
21. Back cover
22. Back-cover release
View original page 2Page 3 · Read text
www.butkus.us23. Low-battery indicator
24. Frame counter
25. Mode indicators:
  nuro       ! Autoflash
  €r r' Self-timer/Remote control
    (a' appears on the quartz-date model only)
  t  Fill{lash
 e Flash cancel
  I  LandscapeiNight view

26. Indicator lamp                  VIEWFINDER
       Steady: focus confirmed
       Blinks quickly: subject too close
        Blinks slowly: flash charging
. The indicator lamp lights when the shutter-
 release button pressed partway down.
27. Focus frame
View original page 3Page 4 · Read text
Venmo @mike-butkus-camera  Ph. 2083
PayPal Name  Lynn@butkus.org      www.PayPal.me/lynnbutkus
View original page 4
Page 5 · Read text
INSERTING THE BATTERIES

           The camera uses two AA-size alkaline bat-
                teries to supply power for all camera oper-
                ations.
                     . Nickel-cadmium  batteries, nickel-metal hydride
                    batteries, and lithium batteries cannot be used.
           1.Open the battery-chamber door by
                sliding it in the direction indicated.
                      . When replacing the batteries, make sure the
              camera is off.
                      . Quartz-date model: the date and time must be
                   reset when the batteries are replaced.

              2.lnsert the batteries with the polari-
                 ties as indicated by + and - marks
            on the back of the battery-chamber
                door.

            3.Close the battery-chamber door and
                slide  it toward the body to engage
              the safety catch.
View original page 5Page 7 · Read text
p2
      LOADING THE FILM

                     Only use 35mm, DX-coded negative film.
                    ISO 400 is recommended  for best results.
     ?ou,. Tl,of"F,.n,. DX          . The use of slide film is not recommended.
                                   . Do not use Polaroid instant 35mm film.
                         Winding problems may occur.


                        l.Slide the back-cover release down to
                    open the back cover.
                                       . Always load and unload film in subdued light.


  www.butkus.us  e0
                    2.Place the film cartridge into the film
                     chamber. Extend the film leader to
                       the "FILM TlP" mark. Make sure the
                           film lays flat.
                                   .  lf the film tip extends beyond the film tip mark,
                         push the excess film back into the cartridqe.


                    3.Close the back cover.
                                       . The film is automatically loaded into the cam-
                                era. Wait for the film-transport motor to stop.
                        The frame counter will display the number of
                         frames remaining on the roll.
                                   .  lf the film has been loaded improperly, the G}          frame counter will display zero ( ii  ). Open the
                          back cover and repeat the loading procedure.
View original page 7Page 8 · Read text
Stepff                              www.butkus.us
        FULL-AUTO OPERATION

                          l.Press the main switch to turn
                           the camera on.
         -----       --aa1)                 . To conserve power, the camera automati-              tt\v/                                         cally turns off if an operation is not made
                                    within eight minutes.


                          2.Hold the camera steady, making
                           sure your fingers do not cover
                           the flash, lens, or AF windows.
                                   . For vertically framed pictures, turn the
                              camera so the flash is positioned above
                                 the lens as illustrated.

                         3.Look through the viewfinder and
                           press the T side of the zoom
                               lever to zoom in or the W side
                              to zoom out.
                       T = telephoto: zoom in
               W = wide-angle: zoom out

                         4.Place the focus frame on the
                            subject and press the shutter-
                             release button partway down.
                                               . The subject must be at least 90cm (3 ft.)
                                 from the camera.
View original page 8Page 9 · Read text
S.When the green indicator lamp
                        glows steadily, press the shutter-
                           release button all the way down
                             to take the picture.
                                             . The flash will automatically  fire in low
                                             light.
                                             . The film automatically advances to the
                                  next frame.

  .  lf the green indicator lamp blinks rapidly, your subject is closer than
   the minimum focusing distance of 90cm (3 ft.). The shutter will not
   retease.
  . Tittie subject is very close to the camera, the green indicator lamp
  may glow steadily, but the picture will not be in focus. The shutter can
  be released.


RED-EYE REDUCTION
                    The red-eye reduction lamp auto-
                            matically activates when the shut-
                          ter-release button is pressed part-
                   way down. The lamp reduces the
                        red-eye effect when photograph-
                          ing people or animals in low-light
                              situations.
View original page 9Page 10 · Read text
ep4                             www.butkus.us
       REWINDING THE FILM

                    The film will rewind automatically
                             after the last frame has been            -/   flLI -   exposed. When zero ( i, ) is dis-
                        played on the data panel frame
                          counter, open the back cover and
                     remove the film.


MANUAL REWIND
                               -ro rewind the film before the end
                            of the roll, turn the camera on
                     and gently press the rewind but-
                              ton.
View original page 10Page 11 · Read text
CHANGING THE CAMERA MODES


The camera has five modes.
Press the mode button until the
desired indicator is displayed on
the data panel.
Each time the mode button is
pressed the mode cycles as
shown. When the camera is
turned off, the mode is reset to
autoflash.
View original page 11
Page 13 · Read text
tN)                                         |
l-ou,o t I SELF-TIMER
                     The self-timer delays release of the
                            shutter for approximately 10 seconds
                                 after the shutter-release button is
                           pressed.
                         l.Place the camera on a tripod.
                         Press the mode button until the
                             self-timer indicator 1S; is Ois-
                          played on the data panel.

                         2.Place the focus frame on the
                            subject. Press the shutter-
                           release button all the way down
                             to start the countdown.
                                             . The self-timer indicator on the data panel
                            and the self-timer lamp will blink during
                               the countdown. The self-timer lamp glows
                                     steadily just before the shutter releases.
                                        . Self-timer is automatically canceled after
                               the shutter is released.
                                            . To stop the self-timer, press the mode
                                    button. To cancel the self-timer and reset
                               the camera, press the main switch.
 www.butkus.us
View original page 13Page 14 · Read text
www.butkus.us
E     FILL.FLASH
                     The fiash fires wiih each exposure
                            regardless of the amount of ambient
                                   light. Fill-flash can be used to reduce
                          harsh shadows caused by strong
                              direct light or sunshine.

                       Press the mode button until the
                                fill-flash indicator (t ) is displayed
                     on the data panel. Take the pic-
                         ture as described in the full-auto
                        operation section.
View original page 14Page 15 · Read text
FLASH CANCEL

                       The flash will not fire. Use flash cancel when
                             flash photography  is prohibited, natural light
                                    is desired to illuminate the subject, or the
                           subject is beyond the flash range.


                       Press the mode button until flash-cancel
                          indicator (€, ) is displayed on the data
                          panel. Take the picture as described in
                        the full-auto operation section.
                                        . Shutter speeds may be slow. The use of a tripod
                                        is recommended.

l,r Ol LANDSGAPE/ NIGHT vlEW
                      The flash will not fire in this mode and the
                         focus is set to infinity. Landscape/night view
                                    is used for photographing outdoor scenery
                            during the day or at night.


                       Press the mode button until land-
                       scape/night-view indicator (A ) is dis-
                       played on the data panel. Take the pic-
                         ture as described in the full-auto opera-    o      tion section.
                                         . Shutter speeds may be slow. The use of a tripod
                                        is recommended.
                                            . Always use this mode when photographing land-
                             scapes through windows.
View original page 15Page 16 · Read text
FOCUS LOCK                       www.butkus.us

                       Focus lock is used when you want to com-
                       pose the image with the subject off-center
                       and outside the focus frame.
                        l.Place the focus frame on the subject
                     and press the shutter-release button
                         partway down until the green indicator
                       lamp glows steadily.

                       2.Without lifting your finger, recompose
                         the picture. Press the shutter-release
                         button all the way down to take the
                              picture.
                                       . Focus lock is canceled when the shutter button
                                       is released.


SPECIAL FOCUSING SITUATIONS

                     The camera may not be able to focus in cer-
                              tain situations. In these situations, the focus-
                                       r':-     lock function can be used to focus on an
                           object at the same distance as the main
                            subject, and then the image can be recom-
                       posed to take the picture.

                     The autofocus system may not be able to
                         focus on the the following:
                                       . Bright light sources such neon lights.
                                       . Highly reflective surfaces such as water or mir-
                                         rors.
                                       . Flames or fireworks.
                                       . Dark objects and surfaces with low reflectance.
                                            . Objects behind glass, bars, or other partitions.
                                         . Objects smaller than the focus frame.
View original page 16Page 17 · Read text
REMOTE CONTROL       (soLD SEPARATELY)
                               For the Quartz-date Model only

              The optional lR Remote Control RC-3 allows remote
              camera operation from up to 5 meters (16.4 ft.) away.

                               . The remote control may not operate under fluorescent
                            lighting or with backlit subjects.
                               . To save power, the camera automatically shuts down if
                      the remote control is not used within eight minutes.l.Emitter window
2.Delay button
3.Release button
4.Battery chamber

                             l.Press the mode button until the
                                remote-control  indicator (/)  is
                              displayed on the data panel.

                     2.Point the remote control toward the front
                         of the camera and press either the release
                      or delay button.
                                . Release button: the remote-control lamp on the cam-
                         era blinks once before the oicture is taken.
                                . Delay button: The remote-control lamp on the camera
                              blinks twice before the oicture is taken.

  Remote control mode will remain in effect after the oicture is taken. To cancel
  the mode, turn off the camera or use the mode button to change the mode.
View original page 17Page 18 · Read text
www.butkus.us
CHANGING THE BATTERY
                     The remote control uses one CR2032 lithi-
                  um battery.
                           1.Pull out the battery chamber and
                      remove the old battery.
                          2.lnsert a new battery into the chamber
                          with its positive pole (+) up. Slide the
                     chamber back into the remote control.
View original page 18Page 19 · Read text
CARE AND STORAGE

OPERATING TEMPERATURE AND CONDITIONS
  This camera is designed for use from -'10' to 40 "C (14 to 104 'F).
 ' Never leave your camera where it may be subjected to extreme temperatures
  such as in the glove compartment of a car.
 . At colder temperatures, the data panel response time will be slow. At higher
  temperatures, the display will temporarily darken, but will be restored when the
  temperature normalizes.
 . Never subject the camera to extreme humidity.
 . To prevent condensation from forming, place the camera in a sealed plastic
  bag when bringing  it from a cold environment into a warm one. Allow  it to
  come to room temperature before removing  it from the bag.
 . When photographing  in cold weather,  it is recommend that you keep the cam-
  era and spare batteries inside your coat to keep them warm when you are not
  shooting. Cold batteries will regain some of their charge when they warm up.
 . This camera is not waterproof, dust-proof, or sand-proof.  lf you use this cam-
  era near water or the beach, water, dust, or sand damage may occur. Protect
  the camera at all times from moisture or splashes, especially saltwater spray.
  Be extremely careful to keep sand from both the interior and exterior of the
  camera and its accessories
CLEANING
. Keep the AF windows clean to ensure accurate focusino.
.  lf the camera body is dirty, gently wipe it clean with a soft, clean, dry cloth.
. To clean the lens surface,  first brush away any dust or sand. Then, if neces-
  sary, moisten a lens tissue with lens cleaning fluid and gently wipe the lens in
  a circular motion, starting from the center.
. Never place lens fluid directly on the lens.
. Never touch the lens surface with your fingers
. Never use alcohol or solvents to clean the camera.
STORAGE
When storing the camera for extended periods, please follow these guidelines:
. Store the camera in a cool, dry, well-ventilated area away from dust and chem-
  icals. For very long periods, place the camera in an airtight container with a sil-
  ica gel drying agent.
' Before using after prolonged storage, always check the camera's operation to
 make sure it is functioning properly.
BEFORE IMPORTANT EVENTS
. Check camera operation carefully or take test photographs.
. Minolta is not responsible  for any loss which may occur due to an equipment
  malfunction.
QUESTIONS AND SERVICE
'  lf you have questions about your camera, contact your local camera dealer or
  write to the Minolta distributor in your area.
. Before shipping your camera for repair, please contact an authorized Minolta
  Service Facility for details.
CAMERA ERROR
lf all the indicators on the data panel blink, or the data panel is blank and the
camera will not function with fresh batteries, remove and reinsert the batteries.  lf
normal operation does not resume, or the camera malfunctions repeatedly,
contact an authorized Minolta Service  Facility.
View original page 19
Page 20 · Read text
www.butkus.us

FOR OWNERS OF THE QUARTZ.DATE MODEL

This feature enables you to record the date or time onto the lower-
right portion of the picture. The camera has an automatic calendar
through the year 2049.
 . lmprinted data may be difficult to read  if the area over which it is superim-
  posed is bright or non-uniform.
 . bo not use i-he data back when temperatures fall outside the operating
  range of 0' to 40"C (32' to 104"F).

           Name of parts

                           1. Print indicator
                         2. Mode button
                         3. Select button
                           4. Adjust button

                                    '                   :a             _,.,     lmprinting mode selection
      lilf-  -:li'l      Press the mode button to choose the
                  data imprinting format.

                             1. Year, Month, Day
                        2. Day, Time (24-hour clock)
                          3. No imprinting
                        4. Month, Day, Year
                          5. Day, Month, Year
View original page 20Page 21 · Read text
l'    .,.1:..
                 Setting the date and time
                   l.Press the select button until the item
                       to be adjusted blinks.
                                   . The select button cycles to the next item of the
                        calendar and clock every time  it is pressed'

                   2.Press the adjust button to change the
                       blinking item.
                                . Data williontinue to change as long as the but-
                         ton is held down.
                 3.Repeat steps 1 and 2 until all items
                  on the calendar and clock are correct'
                                  . When the colon is blinking, press the adjust but-
                           ton to reset the seconds to 00.
                      4.After the calendar and clock are set,
                     press the select button until the print
                         indicator is disPlaYed.

. The date and time must be reset each time the camera batteries are
  replaced.
View original page 21From the M. Butkus archive. Original publisher and archive notices are retained.
Check the model and edition against your equipment.
PDF verified 2026-10-10.