Film cameras
Minox 35PL User manual
User manual for Minox 35PL. 15 pages in English. Read the original PDF, download or print a copy without registration.
15 pagesEnglish0.8 MB PDF
Loading your manual…Open PDF directly
Document details
- Brand
- Minox
- Model / document
- Minox 35PL
- Document type
- User manual
- Language
- English
- Pages
- 15
- File size
- 0.8 MB
- Category
- Film cameras
- Document date
- Not specified in catalog
Search available document text
Find a term, then jump to its page in the original PDF. Image-only pages may not be searchable; check the PDF for exact wording and diagrams.
Page 2 · Read text
Introduction

This detailed instruction manual will help you to make the most of your Minox 35 PL. The most important text
Sections are printed in bold type.

References to parts, controls or camera signals are followed by a numeral in brackets; This is the number of that
part in the annotated illustrated on pages 4 and 5.
Most handling steps work without a film in the camera So get familiar with your camera by trying it out before
actually taking pictures.
Many operations of the Minox35PL are controlled electronically. The camera therefore only works with a
battery.
Despite its small dimensions the Minox 35 PL is a full-frame 24 x 36 mm miniature camera and takes any
standard 35mm (No. 135) cartridge.

Contents

Annotated camera views

Front view 4                                Flash exposures 18

Rear view 5                           The self timer 19

Handling the camera                   The distance setting 20

The battery 6                             Loading the film 21

Inserting the battery 6                      Unloading the film 24

Battery check 7                        Care of the camera 25

Opening and closing the camera 9            Accessories

The viewfinder 9                             Special computer flash units

Holding it right 10                     Minox FC 35 27

Releasing 11                          Minox TC 35 28

Advancing the film 12                   The ever-ready case 30

The frame counter 13                    The belt and wrist pouch 31

Setting the film speed 13                 The pocket tripod 32

Daylight exposures 15                     Push-on filters

Program automation 15                  The skylight filter 33
View original page 2
Page 5 · Read text
A click on pressing the release does not necessarily indicate correct operation of the electronic shutter. So check
the battery.

Battery check


                                Open the front cover (16), fully advance the
                                          film transport lever (19) see page12 -and
                                     check as follows:

                                         Fully depress the small rectangular battery
                                     check button (3) between the hot shoe and the
                                       green release button. If the left-hand green
                           LED (7) in front of the hot shoe lights up, the
                                           battery is OK.


If the green LED (7) fails to light the battery is exhausted or was inserted the wrong way around.

If the green LED (7) goes dim within 2-3 seconds, the battery is nearly exhausted - so replace it as soon as
possible.

The battery check does not indicate how much longer the battery will last. To be on the safe side, replace the
battery once a year by a new one, even if the battery check is still positive.
Apparent early failure of the battery may in fact be due to a poor contact. Remove the battery from the camera,
firmly rub down both contact faces with a rough cloth and replace.
Never keep spent or too old batteries in the camera. Also remove the battery if you do not expect to use the
camera for some time.

Note: The battery used here contains mercury compounds that could pose a health risk. So never throw used
batteries on a fire; also keep them out of the reach of small children. Photo dealers usually accept spent batteries
for disposal.

Opening and closing the camera
To prepare the Minox 35 PL for shooting, fully pull down the front cover (16). After shooting push the cover up
again against the camera body.
Opening the front cover automatically extends the lens (14), closing the cover retracts it.

The closed cover also covers the viewfinder, blocks the release and switches off all electric circuits
With the camera closed you can still advance the film (page 12) or rewind an exposed film (page 24).

The viewfinder
The bright frame in the finder (17) outlines the field of view.
In certain light conditions a red signal appears in the finder below the bright frame at the right. This is the slow-
speed warning signal (page 16).
The closed front cover (16) also blocks the finder view. So when you see nothing through the finder you must
open the cover.
View original page 5Page 6 · Read text
Holding it right

The picture at the left shows a convenient camera hold
for horizontal shots, the illustration opposite a suit- l
able hold for upright views. To minimize the risk of
camera shake hold your 35 PL steady while you shoot.

Keep your fingers clear of the lens (14)andoftheCdS
cell (15).Preferably press your fingers flat against the
front of the camera body.


Releasing

Once you have framed the view you want in the bright-
line finder frame, gently depress the green release
button (2). That triggers the shutter to take the picture.

On pressing the release, the self timer LED (9) briefly
lights up on the camera front. During the exposure the
red slow speed warning LED lights up on the camera
top (6) and in the finder at the bottom right. This red
signal remains lit until the shutter closes - a useful
indication during long time exposures with the camera
mounted on a tripod.
View original page 6
Page 7 · Read text
Advancing the film


                                    Pull the film transport lever (19) -at the top right of
                                    the camera back fully out to the right and forward.
                                Repeat this.

                                             If you failed to pull the lever fully forward either
                                    time, pull once more.  If you have loaded the film
                              and it is advancing correctly, the knob with the
                                rewind crank (8) at the top left of the camera also
                                      rotates as you operate the transport lever. So do not
                                    obstruct this knob as you wind.

                    A light dot on the rewind crank (8) shows up this
                              movement.

                        When the whole f ilm is exposed, the transport lever
                             no longer swings out fully and the release is
                                  blocked. You can advance the film with the front
                                 cover open or closed.


The frame counter


                            The frame counter (1) - the white window at the far
                                       right of the camera top tells you how many pictures
                              you have taken on the film.

                            The frame counter returns to its start position when
                              you remove the camera back to change the film (see
                               page 24) or as soon as you then press the release (2).

                                  Setting the film speed

                              Every film package carries an ASA speed rating
                                 (and often DIN)

                          To set the automatic exposure program of the 35 PL
                                      for the film speed, turn the dial (23) in the camera
                                 base to the appropriate ASA (or DIN) rating of the
                                      film. The dial engages at every speed setting. The
                             unmarked dots between the arrowheads indicate
                                   intermediate speeds, for instance 64 and 80 ASA
                               between 50 and 100 ASA.

                      ASA speed figures are marked in red, DIN figures in
                                    green.  If you have set too high a film speed, your
                                     pictures will be underexposed; too low a speed
                                      setting yields overexposed shots.
View original page 7Page 8 · Read text
(webmaster: The other dots are setting for the following ASA settings *400, 333, 267, *200, 166, 133, *100,
84, 67, *50, 42, 33, *25)

Daylight exposures


                              Program automation
                                For all shots without flash set the white
                               arrowhead on the lens mount (12) to A
                                   (automatic control).

                                 At this A setting the camera automatically
                                           selects a correct aperture and shutter speed
                                    combination for the subject brightness and film
                                       speed.

                               The F-stops, for instance 2.8 - 4 5.6 etc. on the
                                        aperture ring (12) are only used for flash shots
                                     (page 18). If you accidentally set the ring to an
                                        aperture figure instead of to A, daylight and
                                        other shots without flash e.g. bright interiors lit
                                by artificial light - may be wrongly exposed.


The electronic program of the Minox 35 PL yields aperture/speed combinations from f/16 to f/2.8 and
from1/500to4secondsat100ASA(up to 15 seconds at 25 ASA or up to 1 second at 400 ASA).


                          The slow-speed warning

                                            If the camera is ready to shoot (front cover open,
                                   film advanced) at an exposure time longer than about
                                1/30 second, a red flashing signal warns of likely
                              camera shake with hand-held shots.

                            The red signal flashes clearly on top of the camera
                                     (6) and also in the finder (at the bottom right). There
                                                    it appears weaker to avoid glare in the finder image.

                            The automatic control of the Minox 35 PL can also
                                  generate exposures much longer than 1/30 second.
                            The red flashing signal is thus not an underexposure
                               warning but only a recommendation to use a flash
                                     unit (pages 27 to 29) when photographing moving
                                    subjects (e.g. people) indoors. Or -for static subjects-
                            mount the camera on a tripod (page 32).


The slow-speed warning uses battery power. So close the front cover when you put away your Minox 35 PL.
View original page 8Page 9 · Read text
The backlight switch


                                            If you push the backlight switch (4) -the small
                                   rectangular button next to the hot shoe - fully
                                  forward, this automatically doubles the exposure.

                    A red window with 2x in white reminds you that you
                               have switched on the backlight switch.

                                Apart from lightening shadows in backlit subjects,
                                use the backlight switch also for outdoor views
                              where predominant snow or a bright sky area could
                                 cause the meter to set insufficient exposure.


Flash exposures


                               The hot shoe of the Minox 35 PL takes any
                                        electronic flash unit with a centre contact in the
                                        foot - as well as the Minox TC 35 and FC 35
                                  computer flash units which are specially matched
                                         to the Minox 35.

                                 Push the black blanking plate out of the hot shoe
                                   towards the rear. Fully push the foot of the flash
                                         unit into the shoe.

                                    This disengages the automatic exposure control
                                      of the Minox 35 PL and sets a fixed shutter speed
                                      of 1/90 second.


Do not take flash shots with the aperture ring (12) set to A (automatic). For flash shots select one of the marked
apertures between f/2.8 and f/16 (including intermediate values) - check the instructions of the flash used.

With some electronic flash units (not with the special Minox flashes) you must operate the film transport of
the35PL immediately after every flash shot. For unless the shutter is tensioned, such flash units either fail to
give a ready signal for the next flash or (more rarely) may automatically trigger the next flash after recycling.
(Th is is not a fault but a f eature of the electronic circuit.)
View original page 9Page 10 · Read text
The self timer


                                 Push down the small sliding switch (18) at the
                                          right of the finder eyepiece to uncover a red
                              window with T (timer) in white. This delays the
                                         shutter release by about12 seconds after you have
                                     pressed the green release button (or released with
                                    a cable release).

                      A red flashing LED on the camera front (9)
                                        signals that the self timer is running but the
                                   exposure has not yet started. The flashing rate
                                    doubles after 4 seconds and again after 8 seconds
                                      of the delay period.


The distance setting


                                Estimate the approximate distance to the main subject
                             and set this on the distance scale (13). In view of the
                                  considerable depth of field of the 35 mm lens a really
                                  accurate setting is only necessary at near distances of
                               around 3 to 4ft or O.9 to 1 m.

                               For a useful snapshot zone set the scale to the green
                                 dot between 10 and 20 ft or between 3 and 5 m; in
                            good light this then covers everything from about 6 to
                            60 ft or 2 to 20 m.

                               For landscapes without near foreground set the scale
                                    to oo (infinity).
View original page 10Page 11 · Read text
Loading the film


                                                         Never load the camera in direct
                                                                       sunlight- at least do it in the
                                                             shade of your body.

                                                         Turn the back cover locking lever
                                                                   (24) in the camera base to
                                                             uncover the recessed red dot, then
                                                                        pull off the beck from below
                                                                              (illustration a).


Insert the film cartridge in the film chamber (25) to the left of the film track, with the film leader pointing to the
right.

Turn the take-up spool (20) with the r ight thumb to bring the broad slot of the spool core to the top.

Now press the rewind release (21) at the right in the camera base to lock the take-up spool. Push the film leader
underneath the metal sleeve as far as it will go (illustration b), then let go of the rewind release button.

Open the camera's front cover so that you can operate the release button.


                                                                     Alternately advance the film and
                                                                       release until:

                                                                                     · The full film width is drawn
                                                                with both perforation rows
                                                                    across the film track and lies flat
                                                                      against it (arrow in illustration
                                                                                   c), and


 · One tooth of the sprocket wheel (at the right below the film gate) engages a perforation hole of the film
(circled in illustration c).

Replace the camera back by pushing it on and lock by turning the back lock in the camera base to cover the red
dot again (illustration d).

Advance the film, release the shutter, advance once more. Check that the rewind crank (8) at the left in the
camera top rotates - watch the light dot The frame counter (1) is now at O.

Set the film speed on the scale in the camera base (page 13).
During shooting you can still check that the film is advancing correctly: Whenever you work the film transport
lever, the rewind crank with the light dot must rotate, too.
View original page 11Page 12 · Read text
Unloading the film


                                    After the last exposure (No. 36, 24 20 or 12 on the frame
                                      counter, depending on the film length) you must rewind the
                                     film into its cartridge: Unfold the rewind crank end with the
                                          light dot (8, in the camera top at the left), press the rewind
                                       release button (21, in the recess in the camera base at the
                                         right) and let go. Rewind the film by turning the rewind
                                   crank clockwise.

                             The film is fully rewound when the crank starts turning more
                                          freely.


After rewinding remove the camera back and withdraw the cartridge from the camera.

If the frame counter (1) does not return to its start position on removing the back, release the shutter once.

However the frame counter automatically resets itself during loading at the latest when you have pushed the
film end into the take-up spool and advanced the film and released the shutter before closing the back (see page
22).

Care of the camera
Periodically clean the front lens element, the outer finder window surfaces and the curved window in front of
the CdS cell. Remove any dust with a soft brush, air blower or special lens cleaning tissue -these are obtainable
from photo dealers. Do not use lens cleaning fluids.

Immediately remove fingerprints from the front lens; such marks greatly reduce definition.

When changing film, check that the back of the lens and the camera i nterior are also clean and dust-free.

Accessories

The matched Minox FC 35 computer flash


                             The Minox FC 35 electronic flash is the smaller of the two
                               computer flashes designed for the Minox 35 cameras. It is 3 x
                                   5.5 x 7.5 cm (1.2 x 2.2x3in.)1argeandweighs130g(4.6 oz). The
                                   metric guide No. for 100 ASA is 18 (59 in feet).

                          You have two aperture options with two working ranges of the
                               computer control: At the "green" setting the flash covers
                                     subjects up to 4.5 m or 15ft.Attheredsettingthelimitis3.2m (10 ft)
                                   but the depth of field is greater, for at any given film speed you
                                 use one stop smaller than with the green setting.


If you switch off the automatic control of the PC 35 you can cover greater distances with high-speed films, e.g.
up to 13 m or 40 ft with 400 ASA.
View original page 12Page 13 · Read text
Recycling time: Approx. 10 seconds. Batteries: 2 size AAA alkaline manganese cells. Capacity approx.60 to 80
flashes per battery set. (Ail data based on DIN 19011 specifications.)


The matched Minox TC 35 computer flash


                             The TO 35 is the more powerful of the two Minox
                                   35flash units and offers additional features.

                             The guide No. (in accordance with DIN 19011) is
                              26 (m) or 95 (ft) at 100 ASA. Three aperture
                                   options with ranges up to 9, 6.5 and 3.25 m (30, 21
                               and 10 1/2:ft). LED on a scale show available
                                  ranges and working apertures; in manual mode
                                   (range with 400 ASA up to about18 m or60 ft) this
                                    serves as an aperture calculator.


In computer (automatic flash duration control) mode, and especially at near to medium distances, the thyristor
series circuit provides fast recycling (1 to 10 seconds) and a high capacity (about 80 to 500 flashes) per battery
set of 4 size AAA alkaline manganese cells. An economy circuit automatically switches off the unit when not in
use for longer periods, so saving batteries.

A test button and green LED provide a battery check.

For bounce flashing the flash reflector tilts up to 90° in 15° steps. On triggering a test flash, a built-in auto ch
eck control shows by a green or red signal whether the flash power is sufficient for the subject in question.

For storage in its leather case or for carrying in a jacket pocket swing the reflector up; the unit is then no thicker
than the camera. It is 10 cm (3.9 in.) wide, 6.5 cm (2.6 in.) high with the reflector pointing forward or 9.1 cm
(3.6in.) tilt up through 90°. lt weighs 188 9 (6.6 oz with batteries

The ever-ready case


                             The black leather ever-ready case of the Minox
                           35PL is closely tailored to the camera so that it is no
                                   bigger than a soft zip pouch. But you can shoot
                           much faster with it.

                        An eyelet at the left and right of the ever-ready case
                                    takes the wrist strap supplied, fit it at whichever
                                     side you find more convenient for handling. The 90
                        cm (3 ft) neck strap -an optional extra accessory -
                                     attaches to both eyelets for carrying the camera
                                around the neck.


You can remove the top of the Eveready case altogether. If you carry the Minox 35 PL slung around your neck
in the bottom section of the case, with the camera front open and the filter and lens hood in place, you can walk
around and be instantly ready to shoot (see illustration page 33).
View original page 13Page 14 · Read text
The belt and wrist pouch


                                 This smart elegant case is a piece of luxury leather
                             work in top-quality soft burgundy red Naskapi
                                        leather. It is totally unlike any ever-reedy case: It
                                      ideally matches smart leisure wear and you can
                                    carry it either slung around your wrist or fixed to
                                your belt (up to 4 cm or 1 win. wide). When used as
                                 a belt case, remove the leather wrist strap with its
                                    brass snap hook.


For shooting you remove the Minox 35 PL from the case. The sides are in generously tailored so that the closed
case fits snugly around the Minox, yet you can get into the open case with the fingers to grip the camera easily
and securely from both sides.


The pocket tripod


                          The Minox pocket tripod is a very handy camera stand
                                         - not much larger than a pencil when closed but very
                                    rigid as stable and wall support - even on rough
                                   surfaces. It can also serve as a chest pod for horizontal
                                 shots with the Minox 35 PL. The Minox pocket tripod
                                includes a cable release indispensable for tripod shots.

                           Screw the tripod screw into the bush in the camera
                                 base. Do not screw the camera too tightly onto the
                                  tripod but tighten instead the large milled plate of the
                                  tripod against the camera body.

                           Screw the cable release into the thread next to the
                                  release button.


Push-on filters with collapsible lens hood and leather case


                          The Minox 35 PL takes only Minox filters marked
                                    either "Minox 35 GT" or "Minox 35 GT/PL/PE".
                         Minox filters not so marked are intended for the older
                      EL and GL models and do not fit the Minox 35 PL.
View original page 14Page 15 · Read text
The skylight filter
This reduces any blue cast liable to arise in color slides taken by brilliant blue-sky light. In daylight the filter
also absorbs ultraviolet rays that could with any film - impair definition.

The 4 x neutral density filter
This reduces the light coming through the lens to one-quarter and is recommended for shots in bright sunlight
on high speed film (400 ASA).

Technical data
Type: Minox 35 PL miniature camera. Minox code Nos.: 10.721 with distance scale in meters 10.722 with
distance scale in feet

Picture size: 24 x 36 mm.

Film: Standard 35 mm cartridge (No.135).

Lens: 35 mm Minox Color-Minotar f/2.8, focusing range from infinity to 0.9 m or 3 ft. The lens retracts
automatically on closing the front cover.

Automatic exposure control: Electronic program control (with aperture ring set to A) from 1/500 second at
f/16 to 4 seconds at f/2.8 with 100 ASA. Longest reliable time depends on film speed, e.g.15 seconds with 25
ASA down to 1 second with 400 ASA.

Slow-speed warning: With exposure times longer than 1/30 second a red LED blinks on top of the camera; also
visible in the finder via a fiber-optical light guide.

Backlight switch: Doubles the exposure.

Release: Soft release, blocked if front cover is not fully open.

Cable release socket: Next to release button in camera top.

Self timer: Electronic, approx. 12 seconds delay. Red flashing LED on camera front during delay time; flashing
frequency increases in three steps.

Viewfinder: Bright-frame direct finder with slow speed warning signal.

Frame counter: Counts forward, returns to start position on removing camera back and releasing shutter.

Flash contact: Hot shoe, X synchronized, automatic time switching to 1/90 second.

Tripod bush: l/4 in. Battery: One Varta V 27 PX, Ucar EPX 27, Duracell PX 27 or equivalent (5.6 volts).;

Battery check: Check button, green LED signal.

Camera body: Glass fiber-reinforced Makrolon. Size: (Width x height x depth):10x6.1x 3.1 cm (3.9 x 2.4 x 1.2
in.)

Weight: Approx.190 9 without or 200 9 with battery (6.7 or 7.1 oz respectively).

Made by: MINOX GmbH, Postfach 60 20, D-6300 Giessen 1, West Germany.
View original page 15
Related documents and language editions
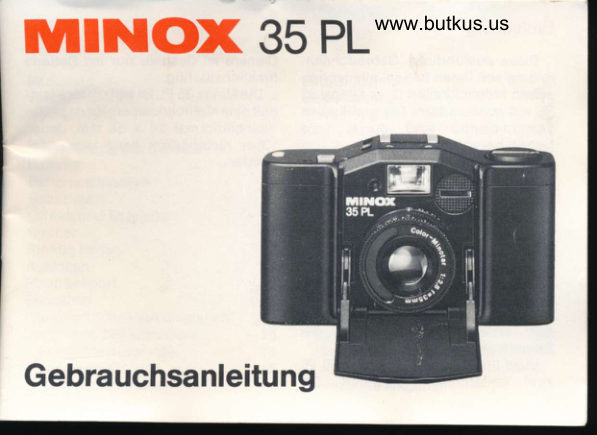
From the M. Butkus archive. Original publisher and archive notices are retained.
Check the model and edition against your equipment.
PDF verified 2026-10-10.