Light meters
Miranda Coupled CDs meter for model F User manual
User manual for Miranda Coupled CDs meter for model F. 7 pages in English. Read the original PDF, download or print a copy without registration.
7 pagesEnglish3.5 MB PDF
Loading your manual…Open PDF directly
Document details
- Brand
- Miranda
- Model / document
- Miranda Coupled CDs meter for model F
- Document type
- User manual
- Language
- English
- Pages
- 7
- File size
- 3.5 MB
- Category
- Light meters
- Document date
- Not specified in catalog
Search available document text
Find a term, then jump to its page in the original PDF. Image-only pages may not be searchable; check the PDF for exact wording and diagrams.
Page 3 · Read text
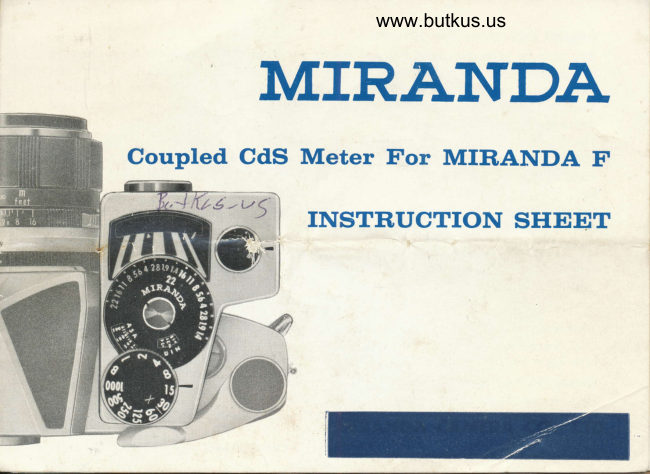
Coupled CdS Meter For Miranda F
     You have an exposure meter that was specifically designed to integrate with the operating
                                                                                                                          this.      mechanism of the Miranda F camera. The accuracy and ease of handling places
      meter on a par with the most expensive hand held type exposure meter. The highly
        sensitive Cadmium Sulphide cell (CdS) is incorporated in this instrument, manufactured
       under the most rigid standards.
      The clip-on meter contains the same broad versatility of use inhetent in the Miranda
       system of photography. This meter will read the light reflected from your subject while
      mounted on your Miranda F, and by clipping on the hemespheric diffuSer supplied with
      your meter, you can obtain incident light readings highly important in the areas of
        contrasting light source, by reversing your position and taking readings from subject to
      camera. To further enhance its use, this meter may be used as a regular hand held                                                                       l
       meter, witlr the same cptimun; results                                                                                           ,-.1'l
        Specifications                                                                                                                                                                                                                                                                                                                                         I
                                                                                                                                      1i 1000 and B.      ASA SCALE: 6 to 6400 (DIN): 9 to 39. SHUTTER SPEEDS: 1 to                                                                                                                                                                                            ..t   I'{
                                                                                                     degrees.      APERTURE SCALE: F 1.4 to F 22.  ANGLE OF ACCEPTANCE: 30'
       Sensitivity Range For Reflected Light (K equats 1.3)                                                                                                                                                                                                                                                                                                                                         l
      High/Normal Light Level: ASA 100 EV 10-18 160 Cd/m'z-41000 cd/m2
                                                                             Cd/m'z     Low Light Level:      ASA 100 EV 2-11 0.565 Cdlm2-320
        Sensitivity Range For Incident Light (C equals 20)
      High/Normal Light Level with Hemespheric Diffuser   :
                      ASA 100 EV 10-18 2250Lux-650,000Lux
     Low Light Level with Hemespheric Diffuser:
                      ASA 100 EY 2-ll 9 Lux-5100 Lux
a,J
View original page 3Page 5 · Read text
Battery Screw Cap.
                                      Zero Adjustment Screw.


                                                  Coupler.


                                                                                                                                      :':-1;                                          Coupler Pin.   t;,   I                                                                                                                                                                            Digitally signed by mike butkus
                                                                                                                                   cn=mike butkus,
                                                                                                                                       o=orphancameras,                                                                                                                                                        ou=29,                                         Connecting Bracket. -----'-----tj   mike butkus DN:                                                                                                                                            email=mike@butkus.org,
Zero Adjustment                                                                                                                   Date: 2019.04.21 13:50:10c=US-04'00'
Check position of needle with switch in Off position for Zero alignment. If  necessary
to correct, turn Zero adjustrr^ent 'screw (2i) to rrght ,r left until proper alignment  is
made at zero index point.
Battery Check
Turn switch dial to B position. If needle moves past triangle on meter scale, battery
condition is good. If needle fails to move past battery index marker, replace with pX 13
Mercury cell of recognized brand. Under normal use, battery should give over one year
service.
Your Clip-on CdS meter is a highly sensitive instrument, and calibrated in accordance
with highest industry standards. Avoid unnecessarily long exposure to excessively bright
lights, as this will tend to affect the cell's responsiveness for a brief time thereafter.
Other than that simple precaution, you need only give your clip-on meter the same care
you give your Miranda F camera.
View original page 5Page 7 · Read text
Coupling Meter to Camera
 Coupling the clip-on meter to the shutter speed mechanism of your camera, is simple
 and rapid. The meter may remain engaged permanently, or just as easily removed.
 1. Remove screw cap from battery compartment in base of meter (20).
     Insert longlife Mercury cell, observing correct polarity.
    Replace screw cap.
 2.  Set shutter speed dial on camera to X position.
    Loosen 3 set screws, and lift dial off.
    Replace with slotted shutter speed dial, supplied with your meter, at same X position.
3. Remove threaded sleeve over shutter release button.
    Clip-on meter seats snugly alongside prism housing. Merely rotate shutter speed dial
    on meter, until coupling pin (19) drops into slot of camera shutter speed dial directly
       !sls..'.' it  The rnetal fork piojecting down frcs yclr: meter is locked in place with
    the new threaded sleeve supplied with your meter.
   The clip-on meter is now fully coupled, ready for instant use.
How To Operate
(1)  Set ASA film speed scale for type of film to be used.
(2)  Set shutter speed dial on meter to pre-selected shutter speed.
(3)  Turn control switch to H position; if light level is inadequate to activate needle,
     switch is turned to L position. Correct lens aperture is immediately determined by
     noting F stop which appears directly in line with scale calibration at point needle
    comes to rest.                                                                                                                                                                                                                                                                                                                                                                iiiit
Should it be necessary to pre-select a particular F stop, the operaticn is reversed. set
designated F stop opposite needle position by rotating shutter speed ciial. When pre-
selected F stop and needle on scale line up, the correct shutter speed is indicated.
View original page 7From the M. Butkus archive. Original publisher and archive notices are retained.
Check the model and edition against your equipment.
PDF verified 2026-10-10.