Film cameras
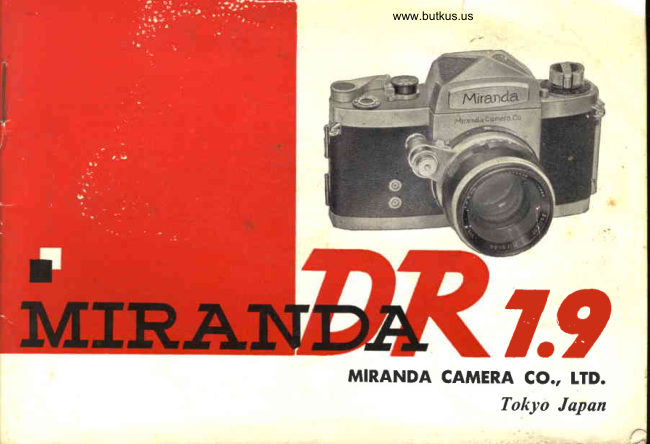
Miranda DR 1.9 User manual
User manual for Miranda DR 1.9. 31 pages in English. Read the original PDF, download or print a copy without registration.
31 pagesEnglish3.6 MB PDF
Loading your manual…Open PDF directly
Document details
- Brand
- Miranda
- Model / document
- Miranda DR 1.9
- Document type
- User manual
- Language
- English
- Pages
- 31
- File size
- 3.6 MB
- Category
- Film cameras
- Document date
- Not specified in catalog
Search available document text
Find a term, then jump to its page in the original PDF. Image-only pages may not be searchable; check the PDF for exact wording and diagrams.
Page 2 · Read text
/-

           A FEW WORDS ABOUT YOUR MIRANDA


                  In cameras with coupled rangefinders, the lens, and rangefinder are operated simultane-
           ously but are optically  entirely separate entities, and  the  viewfinder   is another  separate
              entity.  The rangefinder  is mechanically complex with many moving parts which rarely stay
              in perfect adjustment  in relation  to the lens.  Accordingly,  the photographer who uses such
           a  rangefinder  frequently  finds his pictures are not as sharp as he had hoped.  The view-
             finder, on the other hand, usually contains no moving  parts to get out  of adjustment, but
                     it  is optically so imperfect  that  the photographer cannot  tell with reasonable assurance what
               will be included, and what  will be excluded, from  his picture.   In  ordinary  snapshooting
            the  inconvenience  rr:ay not  be  great.   Ffowever, nowadays photographers are becoming
            increasingly demanding.
             More and more photographers are demanding  that  their cameras give them black and
           white negatives good enough to make very large prints and color transparencies good enough
             to project onto a large screen.  Interest in fine pictures, artistically composed, is increasing
          and many photograpners are demanding 35 mm. cameras which will enable them to compose
          and take pictures formerly  thought  to require the use of  large ground-glass-back cameras.
           Increasing numbers  of  photographers  have discovered that small subjects-a  single flower
           taken closeup-often make beautiful pictures.  Technical, medical, and  scientific workers are
           rnaking photographs, frequently under extreme and exacting conditions.
              These are the basic reasons why  the single  lens  reflex  carr,era  is  today  coming  into
            increasing popularity  conrpared  to the coupled  rangefiirder  rype.

\
View original page 2Page 3 · Read text
www.butkus.us


      In  the  first place, the single lens  reflex  carnera) such  as the  MIRANDA,     offers  the
 advantages  of  ground  glass focusing.  This  is simplest and  surest system, the  only  one
 which uses the lens itself, has no moving  parts other than the lens, and  never gets out  of
 adjustment.    It works  equally  well  at  all distances from  infinity  tb extreme close up, with
 all lenses from  telephoto to wide angle and even when taking pictures through a microscope..
 The ground  glass by which  the focus  is adjusted  is also the  viewfinder.   As  a  viewfinder,
 it  is  far superior to the  type used on  coupled  rangefinder cameras since it gives you the
 exact edges of your  picture, works equally well with  all lenses at  all distances, . and when
 using a microscope.  This  is not surprising when you consider that the view  that  you  see
 on  your  sround  glass is the view which  the lens sees.  It  is merely being reflected up  to
you  by  a  mirror.  When  you  take a picture the mirror  flicks out  of the way,  letting the
same light rays go straight on back  to  the  film.  The  result  is a  picture  corresponding
 exactly  to the scene which you saw in the viewfinder.   In most cases the final  picture  will
be even sharper  than  the  scene as viewed.  When the exposure is made, the lens auto-
matically closes down  to the preselected opening,  providing  increased depth  of  field. The
c^rnera  is focused with  the lens wide open, when  the depth  of  field  is at its minimum,   but
the picture  is taken with  the diaphragm. shut down, and increases the depth  of  field.
   wE HOPE THAT  YOUR  MIRANDA   I,VILL BE A GOOD  COMPANION  TO  yoti
FOR A LONG  TIME  TO COME,  THAT  YOU  WILL  ENJOY  USING   IT, AND THAT
THE  PICTURES  YOU  TAKE  WITH   IT  \VILL  GIVE YOU MUCH  PLEASURE  AND
SATISFACTION.


r  r,:ifih#,.'.
View original page 3Page 5 · Read text
www.butkus.us


l.   The  Eye-Level   Vlewffnder    offers a view-finding  image which  is brilliant,  evenly  illu-.
    minated,  full  life size, has no parallax,  is precisely defined at  the edges, is  grainless,
    can be seen with  glasses on, and  is not reversed from  right  to  left, as  it  is in the case
     of  all twin  lens reflex cameras and some single_lens reflexes.
2.   Multi   Split  Range  Finder   is located  in the center  of the focusing screen and permits
    the exact distance from camera to subject to be determined.  This focusing  is accom-
    plished optically without  moving  parts, as is normal  in RF cameras.
3.   Vierrfinder    fnterchangeability      permits  the  substitution  of the chest-level collapsible
    viewfinder (VF   l)  or chest-level critical focuser (VF  3) in place of the standard penta-
    prism viewfinder.
4.  The  Miranda   Lenses   utilize  a new design made possible by  recently  improved   rare
     earth glass with remarkable properties.  They  will make pictures of extraordinary sharp-
    ness and  brilliance.  The lenses are quickly removed permitting  the use of other lenses.
     with  a wide range of focal lengths.  Instead of interchanging merely the front element
     of a lens, the MIRANDA    offers the much superior sharpness and  quality  of true wide          )
    angle and telephoto lenses.


                                                                                                                                              !i:.r.j;:;')ii;;";i       : ::.t.                                                                             .1.: ,  -.;i-1{is.}a".-:i;i:-.,                                              -g
View original page 5Page 6 · Read text
5.  The  Fully  Autornatic   Diaphragrn    stops dor,vn to whatever  opening  is  desired. when
    a  picture   is taken and then returns automatically  to .its wide open losition  after each
     picture.  A  brilliant  view and accurate focusing are assured because the lens is always
    wide  open  at  f  1.9, when viewing.   Unlike  other systems, which  are really semi-auto-
     matic, there is no lever which must be pushed after each picture  to  get the diaphragm
    open again.
6.  The  Lens  Mount  Opening    is larger  than any  other 35 mm.  camera.   This  makes   it
    nossible with  adapters to use lenses made for other carreras.  Some of these lenseswill
    focus normally  at any distance but others can be used only close-up.  The  large  lens
    mount  opening makes possible the use of improved high-speed lenses without  restric-
     tions imposed by the size of  the  mount.      It  eliminates  vignetting  when  the  lens  is-
    extended for taking close-ups, and when a fast lens of long focal Lngth  is used.
7.  Close-Up   Photography     is  Convenient   because the  standard  50 mm.  lens can be
    focused as close as  17 inches without  any  attachment.    Still closer pictures can be
   made easily by further extending the lens using extension tubes or the Focabell.  Close-
    up  pictures made  by  extending MIRANDA   stand.ard or teleph-oto lens out from  the
    camera are sharpr:t than pictures taken with add-on lenses.   I;   addition,  ultra  close-
    ups  can be  taken,  which   is not  possible with  add-on  lenses.  Pictures can also be
    taken through a microscope by using an adapter.
View original page 6Page 8 · Read text
www.butkus.us


          8.  The  Instant-Return     Mirror     is one of the advanced  features of the MIRANDA   DR.
          When the shutter release button  is pressed, the mirror  swings up  permitting  the  light
              rays from  the lens to reach the  film  as the  focal  plane  shutter opens.  lmmediately
                after the film  is exposed the mirror  returns to the veiwing  position.  When the mirror
                  is up, the view  through  the  viewfinder   is momentarily  blacked  out,  but,  at speeds
                of  l/15 second and  faster, the mirror  returns  to the viewing  position  so quickly  that
              the  photographer  hardly  notices the  interruption.    This   is  an  important   aid  in
              following  fast  action,  and when  fleeting expressions are important   to  the successof
              the picture.
            The  Rapid   Filnil-Winding    Lever  has a  short  convenient  stroke.  The  purpgse  of
            such a lever is defeated  if the stroke is very long and  inconvenient.  Only   light  pres-
             sure is required  to operate the MIRANDA    lever.
         lo.   Quietr  Vibration-Free    Operation     is a result  of  the  precision  quality  and. superiorf
             design of the MIRANDA   shutter and mirror mechanism
             ll.   MIRANDA    Ca"tnera  Quality  means that  in the concept  of  this  carnera, in  its design,
            and  in the making  of each component part,  only one principle has been observed and
               that  is that  the MIRANDA   must be the  finest 35 mm.  carnera in  the  world.  The
          MIRANDA    is the  first camera of  its type to be made in Japan.    It  incorporares many
               original design features, some of which  are  still unique.   Its maker  offers  it  to you
              with  confidence and pride.
View original page 8Page 10 · Read text
www.butkus.us
@ ASA speed indicator
@ Ey.  level pentaprism  finder
@ High  shutter speed dial
@ High  shutter speed index
@ Slow shutter speed dial
@ Slow shutter speed index
@ Rapid  film winding  lever
@ F.P. flash socket
@ Electronic flash socket
@ Instant return  mirror
@ Screw thread mount
@ Bayonet mount  flange
@ Eyepiece

                                                                          www.butkus.us

                                    aa

                                     @ Back hinge
                                     @ Tripod  socket
                                     @ Rewind  release button
                                     @ Sprocket wheel
                                     @ Film  take-up spool
                                     @ Film  pressure plate
              a9 a9 @                   @ Film  cartridge guide
View original page 10Page 12 · Read text
www.butkus.us

       If necessary, turn  the take-up spool (the flange is serrated for this purpose) until a slot is
on top. Then gently draw the film leader farther out of the cartridge and insert it into the  slot.
    Turn  the take-up spool toward  the center of the camera,  for  ll2  revolution  or more.
    Hold  the  lip  of the cartridge (where the  film comes out) down  against the camera and
turn the rewind knob on top  of the camera in the direction  of the arrow.   Continue  turn-
ing  until  there  is  resistance and  all  of the slack in the cartridge has been taken up and
the film  is taut across the back of the camera.  You  will  notice that a 20-exposure cartridge
will  require several turns  to absorb  all  of the slack while a 36-exposure cartridge  will have
very  little  slack.  Be sure the perforations  in the  film have caught  in the sprockets of  the
sprocket wheel.    If  not,  turn  the take-up spool until  they catch.  Close the back cover and
push the sliding back lock down.
    Release the shutter, and advance the  film  with  a  full  stroke of the  film winding  lever,
while watching  the rewind knob  to see that   it  turns, then release the shutter a second time.
If  the rewind  knob  turns,  it shows that  the  film  is moving properly  through  the  camera.
If    it does not  turn,  either the slack was not  fully  taken up  in the cartridge  or the  film  is
not properlv  attached  to the take-up spool.
                                                                      4. I{ow  to Set the Ex-
                                                         posure  Counter
                                                                            Set the exposure counter
                                                                                         dial   to  0  by   turning      it
                                                                            counter      ' clockwise,    after
                                                                                    the    carrrefa    has   been
                                                                            cocked.
                                                                      The  carnera  is now ready
                                                                                           for  taking  the  first  picture.
View original page 12Page 13 · Read text
After  tlu  full   roll  of -lrtm has been exl,osed the  _fit*  winding
                                      krnb  cantnt be turnzd.  Do  not tr2  io fora   oith*    turn, but
                                        reuid   the film  back into the cartridge and remoae it  from  the                                    &mera,.
Unloading    Fikn                                 l .  Flip  up  the  rewi'd   crank  on  the  rervind  knob   to  a
                                            horizontal   position  and   r,vind  in  the  direction   of  the
                                                2r ro\A/, while  depressing  the  film  rewind  button  located
                                                 at  thc  bottom   of  the  camera.
                                               ,   At   the  end  of  the  roll  you   r,viil feer the  resistance  in-
                                           cre ase and  then  suddenry  cease.   Turn   the  rewind
                                        crank  several more  turns  to make  certain  the  film  has
                                     been  cntirely   rer,vouncl.
                                                                             o
                                                                                     J  .  open   the back  cover,  pu[  up  the  rewind   knob  and
                                    remove  the  film  cart.idge.  put  the cartridge  back  inro
                                                        its container.   This   roil  is now  ready  for  dlveropment.
View original page 13Page 15 · Read text
SETTING THE SHUTTER SPEED


        To Set the High  Shutter  Speed Dial

               For speeds between 1130 and  l/500 second,  lift  the high speed dial and set the desired
          speed opposite the red index arrow on the center post.  The  setting can  be made  either
           before  or  after  the shutter  is cocked.  The  shutter speed index arrow  also shows whether
            or not the shutter  is cocked.  When  the shutter  is cocked, the arrow  points directly  to the
                left.    If  the arrow  points  in the other  direction,  the shutter  is not yet cocked.  By noting
           these positions, you  will  be able to  tell  at any time whether  or not your  shutter is cocked.


www.butkus.us
View original page 15Page 16 · Read text
www.butkus.us


    When   using   the  speeds  on  the  high  speed   dialr     it   is  necessary    that   the  black
arrow  on  the  slow  speed  control   be  set  opposite   the  inde:r   rrrark.   The  red X  set-
ting  on the  dial,  half-way  between the  l/30 and the  l/60 setting,  is especially provided  to
synchronize with  electronic flash.  Time exposure are also  set on  this  dial  by  setting B
opposite the  red  arrow.   In  this case a cable release should be used and the shutter  will
remain open as long as the cable release is pressed. Use a cable release with  a Leica type
fitting.   For extremely  long exposures, a cable release which can be locked with a set screw
is recommended.

To Set the Slow  Shutter  Speed Dial                                          ii,;;lallfi;t, , , ,

                                      For  speeds between     I  second  and
                                                                        I / 15  second,  the  desired  speed can
                                 be selected by rotating  the slow speed
                                       control.  When  using one  of  the  slow
                                  speeds,  the  high  speed  dial  carr be
                                                 left  at  any  setting.   The  position  of
                                     the  high speed dial does not influence
                                      the  exposure  when   a  slow  speed  is
                                       set.
View original page 16Page 17 · Read text
SETTING          Set the  desired  aperture  opposite  the  red
                                                   dot  on  the  top   of  the  lens  by  rotating   the
                                                                                  rine.   Click  stops  are  pro-                       TI{E     diaphraem   setting
                                                 vided  at  the  full  stops.
         DIAPHRAGM       automaticThe  diaphragmin  operationof  thewhenMIRANDAtl-re automais fullytic
                                            diaphragm    control   button    is  in   its  position                                                     farthest  awa\/ from  the  lens.  Whcn   the  cont-      t
                                                              rol  button   is closest to  the lens, the diaphraem
                                                                  is controlled  rnanually.
                                              Under    all  ordinary  circumstances, use of
                                                   the  automatic   diaphraem    will   rnake  picture
                                                  tahing  much   easier  and   fastcr.   Wher-r  the
                                                    control   button    is set for  automatic  operation.
                                                              t}-re diaphragm    will  rernairr  wide  opcn   to  faci-
                                                             litate  viewing  and  locusing   until   the  shutter
                                                  release button   is pressed.  The  diapliia.qm   u,ill
                                                then  close down   to  the  desired opcr-ring for the
                                                  time  the  picture   is beins  taken,  and   r,r'ill then
                                                  automatically  reoDen  to  its rvide open  position
                                                ;?S soon aS pressure  on  the  shutter  button    is
                                                released
                                         When  the diaphraem   control  button   is set
                                                            lor manual  operation,   the  automatic  mecha-
          fifr$,fff#$$tIrF$$$$f'9$                             riism   is disconnected  and  the diaphragm  open
                                           and  closes as  the  diaphr agm  settinq  rins   is
                                                 turned.

{nr}
View original page 17Page 19 · Read text
DEPTH   OF  FIELD:          This  is the range that  is  in sharp focus for any particular
                                          distance and diaphragm  setting  There  is relatively very   little
                                         depth  of  field where close-up  subjects are  focused  on, and  a
                                           great deal of depth of field in the case of more distant subjects.
                                         Closing the diaphragm down increases the  depth  of  field, and
                                       opening  the  diaphragm  up  reduces the depth  of  field.  The
                   ffi:';:i?iffi:?1':,J*1':T*':$i;#"
                                                 of field is much reduced.   If your picture  is such that you want
                                           both nearby  and distant  objects to be in sharp focus, then the
                                             smallest  possible diaphragm  should  be  used.  However,  very
                                              frequently  the composition  of  a  picture can  be  improved.  by                :
                                        having the principal  subject in sharp focus while  other objects
                                                     in the scene are soft and out  of focus.  This  will de-emphasize                   i
                                                clistracting background  objects, and  concentrate  the  viewer's                                                                                                                                                           *
                                             attention on the principal  subject.   If you want  to preview the
                                         depth  of  field  prior  to exposure, you can readily do so by  slid-
                                             ing  the  preview  button  towards  the  lens barrel.  To  restore
                                         automatic  operation, slide button back to original  position.


bee!d-tu"a-+----*.                           &,--'             . r !id{*.*i&,*}dir*i***:,i;;;
View original page 19Page 22 · Read text
www.butkus.us

EXPOSURE
      'l'he^
            follorving. table applies to commonly used black &  rvhite 6lm IASA  100) at  lll2s
second' from two hours alier  sunrise to two hours before sunset.  Wtreri tat i"g  dU.t   urJ
$'hite  picturcs  under  unusual  light  conditions  or when  using aoto.  frf-,-u  "photoelectric
exposure meter  is strongly recommened.
                           Clear  Sun      Hazy Sun    Cloudy Bright   Cloudy Rain
   I-ight  Subject                     f l 2 2                      f l t 6                       f l n                         f l }
   Averase  Subject                 f l 1 6                      f  l r r                      f  l B                       f  5 . 6
  Dark  Subject                     f I t l                      f  l B                        f / s . 6                    f 1 1


                       MIRANDA ACCESSORIES
View original page 22Page 23 · Read text
USING ACCESSORIES WITH THE MIRANDA DR 1.9

The   Chest-Level      View'finder            A chest-level collapsible viewfinder (VF   l) and
                                         a  critical focuser (VF  3) are available  as acces-
                                               sories and       be substituted  for  the standard
                                                                       \"y                                         pentaprism viewfinder when so desired.
                    The VF   I viewfinder opens and closeswith a touch.  A hinged magni-
                           fier  is quickly  raised for  accurate focusing.
                     The  critical focuser (VF 3) is of unique  design and  efficiency.    It has
                   two  positions, one giving  a five-times magnification  of the  entire field of
   ;        IIi;J?1,T:1TJ1?,:.11;"#J'ffi"?1T,'3
                    This  viewfinder   will  be found  convenient wherever   it  is desired to  look
                        into  the  top  of  the  carnera,  rather  than  the  back,  for viewing and
                     focusing.   This may frequently  be the case when  taking  pictures  of very
                     small subjects, -for example  in nature photography.   With  this viewfinder,
                    the image is reversed from  right  to  left'
                     To remove the viewfinder on the camera, pull  the viewfinder release
                       to the  left and at the same time gently draw  the viewfinder to the rear.                      .
                 To replace with  the other viewfinder,  insert  the  finder's  rail  into  the
                  groove of the c^rnera and push  it gently forward.     It  will automatically
                     lock into place.

                      *i*l;P&rd.
View original page 23Page 24 · Read text
www.butkus.us


VF    I  Viewfinder               VF  3  Viewfinder
                                   (magnification  X l5)
View original page 24Page 25 · Read text
Extension                   The 50 mm.  standard lens r,vill focus at distances as close
                                        as  17 inches without  accessories.  By  adding  an  extension
          Adapter                                           adapter between  the  carrrera and  the  lens,  pictures  carr be
         and                         taken  from   l7  inches  to  l0 inches.  To  take pictures at  still
                                            closer distances, extension tubes are added  betlveen the  ex-
          Extension                                           tension adapter  and  the  camera.  The tubes are supplied in
         Tubes                       lengths of  B, 16 and 32 mm.  and enable the photographer  to
                                          take full frame pictures of subjects the size of postage stamps,
                                     and even smaller.
                                                       In  addition  to the regular extension tubes, a special helical
                                          focusing tube   is  available.   This  tube  is used between  the
                                         carnera and the lens either alone, or  in combination  with onew^                                         or more regular extension tubes.  The purpose of the focusing
                                         tube  is to make focusing in close-up photography more flexible
             than   it  is when  using only  the focusing  range which  is afforded  by the lens.  The focusing
             tube  is 16 mm.  long when  fully  telescoped and 24 rnm. long when  fully extended'
             When using extension tubes the automatic  lens will  not couple with  the shutter release.
               In  this  case,  it   is suggested the two cable releases be used, one on the lens to close the
            diaphragm and one on the carnera to  trip  the shutter.  This  will  preserve the advantages of
              the automatic lens for close-up photography.  The  shutter can be tripped by using a regular
             cable release with  a Leica-type  fitting  at the shutter release button  in  front;  in  this case it
                 will be more convenient  if the lens is mounted with  the red dot on the lens lined up with
              the blue (instead of the red) dot on the extension adapter.

                                                                    ,--.-:,r,     , .-.     ., r;u   ^                             &
View original page 25Page 28 · Read text
www.butkus.us

The  Focabell           The   Focabell
                                      is a  bellows-type
                             focusing     device
                            intended    prima-
                                         rily    for    taking
close-up  pictures.      It  focuses over  an  ex-
treme range  very  quickly  and conveniently.
There   are  two   provisions    for   changing
the  focus,  one  for  rapid
shifts and one  for  critical
adjustments.   The   Foca-
bell   is  made   with   fine
precision,    is  very   rigid,
and    will   be  found    to
satisfy   the  most   exact-
ing re,quirements.  In  ad-
dition    to   MIRANDA
lenses,  lenses   of   other
makes  car.  be used  with
adapters.        Telephoto
lenses  in   short  mounts
can  be  focused  from   in-
finity;  other  lenses  only
for close-up photography.
View original page 28Page 29 · Read text
List  of MIRANDA   Accessories
MIRANDA   Everready Case                      Helical Focusing Mount  for critical close-up
Leather Case for  all MIRANDA   lenses          focusing
Waist Level Finder with  built-in  magnifier     Extension Tube Set incl. 3 tubes & Adapter
  (vF-l)                                     Microscope Adapter  with bayonet Eye Piece
Critical   Focuser  with   variable   magnifier       mount
  (vF-3)                                       Flash Bracket fit flash gun on the side of the
Case for waist level finder and critical focuser        finder
                                                 Front Lens CapRubber Eye Cup with  diopter mounting  for                                           Rear Lens Cap  for Miranda bayonet mount  Prism and  Critical  Focuser                                                 lenses
Prescription Eye Piece Mounting  for Finders:    Rear Lens Cap  for  Miranda   sclew  mount
  Model  "A"   for  near and farsightedness        renses
  Model  "8"   for astigmatism                Miranda Body Cap
Focabell Bellows Extension with double track      Pistol Grip  for  all models
  and micro  focusing adjustment               Double Release for close up attachment   in
Bellox Single track bellows extension              coniunction with  Automatic  lenses
Lens Adapters 'P-M
        udapt.,      (with  this adapter any lens made for the Praktica, Pentacon or  Pentax
                  cameras may be used from  close-up to  infinity)
  X-M  adapter     (with   this  adapter  any  lens made  for  the Exakta  camera may be used
                    from  close-up to  infinitv)
 AXM  adapter    (for Automatic  Exakta lenses (Couples to release))
  AU  adapter       (for  all Automatic  Miranda  lenses to  fit tubes &  focusing devices)
  L-F adapter      (with  this adapter any lens with  standard Leica threads can be used for
                    close-up photography)
 cS-Fadapter (ili't,lf'r;.0?iJs_,iJH:Tg:i3riicarrengthcontaxor Nikonrenscan
  CT-F  adapter    (with  this adapter Contax and Nikon wide angle and telephoto lensescan
                  be used for close-up photographv)


                                                                                                                        dEde.;...,'q,           &.
View original page 29Page 30 · Read text
www.butkus.us


List  of MIRANDA   Lenses
 28 mm   f  : 2.8 Wide Angle  Fully Automatic  8 element ultra  rvide angle
 35 mm   f  : 2.8 Wide Angle  Fully Automatic  7 elenrent
 35 mm   f  : 2.8 Wide Angle Preset 6 element
 50 mm   f  : 2.8 Normal  5 element Preset
 50mm   f  : 1.9 Normal  Fully Automatic 6 element
105 mm   f  : 2.8 General Purpose Telephoto 5 element
135 mm   f  : 3.5 Short Barrel Telephoto  to be used with  auxiliary  focusinp' devices
135 mm   f  : 3.5 True Telephoto 5 element Preset
135 mm   f  : 2.8 Preset High Speed Telephoto 5 element
I35mm   f :3.5 Telephoto Fully Automitic  5 element
135 mm   f  : 2.8 Telephoto  Fully Automatic  6 element
180 mm   f  : 3.5 Telephoto  Preset
      --      f  : 4.5 Telephoto  preset with  tripod  socket at center of gravity?19
400 mm   f  : 5.5 Preset Telephoto  in de luxe leather case with  oriinting  tripod  sockct at
               center of gravity and  filter  slot with  holder  for Series V
View original page 30Page 31 · Read text
CARE OF YOUR CAMERA

Storage
Keep your MIRANDA    in a cool, dry,  ventilated  place'    (If  possible, keep   it  in  an  air-
conditioned room.)
Do not store in a'closed cabinet under humid  conditions'
N.".r    ,t"..   in a humid  place' such as a basemen-t, particularlv  during  rainy  seasons'
If   it  is to be stored fo.  .o-.'ti-.,-      r.t"""    yorrt lithAnDA    from  thi  everieady case, and
;";"ia    i;;.."1.d      container  al,on! with  a drying  a,gent such as_silica gel.  Do not permit
ihe drying  agent to come into  direct contact with  the camera body'
                               nd SaIt SPraY
                                                                                            it  will  in  tirrG  picl  up  a  certain  arnount   of
                                             a  soft brush and  air  blower'
                                       {NDA   should be protected  from  contact  with
                                                            tt"if,tt,'ir'?i.,.ll;'"   the metal and leather
                                                                  tirror  surface should never be touched'   They
should be cleaned only with  an  air blower, which can be ,purchased,qu,ite. re^asonably.
ii-;;       ;l""t.i    or  eth;r   is  available,  wat;r  can  be used   if  the  cloth  is first vigorously
wrung  out.
The  flass surface of the  lens should  never be touched  with  a.finger   since the  slighte-st
,.""n"i,iif    f1.".   n".e.l  p.i"tr   *tti"tt    *ill   in time may seriously injurethelens.    Dust should
L.  r.-o".a   from  the lens with  an  air blower  (an ear syringe  purchasable,at   drug-stores
i.- *""a1.    Finger  p.ints- and  stubborn   dirt  ihould  be removed with  a photographic  lens
cleaner and lens cleaning PaPer.
The  mirror  is front  su.faced-and  the reflective coating  is very  delicate.  It should never be
touched.   It should be cleaned only  with  an  air blower'
View original page 31From the M. Butkus archive. Original publisher and archive notices are retained.
Check the model and edition against your equipment.
PDF verified 2026-10-10.