Film cameras
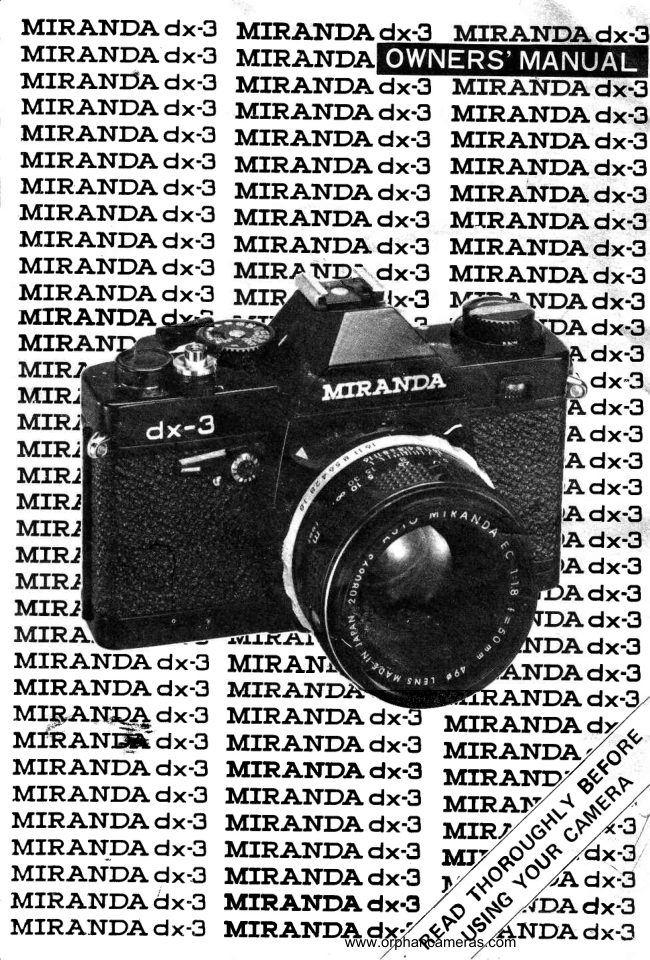
Miranda DX-3 User manual
User manual for Miranda DX-3. 33 pages in English. Read the original PDF, download or print a copy without registration.
33 pagesEnglish4.4 MB PDF
Loading your manual…Open PDF directly
Document details
- Brand
- Miranda
- Model / document
- Miranda DX-3
- Document type
- User manual
- Language
- English
- Pages
- 33
- File size
- 4.4 MB
- Category
- Film cameras
- Document date
- Not specified in catalog
Search available document text
Find a term, then jump to its page in the original PDF. Image-only pages may not be searchable; check the PDF for exact wording and diagrams.
Page 3 · Read text
THE STORYBEHINDYOUR
MfRAI\TDAdx'3

                                 In 1946 Miranda Camera Company, Ltd.'s pre-
                       decessorf irm was established in Tokyo.   I nitially  it
                       manufactured a limited line of photographic prod-
                            ucts, but most of  its business was as a top notch
                         service center for professional photographic equip-
                        ment. The company continued to produce photo-
                         graphic accessoriesfor 35mm rangefinder cameras,
                          but  in 1948 they very quietly began  investigation
    M I R A N D A  T '      and development of  a revolutionary 35mm SLR.
While this development continued, the company consistently made news with
pioneering products such as an adapter which  allow",g,f,j'ffi.il4ynersonfo"iLejcatype
camerascamerastoto useuse ContaxContax oror NikonNikon lenseslenseswithwith  it.;1. .*-#,rr,$,fr#fi"{:iiifi.f$iiT.****rl+t'$++,1,'t1li,ff$iii'filfl#lr'Ifu*#,+ffiw.--*ffi'+ffi.,*.
   Probablythe first product that earnedtheffirnpdnV..,a'world        tion
was the revolutionaryMIRAX mirror box wi#$,      hamedbjlereffiffiist-
                           level uffi't                  cfgr     c          its         M.RAXBdl          & FocABELL I unique                        iffbu**gfi*#c'fi   non,
                                    Contig"'i                                       very
                      urr#                                             ight
                                  im#iiii!fi1heh,.                       ffi              o&ffiffi'*Arket
                                                              i n                                                       i                    n i t s
                                     lauffi,                             #ffi-kW.affiore
                          ver
                                      fin                                             affKffiffi|ffir..          $t-
level finder. Surely this was 4                                  ;.      t   $tffi"                     it
amazinginventionate|ephotoH op#Wi.t|b.ffffiffiffiffiruas
marketed under the name SUpffiffi.gffim                        lenbttffiffieed      of
12.8 something quite unbelieva5          With the introductid
tionary bellows system, the FOCABELL, the owner of a 35mm rangefinder
camera / MIRAX box  / SUPREME lens / FOCABELL combination could now
focus anywhere from ooto extreme macropositions.Shadesof the modern SLR!
   The world was unawarewhen Orion CameraCo. introduced the PHOENIX in
1953. Although only a few hand made sampleswere available,word spreadlike
                             wildfire that a new type of camera had been born.
                     The actual production model rolled off the assembly
                              line shortly thereafter, and was marketed in 1954 as
                                                    'T'                          the  model         .  Instead  of  Phoenix  the name
                  MIRANDA was emblazonedon the viewfinder. The
                 M I R AN DA T was th e pioneer of a new breed of
                      camera,a 35mm SLR with a built-in mirror housing
                      and  upright image pentaprism. lt was the  first
                     modern JapaneseSLR camera as we know  it today.


                   C O N T I N U E D O N P A G E 3 1
View original page 3Page 5 · Read text
MIRAIVDAdx'3
  CAMERANOMENCLATURE

        1 .  F I L M S P E E DI N D E X
        2 .  F I L M S P E E DD I A L  ( A S A O R D I N }
        3 .  F I L M A D V A N C E L E V E R
        4 .  S H U T T E R S P E E D D I A L
         5. SHUTTER SPEED INDICATOR
         6. ACCESSORY SHOE
         7. HOT SHOE CONTACT
         8. ACCESSORYSTOPPER(W/LED CUT-OFF SWITCH}
        9 .  F I L M P L A N E I N D E X
       1 0 .  F I L M M E M O R Y I N D I C A T O R
       1 1.  F I L M R E W IN D C R A N K
       1 2 . F I L M M E M O R Y D I A L
       1 3 . R E W I N D D I R E C T I O NA R R O W
       1 4 .  L E N S P O S I T I O N I N GM A R K
       1 5 . A P E R T U R E I N D I C A T O R
       16. APERTUR E SCALE
       1 7 . D I S T A N C E I N D I C A T O R
       1 8 .  F O C U S I N GR I N G
       1 9 . M I R A N D A A U T O E C L E N S
       2 0 .  F I L M R E W I N D K N O B
       2 1 . S E L F - T I M E RO P E R A T I N G I N D I C A T O R
       22. EXPOSURE SENSING AR EA
       23. F/NUMBER ADJUSTMENT LEVER
       24.  XIF P F LASH TERM INAL
       2 5 . O U I C K - R E T U R NM I R R O R
       26. DIAPH RAGM CONTROLLER
       27. OUICK-CHANGE BATTERY CHAMBER
       28. TRIPOD SOCKET (W/DC MOTOR DRIVE CONTACT)
       29.  FILM REWIND RELEASE BUTTON
       30. MOTOR DRIVE ATTACHMENT CAP
       3 1 . N E C K S T R A PE Y E L E T
       32. BAYONET MOUNT lwl440 MM SCREW MOUNT)
       3 3 . M A X I M U M A P E R T U R E L E V E R
        34.  F/STOP PIN
       35. SELF.TIMER SETTING BUTTON
       36. SE LF-TIM ER LEV ER
       3 7 .  L E N S P O S I T I O NI N G A R R O W
       38. SHUTTER RELEASE BUTTON (W/INSIDE SCREW SOCKET)
       3 9 ,  F I L M S P E E DS E T T I N G R I N G
       4 0 .   I N F R A R E D D I S T A N C E I N D I C A T O R
       4 1 . D E P T H O F F I E L D S C A L E
       4 2 "  L E N S R E L E A S E L E V E R
       43. SHUTTER RELEASE LOCK MARK
       44. SHUTTER RELEASE LOCK
       4 5 . A U T O M A T I C F I L M F R A M E C O U N T E R

4-
View original page 5Page 6 · Read text
MfRAIVDAdx-3
        How to...and Where
 OperationA. B.C                                   pp.6-7
 Load Batteries                                          . .               p . 8
 Set the Film Speed . .                . .                      p . 9
 Load and Wind the Film                                 pp.l0- 1 1
 Set the Shutter Speed                    . .                       p. 12
 Set the Film MemoryDial                             p . 1 2
 H o l d t h e C a m e r. .a .                       . . . .                 . . . .    p . 1 3
 Lock the Shutter ReleaseButton                           . .         p. 13
 PreviewDepth of Field                                     pp.l 4-15
 T e c h n i c aDla t a   . .                               . .                 . .          p. '17
 Set the Aperture                    . .                            p. 18
 Openvs.Close-downMetering                      . .           . .      p. 18
 Mirandadx-3 lC Metering.                                p. 19
 Focusthe MirandaOIS Way                                p. 20-21
 Determinethe ProperExposure.                             p. 22-23
 Rewindthe Film . .                                          p. 24
 Removethe Back Cover                                     p. 24
 Utilize FlashUnits                                          p. 25
 Usethe Self-timer                                          p. 26
 InterchangeLenses                        . . . .                     p. 27
 MirandaAuto EC LensSeries                 . .                  p. 27
Two Notesof Caution                                  . .                p. 28
 Storeand Carefor Your fVlirandadx-3                        p. 28


CONGRATULATIONS  on purchasing the world's  first electronically controlled
compact 35mm SLR camera, the Miranda dx-3. World renowned, Miranda Camera
Co., Ltd., has always striven to produce the camera systems that photographers want
and trust. Truly an advanced camera designed with  the most up-to-date spaceage
technology, the Miranda dx-3 offers you an expansivesystem of accessoriesthatwill
never fail to expand your photographic horizons.Carefully read and study this owners'
manual, and then go out and experiment. The outstanding features of the compact
dx-3 especiallyits amazing OIS (pat. pend.) rangefinder,ease in handling, quick and
easy metering, LED readout, and largecolor-coded markingswill constantly reaffirm
your wise choice in purchasingthe Miranda dx-3 system. One without equal.
   Through proper care and handling, your camerawill provide you with many years
of photographic pleasure. Should any questions or problems arise, we urge you to
first consult your local Miranda dealer for quick responseand service,the distributor,
and then,  if necessary, Miranda Camera Co., Ltd. at the address on the rear of this
manual

                                    www.orphancameras.com
View original page 6Page 8 · Read text
Determine and set the
shutter speed.

                            (Seepage12)


Compose the picture and focus.

                      (Seepage20 &211


Adjust the diaphragmfor
correct exposure.

                (Seepages18, 19,22 & 23!.


         www.orphancameras.com
View original page 8Page 9 · Read text
LOADINGTHE BATTERIES
           A I

                           To open the OUICK-CHANGE BATTERY CHAMBER
                                  (27) press down and back, in the direction of the arrow
                             molded into the chamber cover.


           A 2

                                    Insert four 1.5 volt silver oxide batteries (Eveready 576,
                                 Mallory MS 76, or equivalent) into the chamber in the
                                   direction shown on the Gover. MAKE SURE THE BAT-
                            T E R I E S A R E  I N S E R T E D P R O P E R L Y .


           A 3

                       TO CIOSEthE OUICK.CHANGE BATTERY CHAMBER
                               Q7l  press down  and  forward  on  the  cover  until    it
                                    clicks shut.


           A 4

                          One set of batteries (fourl  is supplied in a special plastic
                              casewith the camera. DO NOT discard this plastic case.
                              There is a specially designed pouch built into the camera
                               case to hold this plastic battery case.
                                                           It is suggestedthat you purchase an extra set of batteries,
                                     p.ut them into the empty- plastic case,and store them in                                  the camera case pouch.


                           NOTE: The LED's act as a battery check. When they do
                                   not  light it is time to replace the batteries.


8
View original page 9Page 12 · Read text
c5

                                  Using the FILM ADVANCE LEVER  (31, advance the
                                               film  to check that  both  top and bottom  film  perfora-
                                          tions are engaged by the SPROCKET WHE EL (56). Snap
                                         the back cover closed.


                          L'0A F

                                 Turn the FILM REWTNDCRANK (11) ctockwise(in the
                                           direction  of the engraved arrowl  until  all the slack in
                                         the falm cassette is taken up. This occurs when there is
                                      resistanceto further turning of the crank.

             D I

                               Wind the FILM ADVANCE LEVER (31. When it is be-
                                ang operated, the F|LM REwtND KNoB  (2Ol shoutd
                                         turn  in a direction opposite the engraved arrow indicat-
                                        ing that the film  is moving properly.

            D2

                               Wind the FILM ADVANCE LEVER (3) and reteasethe
                                      shutter until the pointer in the FtLM COUNTER (451 is                                                                         '1'.                                      aligned with    You are now ready for taking the first
                                      photo.


                                          www.orphancameras.comi
View original page 12Page 13 · Read text
SETTINGTHE SHUTTERSPEED
                                                              -t 1r l
                           Rotate the FILM SPEED SETTING RING (39) until the
                             desired shutter speed on the SHUTTER SPEED DIAL
                                 (4) lines up with the SHUTTER SPEED INDICATOR
                                    {5}. Note that the speedsare in fractions of a second ....
                             112,114,1/8, etc. except for the yellow 2 and 4 seconds.
                         The RING click stops in both directions, but goes only
                                                     '100O'the                            as far as'B' one way, and           other way.

                          r-ne-z
                                               'B'                          The     or bulb  setting allows you to keep the shutter
                         open as long as you keep the SHUTTER RELEASE
                     BUTTON   {38}  depressed. Your  camera should be
                         mounted on a tripod when long exposures, 1/15 sec. or
                                 longer, are used. A cable release should also be used to
                             avoid shaking the camera.


                     FE- QUt


                           Set the SHUTTER SPEED DIAL (41 at 1/60 second for
                             qynchronization  with  electronic flash units. See page
                          25 t or f urther instruction s.


                          Turn t{re FILM MEMORY DIAL (121 until the type of
                                  film  lines up with the FILM MEMoRY  tNDtcAToR
                                               ( 1 0 ) .
                   B&W   -  black and white film
                           Neg.   -  color negative film  (color prints)
                             Pos.    -  color  reversal film (35mm  slides)
View original page 13Page 14 · Read text
HOLDINGTHE CAMERA

                            Tr   Il

                         To avoid blurred photos the camera must be held firmly.
                         The sharpest pictures can be taken only when the camera
                           does not move while tre shutter is released.

                                   Firmly hold the camera with both hands.

                         When the camera is utilized  in a horizontal  position,
                                 comfortably  brace your elbows against your  body.
                               Rest the camera on your extended right thumb. Take
                               a deep breath, and release half. Then while holding in
                                 the rest, smoothly depressthe SHUTTER RELEASE
                       BUTTON (381with the tip of your right index finger.
                            The camera is further steadied by pushing the camera
                                         in towards your nose with  the  last three fingers of
                                  the right hand. Your  left hand *rould  serve to focus
                             and support the lens barrel.

                        When the camera is held vertically your right hand is
                                    essentially in the same position with the elbow braced
                                  against the body. The left hand drould  either func-
                                      tion as abone or grasp the end of the camera gently
                                  pulling in.

                            The camera slrould be mounted on a tripod  and a
                                cable release used when taking pictures with a tele
                               photo  lens and/or  at slow speeds (l/1S  second or
                                   slower).   lt  is also recommended  for  microphotog
                                  raphy.


                    T f ,                                    L L
                                                       lf you  don't  want  to take a picture  after cocking the
                               slrutter,turn the SHUTTER RELEASE LOCK (44) until
                                                  it covers the SHUTTER RELEASE LOCK MARK (431.
                              This prevents accidental  release of  the  shutter.  After
                                  fini$ing   with  the camera set the LOCK so any pressure
                         on the SHUTTER RELEASE BUTTON (381 witt not
                         cause the LED's to light and thereby drain,the batteries
                      Do not keep the SHUTTER cocked for any great length
                                 of tame.

                                   www.orphancameras.com
View original page 14Page 15 · Read text
PREVIEWINGDEPTH OF FI ELD

                        F  I
                                                     t ^ I I


                          The Miranda dx-3 offers both full open and closed-down
                               metering. When using the dx-3  in  its closed-down mode
                           you  will preview the depth of  field while you are deter-
                              mining the proper exposure. In the full-open mode, pre-
                              viewing  depth  of  field,  and  determining  the  proper
                            exposure are done  independently.

                             Provision for DEPTH OF FIELD PREVIEW is made on
                                the lens, not on the camera body. For this reason the
                          method for previewing the depth of field  will vary with
                                the lens mounted on the camera.

                           Miranda Auto EC lenses have a PREVIEW LEVER (5O)
                           on the lower left, next to the X/FP FLASH TERMINAL
                                 (24) when mounted on the dx-3. Each Miranda Auto
                     EC lens also features a DEPTH OF FIELD SCALE (411
                           on the top  of the lens. To read the approximate depth
                                    of  field,  note  the  aperture number  indicated on  the                                                                                 c                     APERTURE RING  {67). The same numbers to the left
                         and right on the.DEPTH OF FIELD SCALE (46) point       c
                                   to the depth indicated on rfie DISTANCE SCALE (69).

                                                                                                                                   v
                             For example: On the Miranda Auto EC Somm f/1.4
                                lens as shown  at  left; when the aperture  is at f/8 and
                                the subject is at 5 meters n6.25   ftl,  the depth  of field
                            extends from approximately 4 meters (13 feetl  to 10      F
                             meters (32.5 feetl.


                          To  vizually see the depth  of  field,  stop the aperture
                        down  (close the diaphragm) by sliding the PREVIEW
                      LEVER  (521 downward.
View original page 15Page 16 · Read text
DEPTHOF FIELD:APERTURE
           VISUALLY

                                                                                                              --f--Subject
                                        Sublect's Disrance
                                A  iig p ---------+e        r         t     u Smaut  bepthe   of  tFietd_________>j         t              '
               -            f.'s AAAtttAAA
                 ^,'"?,11"{r-mFffiT+-ffit-!or Field-J
                                                                    t-----+         f-DepthLargeDeplh of Field----{>


l12^ 6 z.

  Very frequently  the composition  of a picture can be enhanced by having the main
  subiect in sharp focus while the surrounding objects in the scene are soft and out of
  focus. This  will de-emphasize distracting background oblects, and concentrate the
  viewer's attention on the principle subiect.


          Three factors determine depth of field:
     DEPrHoF+ ApERTU*e.           *  to"drt,.ffon"                        BYSJifiL
             small          large          near               long
               large          small            lar                  short


                     tsJt - ' l


                    DEPTH OF FIELD  is the zone of diminishing, but still
                            acceptable, sharpness in front  of and behind the image
                           plane on which the lens is focused. Usually the front
                          depth  is smaller than the rear depth.


                                                   1
                                   www.orphancameras.com
View original page 16Page 18 · Read text
MIRAMAdx'3
TECHNICALDATA

CAMERATYPE
 Compact 35mm  singlelens  reflex (SLR) camera with  electronically
 controlled  focal plane shutter, TTL  meter, and lC-LED  circuitry.
 FILM FORMAT
 35mm-24   x 36mm,43.3mm    film frame diagonal.
STANDARDLENSES
 Miranda Auto EC SOmm/f  1.8 or  f 1.4,460  A.ngle of View.
SHUTTER
 Electronically  controlled  rubberized  cloth  blind  focal plane shutter
 with  speeds from  4  to  1/1OOO second  and  B. Top  shutter  release
 button  with  cable release remote  control  socket. 8 second delay  self-
 timer  with  flashing  indicator.  Built-in  provision  for motor  drive  -
 20/3O/bulk   exposure.
VIEWFINDERSYSTEM
 Bright, full display viewfinder  which  displays focus, aperture readout
 shutter  speed, and LED  exposure  indicators.  Three  lC controlled
 LED's (OK, +, -)  which  read when  shutter release button   is partially
 depressed. Fixed pentaprism  with  O.83x image magnification  when
 using SOmm lens at q,949/o  field  of view.
EXPOSUREMETER SYSTEM
 TTL, zone (lower center-weighted)  light measuring at open or closed-
 down  aperture,  CdS  cell  built  into  mirror  assembly,  lC  circuitry
 comparator    cross-coupled    to   shutter   speed/aperture/film    speed
 controls,  readout  by  LED's,  meter  system  activates  by  depressing
 the  shutter  release button.   Light  measuring  range EV  2-18 (ASA
 1OO), ASA:  25-1600,  DIN:  15-33, Apertures:   f  1.4  to   f 22-
 FOCUSING SYSTEM
 Rapid, unique  OIS  (Ouadrascopic  lmage System)  rangefinder com-
 bining  360  degree multimicroprism   split-image center  with  ground
 glass ring, and matte  Fresnel  field.
LENS INTERCHANGEABILITY
 Accepts  all Miranda lenses. Dual Miranda mount:  four-claw  bayonet,
 and inside 44mm  0 screw mount.
 FLASH  SYNCHRONIZATION
 Single  flash terminal  on  front   for PC cord  accessory shoe w/hot
 shoe on top, X synchronization   at 1/6O sec. or slower, FP at1/125
 sec. or faster.
 FI LM ADVANCE/COUNTSYSTEM
 Rapid-load spool, auto-resetting advancecounter, single stroke 1850
 film advance lever, plastic tipped.
DIMENSIONS
 134.6 x 89 x 86 mm (w/SOmm f 1.8 lens)
 5-1/4 x 3-1/2 x 3-113 inches.
W E I G H T
8OOgrams (w/5Omm f 1.8 lens) 28.2 ounces.
POWEB SOURCE
 Four 1.5V silver oxide batteries (Mallory MS 76, Eveready576)
 *  Specificationsin this manual are subject to changewithout notice
   due to ongoing technologicaladvances.

                                    www.orphancameras.com
View original page 18Page 19 · Read text
SETTINGTHE APERTURE
          H 1

                           Rotate the APERTURE RING  (67) with  the thumb
                          and index finger  of your  left hand. Align the desired
                              aperture number  (f/stop)  with  the APERTURE  lN-
                    DTCATOR (15).


OPEN VS CLOSED.DOWNMETERING
                   FT  I  I


                             For  full-open  metering turn  the LIGHT MEASURE-
                    MENT MODE SWITCH (49) so the INDICATOR (47) is
                              aligned with  the red FULL-OPEN MARK  (46). Follow
                                 the procedures on pages 22 and 23.


                 Ea q1

                             For closed-down meterang turn the LIGHT MEASURE-
                    MENT MODE SWITCH (49) so the INDICATOR  (471
                                        is aligned with the white CLOSED-DOWN MARK  (48).
                              Folfow  the procedures on pages 22 and 23 but make
                              sure the  aperture  is stopped down when metering by
                                sliding the PREVEW LEVER (50) downward.


                   Ft   l Q.  ,
                          As soon as the MODE SWITCH (49)  is set at closed-
                           down,  the LED  lights.  lt  remains  lit  for 20 seconds,
                              then cuts off.  To  reactivate  the LED  for  2O  more
                            seconds, depress the SHUTTER RELEASE BUTTON
                                (38) slightly, and then release your finger. There is no
                           need to keep the BUTTON  (38) depressed to keep the
                      LED  lit.
View original page 19Page 20 · Read text
MfRAIVDA  dx-3  | C METERING


  @     @     LED CUT-OFFWruWSWITCH       EXPOSURE                               COMPARATOR
 SHUTTER              #   MiiEE_Bl:'':CONTROLS @-^                      @


                                                   R E S I S T O R T , I


                        F I R S T
 SECONDSHUTTER   SHUTTER     MAGNET            nl\(]
 CURTAINRELEASE  CURTAIN     POWER
    MAGNET        T R I G G E R      SWITCH


      CdS Cell EV Capability at ASA 100          Exposure Meter Operating Range


SETTINGSIN RED CAN BE SET ON THE CAMERA BUT THE METERSYSTEM
WILL NOT WORK IN THIS RANGE.
                                    www.orphancameras.com
View original page 20Page 21 · Read text
FOCUSINGTHE UNIQUE
         G I


                            To focus, look through  the viewfinder and at the same
                                 time rotate the FOCUSING RING (181 right or left as
                                  required.


                               F12z6

                               For INFRA-RED photography, first focus normally.
                                 Next, turn  the  indicated distance on the DISTANCE
                       SCALE  (69) so  it  is aligned with  the INFRARED
                        DISTANCE INDICATOR  (40) (red dot and 'R') on the
                      DEPTH OF FIELD SCALE (41)


          G4

                                 For moving srbjects use a fast 11l25O or higher) shutter
                                speed, and move your  camera ("follow   the  action")
                                        witr  the  subject. Ask  your Miranda dealer to recom-
                          mend photographic  literature  that  will explain this and
                                   other photographic  principles.


20
View original page 21Page 22 · Read text
MTRATVDAQls WAY

    I N N E R M U L T I M I C R O P R I S M S P O T             G5


                                   The  unique Miranda Ouadrascopic lmage
                                     System  (OlSl  rangefinder  is a  four  way
                                           focusing system, hence-quadra (fourl scopic
                                            (viewing).


   OUTER MULTI.
  MICROPRISMRING
  MATTE (GROUNDGLASS)RING
   MIRANDA OUADRASCOPICIMAGE SYSTEMRANGEFINDER

         G6

                         The QIS rangefinder screen is composed of a circular
                              split-image dot and ring which splits any image, vertical,
                               horizontal, or oblique; a multi-microprism  spot which
                             checker's the image; a surrounding ground glass (matte)    V         ring that blurs the image; and a matte Fresnel field that
                               blurs the surrounding background.
 OUT
  OF
 FOCUS


                              This  extremely  versatile screen  is  bright,  clear, and
                             sharp. lts unique design when coupled with a condenser
                                   built  into  the pentaprism makes especially rapid and
                             accurate  focusing  easy  wit'rout   the  split-image  ever
                            blackening. Under  the  most  adverse conditions  the
                            rangefinder will  onty  darken somewhat.         i<\
                           There  is no  other  rangefinder  like   it.
     I N
FOCUS
                                 (PATENTeENDTNG                                QIS
                                    www.orphancameras.com         21
View original page 22Page 23 · Read text
H3b

            Set the                                        Set the
              shutter                                          lens       OR            speed.                                           aperture.


          H4
                          The Miranda dx-3 features a  full  in-
                              formation viewfinder. Your eye should
                            remain looking through the viewfinder
                            as you  adjust  for  proper exposure.
                               Aperture reading is on the right, shutter
                           speed on the  left and the meter LED's
                            on the bottom.@

 OVEREXPOSEDH5


                        Metering  is achieved through miniature lC
 CORRECTLY         circuitry.  Release the  shutter when  either
      EXPOSED 'OK'.'OK+i  or'-OK'  LED's light uP.


 UNDEREXPOSED
View original page 23Page 24 · Read text
H6

                              The Miranda dx-3  is a zone qfstem metering
                                camera, and  the  area measured  is lower,
                                  center-weighted. When using your camera in
                                a vertical position, determine exposure while
                                  holding  the camera horizontally,  then  re-
                                      turn  the  camera  to   its  vertical  position,
                               compose,  focus, and  shoot.

CdS Cell SensingArea


                                    lf you performed step 3a, then while slightly depressing the
             SHUTTER RELEASE BUTTON (3gl adiust the lens aperture                                'OK'                       until the red       lights up in the viewfinder.

                          When using the close-down metering mode,
                          make sure you rotate the PREVIEW LEVER
                                    (50) down  after each aperture adjustment
                                   otherwise the reading wiil  not be accurate.
                       DO NOT keep the PREVTEW LEVER (SOl
                           down while adjustingthe APERTURE RtNG
                                   (67).


                                   lf you performed step 3b, then while slightly depressing the
             SHUTTER RELEASE BUTTON (381 adiust the shutter speed                               'OK'                      until the red       lights up in the viewfinder.


                          When using the closed-down metering mode
                          make sure the PREVTEW LEVER  (S0) is
                                   held down.   lt  is not necessary to keep the
                       SHUTTER RELEASE BUTTON  (38} de-
                                   pressed.

      H8
             When the meter LED's  in the viewfinder do not  light, the
                combined  power  of  the  batteries has fallen  below  4.4V.
                Replace the batteries as shown on page 8.


                               www.orphancameras.com
View original page 24Page 25 · Read text
REWINDINGTHE FI LM
          K I


                          Depressthe REWIND BUTTON (291 until  it clicks.


          K2

                                 Flip open the FILM REWIND CRANK (11), and turn  it
                            clockwise, following  the REWIND DIRECTION AR-
                  ROW ( 131. Continue turning until you feel the resistance
                             cease, t{ren turn the crank which now moves very freely,
                            two or three more turns.

          K3

                                Pull the BACK covER  LocK LEVER (511 down, and
                              the back cover will swing open. Pull the Fl LM REWIND
                     KNOB (20)  all the way up. Remove the film cassette.
                         Use a blower  brush  to  remove  film  chips  or  other
                                  particles from  inside the camera.

REMOVINGTHE BACK COVER


                         To  remove  the BACK COVER  simply  depress the
                     BACK COVER RELEASE PIN (61), move the top out a
                                               little, and  lift  up. To return,  just reverse the procedure.
                           Only  remorre the BACK COVER  when  absolutely
                               necessary.
View original page 25Page 27 · Read text
USINGTHE SELF.TIMER
        M I


                                 After  cocking  the  shutter,  push  the SELF-TIMER
                       SETTING BUTTON  (35)  in, and at the same time,
                              pu*r the SELF-TIMER LEVER (36) down.


         M2


                            Release the shutter. The self-timer now  activates, and
                             the SELF-TIMER OPERATING  INDICATOR  l21l
                            begins flashing.


         M3

                         The self-timer will give you an  I second delay. During
                                this time the SELF-TIMER OPERATING INDICATOR
                               (21)  will  continue to flash. At  the end of 8 seconds,
                               the INDICATOR  shuts off, the LEVER returns, and the
                                 shutter moves.


         M4

                                                       lf you want  to release the self-timer press up on the
                       SELF-TIMER LEVER  (36).   lf  you  haven't already
                          pressed the SHUTTER RELEASE BUTTON (38) the
                     SHUTTER  will not go off, but  if you have, a picture
                                     will be immediately taken when you move the LEVER
                              (36) uP.
View original page 27From the M. Butkus archive. Original publisher and archive notices are retained.
Check the model and edition against your equipment.
PDF verified 2026-10-10.