Film cameras
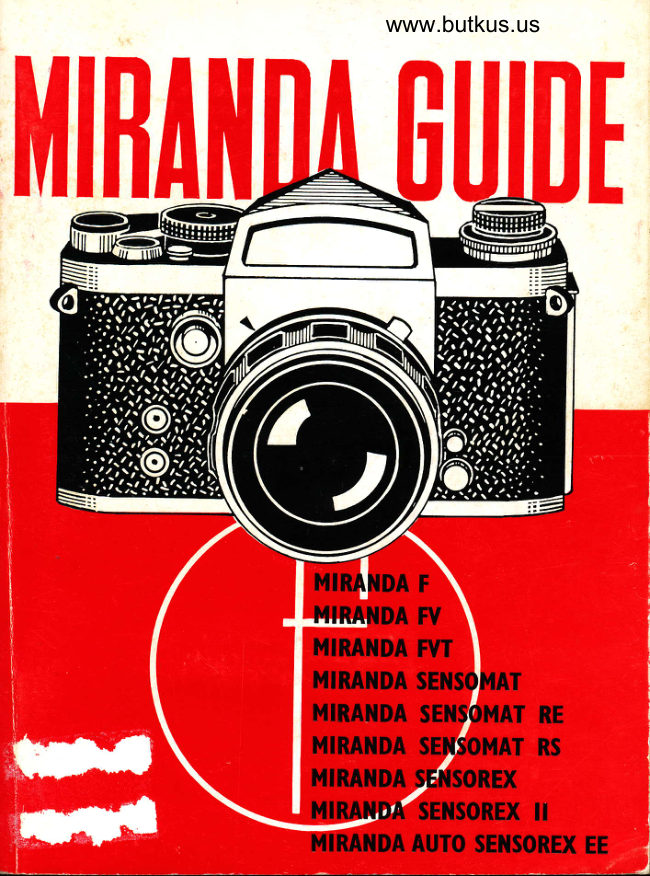
Miranda Guide Reference guide
Reference guide for Miranda Guide. 83 pages in English. Read the original PDF, download or print a copy without registration.
83 pagesEnglish5.8 MB PDF
Loading your manual…Open PDF directly
Document details
- Brand
- Miranda
- Model / document
- Miranda Guide
- Document type
- Reference guide
- Language
- English
- Pages
- 83
- File size
- 5.8 MB
- Category
- Film cameras
- Document date
- Not specified in catalog
Search available document text
Find a term, then jump to its page in the original PDF. Image-only pages may not be searchable; check the PDF for exact wording and diagrams.
Page 3 · Read text
MIRANDA GUIDE


  Not all pages scanned

             How to Use the
Miranda F, FV, FVT, Sensomat, Sensomat RE and RS,
View original page 3Page 5 · Read text
Page                          Page
   Treating the Camera with    Accessories            66
   Care                  60     Accessory Shoe         66  Coping with Tropical Con-         Interchangeable Viewfinder 66    ditions                60      Waist-level Finder VFI    66                                        Waist-level Finder VF3   66                                                           ' Critical Focuser VF4      68
                                 Changing the Viewfinder 68
                                        Interchangeable GroundClose-Up Work            62        Glass Screens       68   Close-up Lenses        62     Microscope Adaptor    68  Extension Tubes        62      Optical Slide Duplicator 68  The Helicoid Focusing       Eyecup                69
    Mount                  64      Eyesight Adj ustment Mounts 69
  Miranda Lens  Reversing          Pistol Grip               69    Mount                  64     Lens Hood              69
  Extension Bellows          64                                                               70  Miranda SLR Copying           Facts and Figures
     Stand                    6s  How to ... lAhil is lYhere? 76
            The Green Section between pages t6 and 17
The Mirandu Single Lens Reflex: Model by Model             Page
Miranda Auto Sensorex EE                                      2
  Loading 2 - Unloading 2 - Shooting 2 - Exposure Control 4
   - Average and Spot Light Measurement 4 - Automatic Ex-
  posure4 - Manual Exposure 5 - Changing Battery 5 - Special   Controls 5
Miranda Sensorex and Sensorex II
  Loading 5 - Unloading 5 - Shooting 6 - Exposure Control
  by Open Aperture Reading 8 - Exposure Control by Stopped
 Down Reading 8 - Variable Sensing Spot 8 - Changing
  Battery l0 - Special Controls l0
Miranda Sensomat, Sensomat RE and RS                               IT
  Loading ll - Unloading ll - Shooting  I I -Exposure Con-  trol 14 - Using Pre-set or Manual Aperture Lenses 14 -                                              15  Changing Battery 14 - Special controls
Miranda F, FV, FVT                                                 15
  Loading 16 - Unloading                                                                  f 6 - Shooting                                        16 - Attaching the  Snap-on Meter 20-Exposure Control 20- Changing Bat-
   tery 20 - Special Controls 20
  Sorne items of equipment or certain moteriols mentioned in this book moy not be freelyavailoble in every country. lmport ond morketing conditions vory widely, ond are outside
the control of the photogrophic retoiler.
           @ Focal Press, 1975
                           rssN 0 240 50709 6
    Printed in Great Britain by Staples Printers Limited, at The Stanhope Press,
                                 Rochester, Kent.
View original page 5Page 6 · Read text
www.butkus.us

   THE MIRANDA SLR CAMERAS
  The Miranda single-lens reflex is a 35 mm. eye-level reflex
camera with a viewing system designed for accurate focusing
and precise viewing.
  The body is die cast and covered with black resilient
material with a hinged-on back. The metal parts are black
anodized or satin chrome finished. The camera yields up to
36 negatives, size I x l$ in. (24x36 mm.) on perforated
35 mm. film.
   It has an interchangeable eyeJevel reflex finder which
shows an upright and right-way-round image 0.92x natural
size via a pentagonal prism. The focusing screen has a micro-
prism centre for easy, critical focusing, while the surround
is covered by a fresnel screen giving even image brightness
right into the very corners.
  Interchangeable finder units for waist level viewing, for
critical close-up focusing, and for eye-level viewing with or
without TTL metering, are available.
  The taking lens itself is used to form the finder image. In
consequence the finder shows practically the same fields as
will be obtained on the film. The reflex image remains fully
correct at any distance, with any lens, including supple-
mentary lenses, extension tubes or bellows extension.
  The mirror of the reflex finder-which deflects the image
from its straight path to the film on to the viewfinder screen
         to the viewing position immediately after the-returnsexposure, so that the image is always visible except during
the actual exposure, normally only a fraction of a second.
  The lens is interchangeable by a four claw bayonet mount,
permitting quick mounting and dismounting with about {
turn, accepting the Miranda automatic aperture lenses. In
addition there is an inside screw mount of 44 mm. diameter
for use with pre-set lenses, extension tubes, etc. A wide range
of lenses from 25 mm. to 800 mm. is available. In addition,
lenses designed for other SLR cameras can be used with the
aid of specially designed adapter rings.
View original page 6Page 7 · Read text
An internal link between the shutter release and lens mount
 automatically couples lenses which have automatic pre-
 selector diaphragm control. You select the aperture requiied,
 but the lens remains at full aperture for focusing. Thii gives
 maximum brightness of the image and minimum depth of
 fie-ld, ensuring the greatest accuracy in focusing. When you
 release the shutter, the aperture closes to the pre-set opening
 and automatically re-opens as soon as the exposure is made-.
A depth of field preview button permits stopping down the
 lens to the pre-set aperture to observe the <Iepttr of field at
 any time.
   All "Auto Miranda" lenses have this automatic diaphragm
 setting and the long focal length "Miranda" lenses-are de-
 signed with manual pre-set iris.
  The lens mount carries a depth of field indicator and
 distance settings in both feet and metres as well as an infra
 red focusing mark. Focusing is effected by a helical focusing
 mount which is part of the lens mount. The focusing range
 of the standard lens is exceptionally wide and covers *ithout
 any attachment distances from l7 in. to inflnity.
  The shutter is a focal plane type, travelling close to the
film and ensuring full protection of the negative material.
With this type of shutter, lenses can be changed while the
camera is loaded and whether the shutter is tensioned or
 released. The full range of shutter speeds, I sec. to 1/1000 (or
 l/500), B, is on one dial, which does not rotate when the'shutter           is released. The shutter is synchro nizedfor flash bulbs
and electronic flash with standard 3 mm. co-axial outlets.
The shutter release is on the camera front and in addition
there is a second release (except on the Sensorex) in the
camera top plate. A cable release can be attached to all
models.
  The Sensorex, Sensomat, Sensomat RE and FVT models
have a built-in through-the-lens exposure meter, while for
the models F and FV a pentaprism finder with CdS through-
the-lens meter is available as an extra converting these
models effectively into a FVT model, or alternatively a
clip-on CdS meter can be used.
  The measuring systems of the different models vary. The
                              5
View original page 7Page 8 · Read text
www.butkus.us
Sensorex offers full aperture and stopped down aperture
reading. Full aperture reading can be obtained not only
with the automatic aperture lenses, but also with lenses with
manual or pre-set aperture control. The Sensomat measures
stopped down with a measuring field arranged to avoid over
exposure caused by a bright sky. On both instruments the
meter is coupled to the shutter speed and lens aperture. The
reading is taken while looking through the finder. The TTL
meter built into the prism of the FVT model and usable on
F and FV cameras is not coupled to the shutter speed and
aperture of the camera, the reading is taken at full aperture
and an average exposure is obtained of the whole subject
area. The reading is seen on top of the prism and transferred
to the lens or shutter.
  The CdS meter is extremely sensitive, covering EVI to
EVl8 at 100 ASA on Sensorex; EV3 to EVl8 on EE
coupling of Sensorex EE; EV1.6 to EVIS on Sensomat;
EV4 to EV18 on FVT meter.
  The film advance is by a quick-wind transport lever which
with a single stroke advances the film, operates the exposure
counter and cocks the shutter, automatically preventing
double exposures or blank frames.
  An exposure counter built into the top plate re-sets itself
to start when the camera back is opened. The Sensorex has
also a delayed action release (self timer) built into the front
plate. This gives variable delays up to l0 sec. and can be
cancelled on changing one's mind.
 A film speed reminder disc on cameras without meter and                   I
film speed setting on cameras with meter is provided. The                                     t.!
camera takes standard 35 mm. cassettes. The film runs from
the cassette to the fixed take-up spool and is rewound after                  j
exposure. The rewind knob incorporates a fold-over rewind
crank for convenient and rapid rewinding of the exposed
film.
 A tripod bush is placed centrally below the lens in the
camera base. The approximate dimensions of the camera
with lens are 147 x 95 x 90 mm. overall; the weight with lens
is about 1000 g.
                            6
View original page 8Page 9 · Read text
THE MIRANDA VIEWING SYSTEM


                                                      Pentaprism


                                                     Viewfinder eyepiece


                                                  Condenser

                                                         Fresnel screen
                                                     Mirror  -{W$.-
                     4                         Film plane    \N) tl/l
                                                      Lens


 Above: A section through the camera shows the optical system of lens, mirror, viewfinder lens and
fresnel screen, pentaprism and viewfinder eyepiece. The broken line indicates the path of the light
when the mirror is in position for viewing and focusing.

Below: When you press the shutter release, the iris closes down to its pre-set aperture, then th,e
mirror flies up, the shutter opens and closes, the mirror returns to its original position and the iris
opens to full aperture. Thus, the light is shut offfrom the viewing screen (as symbolised by the black
strip in the bottom diagram) only during the actual exposure. The image is visible at all other times
both before and after taking the picture.
 o
View original page 9Page 10 · Read text
www.butkus.us
 The ilIiranda lllodels
 o THE MIRANDA SENSOREX is as described above with
 eleven shutter speeds from I sec. to 1/1000 sec., B, Fp and X
 flash synchronization and built-in self timer, built-in TTL
 e.xpos_ur-e measuring at full aperture, stopped down or selec-
 tive. It has a film advance indicator.
  THE MIRANDA SENSOREX II is the successor of the
 Sensorex, updated in outside appearance. The lens selector
 dial has been transferred from the camera front to the
 rewind knob on top of the camera. Focusing is by micro-
 split.image. The accessory shoe has direct cable-less (hot-
 shoe) fl?rlt contact. The back cover is opened by pulling up
 the rewind knob.
 . THE MIRANDA SENSOMAT  is similar to Sensorex but
 its TTL meter measures at stopped down aperture only. It
has no self timer nor film advance indicator.
 THE MIRANDA SENSOMAT RE is the Sensomar
renamed.
  THE MIRANDA SENSOMAT RS is a Sensomat RE
without the built in exposure meter. It also has only one
shutter release, on top of the camera.
 THE MIRANDA AUTO SENSOREX EE has com-
pletely automatic EE exposure control mechanism, in
addition to the facilities the Sensorex II offers. The auto-
mation can be set for average or spot light measurement.
The EE coupling can be disconnected *hen shooting at
speeds outside its range. It uses special Auto Miranda E
lenses, designed for EE photography. Other Auto Miranda
lenses or the T-2 or T-4 Soligor lenses can only be used for
manual photography.
  The Auto Miranda E lenses however can be used on the
                                                 16.other Miranda cameras except on aperture f
o THE MIRANDA FVT is similar to the Sensomat but it
has_an uncoupled TTL meter built into the prism finder and
a film advance indicator.
o THE MIRANDA FV is similar to the FVT but without
the TTL meter in its finder prism. A Miranda snap-on CdS

                                8
View original page 10Page 11 · Read text
meter can be attache4 and coupled to the shutter speed dial
 or the prism replaced by the TTL prism of the FVT camera.
 o THE MIRANDA F is a FV camera with shutter speeds
 Lp^.r]o l/5-00 sec., B. Early models of the F have ,p..^a, io
 l/1000 sec. but do.not-accept the "snap-on" meter,^and the
 aperture pre-selection knob is on the camera body (not on
 the lens).
  THE MIRANDA G whichis not referred to separately in
 this Guide is a specialist version of the Miranda FV
 teaturing an extra large mirror system for brightest viewing,"amera
 particularly with long focal lengih lenses, mirior lock, builTl
 in delayed action release. In addition to ihe interchangeable
 finder- system,. it has also interchangeable focusing screens.
 It,has been designed. for the requiremdnts of the phoiographer
 who.extensively takes close-ups, for copying,- photSmicro-
 graplly and astronomical work-in additiori to-geireral photo-
 graphy.
 o THE MIRANDA AuroMAX III which is not referred
to separately in this Guide, is the predecessor of and similar
to the Sensorex, but has a built-in CdS meter with separate
sensing eye (not through-the-lens) and a split image range-
finder centre in place of the microprrsm.


O:Discontinued
View original page 11
Page 12 · Read text
www.butkus.us

      IIANDLING THE MIRANDA
  In order to simplify the description and handling of the
Miranda SLR camera without being confused by dffirent
        of individual models, this-_guide- .is diyi/ed into afeatures"general        section which applies to all models, while the indi'
 vtduat requirements and dffirent handling of each model are
found on the green poges.
  For convenience a symbolic reference system is also used in the                                     appears further details will begeneral section. Wherever the sign Iiound in the camera pages of the green section for each camera. The
appropriate pages ar6 marked accordingly in the bottom left or right
hand corner.

Holding
    It is obvious that the camera should be held as steady as
 possible. The slightest shake, even if not seen in the negative,
 will become visible in the enlargement.
  FOR HORIZONTAL PHOTOGRAPHS  hold the camera
 in the palm of both hands, the fingers gripping the front of
 the body, the thumbs against the back. Use the thumb and
 middle hnger of the left hand to move the lens focusing
 mount, and the index finger of the right hand to operate the
 release button. Keep the elbows pressed against the body.
 Either the right or the left eye may be used on the finder.
  Always stand with your legs aPart.
  FOR- VERTICAL PHOTOGRAPHS turn the camera
 through 90o so that the left hand presses the camera against
 your forehead from above. Use the thumb and the index
 hnger to move the focusing mount.The right-hand holds the
 cairera from below with the index finger on the front release
 button. It is of no consequence  if the position of the hands is
 reversed: you can suit your own convenience.
  To releise the shutter, press the release button with the
 ball of the finger (or thumb). Use finger pressure only, and
 keep the hand-and its grip on the camera steady. The actual
                              10
View original page 12Page 13 · Read text
H OLDI NG
 For horizontal shots (right)
 hold the camera in the palm
 of both hands, the fingers
 gripping the front of the
 body, and the  thumbs
 against the back. Focus the
 lens with the middle finger
 of the left hand.

                                                                   Press the elbows close to
                                                                       the body.
        q
                                                                   always stand with your legs
                                  For upright shots (left) turn                  well apart.
                                the camera through 90o so
                                   that the left hand supports
                                                       it from underneath. Alter-
                                    natively, turn  it round in
                                  the other direction, so that
                              the left hand presses the
                                  camera against the forehead
                               from above. ln this case the
                               index finger of the right
                               hand presses on the release
                                  button, while the palm of      and hold quite still while                                  the right hand supports the             you
                                 weight of the camera.


  V                            release.)iI


Above;,lt-is important to keep the camera really steady during the exposure and for a fraction of a
second after pressing the release button. Whenever possible-support your body against something
solid, such as a tree or wall or p-rop up your hands against your knees or a table, particularly witfi
slow speeds. Use a cable release for time exposures from a tripod (page 38).
                                               il
View original page 13Page 14 · Read text
www.butkus.us
pressing down must be done slowly and smoothly. The
slower the exposure time, the smoother must be the release.
  For slow exposures in the hand, it is advisable to rest the
elbows or at least to lean the body against some support in
order to avoid shake. In this way,ll15,l18 and even l/4 sec.
can be risked without incurring noticeable camera shake at
small degrees of enlargement.
  Such a support is also desirable for faster exposures, as
quite a lot of movements take place inside the camera after
pressing the release button. A slightly unsteady hold may
easily lead to blurred pictures.
  The use of a tripod is necessary when taking time expo-
sures and it is also recommended for speeds from 1/15 to
 I sec. For upright photographs from the tripod use a ball and
socket head to allow changing from horizontal to vertical
position.
Carrying
  To be ready for quick action, it is best to carry the camera
on a short strap round the neck so that it lies on your chest.                                                    j
Lifting it to the eye then takes a split second.                                                            I
  For convenience and protection the Miranda SLR should                            I
always be carried in its ever-ready case. This case is designed
to hold the camera ready for use. The flap of the case is                 t
removable when the camera is in continuous use to enable
quicker working.
Yiewing and Foeusing
  The image reflected by the lens on to the screen is always
visible except during the actual exposure.
  The brilliant image appears in natural size, free from
parallax. A fresnel lens ensures even illumination into the
very corners. A viewing pentaprism shows the image upright
and right way round at eye level.
  The best way to arrive at critical definition is to turn the
focusing mount of the lens slowly to and fro while observing
on the ground glass the subject to be focused. As you turn
the mount, the image becomes more and more sharp up to a
certain point, beyond which it will again lose definition. At
                             t2
View original page 14Page 16 · Read text
www.butkus.us
this "beyond" stage turn the mount back again, narrowing
down th-e degree of movement until you arrive at the qoint
of best definition. The centre of the reflex image is a micro-
prism area; in it you will see the image snap into critical
focus by losing its jagged edges.
Focusing Moaing Subiects
  The orthodox way of focusing with the ground glass-may
be adopted for taking photographs 9f subjects that are fai-rly
station-ary. A        method of_ focusing with the reflex                .differentscreen rs requlred when taking subjects in motio.n. Set the
lens to a di3tance at which the subject will be in a given
moment, or focus at some spot which it actually has to pass,
and preis the release button when the subject reaches the
             point.'pre-focused                  liable to react self-consciously  (e.g., child-  With subjects
ren) set the lens to a suitable distance, ald then approach
the'subject, exposing as soon as the reflex screen i4"g.appearisharp. Alternatively, focus on an objggt which is at
the same distance from the camera as the subject, but in a
different direction. When you have found the range swlng
round to press the release button as soon as the victim slips
into the field of view of the finder.
Waist Leoel Finilers
  The viewfinder of the Miranda SLRis interchangeable and
can be replaced by one of several waist level flnders by
simply slid-ing the prism flnder backwards after releasing.-its
loctiirig device anilpushing in the rePlacement finder until it
clicks into position. See also page 66.
  The wais^t level finder allows the screen image to be viewed
from above at about chest level and is particularly useful for
low angle shots, children (so as not to dwarf them by tilting
the cairera downwards), for focusing while holding the
camera above the head, to give it a higher viewpoint and to
allow the camera to be held at right-angles to the standing
                   photograPhs.         for candidposition^                         reflex streen appears upright but re-            on the  The picture
versed ieft to right. Similarly, movements are also shown in
                             l4
View original page 16Page 18 · Read text
www.butkus.us
reverse and the camera has to be turned against the apparent
movement of the object to follow it. Care should be taken to
avoid light entering the camera through the focusing screen                               I
which may cause incorrect exposure. This is simplest done
by shielding the reflex flnder with one hand while taking the
reading. The three types of waist level finder are detailed on
page 66.                                                                                                                                                     I
Pre-Yiewing the Depth ol Field
  You can examine the precise depth of field you get with                j
the pre-selected aperture before taking the picture. Press in                      1
                                                                                                                                                                                                                                                                                                                                                                                         .lthe depth of field preview lever on the lens mount of the
automatic pre-set aperture lenses (in the 2 o'clock position),                         I
and the aperture closes to the selected opening. The image
will of course become darker but your can see the extent of
sharpness to the foreground and the background from the                       l
subject you have focused on. See also Aperture and Depth of
Field, page 42.                                                                                                                                    I
Inlra Red FiIm Indicator
  When infra red film is used, focus in the ordinary way.
Then read off the distance on the lens mount scale and turn
this to the red letter R engraved on the distance scale. For
example, if the focusing scale points to 30 ft., turn the focus-
ing ring so that the 30 ft. mark comes to lie opposite the R.
Delayed Action Release
  On the Sensorex, a self timer, or delayed action release, is
built into the front of the camera body to the left of the lens.
This timer permits self-portraits and is also useful for hand-
held exposures with slow shutter speeds.
  To use the delayed action release, swing the lever down-
wards as far as it will go before or after the film transport
lever has been advanced. To bring the timer into action,
press the shutter release button, and the shutter will auto-
matically be relased after about 10 sec.
  By turning the lever only part of the way, the delay time
is reduced. This method can be used to enable the hands to
be shifted to take a particularly steady grip of the camera.
                             l6
View original page 18Page 20 · Read text
www.butkus.us
Exposure Control
. The metering field.along the right hand edge of the viewfinder givesfull intbrmation on the metering system:
  The correct exposure area lies between the warning marks of under-
and over-exposdre and shows the aperture values16, l.!,9,5.6,4,
3.5, ?.p, 2, 1.8, 1.4. Correct exposure with the EE setting is onlypossible when the meter needle remains in the field between over-
exposure and under-exposure.
  Average and Spot Light Measurement. The average light measure-
ment is generally employed under normal light conditions, for land-
scapes, groups, etc. It mainly reduces sky brightness preventing it from
exerting an undue (falsifying) influence on the total exposure. Spot
light measurement determines the correct exposure for a definite smatl
section of the picture field, indicated by the space occupied by the
multi-split-rangefinder.  It is mainly used for against-theJight piciures,
subJects with extreme contrasts, stage photography, wide open scenes
of sea, mountains, landscapes with -high lighi-confrast. Here one can,
by using the "S" setting, choose tle settion one wants correctly
exposed. By turning the meter switch on top of the camera to A or S
the-triangular arrowhead near the top of theright edge of theviewfinder
will point to the there shown A:average setting -or S:spot setting
of the meter.
Automatic Exposure ( EE                     -pre-select    )
   Set film speed,            shutter speed, set aperture ring to EE, set
f9r 4 or S light measurement. While adjusting focus and determiningthe fleld, check that the needle remains within-the field between under-
and over-exposure and release the shutter when the needle has come
to rest. If the use of another aperture than the given one is preferred
one can rotate the shutter speed dial until the desired aperture appears.
The shutter has to click into position.
  The range of coupling of the EE meter varies according to the
maximum aperture of the lens employed and the film speed. This
range with the standard 50 mm./1.4 is: at 25 ASA from 1 to lll25 sec.
at 50 ASA from 112 to 1/500 sec., at 100 ASA from 1/4 to 1/1000 sec.,
at2O0 ASA from 1/8 to 1/1000 sec., at 400 ASA from 1/15 at 800 ASA
U30 and at 1600 ASA from 1160 to U1000 sec.
Manual Ooenide
  To take pictures at a shutter speed outside the range of the auto-
matic coupling one can depress the manual override button in the
centre of the shutter speed knob and turn the shutter dial to the speed
required. The meter needle moves according to the light prevailing,
but the EE is not operative. The EE function is automatically re-
engaged by turning the shutter speed back to a value within the
coupling riurge. The manual override button disengages  itself.
                                 EEl-4_ rrlANPA AUr9 SENSOREX
View original page 20Page 22 · Read text
www.butkus.us

MIRANDA SENSOREX AI\D SENSOREX II
  The Miranda Sensorex is as described on pages 4-6.
  THE iENS fitteC as standard is the Aufo Miranda 50 mm- /1.9,               focusing down to 17 in. (0.43 m.) and using 46mm.-screw-inft.f  or f 1.4,         hlters and 50 mm. push-on lens hoods.
  THE SENSOREX II has its lens selector dial on the camera top,
foJuiing by micro-split image, an ac@ssory _glroe i-s built into the top
of tne [entaprism dnd has-direct cableless "hot-shoe" flash contact.
ifre Uait< cover opens by pulling up the rewind knob. The facia is
restyled.--Fbn      closE-UP PHOTOGRAPI{Y below the minimum focusing
ranel of 17 in., close-up lenses, extension tubes, bellows focusing
attihments, lehs reveriing ring and helicoid focusing mount are
available.-  Oiftnn ACCESSORIES include waist level finders, accessory_shoe,
interihangeaule ground glass screens, micros@pe adaptor, sli{e {.upli-
Cator, ey@up, eyesight ad]ustment mount-s, pis-tol grip, lens lrood, filters,
case and an extensive range of wide angle, tele and zoom leilles.

Loading (see Page 17)
1. Open camena back.
2. Insert film.
3. Attach fflm leader to take-up spool.
4. Close camem and take up fflm slack.
5. Make two btind expodur€s and wind for first exposure.                                                                 the                                       spee4                                             rirnand                               the shutter                       up                Uy fifting         speA                                                                  !.urn it until6.-- $tfit                                                                           in                                                mark                                   points                                             red indicator                                        [o the                   ASA                  usedin                      filin   ipeeO ofihe
   the cutout in the sPeed dial.

                (s€e Paee 20) llnloailing
1. Push in rewind button.
2. Rewind film.
                back, remove film.;: 6HL'#;

 Shooting (see page 17)
 1. Wind film transport.
2. Pre-set shutter speed.
3. Set co6ect aperllre with the built-in meter. See below "Exposurc
   Control".
 4. Focus and deternrine picture area.
 5. Release the shutter gently.
 l6   I'IIRANDA SENSOREX
View original page 22Page 24 · Read text
www.butkus.us
Exposure Control by Open Aperture Reading
    . Thr open aperture.reading  is most suitable for normal subject mattergiving mzu<imum brightness of the screen for viewing and prevents
inaccuracy of measurement from back light entering through the finder
gyeRiece. To use the CdS meter of the Sensorex for open aperture read-
mg:
1. Switch on meter by pushing the lever on the base of the rewind knob
   forward to the 9 o'clock position. Sensorex Il-black mark. On
   Sensorex Only: in the cutout of the disc below the rewind knob
   marked 'oBattery", the word ON will appear. It is essential that the
    disc, which is at the same time the flash selector, is set either to X
   or FP.
2. Set the lens selector-on Sensorex I the circular short tube pro-
   truding on the right of the camera fron plate-by turning the front
   milled rim of its disc until the aperture of the lens used appears in
   the cutout on its top, i.e. with 50mm. f 1.9 lens to 1.9. The lens    selector dial carries the values 1.4; 1.8 (1.9);2.8; 3.5;4;5.6; 8. On
   Sensorex II turn the lens selector dial on the base of the rewind
   knob until the widest aperture of the lens used points to the black
    Iine engraved on the camera top plate.
3. Pre-set the shutter speed required.
4. Point camera to the subject and turn the aperture ring of the lens until
   the needle on the right hand side in the viewfinder is in the centre of
   the claw. Alternatively, pre-set the aperture and turn the shutter
   speed knob until the needles match. With automatic lenses the
   camera is now ready to take the picture. In case of manual or pre-set
   aperture lenses the aperture read off the diaphragm ring is trans-
   ferred to the aperture scale on the lens to be ready for taking the
   picture.
Exposure Control by Stopped Down, Reading
  The stopped-down aperture reading is mainly used for photomicro-
graphy, for lenses without determinable aperture values. To use the
CdS meter of the Sensorex for stopped-down readings:
1. Set both aperture selector (as with open aperture readings) and the
   aperture setting lever to f 1.4.2. Pre-set the aperture required on the lens aperture ring.
3. Point camera to the subiect and turn the shutter speed dial to match
   the needles in the viewfinder (as with open aperture readings) while
   taking every precaution to avoid light entering the viewfinder eye-
   piece. It is best to use the eyecup (see Accessories, page 69). You are
  now ready to take the picture.
Yariable Sensing Spot
  The sensing elements of the meter are behind the reflex mirror within
the optical axis. The metering conditions and angle change automatic-
ally with different focal length lenses. With a wide angle lens, the most
useful average reading is obtained while with a telephoto lens the area
 I 8 MTRANDA SENSOREX
View original page 24Page 26 · Read text
www.butkus.us
and angle of the sensing spot decreases giving a "spot" reading. The
variable sensing spot on the screen has not been marked because  it
would impair a clear view of the image on the scre€n. The measuring
circleis ona28 mm.lens 10o l0', 35 mm.8o 10',50 mm. 5" 40',135 mm.
2" 13',400 mm. 45'and 800 mm. 23'.
Changing Battery
  The CdS meter is powered by a mercury battery. The life of the
battery in normal use is in excess of one year. Its power declines sharply
towards the end of its life, resulting in a sluggish movement of the meter
needle in the finder, indicating that the battery needs to be replaced.
  To change the battery, unscrew the battery compartment lid on the
top of the camera back wall, below the rewind knob, remove the old
battery and replace by a fresh one. The Mallory 625 or equivalent bat-
tery is used. When inserting the battery make certain that its *  sign
points towards the back of the camera (the screw lid) and close the lid.
   It is important to keep both battery and the contacts free from finger-
marks and clean, because perspiration,  dirt, etc., will impair the func-
tion of the meter. The battery should be removed and stored in a dry
place if the camera is not used for some time.
Special Controls
  SELF-TIMER. The Sensorex has a buil t-in self-timer (delayed act ion)
release (see page 16).
  FLASH. The camera is synchronized for flash bulb and electronic
flash use (see page 48).
 INTERCHANGEABLE VIEWFINDER. To change the viewfinder
(see page 68).


I  t0 l.ilRANDA SENSOREX
View original page 26
Page 27 · Read text
MIRANDA SENSOIVIAT,
          SENSOMAT RE AND RS
          The Miranda Sensomat and Sensomat RE are as described on pages
        4 to 6. Their TTL meter uses the stopped down aperture measuring
         system only. The Sensomat RS is of the same design as,the model RE
         but without the built in exposure meter and with only one shutter
           release, on the top of the Camera. They have no self-timer or film
          transport indicator.
           fflg fnNSES fitted as standard are the Auto Miranda 50 mm./1.8
         or f1.4, focusing down to 17 in. (0.43m.) and using 46mm. screw
             filters and 50 mm. push-on lens hood.
       FOR CLOSE-UP photography below the minimum range of 17 in.,
         close-up lenses, extension tubes, bellows focusing attachments, lens
          reversing ring and helical focusing mount are available.
       OTHER ACCESSORIES include waist level finders, accessory shoe,
          interchangeable ground glass screen, microscope adaptor, slide dupli-
           cator, eye-up, eyesight adjustment mounts, pistol grip, lens hood, filters,
          case and an extensive range of wide angle, tele and zoom lenses.

      Loading (see page 17)
         1. Open camera back.
         2. Insert film.
         3. Attach film leader to take-up cpool.
         4. Close camera and take up film slack.
         S. *fate two blind exposures and wind for first exposure.
         6. Set film speed by lifting up the shutter speed rim and turn it until the
            speed of the film used in ASA points to the red indicator mark in
            the cutout in the speed dial.
       llnloading (see paee 2o)
         1. Push in rewind button.
         2. Rewind film.
         3. Open camera back, remove film.

       Shooting (see page 17)
                 \trinfl film transport.i1.12.        Pre-set shutter speed.
           3. Set correct aperture on models Sensomat and Sensomat RE with
            the built-in meter. See below "Exposure Control".
           4. Focus and determine picture area.
           5. Release the shutter gently.
                                  MIRANDA SENSOMAT  II  I
View original page 27Page 29 · Read text
EXPOSURE CONTROL
ffiffi*


                            When.using the-Sensomat and Sensomat RE with automatic tenses, theffi             procedure  for obtaining correct exposure (obove) is first to wind on the
                                film and ser the shuttei speed. Theh press the meter-activating brtton
                             yhjls pointing the camera at the subjict. Finally, turn the            iin!                                       (Ieft) until the needle is centred between the claws. For non-automati;"p"rirre
                                   lenses, the procedure is reversed (below). The aperture  is set firii and
                             the shutter speed adjusted to centre the needle. i;;Y*ttit*!;:;iil:1i:;iffi


             o
                                                                           left: The actual area of the view measuned
                                           by the Sensomat and Sensomat RE
                                                         through-the-lens meter.ffiffi


                                   MTRANDA SENSOMAT t3 I
View original page 29Page 30 · Read text
www.butkus.us
Exposure Control lnot on model RS)
  The sensing cell of the Sensomat meter is situated behind the mirror
in line with the optical axis and meuuures a fair average of low lieht
while cutting out the influence of sky brightness by the expedient of the
single CdS cell being composed of three separate light-measuring ele-
ments positioned so that the major account is taken of the lower and
middle parts of the subject.
  To use the CdS meter of the Sensomat with Auto aperture lenses:
1. Transport the film. This activates the meter button at the same time.
2. Pre-set the shutter speed required.
3. Press the meter button (on the front of the camera).
4. Point camera to subject and turn the aperture ring until the needle
  on the right hand side in the viewfinder points to the centre of the
   claw. The camera is now ready to take the picture. Alternatively,
   pre-set the aperture required and turn the shutter speed dial.
   If the aperture has to be opened up for any reason, i.e. for refocusing
before thC picture is taken, the exposure meter release button (the small
button jusf above the meter activating button) has to be depressed.
  This meter release button should also be depressed  if the camera is
not used for some time. It ensures that the meter is switched  off.
  The * and    signs on the claw of the meter indicate the directionof over- or under-exposure-              respectively.

Using Preset or lllcr,lual Aperture Lenses
  The general procedure and remarks as above apply but select and
pre-set on the lehs the aperture required and turn the shutter speed dial
until the meter needle is in correct position. If no suitable shutter speed
is obtained, adjust aperture (larger for faster speed and smaller for
slower speed) and turn the shutter speed dial again.

Changing Battery
  The CdS meter is powered by a mercury battery. The life of the bat-
tery in normal use i5 in excess of one year. Its power declines sharply
to*ards the end of its life, resulting in a sluggish movement of the
meter needle, indicating that the battery needs to be replaced.
  To change the battery, unscrew the battery compartment lid in the
base of the camera, remove the old battery and replace by a fresh one.
The Mallory 675 or equivalent battery is used. When insertilg the
battery malie certain that its *  sign points towards the screw lid.
   It isimportant to keep both battery and the contacts free from !ger-
marks an-d clean, becaGe perspiration,  dirt, etc., will impair the func-
tion of the meter. The battery should be removed and stored in a dry
place if the camera is not used for some time.
 I  t4 MIRANDA SENSOMAT
View original page 30
From the M. Butkus archive. Original publisher and archive notices are retained.
Check the model and edition against your equipment.
PDF verified 2026-10-10.