Film cameras
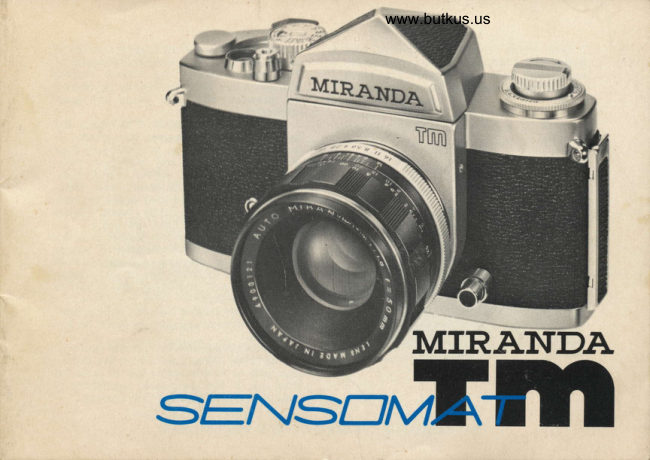
Miranda Sensomat TM User manual
User manual for Miranda Sensomat TM. 33 pages in English. Read the original PDF, download or print a copy without registration.
33 pagesEnglish11.2 MB PDF
Loading your manual…Open PDF directly
Document details
- Brand
- Miranda
- Model / document
- Miranda Sensomat TM
- Document type
- User manual
- Language
- English
- Pages
- 33
- File size
- 11.2 MB
- Category
- Film cameras
- Document date
- Not specified in catalog
Search available document text
Find a term, then jump to its page in the original PDF. Image-only pages may not be searchable; check the PDF for exact wording and diagrams.
Page 2 · Read text
We thank you for  selecting our         As the pioneer of the single-lens reflex in
MIRANDA Sensomat TM as your com-       Japan and as a specialized manufacturer of
panion and hope that it gives you much         this type of camela, the Miranda Camera
pleasure and satisfaction for a long time to      Company has been continually developing
come.                                               its products with new ideas and great
                                                              originality.
                               MIRANDA Sensomat TM which has
                                     become your companion from today, is
                                          equipped with a lens of extremely high
                                                    resolution, a bright and easy-to-use view-
                                                 finder, quick-return milror, wide inter-
                                                changeability of viewfinders and other
                                                   distinctive features found only on high
                                             grade cameras, and rightly desewes being
                                                         called a perfect SYSTEM CAMERA.
                                                                   It  has, moreover, an almost noiseless
                                        shutter  and   vibration-free mirror
                                           mechanism, a compact and easy-to-hold
                                            body, and a complete line of interchange-
                                              able lenses and convenient accessories to
                                                     zuit all occasions.
                                   We firmly believe that it is able to meet
                                      any requirements of the amateur or pro-
                                                              fessional.
                                                     Before taking your first picture, however,
                                      we earnestly advise you to read this Manual
                                                    carefully as it will enable you to make the
                                                 best use of the remarkable capabilities of
                                                           this MIRANDA Sensomat TM Camera.

           TM STANDS FOR: PRAKTICA SCREW MOUNT 42mmd
View original page 2Page 7 · Read text
SPECIAL FEATURES


Partial Average Light Measwing                     Interchangeable Finder System
   The CdS meter of the Miranda Sensomat TM       For a Single Lens Reflex system to manifest
measures a fair average of low lights while      its fullest capacity, it is an absolute necessity
cutting out the influence of the sky brightness.     that its viewfinder be interchangeable with
The measuring area does not cover the entire    other more convenient types for specific pur-
field of view but gives an accurate average of     poses. If a viewfinder is not interchangeable,  it
the low lit zubjects, an additional prevention    puts immediate limitations on such a camera.
against over or under-exposrre.              The Miranda Sensomat TM has viewfinders,
                                          which can be interchanged,  eyelevel, waistlevel
                                               and magnification types being among the models
                                                          available.
View original page 7Page 8 · Read text
www.butkus.us


A Compact Easy-To-Hold Body           A Complete and Substantial Line of Inter-
   Rounded corners and smart body, small and    changeable Lenses and Accessories
light. The compact, easy-to-hold body is free       Sensomat TM's compact body has a number
from vibration and enables you to shoot the    of excellent capacities and is an easy-to-use
subject accurately from any angle. The SEN-   SLR Camera for amateurs and professionals.
SOMAT TM body has the interchangeable finder   The Sensomat TM is also completely furnished
system of other MIRANDA models, like F, G,    with many different types of interchangeable
and RE, and the capacity to accept a wide range     lenses; from 21mm to 800mm, and abundant
of interchangeable  lenses and accessories. This    accessories; and as a SYSTEM-CAMERA,  it
is the real proof of the excellency of a SLR     enables the owner to make the best use of the
Camera specialist; MIRANDA.                   unlimited capacities in every field, such as
                                            documentary records, close-ups of documents
                                         and specimens, copying, and scientifical micro-
                                                    scopic-photos of medical science, industry and
                                                     education.
View original page 8Page 10 · Read text
www.butkus.us
           7
                              --j                                         ':fr
5. Ad1ust the                                  6. Push the diaphragm activating button
    ring.


                                                               -
7. Adjust the lixposure either by turning the        8. Hold the camera firmlv and release
   diaphragm ring or shutterspeeds dial.                   shuttcr button.
View original page 10Page 11 · Read text
FIIM IJOADING

   The 35mm film is advanced through rota-
 tion of the sprocket and not by direct winding
of the spool; therefore, the sprocket must
engage the film's perforation perfectly. To
check whether the film is advancing properly,
 the rewind knob is first turned slightly to take
up any play in the film; then if the advance
 lever is wound the rewind knob should rotate.
But if the rewind knob fails to turn, it indicates
that the film is not properly loaded and
requires reloading.
o Always load or unload the film in the shade.
     lf no shade is available, do it in the shadow                              Sprocket        Rapid
   ofyourown body.                                                  Wheel          Loadr  Whenever possible, avoid loading and un-
    loading in a dusty place or at the seaside
   where strong salty wind may damage the
o Whencamera.loading or unloading, take care not to
   touch the strutter curtains
View original page 11Page 12 · Read text
www.butkus.us


l. Open the back cover          2. Insert cartridge into film      3. hsh back rewind knob to
   Press lock button in the        chamber                               original position
center of right edge of back         Pull up rewind knob and            If the knob does not go all
cover and pull up clip lwer at      insert cartridge, taking care      the way down turn it a little
top at the same time, which     that the projecting end of      to the left or right
immediately opens the back       cartridge faces down.
cover. When back cover is
opened, counter automatically
returns to "S" (start) mark.
View original page 12
Page 13 · Read text
4. Insert tip of film into the     5. Turn film advance lever un-     6. If  film is advancing pro-
   spool's film slit                             til perforations on both            perly, close back cover
   Insert leader of film. See         sides of film are engage4       Upon closing, push down
that the sprocket engages the       by the sprocket                 clip lever, which will auto-
film perforation.                             If one winding fails to       matically engage the lock but-
                         make sprocket catch the per-      ton and the back cover be-
                                      forations on both sides of the      comes securely locked-
                                       film, press shutter button and
                               wind again.


 10
View original page 13Page 14 · Read text
www.butkus.us


7. Turn film advance lever     8. When film  counter in-     9. As soon as you have loaded
   several times to wind uP          dicates "1"  it means film      the camera, be sure to adjust
   the fogged portion of film          loading i$ completed             the ASA speed indicator (ASA
   Shoot several blanks and      From here. film counter      25- 1600) on the  shutter
continue winding the film       will move frame by frame for      speed dial to the ASA speed of
until  filrn counter indicates     each shot to indicate the num-      the film you have loaded. Lift
"1". Then, slightly turn re-     ber of pictures which have      the shutter speed dial and ro-
wind knob in the direction of     been taken.                         tate it until the required ASA
arrow to take up any slack.                                            speed is opposite the indicator
                                                                     mark.


                                                                                                    11
View original page 14Page 15 · Read text
HOW TO USE THE WINDING LEVER


                                                www.butkus.us


The Winding Lever, When Operated,          The winding lever of the MIRANDA SEN-
Simultaneously Perform s Various Functions     SOMAT TM is of the single stroke, 180", type.
l. The film is transported one frame               Please make sure to fully operate the lever till it2. Film counter moves up one number              stops. Never use any force on the winding lever;
3. Shirtter  is cocked for next exposure        a broken film perforation could cause some
                                                    resistance, and force, used on the winding,
                                               could damage the internal mechanism.
View original page 15Page 16 · Read text
www.butkus.us
SETTING THE SHUTTER SPEED

                                              r  The red "X" between 30 and 60 indicates
                                                        the shutter qpeed of approximately l/45 sec.
                                                           for synchronization  with electronic flash.


                                 SHUTTERWORKING RANGE BY ASA SPEED
                                                                                                                                                     \llA-tdShutier B 1 % % X X' X h XrrhohoXo
                                                                                25                                                                                50  ///////////////z                                                                               100                    +z'/z
  To set the shutter speed, the shutter speed        2N
dial is turned to the left or right until the             100desired qpeed number lines up with the shutter             800               ?speed indicator. The dial rotates in either           1.600         ?zzzzzzzzzzzZ
direction.
r The marks "B, l, 2 .... 1000" indicate        Shutter speed can be freely changed before
   "Bulb, I sec., LlZ sec.... U1000 sec." shut-        or after winding.
    ter speed positions.                        When turning the shutter speed dial, see that
.  "8" (bulb) is for long exposures with the            it falls correctly into a click-stop position. If
    shutter remaining open as long as the button        set to intermediate positions, the shutter
    in depressed.                                                will not operate at an accurate speed-

                                                                                         13
View original page 16Page 19 · Read text
EXPOSURE SYSTEM
   A very ingenious system in the exposure meter, which    PX 675
  accurately measures the light, that enters the camera through
  the lens, has been incorporated in the Miranda Sensomat TM.
    The sensing area of the exposure meter is invisibly placed
  behind the mirror always in position for exposure reading,
  except for the split-second mirror action when taking a picture.
  The exposure meter system is cross-coupled and responds to
  shutter speed or lens diaphragm adjustments. Either shutter
  speed or lens diaphragm may be preselected with the second
  adjustment used to set the exposure meter.
    An important fact is the positioning of the CdS cell directly
  behind the lens, as this obviously gives the most accurate
  "direct" light value and is less sensitive to extraneous light
  entering through the eyepiece.
    The exposure meter of the Miranda Sensomat TM has been
  so designed as to cover the widest possible range of exposures,
  from EV I to EV 18 filrn speeds from ASA 25 to ASA 1600. Correct exponrre is easily obtained
  and isvisible in the viewfinder, an added feature for last minute adjustments.
    The Miranda Sensomat TM through the lens exposure system is of the closed-down aperture and
  partial average type, very convenient for a wide range of applications, and especially convenient in
  macro-micro and close-up photography, and when using lenses of an unknown f-stop number.
    The exposure meter of the Miranda Sensomat TM is provided with a warning system for over-or
  underexposure, which could be caused by either too bright or too dim light conditions. This warning
  system is incorporated in the shutter speed/ASA-speed dial, which will block when attempting usage
  outside this safety-zone. Extension of this range can be obtained by changing the ASA-speed dial, but
   is not advisable when color film is loaded in the camera.
    The table on the next page shows the range within which optimum results can be obtained.
16
View original page 19Page 21 · Read text
For exposure determination by measuring the light on the subject, it is a general rule to give a prime
importance to shutter speed, and determine f-aperture by lens diaphragm. In this case, the sequence of light
measurins is as follows.
www.butkus.us


(l) Determine shutter speed           (2) Advance film                        (3) Press the diaphragm activat-
                                                                             ing button
1. Set desired shutter speed.                                          work
2. Wind film advance lever to advance film.
3. Press diaphragm activating button to close the diaphragm.
4. Turn the diaphragm ring till the needle reaches the center position in the viewfinder.
When prime importance is given to diaphragm opening for such work like close-ups or copying,
diaphragm opening must be set fust, and then adjust exposure by turning shutter speed dial.
*  The light acceptance area is not indicated in the finder, but is positioned as the picture (5) shows.

 18
View original page 21Page 22 · Read text
www.butkus.us


                                                                                                                                            "ff        6

(4) Set exposure by turning dia-      (5) Sensing area and exposure   (6)Exposure adjustment
   phragm ring                          control mark in the finder           completed.

 PX 675 battery - replacement is a Wein Air battery.  Make sure the cover has holes.
 These batteries need air to function !
When measuring light, it is not necessary to point the light acceptance area to the subject, but decide on
 picture composition as desired and measure the light as is done in the case of average light measuring.
*   If the power soluce is cut, the meter needle is in the downward  (-) position as shown in picture (5).
*  As the sensing area of SENSOMAT TM is placed behind the mirror, there is very little extraneous light
entering from the eyepiece, but it is advisable to hold the camera firmly against your eyes.


                                                                                       19
View original page 22Page 23 · Read text
DIAPHRAGM SWITCH


   One preszure of the diaphragm activating button closes the diaphragm and a second pressure will
    open it again. The action of this button  is as follows:
   When the button is pressed after advance of the film, the diaphragm closes to the preselected
    aperture. After release of the shutter button, the diaphragm opens again to full aperture.
     If however, for any reason, such as refocusing, the diaphragm has to be re-opened before the
    picture is taken, the button is to be pressed once again, which releases the diaphragm.
    This switch does not cut-off the battery curent, which can only be performed by releasing the
     shutter.


20
View original page 23Page 24 · Read text
www.butkus.usPICTURE


                                                                              \                                                                                               \
  The waistlevel finder is not only useful in     * When a reflex type finder is used, special
   low angle shooting but also very convenient      care should be taken to avoid light entering the
   in close-ups, copying and microscopic work.     camera through the focusing screen which may
   Moreover,  it can be used in  sideway     cause incorrect expozure. Measure the light by
   shooting.                                        holding your camera close to your eye.
  For close'up, copying and microscope     *  In the case of the VF-3 Finder, using the
   shooting, use critical focuser VF3. This     Rubber eye-cup prevents extraneous  light from
   viewfinder when collapsed turns into a      entering
   l5-times magnifier for critical focusing at      r  The vieMinder can be removed for inter-
   the center of the focusing screen. When        changing by sliding  it towards the rear,
   opened  it becomes a S-times magnifier for        while turning the viewfinder release dial
   inspecting the entire picture area.                  counter clockwise. To attach, match the
   Critical focuser VF4. This finder  is          viewfinder's base to the camera's groove and
    specifically designed for microgtaphy with           slide it forward until it clicks into position.
   S-times magnifier and Diopter adjustment
   from +3 to -4.
                                                                                                 21
View original page 24Page 25 · Read text
l.  First. the film  rewind         Flip the rewind crank on      3. Open the back cover by
   release button on the base         the rewind knob and wind          depressing the lock button
   of the crunera body is         in the direction of the       and pulling up the cover
  pushed in until a small         arrow. At the end of the          clip at the same time. Pull
   click is heard. This button          roll you  will feel the      up the rewind knob and
  need not be held during         resistance increase and          take out the film cartridge.
   rewinding. The film is now        then suddenly cease. Turn       Make certain that no film
  free from the sprocket        the rewind crank several         chips or dust particles are
   which has been advancing        more times to make certain           left in the camera.
     it, and is ready for rewind-         the film has been entirelv
   ing                               rewound.


22
View original page 25Page 26 · Read text
www.butkus.us
HOW TO HOLD THE CAMERA AND OPERATE SHUTTER RELEASE


                                                                                                                                  n4Plus

   To obtain a sharp picture, the camera must         Depress the shutter gently, while holding
be held properly. If there is camera shake, good         the breath for an instant.
pictures cannot be obtained even with the best       Use the right eye to look into the view-
camera in the world.                                         finder.
   Whether shooting in a vertical or hori      When using telephoto lenses avoid camera
zontal position, aim the camera at the subject         shake by holding the lens barrel with the
with the elbows pressed against the body if           left hand.
possible, but not too tightly, as this would        Use a tripod when shooting at slow speeds.
 stiffen the posture.


                                                                                     23
View original page 26Page 27 · Read text
no depth of field
   fj
a
            l-ruOject's   Distan

                         subject's Distancc
View original page 27Page 28 · Read text
www.butkus.us
DEPTH OF FIELD

                      {F**&    s\-t                         sL               a  *                               *"   -€c G                   :_-#      ff&    a 3             'fG


                                                                                                      G       -*s                                             $-ffi   w-,t                           rtr                  s
                                                                                                        is such                                                                                                  that you                                                          reduced.S*If your picture   This          is the range that is                           in sharp focus for    much
any particular distance and diaphragm  setting.     want both nearby and distant objects to be in
Relatively very little depth of field is required     sharp focus, then the smallest possible dia-
when close-up zubjects are focused on, but a    phragm should be used. However, very fre-
great deal of depth of field is needed in the case      quently, the composition of a picture can be
of more distant subjects. Closing the diaphragm     improved by having the principal subject in
down increases the depth of field, and opening      sharp focus while other objects in the scene are
the diaphragm up reduces the depth of field.      soft and out of focus This will de-emphasize
The depth of field also varies with the lens used.       distracting backgrou nd objects, and concentrate
Wide angle lenses have lots of depth of field     the viewer's attention on the principle subject.
while with telephoto lenses the depth of field is


                                                                               25
View original page 28Page 29 · Read text
FLASH PHOTOGRAPHY


                                                   www.butkus.us

                                                           Insert the plug of the flash unit into the camera's l}                                             synchro terminal, the FP terminal (above) for
                                                           flashbulb and the X terminal (below) for electronic
    lror snapshots at night, in dark places, and in       flash.
indoor shooting, flashbulbs or electronic flash can be    The FP Class flashbulb synchronizes with the
used to good advantage. Flash units also provide      shutter at all speeds,from I second to l/1000auxiliary light for taking pictures of against-the-light                                                        second. For electronic flash, set the speed to thesubjects.                                                                                                      sec and l/60o For flash shooting, an exclusive accessory shoe is     red "X" mark midway between l/30
   mounted to the bottom of the rewind knob of the       sec, but slower speed setting can also be used. For
   cam era  -                                                               detai-ls, refer to the table on the next page.
o The flash unit is inserted from the rear of the     fhe [j Class and M Class bulbs can also be used
   accessory shoe and secured by tightening  its     with slow shutter speeds (slower than l/30 sec) but
   mount.                                           whenever possible use the FP Class bulbs.
  26
View original page 29From the M. Butkus archive. Original publisher and archive notices are retained.
Check the model and edition against your equipment.
PDF verified 2026-10-10.