Film cameras
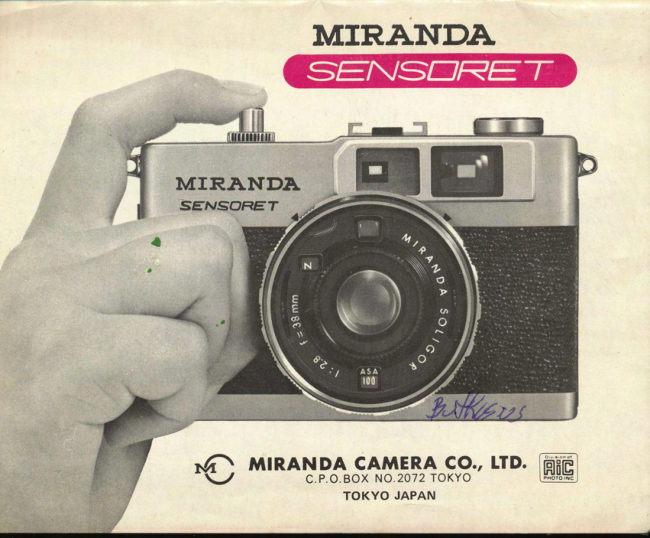
MIRANDA SENSORET User manual
User manual for MIRANDA SENSORET. 16 pages in English. Read the original PDF, download or print a copy without registration.
16 pagesEnglish8.0 MB PDF
Loading your manual…Open PDF directly
Document details
- Brand
- Miranda
- Model / document
- MIRANDA SENSORET
- Document type
- User manual
- Language
- English
- Pages
- 16
- File size
- 8.0 MB
- Category
- Film cameras
- Document date
- Not specified in catalog
Search available document text
Find a term, then jump to its page in the original PDF. Image-only pages may not be searchable; check the PDF for exact wording and diagrams.
Page 2 · Read text
www.butkus.us


The shutter will not operate unless the mercury batteries are loaded correctly.

                         HOW TO LOAD MERCURY BATTERIES
                               Open the cover of the mercury battery compartment
                                           beneath the camera and place both mercury batteries, that
                                    come with the camera, into the compartment. Observe the
                                            correct polarity, indicated on the batteries and on the
                                        compartment by + and -  marks.                                                                   lf the batteries are correctly loaded, a yellow lamp lights in
                                           the viewf inder when the shutter button is lightly depressed.
                                                                            It will not light, however,  if batteries are loaded incorrectly.
                                   The battery service life is normally about one year under
                                               usual operating conditions. When the power drops too low,
                                                the yellow lamp will not light upwhen the shutter button  is
                                                depressed, and replacement with fresh MALLORY RM 640
                                             or EVEREADY E 640 is necessary.
View original page 2Page 3 · Read text
BRIEF INSTRUCTIONS ON HOW TO USE THE CAMERA
                                                                                                                         lensThe MIRANDA SENSORET  is an EE camera with window by turning the knurled ring on the
electronically controlled shutterspeeds.  lt automati- barrel.
cally calculates the correct exposure under any light 4l Setting the exposure correction index
condition, and therefore, has no shutterspeed or Set the letter "N" in the window by turning the 2
aperture dial.                                        studs on the right and left on the lens barrel.
By simpiy depressing dre shutterbutton anyone caR'" The camera is now reaeiy for pict-trre taking. To'take
take perfect pictures. lf a   f lash attachment is  pictures with flash, mount an electronic flash gun in
mounted, flash synchronization is made automatic- the accessory shoe and set the guide number.
                                                                       Taking ally by the flashmatic'mechanism.                   2. Starting Picture
 The Picture taking process can be summarized as 1l Wind the film to the start point
 follows.                                         Turn the film winding lever until  it stops.
 1. Preparation for Picture Taking                    2l Composing and focusing
 1l Loading mercury batteries               The image visible within the bright frame in the
 Load two mercury batteries in the battery compart- viewfinder is the picture taking range. Use the
ment beneath the camera, making sure that the interlocked rangefinder in the center of the view-
 battery polarity is correct.                             finder to obtain sharp focus.
 2l Loading film                                      -  3l Depress the shutter button
The back cover opens when the film rewind knob is Battery power is sufficient to trip the shutter if the
 pulled up.                                      yellow lamp, within the viewfinder, lights up when
 3l Setting ASA rating                              the shutter button is depressed lightly.
Set the ASA rating of the film in use in the ASA Wind the film one frame after taking a picture.

DESCRIPTION AND FUNCTION OF THE COMPONENTS
View original page 3Page 6 · Read text
Venmo @mike-butkus-camera  Ph. 2083
PayPal Name  Lynn@butkus.org      www.PayPal.me/lynnbutkus
View original page 6
Page 9 · Read text
www.butkus.us
HOW TO LOAD A FILM


1. Open the camera back          2. Insert the cartridge into the   3. lnsert the trimmed end of the
Open the camera back by pulling       film chamber                         film into a slit of the film take
up the film rewind knob. When   Pull up the rewind knob and      up spool
the back is opened, the exposure    insert the cartridge into the film    lnsert the trimmed end of the
counter automatically returns to   chamber taking care that the pro-    film into any slit of the spool, at
the start (S) mark.                    jecting end of the cartridge faces   the same time making sure that
                          down. After inserting the car-   the film wind sprocket engages
                                          tridge, push back the rewind knob    the perforation on the side of the
                                    to its original position.                  film.


4. Turn the film advance lever   5. Take-up the slack in the film   6. Turn the film advance lever to
   and make sure that the sproc-    Lift the rewind crank and turn it      take up the exposed film
   ket engages the Perforated   gently in the direction of the   Operate the sh utter   f or some
   edge of the film             arrow and any slack will  dis-   blank shots  till  the exposure
After ascertaining this, close the   appear. Care must be taken not to   counter registers "1". When the
camera back. The back closes at   turn the crank in a reverse direc-    film advance lever is being operat-
finger pressure.                         tion, as this may spoil the film.      ed, the film rewind lever must
                                                             turn in a direction against the
                                                                engraved arrow, indicating that
                                                                            the film is properly moving.
View original page 9Page 10 · Read text
SETTING FI LM SENSITIVITY
                                   Make sure that the sensitivity of the film is set correctly
                                                   after loading. lf this setting is not properly made, exposure
                                                     will be incorrect. To set the sensitivity of the film, turn the
                             ASA film sensitivity setting ring on the front on the lens
                                                  until the corresponding speed value of the film appears in
                                              the ASA film speed window. Film sensitivity is indicated on
                                              the box in which the film is purchased or in the instruction
                                              sheet by either ASA and/or DIN rating. Use ASA values for
                                              the MIRANDA SENSORET.
SETTING THE EXPOSURE MULTIPLE INDEX
Three exposure positions can be selected with the cannot be expected. Optimum exposure is being
Miranda SENSORET in accordance with the prevail- obtained by setting "N", /tx" or "2x" in the ex-
ing picture-taking conditions. As a result photographs posure multiple indicator window by turning the
are always correctly exposed even in such cases exposure correcting studs on the lens barrel.
where, with ord inary EE cameras good pictures


1) Select "N" for ordinary  ptc-   2l Select "Yrx" for pictures  of   3) Select "2x" subjects with side
   ture taking under normal  light    open areas, landscapes,   or      and/or back lighting.
   conditions.                           against the light pictures.
View original page 10Page 11 · Read text
www.butkus.us
DEP R'ESS iNG -StiUTT E R'RE-|-EASE BUTTOT\i
 Match index mark of the shutter lock ring with A.                                     et to 1l2O sec. or
                                                          slower, by inserting a flash unit. Use a tripod at
                                                    slow shutter speeds.
                                           3)When using a slow shutter speed keep the shutter
                                                   button depressed until the yellow lamp extingui-
                                                       shes. The shutter is operating as long as the
                                                     yellow lamp is on.
                                         4)When an exposure is made for a period ol 2
                                                    seconds or longer, accuracy is not guaranteed as
                                                                                   it is beyond the guaranteed rating of the camera.
 1) The electronic shutter will operate correctly     Battery drain is accelerated it  repeated long
   when the yellow lamp (C) lights up, when the     exposures are made.
    shutter button is lightly depressed. lf the yellow  5)To release the shutter, gently depress the shutter
   lamp does not light up, it is an indication of    button with the index finger. As the shutter
    insufficient battery power, and warning that the     cocks itself when the shutter button returns to its
    shutter consequently can not operate correctly.     original position, release your finger from the
 2) When shooting at high speed, the yellow lamp    button after the shutter has completed its opera-
    will blink only. lf it remains lit, it indicates that      tion.
COMPOSING AND FOCUSING
Simply look into the viewfinder and compose your
photograph.                                                                     is about 1m or less.
1) The picture to register on the film is the area  2l Focus by (B) at the center of the viewfinder. A
   within the yellow frame (A).                       double image is seen when focusing is incorrect.
   The area inside the fine line (a) is the picture     Superimpose the image br7 turning the focusing
   taking range when the camera-to-subject distance       ring.
View original page 11Page 12 · Read text
{

REWI NDI NG FI LM
When the film, loaded in the camera is used up,  length of the film in use.
additional exposures cannot be made, and the film When the film is used up rewind the film into the
counter will indicate 12,20 or 36 according to the   cartridge.


                                                                                                                                                                                                                                                         Digitally signed by Mike Butkus

                                                                                                                                                                                                              email=mike@butkus.org,                                                                                                                                                                                                     c=US                                                       Mike Butkus DN:org,Date:cn=Mike Butkus, o, ou=Butkus.                                                                                                                                                                                                                        2025.05.01 19:04:55 -04'00'
1) Depress the film rewind but-  2) Pull up the film rewind crank, 3) At the end of the roll you will
   ton beneath the camera.           turn it in the direction of the      feel the resistance increase and
                                  arrow, and rewind the film     then suddenly cease. Then lift
                                         into the cartridge.              the rewind knob to open
                                                                      the back cover, and remove
                                                                          the cartridge.
CAUTI ON
 1i When the winding lever stops in an intermediate     Pull up the knob with the thumb of the free
    position, do not forcibly cdntinue winding.          hand on the rear cover as shown.
    Stop picture taking and rewind the film.       9 Place the exposed film into a film container as
2) The cartridge may pop out when the rear cover is    soon as possible.
    opened.
View original page 12Page 13 · Read text
www.butkus.us
FLASH PHOTOGRAPHY            When taking pictures indoors or under poor lighting
                                                 conditions, shutter speeds of 1/30 sec. or slower should be
                                                 used, and a flash unit, electronic flash gun, or the like must
                                         be used.
                             The MIRANDA-SENSORET incorporates a flashmatic
                                      mechanism that causes the flash unit to fire only when
                                                 necessary. When lighting is suff icient for pictures within the
                                EE r:ange, the flash_unit will noilire when mounted on the----_i
                                                accessory shoe.
                                           This mechanism is very convenient for switching between
                                                     flash and non-f lash (EE) exposure situations.
                                    Use the exclusive MK-3 electronic flash gun, an optional
                                 SENSORET accessory.
                                          1. Attach the etectronic flash to the accessory shoe
                                     The MK-3 electronic flash has a direct connection contact.
                                                  Electrical connection is made by installing the electronic
                                                flash in the accessory shoe. When an electronic flash unit
                                           without a direct contact is used, connect the synchronizing
                                            cord to the flash terminal 22  .
                                         2. Setting the guide number
                                          Align the guide number of the electronic flash with the
                                            guide number index mark on the camera. (Use scale 5  if
                                            the value is in feet, and scale 17 if the value is in meters.)
                                   When an MK-3 electronic flash is used align either 65 (ft) or
                                    20 (m) (in white) with the index mark, for 100 ASA  f ilm.
                                        3. Exposure  is calculated electronically by the camera
                                 When an electronic flash is used, the diaphragm opening
                                         appears in the window (D) in the viewfinder, the pointer
                                    moves as it is interlocked with the rangefinder, and the
                                               calculated lens opening value, suitable for camera-to-subject
                                            distance is indicated. A red mark appears on the left or
                                               right side of the lens aperture scale, depending upon the
                                         guide number of the electronic flash in use. Exposure  is
                                                         insuff icient when the pointer enters this red mark.
                                         4. Depress the shutter button
                                 When the electronic flash unit is ready for operation look
                                          into the viewfinder and focus, then lightly depress the
                                               shutter button.  lf the yellow lamp (C) in the viewfinder
                                            turns red at this time, the flash unit will fire when the
                                           shutter button is depressed further. lf the red lamp
                                              indication is not given, norrnal EE photography will be
                                       made without using the flash.
                                                                                                                                                                                   is                               When a flashgun, or .the plastic protectivb shoe cap                                                   inserted, the diaphragm .scale becomes vis.ible for manual
                                               operation at 1/20 sec.                                                                                               {
View original page 13Page 15 · Read text
1. Shutter button   Enlarged view for printing    corporates all aids necessary for perfect picture
The shutter button can only be depressed after the  taking.
film is wound.                               17. Guide numbers (in meters)
2. Shutter lock ring                                 Align "2O" (white) with the index mark when using
When the index rrnrk on the ring is aligned with the  the exclusive MK-3 electronic flash unit for this
"L"  mark, the shutter button is locked and the  camera.
battery circuitry is disengaged to prevent battery  18. Lens F2.8/38mm
                                                                                                                                                                                                                                                                       f ourdrain.                               The lens is of Tessar type, composed of
3. Film counter                                    elements in three groups.
The counter reading starts with "S"  (start) and  This is a wide-angle lens having a picture taking angle
                                                                                                                                                                                         f ilter is used.continues to "36". The counter reading advances  of 60 degrees. A 49mm
each time the film is wound, and the number of  19. ASA film sensitivity setting ring
shots taken is indicated by the position of the index  20. ASA film speed indicating window
mark. The counter automatically resets to "S" when  Set the ASA sensitivity value of the film in use in the
the camera back is opened.                             indicating window by turning the knurled ring on
4. Strap  f ittings                                    the lens barrel. Correct exposure cannot be obtained
One fitting is provided on each side to affix the unless this is properly set.
carrying strap.                              21. Viewf inder eye piece
5. Gtride iiuniirer iin f#                           22; -FlasHgrminal*_--
When the guide number of the electronic flash unit is   Receptacle for connection  of a synchronizing cord
aligned with the index mark, correct flash exposure  when taking pictures using a flash unit, not having
is determined automatically. The guide numbers in   direct contact.
meters are engraved on the right side.              23. Film rewind shaft
6. Focusing ring                              24. Film chamber
The rangefinder, within the viewfinder, adjusts for  This space houses the film. Pull up the back cover
correct focusing when this ring is turned.                release knob to open the back cover and insert a film
7. Distance scale                                      cartridge with the end which has a protruding
Values indicate camera-to-subject  distances. The   cylindrical stem facing downward.
graduation range extends from oo (infinity) to  25. Mercury battery chamber
0.91 m.                                              Place two mercury batteries, 1.4V, in this chamber.
8. CdS exposure meter cell                      The camera will not operate unless the batteries are
This is the light receiving window of the exposure   loaded properly.
View original page 15Page 16 · Read text
graduation range extends from @ (infinity) to  25. Mercury battery chamber
0.91m.                                              Place two mercury batteries, 1.4V, in this chamber.
8. CdS exposure meter cell                      The camera will not operate unless the batteries are
This is the light receiving window of the exposure   loaded properly.
meter. lt functions to measure subject brightness  26. Film rewind button
with the electronic shutter automatically determin-  The film wind-up sprocket is released when this
ing the correct exposure in accordance with the light  button is depressed, allowing the film to be re-
intensity.                                      wound.
9. Exposure multiple indicating window            27. Tripod socket
10. Exposure multiple setting stud                 This is a threaded socket used for mounting the
The exposure setting can be changed in three stages  camera on a tripod.
  N (correct) , /.X and 2X bv means of these studs.  28. Film guide rails-,Normally, the "N" setting should be used (set in the   Fit the film between the .uPper and lower outside
indicator window) for general picture-taking.              rails. The two inside rails are slightly lower than the
11. Accessory shoe                                 outside rails by the thickness, equivalent to that of
The electronic flash unit is mounted here. When the   the film.
flash unit is mounted, the flashmatic mechanism  29. Film winding lever
automatically sets the lens opening for flash photo-   Provided for film winding. Film is wound by the
                                                                                                                                                                                    isgraphy. This condition is indicated in the viewf inder.   length equivalent to one frame, the shutter
 '12. Direct flash contact                            cocked, and the film counter is advanced when this
 lf a hot shoe flash unit (direct contact) is used,   lever is turned  f ully until it stops. The lever cannot
direct connection is made without a synchronizing   be operated unless the shutter is released.
cord.                                       30. Sprocket
13. Rear cover open knob                     The sprocket is geared to match the sprocket holes
The rear cover opens when this knob is pulled up,   of the f ilm.
and the film counter is reset to "S" at the same time.  31. Rapid-load take up sPool
Do not touch this knob for any reason, other than   lnsert the lead of the film into any slit in the spool.
to rewind the f ilm.                            n.  Back cover                  --'14. Film rewind crank                                       The back cover is locked when depressed and the
Pull the crank up and turn in the direction indicated   film counter is ready to advance frame by  f rame.
by the arrow with the film rewind button 26 held  33. Film pressure Plate
depressed after the film is used up. This permits film   Correctly holds film in the focusing position with
rewinding into the  f ilm cartridge.                        respect to the lens. Care is to be taken to prevent
15. Rangefinder window                         damaging this plate as it, in turn, could lead to
Provides camera to subject distance measurement.     damage of the film.
16. Viewf inder                                34. Cartridge holder
Enables fast, easy composition and focusing. In-   Holds the film cartridge in the correct position.
sptret trtcaTloNs
View original page 16From the M. Butkus archive. Original publisher and archive notices are retained.
Check the model and edition against your equipment.
PDF verified 2026-10-10.