Film cameras
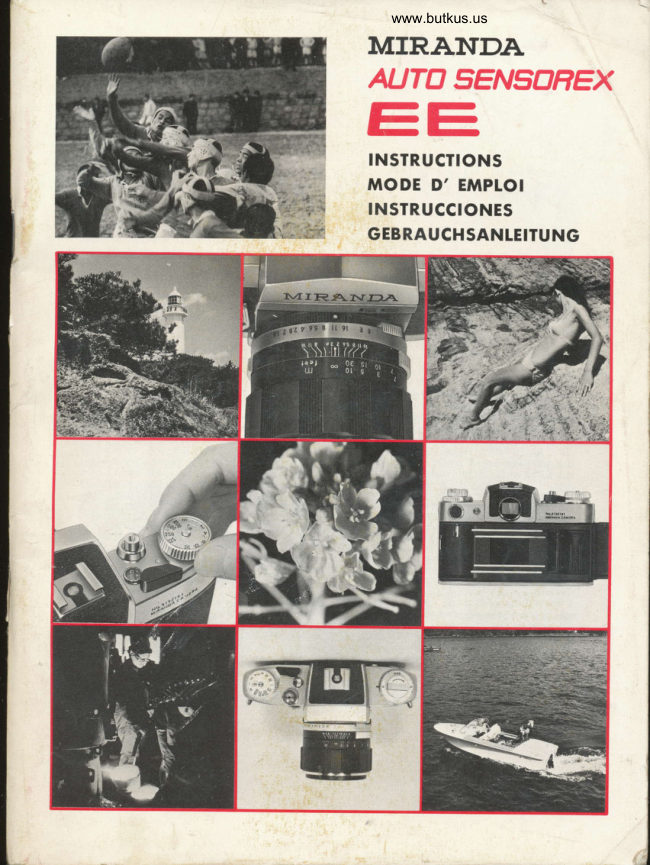
Miranda Sensorex Ee 1 User manual
User manual for Miranda Sensorex Ee 1. 43 pages in German, French, Spanish. Read the original PDF, download or print a copy without registration.
43 pagesGerman, French, Spanish15.2 MB PDF
Loading your manual…Open PDF directly
Document details
- Brand
- Miranda
- Model / document
- Miranda Sensorex Ee 1
- Document type
- User manual
- Language
- German, French, Spanish
- Pages
- 43
- File size
- 15.2 MB
- Category
- Film cameras
- Document date
- Not specified in catalog
Search available document text
Find a term, then jump to its page in the original PDF. Image-only pages may not be searchable; check the PDF for exact wording and diagrams.
Page 1 · Read text
www.butkus.us
MTRAIVDA
AUTO SENSOREX
P-
E-
-bINSTRUCTIONS
MODE D' EMPLOI
TNSTRUCCtONES
GEBRAUCHSANTEITUNG
View original page 1
Page 2 · Read text
We feel very privileged that you have chosen
                                         our Miranda Auto Sensorex-EE camera. As a
                                                specialist manufacturer of single-lens reflex
                                      cameras in Japan, Miranda Camera Co. have
                                     long been producing novel products of
                                       unique and original design. Auto Sensorex-
                                     EE, your constant companion, is a 35mm,
                             EE (electric-eye)  single-lens ref lex camera. a
                              new concept which combines a through-
                                               the-lens light measuring system with a fully
                                         automatic exposure control. lt employs two
                                ways of light measurement, one being the
                                     Average Light Measuring system and the
                                              other, the Spot Light Measuring, each useful
                                             for its own specific application. The camera
                                       permits, besides EE photography,  alsomanual photography.
The interchangeability of the pentaprism, lenses of superb resolving power, accurate and
smoothly-working shutter-mechanism, and other features-are the monopoiy of only thehighest-grade camera. In order to make the best use of these qualities'in your camera,
you are advised to read this manual through carefully before you take the iirst shot andyou will be justifiably proud of the results.


Nous sommes flattds que vous ayez choisi le MIRANDA AUT:O-SENSOREX EE et vous
en remercions. Comme, fabricant spdcialiste des appareils reflex mono-objectifs; Miranda
Qqrydra po fabriALe_ddpuis tongtimps des proditits de conception unique et'originale.L'Auto-sensorex EE sera votre ficiite coinpagnon. c'est un appareii ae ssmlm nz(Electric Eye) reflex mo.no-o.bjectif d'une coiception nouvelle, qii combine un systime
de mesure de la lumidre d travers l'objectif- avec un contr6le du temps cie pose
enfiArement automatique. It emploie deux- modes de mesure de la tumidre, i'un dtaht tb
systime de mesure de la lumi-ire moyenne et l'autre, la mesure de ta'lumidre spot
(ponc-tuelle), chacun ayant son ut.ilitd pour son emploi spdcifique. Tout le systimd de
calculateur et d'automatisme  est ddbrayable
L'interchan-geabiliti. du prisme de visde, des objectifs d'un pouvoir de rdsolution
exceptionel, un mdcanisme d'obturateur travaillant aveb prdcisicin et douceur ainsi que
de   nombreuses                autres                       caractdristiques                                           exclusives,                                                                         qu'il                                                sont                                                                 te silne                                                                                    de                                                                                 s'agit-appareild'un appareifla plus       haute classe.                   Afin                                                    qualitds                               d'utiliser au                               mieux les                                            de                                                               votre                                                                nous vous
conseillons de lire ce ma.nuel tris soigneusement avant de rdaliser votre'p'remidre photo et
vous serez fier, d juste titre, des rdsultats.
View original page 2Page 3 · Read text
www.butkus.us


         Nos sentimos muy honrados de que Vd. haya elegido nuestra c5mara MIRANDA
           Auto-Sensorex-EE. Como fabricante especializado de c5maras reflex de un solo objetivo
          en el Jap6n, la firma MIRANDA CAMERA CO. ha estado produciendo durante mucho
           tiempo productos de novedad. de diseffo 0nico y original. La Auto-Sensorex-EE, su fielI'q            compafrera, es una c5mara reflex de un objetivo, de 35mm. EE (electric eye    ojo                                                                                                               -              el6ctrico), un nuevo concepto que combina un sistema de medici6n de la luz a irav6s                                                                                                               del
             objetivo, con un control de exposici6n totalmente automStico. Emplea dos formas de
           medir la luz, una es el sistema de Medici6n de Luz Media y la otra es la Medici6n de
          Punto de Luz, cada una de ellas muy itil  para su especifica aplicaci6n, La c5maraI           permite tomar, adem6s de la fotografia EE,la fotografia manual.
         La intercambiabilidad del pentaprisma, de unos objetivos de alta capacidad de
             resoluci6n, de unos mecanismos de obturaci6n exactos y de suave funcionamiento,junto
          con otras caracteristicas, son monopolio 0nico de la c5mara de la m6xima calidad. Al
            objeto de hacer el mejor uso de estas cualidades en su c6mara, le recomendamos leer
           cuidadosamente este manual antes de realizar la primera fotografia y Vd. podr5 estar
             orgulloso de los resultados.


            Sie haben eine Miranda Auto Sensorex EE gewiihlt, und Sie haben gut gewdhlt. Diese
          Kamera wird Ihnen sehr viel Freude bereiten und fiir lange Zeit Ihr staniiiger Begleiter
           werden. Das Miranda Kamerawerk ist bahnbrechend in deiEntwicklung und-Prodriktion
              eindug-iger Spiegelreflexkameras.  Unsere Mitarbeiter sind laufend bem-iiht, die Miranda
           Produkte nach neuen Ideen weiterzuentwickeln und auf den nevesten Stand der Technik
           zu bringen. Die Auto Sensorex EE ist eine einiiugige Spiegelreflexkamera  fiir 35mm Film
             (Kleinbildpatron3). EE steht fiir "electric eye'1 =-elelitriichgs Auge. Diese Bezeichnung
           umschreibt die Tatsac-he, dass die Messtechnik durch das Objekt-iv mit einer vollautol
           matischen Blendenzufiihrung verbunden ist. Daneben ist die Auto Sensorex EE eine
           gelungene Antwort auf die Streitfrage, welcher Messtechnik durch das Objektiv der
          Vorzug zg_ggben- ist; niimlich der Punktmessung oder der Durchschnittsmesiung. Die
           Sensorex EE hat beides. Ein kleiner Schaltvorgan-g entscheidet [ber die Messtechnili, mit
           anderen Worten, sie erlaubt die Wahl zwischen beiden Messmethoden. Dariiber hinatis ist
            es grundsdtzlich miiglich, statt der automatischen Blendenzuftihrung diese manuell zu            benutzen-.
          Trotz all dieser Neuerungen  ist es dem Miranda Kamerawerk gelungen,  die Auswech-
            selbarkeit des Suchers beizubehalten. Die sprichwiirfliche P-erfekt*ion  von Miranda          Kameras ist bei der Sensorex EE weiter abgilrundet worden und mit dem zum Teil
          vorhandenen, zum Teil neu entwickelten Miranda Zubehcir wird die Miranda Auto
           Sensorex EE zu einer System Kamera mit Superlativen.
       Um das Arbeiten mit der Auto Sensorex EE zu erleichtern und die Mdglichkeiten dieses
           Kamerasystemes_voll auszuschtipfen, empfehlen wir Ihnen, den Inhalt dieser Gebrauch-           sanweisung sorgfiiltig und systematisch iu  studieren und' gegebenenfalls die einzelnen           Funktionen an der ungeladenen Kamera durchzuexerzieren.
View original page 3Page 6 · Read text
FEATURES OF MI RANDA AUTO SENSOREX-EE
 Caractdristiques du Miranda Auto Sensorex EE
 1. Automatic Exposure through TTL + EE System
  A  high-class camera which combines a TTL  (through-the-lens) system of  light
    measuring, under which critical measurement is made of the light transmitted to the
    film. Also a completely automatic exposure control mechanism which permits
    accurate exposures simply by depressing the shutter button.
 2, Accurate Exposure through Average Light Measurement and Spot Light Measurement
   Average and Spot Light Measurement are control led by a switch and are used
     individually, depending upon the prevailing picture taking condition. The Average
    Light Measurement is used for  general picture-taking under favourable light
    conditions, The Spot Light Measurement is used for special occasions which normally
    requires different techniques such as shooting accurately against-the light subjects,
    under stage lighting and subjects with sharp contrast.
3. Easy-to-Compose and Efficient Viewf inder
    All the functions necessary for photo-taking are visible in the viewfinder, and the
   composing of a picture takes only a moment. The newly invented micro-split image
    rangefinder permits quick and sharp focusing and can be used with any type of lens.
4. Interchangeable Viewfinders for Increased Versatility
   The Pentaprism Viewf inder is very convenient for general picture taking.
    ln instances requiring special techniques, such as low and high angle shots, close-ups,
    reproduction and photo micrography, we recommend the use of the interchangeable
    reflex viewfinders.
5. Newly Designed Standard Lenses for Excellent Color Rendition
   The newly-developed Auto Miranda-E  f : 1.4/5Omm and  f  : 1.8/5Omm lenses are superb
    for color-photography. These lenses not only offer an extreme resolving power but
    depict scenic views with abundant peripheral  light.
6. Unique Type of Lens Mount
   The lens mount of MIRANDA Sensorex EE has on its outside a 4-claw bayonet
   mount and on its inside a screw mount of 44mm inner diameter (ALL MIRANDA
   cameras and lenses have the same standard lens mount). The bayonet mount is for
   attaching the auto E lenses, extension bellows, etc., quickly and easily by merely
    giving 1/8 of a full turn after mounting. The inner screw mount is for preset lenses
   and most other accessories.
7. Automatic Synchro-Switch and Hot Shoe
  The synchro-contacts for  electronic flash (X) and bulb flash (FP) are switched
   automatically by rotating the shutter-dial. The Hot Shoe flash gun accessory shoe is
   employed for the first time with an interchangeable pentaprism type SLR.
8. Complete Line of Interchangeable Lenses and Accessories
   This is-a system camera meeting every requirement of photography. With a wide
   range of interchangeable lenses and accessories, Miranda's Auto Sensorex-EE displays
    its superiority not only in general photography but also in the fields of scientific,
   medical, industrial and educational photography.


 1.  Exposition automatique par systime TTL + EE
  Le EE est un appareil de grande classe qui combine un systAme de mesure de la
   lumidre TTL (a travers l'objectif) dans lequel la mesure est faite sur la lumiire
   transmise rdellement au ftlm par un micanisme de contr6le et de commande de pose
   enfierement automatique Sui permet des expositions prdcises simplemeni en   appuyant sur le bouton diclencheur.)  Temps de poses prdcis grdce d la mesure de la lumidre moyenne ou ponctuelle.
3.  Viseur efficace
   Toutes les fonctions ndcessaires d la prise de vue sont visibles dans le viseur et la
   composition d'une image ne prend qu'un instqnt. Le stigmomitre d image micro-split
   nouvellement conQu permet une mise au point rapide et prdcise et peut 6tre utilisd
   avec n'lmporte quel obj.ectif.
    Viseurs interchangeables pour une universalitd accrue
  Le viseur d prisme convient parfaitement pour la majoriti des prises de vues. Dans les
   cas ndcessitant des techniques spdciales, tels que les photos prises en plongde ou
   contre plongde, les macrophotos, la reproduction et la photomicrographie, nous
   recommandons l'usage des viseurs rdflex intercl\angeables.
    Objectifs de conception nouvelle pour un excellent rendu des couleirs
   L'Auto Miranda EE f:1,4/50mm nouvellement crdd et le 1,8150mm sont spdciale-   ment calgulds pour la photographie en couleurs. Ces objectifs offrent non seilement
  un extr€me pouvoir de rdsolution mais ont un rendu des cou-leurs et du contraste
    excellent.
View original page 6Page 7 · Read text
www.butkus.us                   CARACTERISTICAS DEL AUTO SENSOREX EE MIRANDA


   Type de monture d'obiectif exclusif
   La monture d'objectif du Miranda Sensorex EE est double: d l'extdrieur une monture
   a bal'onnette d 4 crens, d l'intdrieur, une monture d vis de diamitre 44mm (tous les
    obiectifs et. appareils Miranda ont la mAme monture standard). La monture d
    baionnette d encliquetage rapide est destinde d monter les objectifs Auto E, soufflets,
     etc, facilement et rapidement par simple rotation de 1/8e de tour.
   La monture intdrieure d vis est destinde aux objectifs d prd-sdlection manuelle et d la
    plupart des autres accessoires.
    Contacts Synchro automatiques  et griffe de contact
   Les contacts synchro pour. flash ilectroniques (X) et flash lampes (FP) sont
   automatiquement sdlectionnels en faisant tourner le disque des vitesses.
   La griffe de flash d conta.ct incorpord est montde pour la premiire fois avec un prisme    interchangeable sur un rdflex mono-objectif.
 8. Gamme compld te d'objectifs interchangeables et d'accessoires
   Miranda est un systdme complet qui permet de faire face d tous les problimes   photographiques. Avec une vaste gamme d'objectifs interchangeables et d'accessoires,
    le Miranda Auto Sensorex EE prouve sa supdrioritd non seulement en photographie
    gcindrale, mais dgalement dans le domaine scientifique, mddical, naustiietl de
    l'6ducation et du reportage.


 1.  Exposici6n autometic mediante TTL + Sistema EE
   Una c5mara de alta calidad que combina un sistema TTL (a trav6s del objetivo) de
   medici6n de la luz, en virtud del cual se realiza una medici6n exacta de la luz
   transmitida a la pelicula. Es, por consiguiente, un mecanismo de control de la
   exposici6n totalmente autom5tico que permite una exposici6n exacta mediante la
    simple acci6n del bot6n del obturador,
    Exposiciones exactas mediante la Medici6n de Luz Media y la Medici6n del Punto de
   Luz
   Las mediciones de la Luz Media y del Punto de Luz se controlan'mediante  un
   commutador y se emplean individualmente, en funci6n de las condiciones que
   predominan en la fotografia. La Medici6n de la Luz Media se emplea en la fotografia
   general en condiciones luminosas favorables. La Medici6n Punto de Luz se utiliza en
    circunstancias especiales que normalmente suelen reguerir t6cnicas diferentes, tales
   como: la fotografia de precisi6n de objetos en contraluz, iluminaci6n de escenarios y
    objetos con un fuerte contraste.
3.  F5cil de componer y un visor eficiente
   Todas las funciones necesarias para la fotografia est6n visibles en el visor y  la
   composici6n de una fotografia se realiza en un momento. El Teldmetro de imagen
   micro-partida recientemente inventado permite un enforque r6pido y vivo y puede
    usarse con cualquier tipo de objetivo.
    Visores intercambiables para una mayor versatilidad
    El visor pentaprisma es muy adecuado para la fotografia en general, En aquellos casos
   que requieran una t6cnica especial, tales como las fotografias de pequefios y grandes
   5ngufos, primeros planos, reproducciones y microfotogratias, recommendamos  el
   empleo de los visores reflex intercambiables.
    Objetivos normales de nuevo disefro para un excelente rendirniento del color
   Los objetivos Auto-Miranda-E  f :1, /SOOmm. y f :1,8/5Omm. recientemente desarro-
    llados, son insuperables para la fotografia en color. Estos objetivos no s6lo ofrecen un
    extraordinario poder de resoluci6n,  si no que captan unas vistas con abundante  luz
    perif 6rica.
6.  Tipo 0nico de montura de objetivo
   La montura de la MIRANDA Sensorex-EE lleva en su exterior una bayoneta de 4
    garras y en su interior una rosca de 44mm. de di6metro interno (Todas las c6maras y
   objetivos MIRANDA llevan la misma montura standard). La montura de bayoneta
    sirve para adaptar a los objetivos auto-E, los fuelles de extensi6n, etc., de una manera
    f5cil y r5pida mediante el simple giro de 1/8 de vuelta despu6s de haber realizado el
   montaje. El montaje de rosca interior sirve para los objetivos preset y la mayoria de
    los dem6s accesorios.
7.  Conmutador sincro automAtico v zapata de contacto   Los contactos de sincronizacion para Flash electr6nico (X) y l5mpara (FP) se
   conmutan autom6ticamente girando el disco de las velocidades. La zapata de
   contacto en la guia de accesorios de flash se emplea por vez primera con un
   pentaprisma intercambiable,  tipo SLR.
L  Serie completa de objetivos y accesorios intercambiables
View original page 7Page 8 · Read text
Funktionen der Miranda Auto Sensorex EE


   Se trata de un sistema de cSmara que satisface todas las exigencias de la fotografia.
    Provista de un amplio surtido de objetivos y accesorios intercambiables,  la Miranda
    Auto-Sensorex-EE demuestra su superioridad, no s6lo en la fotografia general, sino
   tambi6n en los campos de la ciencia, de la medicina, de la industria y la fotografia
    educativa.


 1. Automatische Belichtung durch TTL und EE System
   Die Sensorex EE ist eine hochentwickelte TTL-Kamera; (TTL: through the lens =
   durch das Objektiv) durch das Objektiv messend. Die Genauigkeit der Belichtung
   wird ergiinzt durch die automatische Blendenzuftihrung,  statt wie bisher notwendiges
    umstiindliches Messen und Einstellen.
 2.  Alternative Punkt- oder Durchschnittsmessung
   Die Auto Sensorex EE ist eine Antwort in der Diskussion um die Vorziige von Punkt-
   oder Durchschnittsmessung.  Sie hat beides umschaltbar. Die gewdhlte Messmethode
     ist im Sucher eingespiegelt.
3.  Alle Funktionen mit einem Blick
   Der Suchereinblick zeigt wie auf einem Kommandostand  die Schautafel aller Daten
   der fi.ir die Aufnahmen wichtigen Funktionen. Neu ist der Mikro-Split-Image-Ent-
   fernungsmes.ser, er wird den veriinderten Anspriichen bei der Verwendung von
   Wechseloptiken verschiedener Brennweiten gerecht.
   Ausrvechselbares Suchersystem trotz modernster Messtechnik
   Zugegeben, eine grosse Anzahl aller Fotoaufgaben meistert das Pentaprisma. Der
   Lichtschacht bleibt jedoch unentbehrlich bei Nahaufnahmen, Reproduktionen und
    bei der Mikrofotografie.
   Neuentwickeltes Standardobjektiv fiir exzellente Farbwiedergabe
   Die Auto Miranda E 1.4 und 1.8 mit 5Omm Brennweite stellen Neuentwicklungen
    dar, die den Anspriichen der modernen Farbfotografie voll gerecht werden.
    Praktischer Universal-Objektivanschluss
   Alle Miranda Modelle haben den gleichen Bajdnettanschl0sse und ausserdem ein
   Innengewinde von 44mm. Der Bajonettanschluss wird fiir automatische Objektive
   verwendet. Nur durch eine l/8-Umdrehung wird das Objektiv festgesetzt oder gel6st.
   Das Innengewinde wird fiir Vorwahlblenden-Objektive benutzt. Ausserdem k6nnen
   mittels einer Vielzahl von Adaptern alle auf dem Weltmarkt befindlichen Objektive
   verwendet werden.
7.  Aufsteckschuh mit Mitten-Kontakt
   Trotz auswechselbarem Prisma ist der Aufsteckschuh mit einem Mittenkontakt
   versehen. Die Kontaktiibertragung  ist durch besondere Vorrichtungen gewdhrleistet
   Der Synchronhebel ermciglicht die Wahl zwischen X- und FP-Kontakt.
8. Auto Miranda Wechselobjektive und Zubehdr
   Die Auto Sensorex EE ist eine System-Kamera, die allen Anspriichen der Berufs- und
   Amateur-Fotografie gerecht wird. Diese Tatsache empfiehlt-die Auto Sensorex EE
   auch fiir den Gebrauch in Wissenschaft, Forschung und-Industrie.
View original page 8Page 9 · Read text
www.butkus.us
                                                        TECHNICAL DATA
                                                                              Sp d cificatio ns te chniqu e s
           Standard Lenses   AUTO Mf RANDA-E: SOmm/t1 .4, S-group 7 element (Gauss,
                            modified type) AUTO MIRANDA-E: SOmm/f1.8, 4-group, 6-ele-
                          ment (Gauss, modified type)
                     TTL  (through-the-lens) exposure meter- full EE coupling, fully
                            automatic diaphragm, angle of view 46-, smallest aperture  f :16,
                           preview lever, filter size 52mm@, closest focusing distance with
                           SOmm/f 1 .4 43cm (17 ins.);5Omm/f1.8 45cm (18 ins.)
            Sh u tter            focal plane, B, 1-1l1OOO sec., built-in self-timer with maximum
                                delay of 1O seconds.
            Flash Synchro     FP and X, automatic synch to X at 1/60 sec., cordless hotshoe.
           Exposure Meter      light measuring at open aperture, built-in TTL CdS meter with full
                              EE-coupling, closed-down  light measuring possible, light sensor
                           behind the mirror, partial light measuring, switch to spot light
                               measuring. EE coupling range EV3-18 at ASA 1OO with SOmm f1.4
                                    lens, shutter speeds 1/4 sec.-1l1OOO sec. The EE coupling can be
  LI                            disconnected when shooting at speeds outside its range by depres-  I                              sing the override button located in the centre of the shutter speed
{                                  dial. Film speeds ASA 25-1600. battery-Mallory 675R, built-in
t          Viewf inder         magnificationbattery checker.O.92X with 50mm lens at infinity,   f ield of view 96%,                             condenser and Fresnel lens combined, interchangeable  viewf inder,IL                                focusing screen w/micro-split image rangefinder.
ll          Lens Mount        Miranda mount (4;claw bayonet and 41!mm@-screw mount)
           Film Advance      winding angle 18O-, marginal angle 25-, ratchet advance possible.
           Film Rewind       rewind crank, self-resetting button for rewind.
           Film Counter       advance counting type, self-zeroing. with  f ilm winding indicator.
It_*          Film Loading       rapid loading type spool, hinged-back cover.
            Size              144 x 93 x 87mm  (f :1.8), 144 x 93 x 95mm  (f :1.4)
           Weight              w/f :1.8 95O grams, w/t:1.4 1 1OO grams


                              Objectif            Obiectif                             AUTO                                    standard                                    MIRANDA E: 50mm f. 1,4 7 lentiltes - 5                            groupes                                       (type                              GAUSS                                                       modifid).
                                    standard                              Objectif                             AUTO                                    MIRANDA E: 50mm f. 1.8 6 lentittes - 5                            groupes                                       (type                              GAUSS                                                       modifid).
                           Posemitre TTL (d(d traverstravers l'obi,t'objectif). Couplage totat EE. Diaphragme
                            entiiremententrcrernent automattque.automatique.omatiaue. AngleAngleAnsle dedede visdevisdevtsee 46-.46".46". OuvertureOuvertureuuverture minimumminimumminimum
                                           f. 16. Levier de contr)le de profondeurde champ. Diamitre du filtre.                            DistanceDistance minimaleminimale dede misemise auau pointpoint 43cm43cm avecavec lele 50mm50mm f.f. 1.41,4 etet
                       45cm avec le 50mm f. 1,8.           Obturateur       Obturateur d rideau, pose B et de I seconde au 1/1000e. Retardateur
                             incorpord d retard de 10 secondes, deibrayable.
            Flash            Synchro flash FP et X - synchronisation automatique pour X au 60e                            dede seco.nde,seconde, griffegriffe dede contactcontact sanssans cdble.cdble.
             Cellule           PosemitrePosemitre  --  lecturelecture dede lala lumiirelumiire dd pleinet      ouverture. Cellude CDS                    TTL  incorporde, d couplage total EE. Possibilitd de lecture a
                           diaphragme fermi. Eldments de lecture detiire  le miroir -  lecture de                            lumiire partielle. Commutateur pour sdlection de lecture de lumidre
                           "ambiance" ou "spot". Gamme de couplage EE: indice de lumination
                     3 d 18 d 100 ASA, evec obiectif de 50mm f. 1,4     Vitesse                             d'obturation I14 de seconde au 111000 seconde. Le couplage EE peut
                             €tre dcibray<i lorsqu'on photographie d des vitesses situdes hors de
                               cette gan me en pressant le bouton situd au centre du disque sdlecteur
                         des vitesses d'obturation. Sensibilitd des films 25 d 1600 ASA. Piles
                           Mallory 675 R. Votmitre testeur de piles ihcorpord.
             Viseur             Viseur d grossissement 0,92X avec objectif 50mm d l'infini. Champ de
                                       viselevisdevisde 96Vo.96Vi.96Vo. CondensateurCondensateurCondensateur etetet lentillelentillelentille dedede fresnel.fre.gnel- ViseurViseur interchanqeable.interchangeable.                            Ddpoli avec tdleimitre d image micro stigmomdtrique.
          Monture        MontureMonture d'objectifs:d'objectifs: monmonture MIRANDA bai'onnettP d 4 ergotsergots etet
                d'objectif     monture vissante de 44mm.
          Avance du Film  Angle                                d'enroulement                                                 I80"   -  Angle marginal 25% -  Possibilitd                                           par saccades.                            d'avancement
          Rebobinage du   Rebobinage du film par manivelle de rebobinage rapide. Blocage de                 Filnt          rebobinage d remise en place automatique.
          Compteur       Compteur de film (type comptant en avant) remise d zdro automati-
View original page 9Page 10 · Read text
DATOS TECNICOS
TECHNISCHE DATEN
                que d I'ouverture du dos avec indicateur d'enroulement du film.
Chargement   A chargement rapide par bobine multifentes dos d charni'ires.
Dimensions    144 x93 x 87mm (f. 1,8), 144 x 93 x 95mm (f. 1,4)
Potds           Avec f. 1,8 950 grs., Avec f. 1,4 I100 grs.


Objectivo       AUTO-MIRANDA-E: SOmm.  f /1,4 7 elementos en 5 grupos (Gauss,
     sta ndard       tipo modificado), AUTO-MIRANDA-E: SOmm.  f /'l ,g 6 elementos en
                4 grupos (Gauss, tipo modificado).
                 Medidor de exposici6n TTL (a trav6s del objetivo); acoplamiento  total
              EE; diafragma totalmente autom6tico;6ngulo de visi6n de 460.;
                 apertura minina t/16; palanca de pre-visi6n;  filtro de 52mm. Q;
                   distancia de enfoque minima con 5Omm. t/1,4:43cms.; SOmm. f/1,8
               = 45cms.
Obturador        Plano focal; B, 'l-1l1 OOO seg.; auto-disparador autom5tico incorpo-
                  rado con un retardo m5ximo de 1O segundos.
Sincronizaci6n   FP y X, sincronizado automaticamente a X en 1/O segundos, zapata
        f lash          de contacto sin cable.
Fot6metro        Medici6n de la luz en apertura m6xima; medidor incorporado TTL
            CdS con acoplamiento total EE; posibilidad de medir la luz a
                  disfragma cerrado; sensor de luz detr5s del espejo; medici6n parcial de
                   la luz; conmutador para la medici6n de Punto de luz. Escala de
                 acoplamiento EV3-18 en ASA 1OO con SOmm. t/1,4; velocidades del
                obturador 'l/4 seg. 1/1OOO seg. El acoplamiento EE puede desconec-
                    tarse cuando se fotografia a velocidades fuera de su escala, apretando
                   el bot6n limitador colocado en el centro del disco de velocidades.
                  Sensibilidades'de pel icula ASA 25-1600; bateria Mallory tipo 675R;
               comprobador de bateria incorporado.
Visor            Ampliaci6n O,92X con objetivo de SOmm. en infinito; campo de
                 visi6n 96o/"; condensador y lente Fresnel combinados; visor inter-
                 cambiable; pantalla de enf oque con tel6metro de imagen micro-
                     pa rt ida,
Montu ra de      Montura Miranda (Bayoneta de 4 garras y rosca de 44mm. @).
    Objetivo
Avance de       Angulo de rebobinado 180", 5ngulo marginal 25", avance del
    peli cu la        trinquete posible.
Rebobinado de    Palanca de rebobinado, bot6n de reposici6n autom6tica para el re-
    la pelicula      bobinado.
Contador de      Tipo de contador de avance, vuelta a cero autom5tica, con indicador
    peli cu la      de enrollado de la oelicula.
Carga de la
    peli u la         Carrete de carga r6pida, tapa trasera abisagrada.
Dimensiones     144x93 x 87mm. (I/1,A),144x93 x 95mm. (f/1,4).Peso            Con  f /1,8 = 950 grs.; con l/1,4 :  1 1OO grs.


Standard Objek-  Auto Miranda 50mm/1.4, S-Gruppe 7 Element (Gauss, modifizierter
    tive         Typ) Auto Miranda E 50mm/1.8, 4-Gruppe, 6 Element (Gauss,
                    modifizierter Typ).
            TTL  (durch-das-Objekfiv)  Belichtungsmess-er, volle EE, Kupplung,
                 vollautomatische Blende, Blickwinkel 46',  kleinste Offnung 16,
                   Tiefenschdrfekontrolle,  Filtergrdsse 52mm, kiirzeste Aufnahme-Ent-
                  fernung mit 50/1.4 43cm (l? ins.);5O/1.8 45cm (18 ins.).
Verschluss         Schlitzverschluss, B, 1-l/1O00 sec, eingebauter Selbstausloser mit
               max. Dauer von 10 Sek.
Blitz Synchron    FP und X, autom. Synch. zu X bei 1/60 sec, kabelloser Aufsteckschuh
                  (Mittenkontakt).
Belichtungs-      Offenmesstechnik, eingebeuter CdS Belichtungsmesser mit voller EE
   messer        Kupplung, Arbeitsblendenmesstechnik   miiglich, Messzelle liegt hinter
            dem Spiegel. Alternative Punkt- und Durchschnittsmessung  durch
                 Umschaltung, EE Messbereich vom Lichtwert 3-18 bei 100 ASA und
                  1.4 Objektiv, automatischer Verschlusszeitenbereich  1/4 bis l/f 0O0
                    sec. Ein Kupplungsknopf im Zentrum der Verschlusszeiten ermtiglicht
View original page 10Page 11 · Read text
www.butkus.us


                     Einstellung. au.sserhalb des Messbereiches. Filmempfindlichkeit von 25
                 bis 16O0 ASA. Mallory-Batterie 6?5R, Batterieliontrolle im Sucher
                      eingespiegelt.
Sucher            V-egriisseru\g-O.92x mit 50mm Objektiv bei Unendlich. Abbildung
               967o vom Filmformat. Condensor und Fresnel-Linse kombiniertl
                 Mattscheibe mit  Mikro-Split-Image-Entfernungsmesser.   pentaprisma
                 gegen Sucherschacht auswechselbar.
Objektiv-         Universal Miranda Bajonett (1/8 Drehung) und 44mm Schraubge-
   Anschluss     winde.
Filmaufzug       Schnellaufzughebel, Sperraufzug moglich.
Filmrtickspulung   Auswechselbarer  Riickspulhebel, automatische Auskupplung am
                Kameraboden.
Filmzdhlwerk    Automatisch ri.ickspringend beim Offnen der Kamerari.ickwand. von
                                     I -36 ziihlend.
Filmeinlegen      Schnell-Ladespule, Klappriickdeckel.
View original page 11Page 14 · Read text
l-
GUIDE TO PICTURE TAKING PROCEDURE
Before starting to take pictures, load the camera with the mercury battery (See pages 12-151 .
Mode d'emploi
Avant de commencer d photographier, placer dans l'appareil une
 pile au mercure (voir pages 8 et 9).


                                              www.butkus.us


1. Open the camera back cover and        2.  Wind the film
    load the film                            wind the film until the film counter
   Open the camera back by pulling up         points to "1"  to wind up the ex-
   the rewind knob and insert the film         posed part of the film.
    properly in the film chamber'.


1.  Ouvrez le dos de l'appareil et chargez         Tension du film
     le film                                Avancez  le' film iusqu'd ce que le   Ouvrez le dos de I'appareil en tirant        compteur d'images indique I afin de
    sur le bouton de rebobinage, et pla-           ne,pas.-utiliser la partie du film qui a   cez le film  correctement dans son         ete vatlee au Jour.   logement.

1.  Abrir la parte posterior de la c5mara         2.  Enrol lar la pelicula
   y cargar la pelicula                               Enrol lar la pelicula hasta que en el
   Abrir la parte posterior de la cdmara        contador de  pelicula aparezca el
   sacando el bot6n de rebobinado e        punto "1",  para pasar la parte ex-
   introducir la pelicula correctamente          puesta de la pelicula.
   en la c5mara.

1. Offnen Sie die Kamera-Ri.ickwand,         Filmtransport
   indem Sie den Rticksoulknoof bii      Nach Schliessen des Rtckdeckels
   z-um A.nschlag herausziehen, lefen Sie        machen Sie zwei Leeraufnahmen. Das
  den Film in die Spulenkammer und          Filmziihlwerk steht nach dem 3. Auf-
   ziehen Sie den Fiim iiber das BiId-         zug auf 1 und ist schussbereit.
   fenster und stecken ihn  in  einen
   Schlitz der Schnellaufwickelspule.


                                      12
View original page 14Page 17 · Read text
www.butkus.us


                                 N
                                                              -L.


 7.  Compose picture and focus                      Press the shutter button gently
   When accurate focus is obtained, the        Hold the camera steady, taking care
    overlapping of  the image in  the          to avoid camera shake.
    central zone of the ground glass is
    merged.


   Composez l'image et faites la mise au         Ddclenchement   point                                    Ap,puyez doucement sur le ddclen-
  Quand la mise au point prdcise est         cheur. Tenez fermement.l'appareil en
   obtenue les deux images de la zone         prenant soin d'dviter de'le faire bou-
   centrale du  ddpoli ne font  plus            8er.   qu'une.

7. Composici6n de la fotografia y en-          Apretar suavemente  el disparador
   foque                                   Mantener la c6mara firmemente, evi-
  Una vez conseguido un foco exacto,         tando las sacudidas.
   la superposici6n de im5genes en la
   zona central del visor se funde en una
   sola imagen.

7. Entfernungseinstellung                             8.  Belichtung
  Der   Schnittbildentfernungsmesser         Halten Sie die Kamera ruhig und
    zeigt die Linie einer Senkrechten so          driicken Sie den Ausliiseknopf weich
   lange zweiteilig, bis die durchzogene          durch.
   Linie die optimale Schiirfe aufweist.


                                        15
View original page 17Page 18 · Read text
\ HOW TO LOAD MERCURY BATTERY, CHECKING POWER


                            www.butkus.us


 A 1.3V mercury battery is provided for the Auto Sensorex as the source of power for its
 EE CdS meter. lf the mercury battery is not inserted in the battery chamber, the meter
  will not function. Before using the camera, make sure that the mercury battery  is
  properly inserted in the battery chamber.
 How to load Mercury Battery
  1, Clean the faces of the mercury battery with dry silicon cloth.
  2, Open the battery chamber of the camera by turning the cover counterclockwise.
  3,  Insert the mercury battery into the chamber with the plus (+) side facing outwards,
     towards the cover, and replace the cover securely.
  4.   lf the plus (+) and minus (-)  poles are reversed, the meter will not function,
     although the misplacement will not affect the mechanism of the camera.
  Checking of Battery Power
  After the mercury battery has been inserted properly into the battery chamber, check
  the battery in the following manner:
  1.  Lift and turn the knurled ASA setting ring surrounding the shutter speed dial in
     either direction and set the figure 1OO to the indicator of the film speed (ASA)
      indication window.
  2. Turn the shutter speed dial and set the 125 11/125 sec.) to the shutter speed
      ind icator.
  3. When using lenses, other than below mentioned, check the mercury battery power
      after removing the lens.
     Auto-Miranda-E Lens SOmm  f :1.4
     Regular Auto Miranda lens  f :1.4 with open-aperture indicator pin.
     Regular Auto Miranda lenses without open-aperture indicator pin.
     T-4 Soligor lenses without open-aperture indicator pin Preset T-2 Soligor lenses.
     Lenses of other makes.
  4, The diaphragm setting is unimportant in this connection.
  5. When the power switch, located at the base of the film rewind crank, has been
     turned to the checker position (C), the meter needle, visible in the viewfinder moves
     to the check mark of the battery, indicating that the voltage of the mercury battery
        is normal (See page '14 tor how to read the exposure meter in the viewfinder).
  6. The moment the battery checker is released, it returns automatically to the Off
     position thus preventing a drain of power of the mercury battery.
 The mercury battery wi ll provide sufficient power to work the meter for a duration of
 about one year. lts power, however, drops sharply towards the end of its life. When the
 meter needle fails to reach the check mark, due to the reduced power, replacement of
  the mercury battery is necessary. The mercury batterynay           t:?i                                               f,"" r".["ri".     ""I_Effio"o*'nn.
                                      National M-lc
                                     Mallory RM-675R
 When the camera is not in use, keep the power switch off to prevent waste of battery
 power. lf the camera is not used for a long time, it is advisable to remove the mercury
  battery from the camera.
  (Caution)
 Do not try to disassemble or burn the exhausled battery.


                                      16
View original page 18Page 20 · Read text
FORMA DE MONTAR LA BATERIA DE MERCURIO Y
COMPROBACION DE SU POTENCIA
 La Auto-Sensorex va provista de una bateria de mercurio de 1,3V. como fuente de
 energia para su medidor EE CdS. Si la bateria de mercurio no se encuentra colocada en
 su alojamiento, el medidor no funcionar5. Antes de usar la c5mara comprobar que la
 bateria de mercurio se encuentra colocada correctamente.
 Como instalar la bateria de mercurio
   '1 . Limpiar ambas caras de la bateria de mercurio con un pafio de silic6n seco.
 2. Abrir el alojamiento de la bateria, girando la tapa a izquierda.
 3, Introducir la bateria de mercurio con la cara (+) mirando al exterior, hacia la tapa, y
    reponer la tapa asegur5ndola.
 4. Si los polos (+) y (-) se encuentran invertidos,  el medidor no funcionar5 aunque esta
    colocaci6n err6nea no influya en el mecanismo de la c6mara.
 Comprobaci6n de la carga de la bateria
 Una vez colocada correctamente la bateria de mercurio dentro de su alojamiento,
 comprobar  la bateria del modo siguiente:
 1. Levantar y girar el anillo moleteado de ajuste ASA que rodea al disco de velocida del
    obturador en cualquier direcci6n y poner el n0mero 1OO en la ventana indicadora de
    velocidad de la pelicula (ASA).
 2. Girar el disco de velocidad del obturador y fijarlo en 125 (1 /125 seg.) frente al    indicador.
3, Cuando se usen objetivos distintos a los mencionados a continuaci6n, comprobar  la
    carga de la bateria de mercurio despu6s de retirar el objetivo.
   Auto-Miranda E SOmm.  f /1,4
   Auto-Miranda normal  f 1 ,4 con aguja indicadora de apertura
   Auto-Miranda normal sin aguja indicadora de apertura
    Auto-Soligor T-4 sin aguja indicadora de apertura
    Soligor T-2 Preset
    Objetivos de otras marcas,
4, El ajuste del diafragma no tiene importancia en relaci6n con esto.
5. Cuando el conmutador de energia, colocado en la base de la palanca de enrollado de
    la pelicula, haya sido girado hacia la posici6n del comprobador (C), la aguja del
   medidor, visi.ble en el visor, se mover5 hacia la sefral de comprobaci6n de la bateria,
   indicando que el voltaje de la bateria de mercurio es normal (ver p5gina 14 respecto a
     la forma de leer el medidor de exposici6n en el visor).
6. Una vez soltado el comprobador de la bateria,6ste vuelve autom6ticamente a la
    posici6n de OFF, impidiendo asi una p6rdida de carga de la bateria de mercurio.
La bateria de mercurio proporcionar5 energia suficiente para que el medidor trabaje
durante un periodo aproximado de un a6o. Sin embargo, su potencia decae r6pidamente
al final de su vida. Cuando la aguja del medidor no llegue a la seiial de comprobaci6n,
debido a la falta de carga., se16 necesario cambiar la bateria de mercurio,
La bateria de mercurio podrii elegirse entre las siguientes:
                            Voltaje 1,3V    JIS Tipo H-C
                                           National M-lc
cuando no se usa ra c5mara, desconectar #1:?X.l*S/?3 .."rn,a a rin de evitar lap6rdida de carga de la bateria. Si la c5mara no se usa durante un largo periodo, es
recomendable retirar la bateria de su alojamiento.
(Precauci6n)
No desarmar ni quemar la bateria agotada


                                          18
View original page 20Page 21 · Read text
www.butkus.us
                                                       BATTERIELADEN


          Eine Mallory 675R ist vorgesehen zur Energieversorgung der automatischen Belichtungs-
            regelung.
              1.- Vor-dem Einlegen sollte die Batterie mit einem trockenen Tuch abgerieben werden.
          2. Den Batteriedeckel gegen den Uhrzeigersinn drehend iiffnen.
          3. Batterie mit + nach aussen einlegen, Deckel im Uhrzeigersinn festschrauben.
          4. Wenn + und -  verwechselt ist, arbeitet die Kamera nicht, wenn es ihr auch nicht               schadet.
             Priifen der Batterie
          1. Filmempfindlichkeit  auf 1O0 ASA einstellen.
          2. Verschlussgeschwindigkeit auf I l125 sec einstellen.
          3. Wenn andere Objektive als das Auto Miranda l.4l5O montiert sind, Batteriekontrolle
             nur ohne Objektiv durchfiihren.
          4. Auf Einstellung C drehen. Die im Sucher eingespiegelte Messnadel zeigt and em roten
            Punkt der 1.4 der Blendenskala benachbart ist an, dass die Batterie in Ordnung  ist.
          5. Der CdS Beli-schaltring (8) geht automatisch in die Ausschaltposition zuriick und
              verhindert ein Entladen der Batterie.
          6. Die Batterie behiilt fiir ca.l Jahr die gleiche Spannung. Die Leistungsskala fiillt danach
                steil ab, so dass hier bei einer nicht mehr leistungsfiihligen Batterie ein starkes
            Abweichen angezeigt wird und diese erneuert werden muss.
         Die unbenutzte Kameia sollte nur mit ausgeschalteter Batterie weggelegt werden. Wird
I         die Kamera liingere Zeit nicht benutzt, sollte sie sogar aus der Kamera genommer
]         werden.
tII


               %


                          $@              .@t-
                              -*,        *-
View original page 21Page 22 · Read text
IMPORTANT

            WARNI NG

   Please note that the lens positioning line is
marked in RED on the camera body. The
RED DOT, on all Auto M iranda lenses
should be aligned exactly opposite this red
 line before turning the lens to mount it.

  On the earlier series of Auto Sensorex EE
cameras a green line was also marked on the
camera body. However, this green line was
only indicated for mounting a bellows unit
and the camera lens must NEVER be im-
properly mounted with the red dot opposite
                                                                      1this green line.

  U nless the above instruction is strictly
adhered to damage to the equipment may
resu lt.

                                                                    I
View original page 22Page 23 · Read text
www.butkus.us
 FI LM LOADI NG
CHARGEMENT DU FILM


 For the Auto Sensorex EE camera, 35mm film (2O or 36 exposures) is used.
Always load or unload the film in the shade. lf no shade is available, utilize the shadow
of your own body.
Whenever possible, avoid loading or unloading the camera in a dusty place or near the
seashore, where salty winds may blow.
While loading or unloading, take care not to touch the shutter curtain.
1. Open the camera back
   Open the camera back by pulling up the film rewind knob. When the back is opened,
    the exposure counter automatically returns to the start (S) mark.
2.  Insert the cartridge into the film chamber
    Pull up the rewind knob and insert the cartridge into the film chamber taking care
    that the projecting end of the cartridge faces down. After inserting the cartridge,
   push back the rewind knob to its original position.
3.  Insert the trimmed end of the film into a slit of the film take up spool
    Insert the trimmed end of the film into any slit of the spool, at the same time making
    sure that the film wind sprocket engages the perforation on the side of the film.
4. Turn the film advance lever and make sure that the sprocket engages both perforated
   edges of the film
   After ascertaining this, close the camera back. The back closes at finger pressure.
5. Take-up the slack in the film
    Lift the rewind crank and turn it gently in the direction of the arrow and any slack
    wif l disappear. Care must be taken not to turn the crank in a reverse direction, as this
   may spoil the film.
6. Turn the film advance lever to take up the exposed film
   Operate the shutter for some blank shots till the exposure counter registers "1", This
    will take up the film which has been exposed during loading. When the film advance
   lever is being operated, the film rewi nd lever must turn in a direction against the
   engraved arrow, indicating that the film is properly moving.
After the film loading has been completed, make sure to set the proper ASA film speed.


on utilise pour I'AUTO SENSOREX EE du film 35mm en chargeur.l35 de 20 ou 36poses.
Q\?rS"? ou- ddchargez toujours te ftlm d l'ombre. S'il n'y a pas d'ombre, placez l'appareila t'omDre de votre propre corps.
Chaque fois qye iela- est poisible, iviter.de charger ou de ddcharger l'appareil dans unendroit poussiereux ou au bord de mer, oi peuvent sou.ffler des vents salis.
En-chai'geant ou en ddchargeant l'appaieil, veillez-h ne pas toucher au rideau de
I'obturateur.
1. Ouvrez le dos de l'appareil
   Ouvrez le dos de I'appareil en tirant sur le bouton de rebobinage du ftlm. Une fois te    dos..ouvert, le compteur d'images revient automatiquement sur te iepire de ildpart
     ",S".
2. Placez le chargeur dans le logement du filrn
    Tirez sur le bouton de rebobinage et insilez le chargeur dans Ie logement du film, en    veillant d ce que le chargeur soil bien en place. Reloussez te boiton de reiobiiage
   dans sa position initiale.
3. Faites entrer l'amorce ddcoupde du film dans une fente de la bobine r€ceptrice
   Faites entrer l'amorce ddcoipie ai ftm dans n'iinporte quelle fente de'la bobine, en
                                    20
View original page 23Page 24 · Read text
IiI!
                                                                                                                                                                                                                                                                                                                                                                                                                li  it,
                                      CARGA DE LA PELICULA                                       ti;11l,l.irlil                                                                                                                                                                                                                                                                                                                            l;l,
                                                                                                                                                                                                                                                                                                                                                                   {r  lil


                                                                                                                                                                                                                                                                                                                 lil,l
                                                                                                                                                                                             li


www.butkus.us
    veiltant simultaniment d ce que les dents de la couronne dentde d'entrainement
    s'engagent dans les perforations latdrales du ftlm.
    Fai{es" toumer le livier d'avancement du film et aisurez-vous que les dents s'engagent
    aii Cteux c6tis dans les perforations dit film. Ceci dtant fait, refermez le dos de
     I'appareil,  celui-ci se verrouille sur simple pression-
 5.  Riiendei te film. Pour cela, tournez doitcement la manivelle de rebobinage dans la
    direction de la fliche; ce qui retendra le ftlm.
     it iaut ieiller d ne pas faire tourner la manivelle dans le mauvais sens, ce qui pourrait
   abimer le film.6. Faites toirner le levier d'avancement du film pour enrouler la partie voilde. Faites   quelques ddclenchements d blanc jusqu'd cb que le compteur d'images se trouve sur le
      i.  Vous aurez ainsi enrould la partie du ftlm qui a dtd exposde g! ioul pendant le   chargement. Lorsqu'on actionne le levier dhvancement du film,. le levier de
    rebo"binage doit tourner dans le sens opposd d la fliche gravde, ce qui montre que le
     film. se ddroule correcteme nt.
     \i;t;    ivoii  cnargd le film,  veillez d bien rdgler la cellule sur la sensibilitd ASA
    correspondante.
En la c5mara Auto-sensorex-EE, se utiliza pel icula de 35mm. de 20 6 36 exposiciones'
Cargar o descargar siempre la pel icula a la sombra, Si no se dispone de sombra utilizar la
del propio cuerpo.
Siempre que sea posible, evitar cargar o descargar la cdmara en un lugar polvoriento o en
 las cercanias del mar, donde soplen los vientos salitrosos marinos.
 Mientras se descargue o cargue, evitar tocar la cortinilla del obturador.
 1. Abrir la tapa posterior
    Abrir la tapa posterior de la c5mara sacando  el bot6n de rebobi nado de pelicula. Una
   vez abierta, el contador de exposici6n vuelve automaticamente a la posici6n inicial
     (s).
 2,  Introducir el chasis de pelicula
   Sacar el bot6n de rebobinado e introducir el cartucho en la c6mara teniendo cuidado
   de que el terminal saliente del cartucho est6 hacia abajo. Despu6s de introducir el
    cartucho, volver el bot6n de rebobinado hacia su posici6n inicial'
 3.  Introducir el terminal recortado de la pel icula en una ranura del carrete receptor
    Introducir el terminal recortado de la pel icula en una de las ranuras del carrete,
   comprobando al mismo tiempo que el pifr6n de enrollado de la pel icula encaja en las
    perforaciones del borde de la pelicula,
    Girar la palanca de avance de la pelicula y comprobar que el pifi6n encaja en los dos
    bordes perforados de la pelicula
   Una vez comprobado esto, ceftar la tapa  posterior de la c6mara. La tapa se cierra
    mediante la sola presi6n de los dedos.
    Eliminar la holgura de la pelicula
    Levantar la palanca de rebobinado y girarla suavemente en la direcci6n de la  fl ech a,
   con lo cual desaparecer| cualquier holgura que existiera. Cuidar de no girar la palanca
   en la direcci6n contraria, lo cual podria deteriorar la pel icula.
 6. Girar la palanca de avance para recoger la pel icula expuesta   Accionar el obturador varias vecei en vacio hasta gue el contador de exposici6n
   marque el "1", De este modo se habr5 recogido la pel icula expuesta_durante la carga'
    Al accionar la palanca de avance, la pplanca de rebobinado deber6 girar en sentido
    contrario al de la flecha, indicando que la pel icula avanza correctamente.
Una vez terminada la carga de la pelicula, comprobar que la sensibilidad de la pelicula
ASA es la correcta,
                                           21
View original page 24Page 25 · Read text
www.butkus.us
FILMEINLEGEN


Verwendet wird ein 35mm Film, 20 oder 36 Aufnahmen. Das Filmeinlegen  sollte nicht
bei intensivem Licht vorgenommen werden, mindestens der eigene Kiirpeischatten sollte
den Vorgang des Filmeinlegens schtitzen.
 l.  Herausziehen des Riickspulknopftls dffnet den Riickdeckel. Der Bildziihler springt
     zuri.ick auf "S" (Start).
2. Die volle Filmkassette in die Filmkammer einlegen. Die Riickspulachse in die Kassette
   drehend zuri.ickdriicken.
3. Den Filmanschnitt iiber das Bildfenster ziehen und in den einen Schlitz der
    Schnellaufwickelspule  stecken. Achten Sie darauf, dass die Zahne des Zahnrades in
    die Perforation des Filmanfanges hineinragen.
4. Filmaufzugltebel betiitigen (wenige cm)- Wenn Sie sich iiberzeugt haben, dass der
   Film richtig   . erfasst ist und transportiert, schliessen Sie den Riickdeci<el durch   einfaches Zudrticken.
5. Durch leichtes Drehen des Riickspulknopfes in Pfeilrichtung  i.iberzeugen Sie sich
    zusiitzlich, dass das Filmende  fiir den Transport richtig erfasst  iit.
6. Betiitigen Sie nun den Schnellaufzughebel  zweimal- unter zwischenzeitlichem Ver-
    schlussauslosen. Nach dem dritten Filmtransport  zeigt das Filmziihlwerk Nr. I an und
   damit die Aufnahmebereitschaft  fiir clas eiste Bilii. Achten Sie darauf, dass der
_- Filmriickspulknopf entgegen Pfeilrichtung mitdreht.(Wichtig)
Die Filmempfindlichkeit,  die auf der Verpackung des Filmes angegeben ist, muss auf der
dafiir vorgesehenen Skala eingestellt wdrden, da die Belicht-uigsmessung sonst von
falschen Anfangswerten ausgeht und nicht funktionieren kann.


                                    22
View original page 25Page 26 · Read text
SHUTTER AND DIAPHRAGM                OBTURADOR Y DIAFRAGMA
OBTURATE UR ET DIAPHRA GME


The shutter speed controls the amount of light reaching the film and "freezes" the image
of a moving subject.
The indications "B, 1,2... 1OOO" indic ate "Bulb, 1 sec., 1/2sec....1/1OOO sec."shutter
speeds. To set the shutter speed, the shutter dial is turned to the left or right until the
disired speed number lines up with the shutter speed indicator. The indicatorturns  red
when the film is advanced and white when the shutter is released.
"Bulb (B)" is used for long exposures with the shutter remaining open as long as the
shutter button is depressed.
When the dial is set to the red "60" mark, the "X"  contact is automatically  set for
synchronization with electronic flash (See pages 26,37 for flash shooting).
Shutter speed can be freely changed before or after film advance.
The shutter dial does not turn beyond the EE coupling range. To turn it, press the over-
ride button in the center of the shutter speed dial.

La vitesse d'obturation contr)le la quantitd de lumiire qui atteint te film et "gAb"l'image du suiet en mouvement.
Les indications R,, 1,2 ... J000 indiquent le temps de pose exprimd en fraction deseconde. 1 sec, I 12 sec. ... I /1000e de sec.
Pour rdgler la vitesse d'obturation on fait tourner le sdlecteur des vitesses, vers la gaucheou vers la droite, jusqu'd ce que le chiffre de la vitesse disirde coi'ncide avec le repire des
iitesses.
L'indicateur devient rouge quand le film est avancd, et l'obturateur armd, et blanc quand
l'obturateur est deiclenchd, et le film a avancd.La pose B s'utilise pour les longs temps de pose, l'obturateur restqnt ouvert aussi
longtemps que l'on appuie sur le bouton ddclencheur.
Quand le sClecteur de vitesse est rigli  sur le repire rouge "60"  le contact est
automatiquement braychi pour synchronisation avec flash dlectronique (voir pages 26 et
27 pour la photo au flash).
I'-a vitesse peut €tre changde d volontd avant ou apris l'avancement du fttm. Le sellecteur
des vitesses ne tourne pas au-deld de la gamme de couplage EE. Pour [e faire tourner enddbrayant, appuyez sui le bouton situd alt centre du sdlbctdur des vitesses.

La vefocidad de obturaci6n controla la cantidad de luz que llega a la pelicula y "para" la
imagen de un objeto en movimiento.
Las indicaciones "B, 1,2,  ... 1OOO" indican "Exposici6n, 1 segundo, 1/2 segundo  ...
1/1 OOO segundo" de velocidad de obturaci6n. Para poner la velocidad de obturaci6n, se
gira a derecha o izquierda el disco del obturador hasta que el n0mero de la velocidad
deseada coincida con el indicador. El indicador est6 en rojo cuando la pelicula est5
avanzada y en blanco cuando el obturador est6 disparado.
La posici6n "Bulb (B)" se emplea para largas exposiciones con el obturador en posici6n
abierta, mientras apretamos el bot6n del disparador.
Cuando el disco se pone en la marca roja "60", el contacto "X" queda sincronizado
automaticamente para el flash electr6nico (ver las pdginas 26, 27 de fotografias con
flash).
La velocidad del obturador puede cambiarse indiferentemente antes o despu6s del avance
de la pelicula.
El disco no gira m6s al15 del campo de acoplamiento EE. Para seguir girando, apretar el                                            I
bot6n limitador en el centro del disco,

                                     23
View original page 26Page 27 · Read text
www.butkus.us
VERSCHLUSS UND BLENDE

Die Verschlusszeiten B, 1,2 bis  f /1000 bedeuten beliebig, I sec, l12 sec, 1/1000 sec. Die
 Verschlusszeiten werden gewiihlt durch Drehen des Riindll-Ringes, wobei die gewiinschte
 Belichtungszeit de-m qunden Index gegeni.iberstehen muss. Dieser Index ist -gleichzeitig
das Signal wenn der Film transport-ieit ist (rot) und wenn der Verschluss alsgeliist  isI
 (weiss).
"B" wird benutzt fifr latge Belichtungszeiten. Der Verschluss bleibt offen solange derAusldseknopf gedrtickt bleibt.
 Ist die Verschlusszeit rot 60 eingestellt, ist die X-Synchronisation  hergestellt  fiir
 Elektronenblitz  gerii te.
Verschlussgeschwindigkeiten  kiinnen ohne Riicksicht darauf gedndert werden, ob der
Verschluss gespannt  ist oder nicht.
Der Verschlusszeitenknopf  wird gestoppt wenn der automatische Messbereich verlassen
wird. Fiir Zeiten ausserh-alb dieses Beieiiches muss der Entkupplungsknopf in der Mittegedr0ckt werden.


            l?:1::
                             (&                    tinn".'"ri"',,""                fJ          @                  CI                       CI              &                  &                  &l/61                                                        I                        ?               Ratio                                                  l/2                                                                                                           1/ |                                                                      t/n                                                                                     t/l                                                            l/16


Aperture "f" stop Light Volume Ratio
The diaphragm controls the amount of light reaching the film and determines the depth
of field (focal range).
The aperture ring of the lens is calibrated (F values) from the full-open to the smallest
apertures and clickstops at the red indicator position, on top of the lensbarrel.
The higher the aperture value the less amount of light is transmitted to the film plane.
Thecalibration on thescale  is so arranged that the setting to the next higher value reduces
the volume of incoming light by half. lf, therefore, the scale is adjusted in succession to
the next higher value, the amount of light transmitted through the lens will be decreased
i-n plogression of 1/4, 1/a, 1/16 and so on. The lens, when set to th-e "EE" position, is set
for EE (automatic exposure) shooting.
By setting the daaphragm to the intermediate positions of the scale, intermediate apertures
are obtained.
The shutter and diaphragm are cross coupled Io the exposure metering system. See page14  f or how to use the exposure meter.          !


                                    24
View original page 27From the M. Butkus archive. Original publisher and archive notices are retained.
Check the model and edition against your equipment.
PDF verified 2026-10-10.