Film cameras
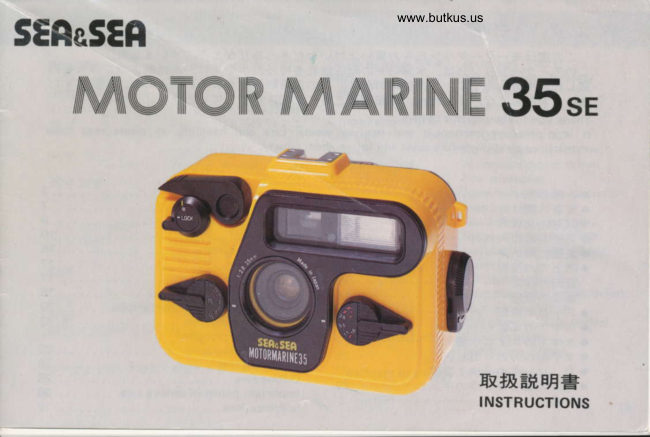
Motor Marine 35SE User manual
User manual for Motor Marine 35SE. 33 pages in English. Read the original PDF, download or print a copy without registration.
33 pagesEnglish2.2 MB PDF
Loading your manual…Open PDF directly
Document details
- Brand
- Motor
- Model / document
- Motor Marine 35SE
- Document type
- User manual
- Language
- English
- Pages
- 33
- File size
- 2.2 MB
- Category
- Film cameras
- Document date
- Not specified in catalog
Search available document text
Find a term, then jump to its page in the original PDF. Image-only pages may not be searchable; check the PDF for exact wording and diagrams.
Page 5 · Read text
Venmo @mike-butkus-camera  Ph. 2083
PayPal Name  Lynn@butkus.org      www.PayPal.me/lynnbutkus
View original page 5
Page 6 · Read text
www.butkus.us

On.v 2 / 7                OBack cover lock knob
(E€'EE              @ Battery compartment
@€;l!,HIHl- t) fr>        @ Battery removal pull-tag
@z < tvt^E7r1Frtv ts-        @Film chamber door latch@z < tv t^E#.                           OFilm chamber door@83FL/I\
063HI'/  t."7l.              @Riwind dog                                             take-up spool@+n+*v t\-                   @Slot of
                                                                    lever@z+)vLh)>?-            @Wind-Rewind setting
@o-t)>2                 @Film counter
                            @O-Rins
@tf$li>>2  tr+*.f,           @Rewind button
                            @Connector holes for accessory flash
                          @Claw
View original page 6Page 8 · Read text
www.butkus.us

OF* a.v 2 .t J                 C)Back cover lock knob
@+FiH                @ Knob position indicator
@FH                      @Back cover
O>-,"'vg-vtL-                @Shutter release lever@vt)                                @Shutter release lock       rJ -zn'y2?4Ptvv tt-@fin
@z *    Tvtr-                @Aperture switch     -h                     @Focus knob@z*-nzt?lF^
@ftt,/ tHiH                    @Focus knob position indicator
                                                switch position indicator@z I n;tir:-f FF              @Aperture
                                                      flash guide table@>>28++'vJ                 @Built-in
@+* >8,                     @Plug for yellow sub connector socket
@+*BR7z4>t"-              @Flash ready light
@ z  |-    'y 7Bylt*ls               @Viewfinder eyepiece     =@z z 4 >?-Ht1-jglJ                              @Strap loop@*lH.2  l'' tr fi                                @Optical viewfinder mount
                                   @Built-in flash
View original page 8Page 10 · Read text
www.butkus.us
          ,v 2 ?'4 f tv@affi=+ t fi.afrfi(:iElL. "oPEN" v-2  z"tt-#.a*L\.i7- 2@E*HnAit6 L lFH@r{,t,- b -6Le) *T                                          &> z B+T+r ( h: u b n *t   "                            "
To open, turn the back cover lock knob O clockwise past the "Open" mark. The cover will
automatically lift up slightly and then can be opened fully by hand.
View original page 10Page 11 · Read text
. EgiU O x*Lfi  Battery installation
   HHtB:[1. €tUE@(-r{*tlo >-)vl:*m L< &>a)EI). @. et:a^l?.J}. €,t& xn  (Td r.. EE;t,E xn6F+. €ttEcH L U fr>@A€)fr.alTLUA J i  t:             L'"                                                                                          iJ H{f * 3-"   ^n<T3       T,fF.f /)E)daFH-{F#/ct) *> &El3 -L-ff^ 6 t EAt:f,q                                                                           t) +7gfut|fr.ffi L (T + r."      x. : a h ./ . (-(*,!-'b fH 3 H7 )vh
   Open the back cover and insert two *AA Alkaline batteries into the battery compartment @as
   shown by the inside diagram. When inserting batteries, place the battery removal pull-tag @
    underneath the batteries so that the inner battery can be easily removed by pulling the tag up.
    * Use only ALKALINE Batteries.
View original page 11Page 12 · Read text
www.butkus.uso 7 4 )vbo^tlfr   Loading film: o
   XHaFn:(t. 7 4 )vll9lHFrriF,fi l-,/t-@AT(f,  7 4 )vLEjHi.@t?x1$ *T"
   Open the back cover and pull down the film chamber door latch @ and swing open the film
    chamber door. @
View original page 12Page 13 · Read text
o74rvA@x*afi @
   74 )vL€58Rt-vlt-(:Tr'B+:LLAl.    74 tvt^t'rt-11 3HL. #8Hv() f ,L
   @0')*FDo>)# (2 ry-rfi&>() *T)  E+^.U:Aar*T"
   :')H+. #3Eq() F. Arr.Ru.{tEl:E'y  I L(u'at.rififr(t14   } f.'<+t)14>  Fq..J+4    r.,zr-@ E t), 4 > F (R) a).ftEEt6L#3EqcJ F 7 L(tE Hl:E+tLEEt=12'y  t (.
   3 *3-"
View original page 13Page 14 · Read text
'* * * * * r                                       r    y y. *                  ?;        www.butkus.us   Y ryxuYWry   ryfffiffff  @
          Insert the film cassette into the  f ilm chamber,  if it does not fit easily, rotate the lower end of the
         film cassette axle sliqhtly so that the rewind dog @ can engage with the film cassette spool.
         Pull out the tip of the film from the cassette and set the wind-rewind setting lever @ to the
      "R" position so that the take-up spool will move freely to easily position the slot for inserting
         the film tip.


                                                                                                                    12
View original page 14Page 16 · Read text
www.butkus.us

7 4 )v/^E#.t  t- 2h'()fEU. 2 +'y I                     7 4 )vLfi t >,(: EHcJ rlr rrH 6 *Ttfi.fi(Td   Lt" -vts-tEEr'+FL<.           -@
NOTE:
Close both the film chamber door and the back cover as previously described, and depress and
refease shutter lever @ until figure "1" appears in the film counter @
View original page 16
Page 17 · Read text
o HH.o>frtVfi Closing the camera
   €Otrl  cJ. 7 4 )vLtrlFrF+ ta* L /:" L.J t'J#.t  l-< I e>;E+rL,E  i Bf(:++(:
   X+nrJ-=-#.2)iH)+ ( Ftr:dD* L * i"   FHAFdaD 6Bf l:. ++(:;iH L (,    O-t) >             ttx(:f4,tL6*/6o'{RrjHor7eH.
                                                     ,J   +4.#.+A L. t)r{ /sf,s(t b t J                                      .      . 6}#n."A\a*H.zK;ffirl t"fr#u.tt6€EE L. FHA9A (                          =: a'(i!-a* ('L -th'I) E L * T"    *F U-:{lrrf{re. ?4 P )vt "LoCr"
    Before closing the rear door, carefully check the surface of the O-ring @ and mating surface of
   body and rear door for scratches, dust, water drops etc., then close the door by setting the
    locking knob to the position marked "Close" and whilst holding the door firmly closed against
    the body, turn the locking knob clockwise to the "Lock" position.
                                                    "Close,,
View original page 17Page 19 · Read text
U$UUilr"                   O
rlr*H-aHHfi                                    ("6EEpg(:;Eafi tt   t t.  :ah  ./ .  a)lffI) (tFz.8r' 6 l6*  H*f.>JB.   #@r{v4fz*m<"T.Et^t.   f*@(ti6-E7 >JT. z 1.,tfo)vf 4 A>Jt  U<,F.ITt *T" E4F.tla*@EJ=zFrIr("EHzf -tt-z--..t-*T"                                                                                         t                                  >                                                                                                  fi''ffi                                                                         t'r  U+4-{            t=d>E.                                                .                         tw+|+|:tAff                  h t ?iHiEE)t &1+6                                             !'v ? -t-'lt-O                                                                 L.*?).                                                                                                                 c) < L*                                 z                               b                                        z6Bf,c:2                          ( +qt                                t ft,fta-ftar,=        6 * ?.(ta                                        + .y t -hrf:.                                                         v rt-@&4+Ehdj.J,                   (J:'ftiu                                          zf                                                  bFtaa)frrfi.-ffi.t)z      zfso')LEDhi24                tFT.8q)fi.\.     f                                    -tt-rt     t)                             3 ()        >2"                       2 + .y                                       t           z"h<=u'/:{tft                               tT  "                                  - t   ->.
O ON.LAND PICTURE TAKING
1. Exposure setting
The exposure setting dial has eight positions and as you
rotate the dial you will feel clicks at each position. The
 last two anti-clock positions are for switching on the built-
in flash. These positions should be used only for flash pic-
ture taking (see Section on F lash Picture Tak ing). Beside
the viewfinder eyepiece @ three exposure display lightsare located. The LH side red light 89 marked with (-)   isfor low light warning (under exposure)  . the centre green
light Q9 is for "OK shooting" and also for "f lash ready"
and the RH side red light @ marked (+) for over expo-sure warning.
To check light conditions face the camera to the subject
and with shutter lever unlocked and exposure control dial
@ set to say "5.6", depress slightly (otherwise the shut-ter will be prematurely released before conf irming the
 light conditions) the shutter release lever to check if the
subject is bright enough.  lf  it is, the centre green light will
glow then pictures can be taken.
View original page 19Page 20 · Read text
www.butkus.us

:           r2rfr,f,lHFfifEl m i.bfFREnfEHE(:,fFH("3 *'{" 7 t   7v/t-@o*t? tv-2@Eet                                     -h      *T" h./.r.bsm!l.-L.tf  tttt,t:tgattft|]FK (+) {:A'tt( ( /:'3t'"
     @)zz1>?-             )07 r4 >t"-+nw#|J.l(190%oTt"  7 v 4 29-h'bat\\f=t#trof'!to           o/otav,?E@r{5Etri,f*=ah./                               t ts t) tT  "
         2. Focusing
        The lens can be focused on subjects from 1
        meter (3   f eet) to  inf inity. Estimate the
           distance between the subject and the camera
       by eye, and set the distance scale to the
           distance indicator dot @  .
           Subjects further away than 5 metres from the
          camera can be considered as inf inity.
         3. Viewfinder
           After having adjusted the exposure and focus
            setting, look through the viewfinder @ and
         compose the subject in the full frame of the
            viewf inder.


                                                                                                       TE
View original page 20Page 24 · Read text
www.butkus.usozKF<"O>*fr#, Under water picture taking
      FE-' g uK* -C.o*&E/srE6^A < +U_( Z                                              6r;@rrf{&) rt &t o                                            .                                =
      (I )EEEE
         zK t EF,a trtfr#aEL'c),F..      ('{i+fi5'f6r{|ltrI(:}b^{(  J.. I  ( .  iJt ( t= R,   *
    T" h./.av>   ?bfflttl:T.4t ^+I, * f d)t.  E T''EU-: /:fEHE(:Arf (.  7 "r -h ^7v       tt-dt-trffi.t) Ae{f (  ( /jd t'"
   @Ji,l
                                                              m T116 Et=6yt1 2      7K+Ta)tI(*iEHlsE  -L-J t) h.rf, t) ,)-tt (.  N EAH! EBTK',R|r3
                                           e)                              t (:fJ                         *T"  TP.nRhrt0 m tftz6)+d  ("(iH(:F4D(Ialnft.t)    -EVFET=7*1U6:                                                                                                                   ""1#.          ffi LK T d L'. (ASA lo0)
                            lE U*.f+TRr,(.L r  i  "     ^H-c{t[EL*&.F.tuNzK#a-.6aBtr. X,frF. t&F/WF=1t=J t) zK#jtr(*H|;zA4t L(ur*f"

   There are two major differences between underwater and on-land photography:
    (1)Distances Because the refractive index of water is different from that of air, the subject
       underwater appears to be closer and larger than it really is, fortunately the camera lens also
       "sees" the subject closer and larger, therefore proceed to focus the camera by estimating the
       distance exactly the same as the instructions for on-land picture taking, and do not make
       actual measurements.
    (2) Light The light conditions underwater are invariably much darker than those on-land it is
      recommended to always use  f lash.


                                                                                   22
View original page 24Page 28 · Read text
www.butkus.us  o Unloading film
           Refer to precautions under "Opening and Closing the rear door" particularly that section recom-
         mending the camera be placed on its back  (f ront of camera upper most) and then open the rear
           door.
           Set the Wind-Rewind lever to "R" position, then hold down the Rewind button @ and the  f ilm
          rewinding will start immediately and continue until the end (tip) ot the film comes out of the
           take-up spool and rewinder stops automatically.ttTII
        Open the film chamber door and take out the film cassette and reset the W-R setting lever back
          to "W" position and close both the  f ilm chamber and rear doors.
          Have your exposed  f ilm processed as soon as possible.

t


                                                                                                   2A
View original page 28Page 30 · Read text
t*,ry-ryryffi                                           www.butkus.us
                ilb'E5fl*l0'nt'uun',**************ff*
      Always check the surface of the O-ring the rear door for dirt, scratches etc. lf opening and closing
      of the back becomes  diff icult lubricate the O-ring with the grease included in the camera kit. lf
      the O-ring is badly scratched or deformed,   f it a new one. When changing the O-ring, removes only
      with your  f ingers never use sharp items such as knives, screwdrivers etc.
     NOTE:
     Use grease sparingly as excessive amounts may migrate into camera and/or attractsand/dirtetc.


                                                                                          28
View original page 30Page 32 · Read text
-                                                            www.butkus.usmaintenance   o Important points & camera                                                        :::'t     :
         " When opening and closing the back cover, be sure the camera and your hands are
t           completely dry and clean.        *         Do not open the back cover in places where water or sand may be hazardous.        *         Do not clean the camera with alcohol or thinner.
         " Do not leave the flash switch on for any long period of time.        *           Change the O-ring of the cover if it becomes scratched or deformed.        *        Do not use an excessive amount of silicon grease on O-ring (refer Changing ofI             O-ring).
           *         To avoid accidentally dropping the camera, use of strap is always recommended.
           *   lf the camera is to be left unused for more than a few weeks, remove batteries.
           *          The camera (and film) may be damaged by excesive heat, do not leave on the back
            shelf of car as sun shining through a car window can cause a great deal of heat.
           Also do not leave camera in a stream laden atmosphere as cornbination of heat
          and moisture can be detrimental.
View original page 32From the M. Butkus archive. Original publisher and archive notices are retained.
Check the model and edition against your equipment.
PDF verified 2026-10-10.