Film cameras
Multiblitz Profilux User manual
User manual for Multiblitz Profilux. 10 pages in German, French, Spanish, Dutch, Swedish. Read the original PDF, download or print a copy without registration.
10 pagesGerman, French, Spanish, Dutch, Swedish0.8 MB PDF

Loading your manual…Open PDF directly
Document details
- Brand
- Multiblitz
- Model / document
- Multiblitz Profilux
- Document type
- User manual
- Language
- German, French, Spanish, Dutch, Swedish
- Pages
- 10
- File size
- 0.8 MB
- Category
- Film cameras
- Document date
- Not specified in catalog
Search available document text
Find a term, then jump to its page in the original PDF. Image-only pages may not be searchable; check the PDF for exact wording and diagrams.
Page 2 · Read text
www.orphancameras.com
ffiultrblrtz
PROFILUX-2OO
          -400
          -600


Bedienungsanleitung
Instructionsfor use
Mode d'emploi
Instruccionesde uso
lstruzioniper I'uso
Gebruiksaanwijzing
Bruksanvisning
View original page 2Page 4 · Read text
t
                                   www.orphancameras.com

       OperatingInstructions                       brightnessof the modeling light varies in proportion
      PROFTLUX200 - 400 - 600                    with the flashoutput selected.
                                                                   Profifux units for 22O- 24OY:
         Caution:                                           Profilux200 comes with a 75 W halogentube, Profi-
        Be sure to form the flash capacitorsbefore first use    lux 400 with 150 W and 600 with 250 W halogen
           of the equipmentas well as after every three month    tubes. Thesetubes are compatiblewith all Profilux
           of storage.                                   models.A 250 W halogen tube is availableas an
        To do this, proceed as follows:                       optional accessory. This is also suited for use in
           1. Switchuniton.                              any of the three models. The halogen tubes do not
           2. Set unit for full power (1/1).                   need any special fuse within the unit and have a
           3. Do NOT fire any flashes!!!                      burning life of 20fi) hours.
           4. Leaveunit in this conditionfor one hour.           Profilux units for 110 - 130 V:
           5. Do NOT turn on the modelinglight.                  All unitscomewith al20V  / 2O0W halogentube with
        The capacitors are formed after one hour, and the   GX 6.35 base.This tube needs its own F 2 A fuse
           unit may be used.                           housed at the front of the unit (24) as well as a
                                                               protectivePyrexglobe (25).To changethe globe, see
           1. Basic outfit                                   item 15.
         Flashunit with plug-inflashtube, halogenmodeling
         tube with B 15 d base, power cable, sync cable,    7. Output control
           protectiveglobe and spare fuse.                    Flashoutput can be continuouslyvariedfrom approx.
                                                12.5%to 100% (overa rangeof four f-stops).Flash
           2. Accessories                              and halogenlight have a fixed relationshipand are
         Variousinterchangeablereflectors,folding reflectors,   variedproportionallyto each other.When you reduce
        honeycombfilters, umbrellas,barn doors, snoot,    the power setting, excessiveenergy is dissipated
          Fresnel-lensattachment,stands. (See system dia-    within the unit; LED (15)does NOT light duringthis
        gram on back.)                                    period.
           3. Design                                             8. 100% modeling light
        The units havea 5/8in.socket (11)with clamp (16),   With the aid of switch(12),the modelinglightcan be
         which fits all lightingstandswith a 5/8in.stud. Stands   switched from proportional to 100% output,
          without such a stud need an MA-151 adaoter.After    regardlessof theflash output selectedwith knob (4).
         looseninglever(10),the unitcan be tiltedup or down   HalogenIOOYo:LED above switch (12)lightsgreen.
         usinghandle(2).To lock the unit,turn the adjustable
          lever(10)clockwise.                                  9. Optical and acoustic firing monitor
                                                The units provideopticaland acousticfiringcontrol
           4. Preparing for operation                            that can be activatedwith switch (13).
           Inserthalogentube, makingsure it is properlyseated   Switch (13) depressed/LEDabove switch (13) lit
         (see item 12 of these instructions).Plug the power   green:Afterfiring,the modelinglightwill go out until
          cable into socket (8) at the bottom of the unit, and    the unit is once morereadyto fire.When usingseveral
         connect it to a wall outlet. Switch unit on with green    units it is thus easy to check whetherall units have
         master switch (6); the green LED (5) above master    fired.
          switch (6) lightsup. Whilethe flash is charging,the    Switch (13) in opposite position/LEDabove switch
       LED (15)will glow very weakly.Once LED (15)lights   (13)OFF:An acousticsignalsoundsafterfiring;the
            brightly-the unit is ready to fire.                       ootical monitor is deactivated.
         Functionsof LED (15):                            10. Synchronization
      WEAKglow:      Unit is charging                Plug the sync cable into terminal(17)in the base of
         OFF:            Discharging(from high to lower    the unit and connect it to the camera.Slavescan be
                       power or after operationof ther-    fired via the photocell(3).This also doubles as an
                        mal circuit breaker,item 14)        infraredsensor.
           Lights BRIGHTLY goes out briefly:
                            Unit readv to fire.               1 1. Changing reflectors
                                                                       All reflectors have a bayonet mount and can be
            5. Power supply                                lockedin the bayonet(23)withslide (1).
         The units are factory-settor 22O- 24oV I 50 - 60Hz    Slideset to A = Mount open.
           or 110 - 130V / 50 - 60Hz AC. Before connecting    Slideset to B = Mount locked.
            to the power supply, check whether your rated   Move slide (1)to A, insertthe reflectorin the mount,
          voltage agrees with  the operating voltage   and turn clockwiseto lock. To remove the reflector,
           specified on nameplate (17).                   proceed in the reverse order. Use umbrellas
                                                              exclusivelywith COMSCH umbrellareflectorwhich
            6. Switching on the modeling light                 includesthe umbrellaholder.
           After switching the unit on with the green master
          switch (6),you may turn on the modeling light using    12. Changing the flash and halogen tubes
          the yellowswitch(7).When the modelinglight is on,   Switch unit off and pull the power plug. Remove
          the LED above the switch will light green. The    reflectorand other accessories.
         4

                                                                                                                                                                                                                                                                                                  i}
View original page 4Page 5 · Read text
www.orphancameras.com


Profifux units for 2N  - 24oV:                       14. Thermalprotection
Halogentube with bayonetmount. Lightlypresstube   The unitshavea thermalcircuitbreakerthat responds
(20)inwardsand, keepingit depressed,turn through    to very high ambient temperatureand heavy-duty
o revolutioncounterclockwise.                       USE.
Profilux units for 1 10 - 130 V:                When the circuit breakeracts, the flash will not fire
Remove Pyrex globe (25); see item 15. Withdraw   any more,and the modelinglightgoes out. The LED
halogentube.                                     (15)abovethe open-flashbutton(14)is OFE whileall
Removetube and replacewith new one, taking care   other LEDs stay lit. Once it has cooled down
not to touch the new tube with your fingers. Follow    sufficiently,the unit switcheson automatically.Under
manufacturer'sinstructions.                      normaloperatingconditions,the built-infan provides
Before changing the flash tube, switch the unit off,    sufficientcooling.
pull the power plug and wait for about one hour to
allow the capacitors to discharge.Then carefully   15. Pyrex globe
withdrawflashtube (19)and replaceit with a new one.    Profilux units for 1 10 - 130 V are factory-equipped
Make sure that the tube is firmly seated all the way    with a protective Pyrex globe (25). To remove the
down in the base, the triggering contact (21)    globe, pressthe two wire springs(26)inwardswith a
surrounding the tube on either side.               pointedobject so that they clearthe screws (27),and
                                                                                       lift them out. After changing the flash tube, replace
13. Fuses                                         the globe (25) and press the two springs (26) back
To change fuses, switch the unit off and pull the    underneaththe screws.
power plug. Fuse drawer (9): Push the fuse drawer
(9) out towards the front with the aid of small    16. Gare and maintenance
screwdriver placed behind the upper part of the    At the end of the shoot,pullthe power plug.Unitsthat
drawer.The fuse is located at the rear,a spare fuse    are used regularlyshould be servicedby Multiblitz
at the front of the drawer.Always replacethe blown   once a year.
fuse by one of identicalrating:
Profilux- 200/400/600 22O- 24OV = T 3.15 A       The flash unit should be carefully protected from
Profilux- 200/400/600 1 10 - 130 V = T 4 A           water splashes.


                                                                                              1f,.  . a
View original page 5Page 6 · Read text
www.orphancameras.com


 Flash power           -J(Ws)   200    400    600     200     400     600
 Powersupply         V         220-240               110-130
 F-stop,1m,ISO100 lRefl.       32,8    64,1    90,1    32,8    64,1    90,1
 GuideNo, m, ISO1m I Flt.No9260   42      67      94     42      67      94
       ranqe. 99nLtqt                       .       -J(Ws) 25-200  50-400  75-600  25-200   50-400  75-600 infinitelyvariable
 Recyclingtime             s  0,4-0,8 0,5-1,3 o,8-2,4 0,3-0,9 0,4-1,3 0,5-2,2
 Flashdurationt 0,5         s  1/600-  1/400-  1/300-  1/600-  1/400-  1/300-
                           1/1200  1/700   1/600  1/1200  1/700  1/600
 Flashtube, UV-absorlcingCode:  coMRow - 4  PROREW coMRow- 4   PRORE\A
 Halogenmodelinglight 100%W   75      1 5 0    250          200
 Halogenmodelinqliqht                      "        WSockel 75/815d     150/815d    250/815d        200/GX6,35
 0SRAM/Radium- Standardeouioment64473AN//RH75i4471AM/RH1s0Tl64479AM/RH250t    64503
 Halogenmax.       W ,_50164479AM/RH250]
 Modelinglight,              W  10-75  20-150 30-250          25-200 control ranoe
 Flashtriggering                Photocell,svnc cable,open flash button, infraredtriqqer
 Voltageacross sync cable  V                         9
 Connected load     A/VA (W)        3.15/ 750                 4,0/ 520
 Flashvoltage stability   %                               +/- 1
 Radio interferencesu ppression       Accordingto CE, DIN IEC 491, VDE 0882
 Dimensions118x118
 Length              (mm)       295        336         295         336
 Weight                  kg   1 , 7    1,85    2,3     1,75     1,9     2,35
 Tolerancesof specificationsanc componentsconforminqto DIN and IEC standards
 Subject to change without notice


 (1)  Accessorieslock slide                         (14)  Open-flashbutton
 (2)  Handle                                     (15) LED readylamp
 (3)  Slavecell/ lR sensor                         (16)  Knurledlockingcollar
 (4)  Output control                                (17)  Nameplate
 (5)  Light-emittingdiodes                       (18) Sync terminal
 (6)  Master switch ON / OFF                      (19)  Flashtube
 (7)  ModelinglightON / OFF                      (20) Halogentube
 (8)  Power socket                                (21)  Flash-tubetrigger
 (9)  Fuse drawer                                  (22)  Protectiveglobe
(10) Clamp lever                                  (23)  Reflectorbayonet mount
(11)  5/8in.socket                              (24) F2Afuse
(12) Modelinglight100%                          (25)  Pyrex globe
(13)  Optical/ acousticfiring monitor                (26)  Wire springs
                                                    (27)  Fitting screws
View original page 6Page 9 · Read text
www.orphancameras.com


                      lhr neues, hochwertigesMULTIBLITZ-Ger1Iwurde auf dem Weg zu lhnen
                durch eine Spezialverpackungoptimalgeschutzt.
                    Bitte heben Siedie Verpackungftlr spdtere Transportzweckeauf.
                 Halogenr)hrebei Rt)cktransportnicht lm Gerdt lassen.
                Separatverpacken.

                Yournew and valuableMULTIBLITZunit hasbeen send to you in special
                   protectivepacking for maximumprotection.We suggestthat thispacking
                 materialbekeptfor possiblelater use.
                 Beforeshipment,be sureto remove halogenlamp. Pack it separately.

             Ce nouvel appareil MULTIBLITZde haute qualitd vous a 6td envoy6 dans un
                emballagespdcial qui le protdgait de manidre optimale.ConservezI'emballage
                pour des transports6ventuels.Pour la rdexpddition,le tube halogine ne doit
               pas €tre laiss6dans l'appareil.llfaut l'emballers6pardment.

              Su nuevo aparato MULTIBLITZ,de gran valorpara el envio a Vd. ha.sido
                  protegidooptimamentepor medio de un embalajeespecial.
                Por favor,guarde el embalajepara fines de transporteposterior.
                Para eltransporteno dejar la l4mparahalogenacolocadasino embalarla
                 por separado.

                 L'apparecchiod'alto valorele vienespeditocon uno specialeimballagiodi
                  protezione.La preghiamopertantodi volerconservarel'imballaggiooriginaleper
               un eventualefuturo trasportodell'apparecchiosfesso.Siprega, in caso di
                  rispedizionedelgeneratore,di non lasciarela lampadaalogenamontata.
                               Imballarlaseparatamente.

            Uw nieuwehoogwaardigeMULTIBLITZapparaatis voor veiligtransportspeciaal
                  verpakt.Bewaartu deze verpakkingvoorhet eventueelveiligverzendenin de
                 toekomst.Halogeeninstellamptijdenstransportniet in het apparaatlaten.
                 Apartverpakken.

                      Ditt nya MULTIBLITZ-aggregatdr ettprecisionsinstrument,som skyddadesav
               en specialfdrpackningpd viigen tilldig. Bevarafdrpackningen,sAatt du kan
               anvdndaden fdr kommandetransporterav aggregatet.Ta ur halogenlampan
               och fdrpackaden separat,innan du sdnder aggregatetper post,
             som bilgods,etc


MULTIBLITZDr. lng. Mannesmann. Ferdinand-Porsche-Str.19'. D-51149 Koln (Eil). Tel.(0 22 Og)I 39 60
View original page 9Page 10 · Read text
www.orphancameras.com


                                                 M U L T I B L I T Z
                                                                                    Dr. Ing. D. A. MannesmannGmbH & Co. KG
                                                                            Ferdinand-Porsche-Str.19
                                                                D-51149KOLN
                                                                                             Tel.: +49 (0)2203-9396 0ffiulttblttz                           Fax.:+49 (0)2203-9396 33
                                                                                 e-mail:multiblitz@t-online.de

                         Achtung: Vor der ersten Inbetriebnahmesowie nach einem Nichtgebrauchvon 3 Monaten mtissen die Blitzkondensatoren
                        unbedingtformiertwerden.Hierbeiist wie folgt vorzugehen:
                              1. Gerdteinschalten
                             2. Gerdt auf 1/1 (volleLeistung)stellen
                             3. GerdtNICHT abblitzen
                             4. Gerdtin diesemZustand1 Stundeeingeschaltetlassen
                             5. Das Halogenlichtdabei NICHT einschalten.Nach 1 Stundesind die Kondensatorenformiefi,das Geriit ist einsatzbereit.

                         Die Gerite d0rfen NICHT mit ungeregelten Benzin- oder Dieselgeneratoren betrieben werden!

                          Caution: be sure to form the flash capacitors beforefirst use of the equipmentas well as after every three month of storage.
                     To do this, proceedas follows:
                            1. Switchuniton.
                             2. Set unit for full power (1/1)
                             3. Do NOT fire any flashes!!
                             4. Leaveunit in this condition{or one hour.
                             5. Do NOT turn on the modelinglight.Thecapacitorsare formedafter one hour,and the unit may be used.

                    Do NOT run the unit on unregulated AC from gasoline or diesel-powered generators.

                           Attention: Avant la mise en service et apres une non-utilisationde trois mois, les cindensateurselectrolytiquesdu flash
                          doiventabsolumentetre form6s.ll faut procederde la manieresuivante:
                        1 Mettrele flashen circuit.
                              2. Le r6glersur 1/1 (puissancemaximum)
                              3. Ne d6clencheurAUGUN 6clair!!
                             4. Laisserl'appareilen circuit,regleainsi,pendantt heure.
                               5. Ne pas mettrele tube halogeneen circuit.Apres t heure,les condensateurs6lectrolytiquessont formeset le flash peut etre utilise
                                                        ll ne faut PAS faire le g6n6rateur sur du courant alternatif fourni par un groupe 6lectrgdne sans r6gulation
                       alimment6 par moteur a essence ou au gazole.

                              Atenci6n:  Antes de la primera  puesta en marcha  asi como tras una inactividad de 3 meses han de formarse sin falte los
                          condensadoress del flash. Proceda como sigue:
                            1 Poner el aparato en marcha
                                              lr Situarlo g:r ;,!1n2 p;rlencia
                                 3. i'.lu racer rrngurI desterlolj
                                   4. Dejar el flash conectado  durante  t hora en este estado.
                                  5. NO poner la luz halogena.

                          Los flashes NO se pueden hacer funcionar con generadores AC de gasoline o de Diesel que no est6n regulados.
View original page 10Related documents and language editions
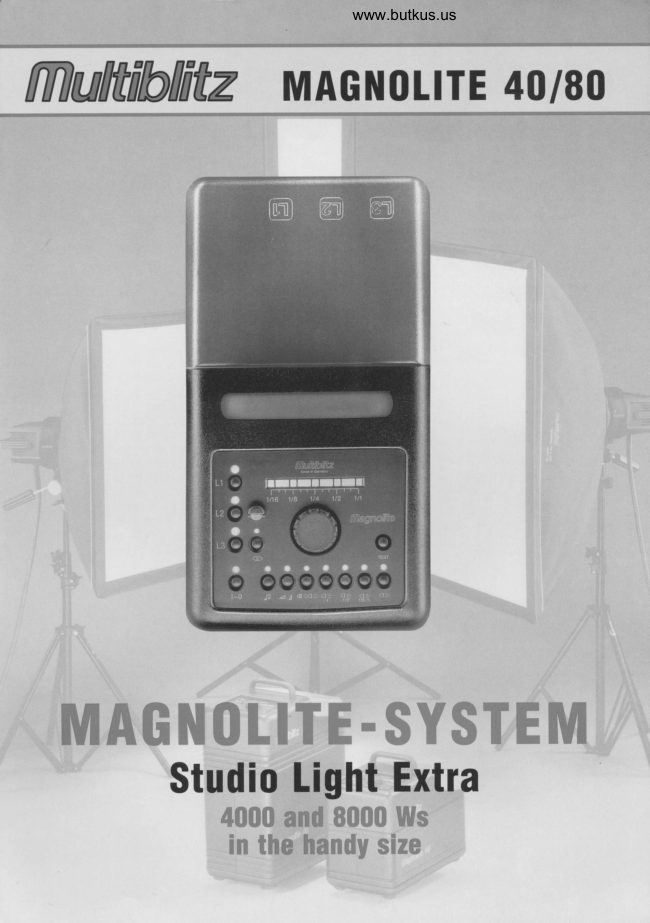
From the M. Butkus archive. Original publisher and archive notices are retained.
Check the model and edition against your equipment.
PDF verified 2026-10-10.