Film cameras
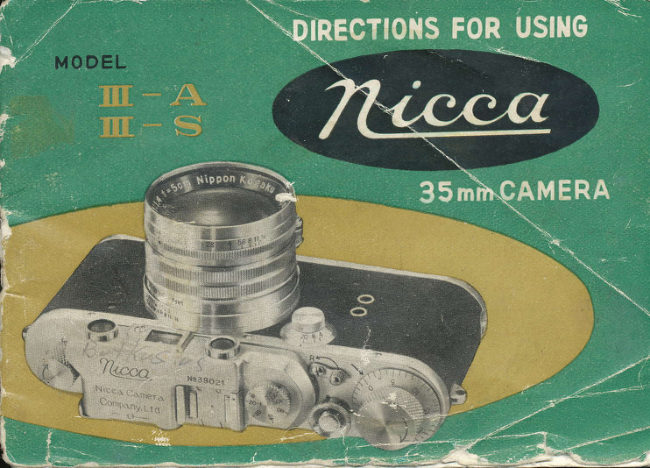
NICCA III-A / III-S User manual
User manual for NICCA III-A / III-S. 28 pages in English. Read the original PDF, download or print a copy without registration.
28 pagesEnglish2.8 MB PDF
Loading your manual…Open PDF directly
Document details
- Brand
- Nicca
- Model / document
- NICCA III-A / III-S
- Document type
- User manual
- Language
- English
- Pages
- 28
- File size
- 2.8 MB
- Category
- Film cameras
- Document date
- Not specified in catalog
Search available document text
Find a term, then jump to its page in the original PDF. Image-only pages may not be searchable; check the PDF for exact wording and diagrams.
Page 3 · Read text
Depth o[ f'rcus scaleA  Lens barrel              J
                 K lensB  Shutter winding knob
                                      Rewinding knob                             dial      Lc  High speed shutter              M Film counterD  Stow speed shutter dial                N Range[inder eyePiece E  Range finder                                                             button               O Shutter release F  Focusing lever                  P AccessorY cliPG   lris diaphragm scale               O Rewinding clutchH  Optical view [inder                 R Synchroniser sockef   I   Distance scale
View original page 3Page 4 · Read text
GENERAL DIRECTIONS
       The Nicca Camera is a precision engineered instrument and is faultless
       in operalion so long as operalional instruclions are carefully followed.
      Pleose study these general directions carefully and exciling professiona]
       resulls will be yours.

                                                         plate by tur:ning the locking knob1. loading he Camera. Release the bottom
   a half lurn from lhe mark S to the mark 0 and slip oft the plate. Remove the
View original page 4Page 5 · Read text
toke-up spool and insert the
leading edge of rhe film un-
der the tongue on the sPool
barrel. Hold the film cartridge
in one hand and take-up spool
in the other and pu  | | ou t iust
enough  f ilm   f rom the cartridge
so that two spools can be
inser ted into the cam era.
View original page 5
Page 6 · Read text
Be sure lhe emulsion side faces lowards lhe lens.
Turn the winding kncb slighlly to check whether
the sprocket has engaged   f he per foralions in
                                                                                                    i lm. Replace lhe bottomthe edges o f  lhe    f
plate, and be su re the pin is engoged bef ore
                         p ressing on the plate and
               then turn the locking knob
               from 0 to S. Turn the win-
              ding knob and click the
                     shutter twice in order lhat the
                                                                      f irst part o[ the unexposed    f ilm
View original page 6Page 7 · Read text
ls in position behind the tens before taking your first piclure. Then sel the ex-
      posqre counter dial at the base of rhe winding knob lo zero. Eoch time the
       winding konb is turned, the rewind knob turns in a counterclockwise direction.
          lf this does not happened,  the frlm has not been engaged by the sprockets
     and it should be wound   back
       olf lhe take-up spool and  reload-
     ed into the camera.
,*'
View original page 7Page 8 · Read text
2. Winding Knob. Each time this knob is turned to the righr until it srops, the
    action turns the film to the next exposure and sets the shutler mechanism at the
    indicated speed on the high speed dial.
3. High Speed Dial.  Set this shurrer speed on rhe dial by stighrly tifring and
    turning to the position required. flmportanl :  Before set]ing lhe shuller dial,
                                                    lhe winding knob should be lurned
                                                                                                                                      f ully to the right.
                                          The position B on lhe shutter dial
                                                                is for long exposures. When sel in
                                                  this position, the shulter remains
                                       open so long as the shutter release
                                                   butlon is depressed. The red figures
                                             20- I is the neulral position when the
                                         slow speed dial is used.  lt is again


                                         7
View original page 8Page 9 · Read text
repeoted that lhe winding knob must be   f ully wound before setting
    the shutter dial lo any position. ll this is not done the shutler
   mechanism spring moy be damaged.
4. Slow Speed Dial. When speed  exposures between 1120
   second and I second (or longer) ar e required,    f irst wind the knob
             f u I ly and set lhe high speed (shu  t ter  ) dial to 20-  | .  Then set the
   slow speed (shulter) dial lo lhe
   posilion required (the figures in-
    dicating fractions oI  I second). When
   a Time expdsure is required,  Iirsl
    set the dial lo position T and leave.
  The shutler remoins open afler
    pressing the shuller release button.
   To close the shuller at lhe end of
    lhe exposure, lurn the diai carefully
   lo the position I (one second) The
   slow speed (shulter) dial should be
   io posilion 20 when lhe htgh speed
    shutter dial is used.
View original page 9Page 10 · Read text
5. Range Finder. Exact focus rs to be ob-
     loined by looking rhrough rhe lefr range finder
    eyepiece and ar the some lime rolarrng the
     lens barrel back and forth by means o[ rhe
     focusing lever, untrl lhe rwo images coincide.
    The range  f inder eyepiece is   f rlted wrlh a lens ad;ustment lor your vrsion. The
    viewing aperlures of lhe erTe-piece on lhe rangeJinder rs adlusted by turning the
    small rotating " eyebrow resl " on eye-piece. Thrs compensales for slrghl dif-
    ference in lhe human eye and lacililales the focusing on near or.drslant |biecrs
                                                      to produce lhe grealesl possible sharp-
                                            ness. When your eye is shifted to the
                                                         right hand aperiure, you may compose
                                         your picture through this eyepieces,
                                    at lhe lime o[  exposure.  (See
                                                   instruction 7 for close up piclures
                                         under item Lens Barrel).
View original page 10Page 11 · Read text
6. Rewind Knob When all exposures have been raken, the film should
   be rewound inlo lhe [ilm carlridge. Press the shutter releose button and then
    sel l'he rewinding clutch (O) to lfre position R (rewind), pull out the rewinding
    knob (L) (as illusfrated) ond wincl in the direction morked by lhe arrow on the
    head of the knob. When lhe film
   has been completely rewound,
     lhe shutter release bullon (0) stop
     its winding action. Before load-
    ing a    f ilm into lhe camera, be
   sure to see that the rewinding
    clutch is not set at R but al A
     odvance
View original page 11Page 12 · Read text
T. Lens Barrel. The latest Nicca Camero is supplied with a non-collopsible  lens
    barrel. Ronges less thon 3.5 feel are marked in red on lhe lens barrel. When
     the lens barrel is rotated with the focusing lever, it slops a little distance lust
    beyond the 3.S mark. With a liltle extra pressure in the same direction, the
     barrel will rotate and may be set at the posilion required.
                                              Speciol Note, The range [inder should noi
                                    be employed [or dislances less than 3.5 feet
                                    but the range may be rneasured from lhe
                                                             position of the [ilm Plane
                                                lo the subiect, ond the
                                                                 cor responding distonce set
                                 on distonce scale with
                                                              forcusing lever.

                    ition mark
View original page 12Page 13 · Read text
8. INFRA-RED PHOTOGRAPHY
      Lalesl " Nikkor "  Lenses bear a mark " R " on the depth of
   focus scale at the base of the lens barrel. When INFRA-RED
   film and filter are used [irst focus your camera rn the normal
   manner then lengthen the focus
                                                                                                                                                                   lli*\
    slightly moving lhe point you                                                   ffi
   have obtained on the distance
   scale from the normal arrow
  to the red " R ".  This pro-
   vides the necessary correciion
   for INFRA-RED pholography.          ffi
                                          l2
View original page 13Page 14 · Read text
9. TLASH SYNCHRONISER
  The Nicco lll-S model camero instolls a built-!n duplex
flash synchroniser, which-outomatically  lights the flash bulb
on lhe Nicco Flosh Unil or ony other stondord flosh gun when
                  lhe shutter is releosed.
            When high speed shutter (l l2O-  I /5 00
                 sec) is used inserl lhe smaller plug on the
                 connecling cord into the Red sockel (upper
                 sockei) on lhe camero, end in cose ol slow
               speqd shutter (l -l /8 sec) or Strobe flash,
                the White sockel (lower sockel).
                 For high speed shutter, o llosh bulb lor
                  focal plone shulter (Soy : GE-N o, 6, Syl-
                 t3
View original page 14Page 15 · Read text
No. 2A, West-No. 6, Wesl No. 6A elc) must be used,
ond for slow shutter speed, either o Jlosh bulb for locol plone
shutter or an open flash bulb (Say: GE-No. 5, No. I l,
Syl-press 25, 40, Wesl-No. l2) con be used.
      Shutter Speed      High (l 120-1/5 00 sec.).    Slow (l -l/8 sec.)

 Socket on lhe comero                   Red (upper)            White (lower) to be used
                                        GE-SM, No. 5,  I I                   GE-No. 6, No. 3l       Syl-SF, Press 25, 40 Flash bulb lo be used  Svl-PF 26, No. 2A                                     West No. 5, No.  | 2                   Wesl-No. 6, No. 64                                                          All of focol plone bulbs

                              Shutler speed         Socket lo be used
  Strobe flosh unit
                                         sec        Whiie (lower)                     l-            +
View original page 15Page 19 · Read text
SPECIAL NOTE:
                                                                             - s.Lealher case lor Nicca model   lll
    A specrally designed  Ilosh-gun
     bracket ts Incorporated  in  lhe
      leather case so lhat lhe comero
     need nol be removed
    when using the patented
     Nicca Ilash-gun.
        Nrcca model lll-S may
    be used wrlh any flosh-
   gun bul the compony
      slrongly recommends  lhe
     Nicca patenled precrston
      llash-gun lor besl results.
View original page 19Page 20 · Read text
IO. SUPPLEMENTARY ENSES

      There are a number oI accessories available for your
    new NICCA 35 mm Camera. One of the most unique
     features in lhe versatility oI lhis camera is lhe facl that
    lhe lenses ere interchangeable. The lenses are all
     slondardized end many oI the famous Leica lenses will
       fit the NICCA 35 mm camera, and the NIKKOR lenses
     will fit any oJ the Leica camer6s.
      The inlerchange oJ lens is done easily. All you have
     to do is screw the lens approximaiely  2rl2 turns by the
    base flange. The lens should Iit moderalely light to     bring il into proper position. When changing lenses,
     lhe open camera body should be protecled from slrong
      sunlighl.
       All ol the NIKKOR lenses for use with the NICCA
    35 mm camera are equipped io couple wilh the range-
     finder. The some principle is used [or the lelepholo or
    wide angle lenses as is used with the standard 50 mm
     lenses. Thus, the regular rangefinder is used for all
   NIKKOR lenses. All NIKKOR occessory lenses come in
      beaufiful, russet-brown plush lined carrying cases.
                        r9
View original page 20Page 25 · Read text
II. UNIVERSAL VIEWFINDER
    When using the NICCA 35 mm camera with any lenses other than the
    slandard 50 mm lens, the field covered is eilher greater (as in the case o[
    the wide angle tens) or smoller (as in lhe case o[ lhe 85 mm or  I 35 mm
    lelephoto lens).
    To determine the correcl field o[ view Jor those wide angle or telephoto
    lenses, a special view[inder must be employed. The Universal View[inder is
                                                                                              length.    especially designed for use with lenses from 35 mm to 135 mm focal
      It can be used with all focal length lenses produced [or ihe NICCA 35 mm
   camera, and may also be used on the Leica with any lenses equivalent to the
    Jollowing NIKKOR lenses  :
        35 mm 112.5 or /3.5 wide         85 mm [/2 telephoto lens  '
         angle lenses
        50 mm slandard l/3.S,ll2or                   I 35 mm f/3.5 telephoto lens
           [/1.4 lenses

                                    24
View original page 25Page 26 · Read text
The Universal Vie-wfinder is'calibrated to be used with 90 mm and 105 mm
lenses, as well as the above lisled NIKKOR lenses. To use the Universal View
Finder, slip it in the occessory clip when focus has been obtained, sel the
parallax adiustment scale in conformity with the dislance range on the barrel
of the lens. The exact size o I the   f ield o f view is obtained by setting the
                                            indicator to the scale shown on the
                                body of the finder. Use the shorter
                                             indicaler for distonces of 5 feet or
                                     less and the longer indicator for
                                           dislances above 5 feet.
View original page 26Page 27 · Read text
J7


        Hand stitched high grade lealher case.
          tens hoods and filters of atl kinds.
           Flash unit for Nicco lll-S model and other carneros"
         Side lighting urnit and exlension cord.
           Self-Timer, for any Leica type c6mera.
         Cable release for any Leica type c6me!.a.
           Film magazine.
          Synchroniser cords (standord and I rn length)
View original page 27From the M. Butkus archive. Original publisher and archive notices are retained.
Check the model and edition against your equipment.
PDF verified 2026-10-10.