Film cameras
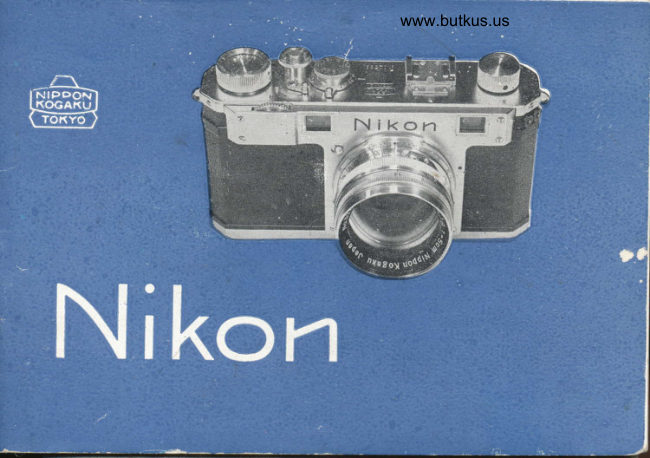
Nikon BOOKLET Product booklet
Product booklet for Nikon BOOKLET. 29 pages in English. Read the original PDF, download or print a copy without registration.
29 pagesEnglish6.2 MB PDF
Loading your manual…Open PDF directly
Document details
- Brand
- Nikon
- Model / document
- Nikon BOOKLET
- Document type
- Product booklet
- Language
- English
- Pages
- 29
- File size
- 6.2 MB
- Category
- Film cameras
- Document date
- Not specified in catalog
Search available document text
Find a term, then jump to its page in the original PDF. Image-only pages may not be searchable; check the PDF for exact wording and diagrams.
Page 3 · Read text
www.butkus.us
             FRONT VIE\fl
a.  Windins Knob. Winds Shur-       h.  Clip for Universal View Fin-
    ter and advances film  si-        der and other attachments.
     multaneously.                                                                                i.  Range and view tinder.
b.  Counting dial. Automatical-                                                                                      i.  Lens focusing wheel.
      ly records number oF expo-                                 Automatic locking device    sures made.                                  k.                                      tor intinity setting.c.  Shutter release button and
    screw for .attaching wire           t.  Diaphragm ring.
     release.                          m.   Barrel lock. Press to detach
d.  Fast shutter-speed dial.            lens barrel.
e. Slow shutter-speed  dial.           n.  Depth oF tield scale.
                                               o.  Range scale.f.  Reversing lever. Arrow "A"
    advances  f ilm, arrow ttPtt       P.  Loops for strap.
    reverses film.                         q.   Syncrijnizer socket t'Ft' For
g.  Rewinding knob.                      tlash sun plus (tast shutter)
View original page 3Page 6 · Read text
www.butkus.us

               REAR VIE\T

 r.  Eye-piece for range and view Finder.
s.  Film take-up spool
 t.  Film advancing sprocket.
u'  Space for tilm magazine or film cartridge.
v. Guide notch for positioning film magazine.
w. Synchronizer socket "S" for flash gun plug (slow ,huttgr).
x.  Semi-circular metal strip.
y.  Tripod socket.
View original page 6Page 7 · Read text
TO LOAD CAMERA

                                  The back and bottom oF fhe
                                    camera are made in ,cne piece. To
                                         remove, turn the semi-circular metal
                                                   strips on the bottom of the camera
                                                  until the engraved arrows point to
                                  "O".  The camera back is now
                                      unlocked and may be removed.
                                                      rlold the camera with the bot-
                                    tom facing you and place the loaded
                                            film magazine in the left end cham-
                                      ber so that projection on the out-
                                           er shell oF the magazine fits in the
                                       guide notch(V, Fig 2).A cartridge
                                may de inserted similarly.
t
View original page 7Page 8 · Read text
www.butkus.us
                                               lnsert the end of the film intc
                             the slit on the spool and leL the
                                              little proiection at the entrance of
                             the siit catch the perforation on
                             the film.
                               Set reversing lever on  ttAtt
                                          (t, Fis s) so that Film ma)' be
                                  advanced.           Fis a
     Turn the winding knob slightly
and make sure that the Film tirmly
is caught by the spool.
    Then let the sprccket catch
the perForation of the tilm.
    Tighten the {ilm in the maga-
zine by rotating the rewinding knob
         r) in the direction oF the.j;;j.'r
                           Fis 5
View original page 8Page 9 · Read text
!/hen film has been loaded
        replace the camera s back and
         secure by turning the semi_circular
       metal strips until the  arrows
        point to ,rSr,.
             fn order to determine that
        the film.is being wound properly,
        turn the winding knob (a, Fig r)
          slightly to see iF the rewinding
      knob rotates in the  direction
                                                            www.butkus.us       opposite to that indicated by
       the arrow.
                              Fig 6
II
View original page 9Page 10 · Read text
www.butkus.us
    Turn the winding knob until it stops. (Fig z). This means
that the knob has made one complete turn; advancing one frame
and that the shutter has been wound. Before taking picture on
a new roll oF film, turn the winding knob and press the release
button.^Repeat the operation a second time in order to pass that part
oF the Film which has probably been atfected by light during loadlng:
                                       zerot using the two small.   Set the counting dial (Fig a) tolugs on the face oF the counting-dial. The counting dial indicates
the number oF pictures taken, not the number oF unexposed frames.


            Fis 7                           Fie 8
View original page 10Page 11 · Read text
TO TAKE PICTURES
         -TO            r)    SET SHUTTER SPEED                       Shutter Dial
            There are two shutter speed
          dials fast and slow; arranged one
       on top oF the other. The tast
         shutter dial is set for speeds oF
         tlzo to l/soo second. Similarly,
       the slow shutter 'dial is adjusted
        to obtain stutter speeds from    I
        second to    l l2o second.
              Shutter setting should always
       be made atter winding the film.
             This is important: iF the shut-
         ter speed is set beFore winding
        the film, the shutter speed will be                                                   Fie g         in error.

tL
View original page 11Page 12 · Read text
www.butkus.us
,4. FAST SHUTTER DIAL
      LiFr the dial slightly and turn.
    Check ro see that the dial
    setLles into place properly
    (Fig ro).
B. SLO\,)/ SHUTTER DIAL
     In order to use slow shutter
    speeds, the tast shutter speed
     dial must be set at the red
    marking "20-1".
   Move the slow shutter dial
   by means oF the small iever
    (F;s rr).
                                                                                                  l-in     |   |
View original page 12Page 13 · Read text
t2
     C. BULB EXPOSURE               TIME EXPOSURE                                                      Fig t2-a To OPen
           First set solw shu*er dial to tlzoth
    second ("20" on the dial), then set
    the fast shutter dial at "8" The shutter
     will remain open as long as the shutter
    button is depressed.
    D. TIME EXPOSURE (Fis tz, a, b)
       Set fast shutter   dial  at the  red       Fig l2-b  To Close
                      then     slow shutter    marking. "20-1" ,
     dial at "T".
         \flhen the shutter b'ubton ^is oressed
    (a), the shutter will remain open until
    the slow shutter dial is turned back to
      I second. Use the small lever on the
    slow speed dial to close the shutter (b).     www.butkus.us                                                      Fis l2
View original page 13Page 14 · Read text
www.butkus.us
                                                                   t3
 2) TO SET THE LENS OPEN|NG
      Turning the diaphragm ring (1, Fig l),
 set the proper marking to the dot on the
 milled ring oF the lens-barreJ.
 3) FOCUStNG
     Press the infinity lock (K, Fig t) and
roate the lens focusing wheel slightly to
 release the automatic device locking the
focusing mechanism at infinity setting.
                                              Fig l3    Focusing is  obtained, when the
double image oF the subject in the center square of the field coincides,
which is accomplished by roating the lens Focusing wheel. The image
in the center slides left and right when the camera is hold horizonally.
View original page 14Page 15 · Read text
14

    ThereFore, in ascertaining the coincidence, the vertical lines oF the
    image are helpful, which, when focused, become soli,J and the blur
   oF the double imbge disappears.
           Out-oF-Focus                        ln Correct'Focus
View original page 15Page 16 · Read text
www.butkus.us
        A red spot below the camera number
          inscribed cn the top oF the camera in_
          dicates the position the Film passes, which
             rvill be helpFul in photographing close_up
           subjects.
           \(hen infra-red film is used, use
     the secondary distance index marking ,,R,,
      4) TO MAKE THE EXPOSURE
         The view obtained with the eye as close as possibre to thef
        range and view finder eye-piece is identical with the field oF vie*
f-      oF the lens when a 5omm lens is being used. The Universar or Vari-
         focal vievr Finder must be used to obtain the exact fielc oF view
       with the 85mm, l35mm, and 35mm lenses. The range  f in.ler,
        coupled through the lens, is accurate with any of the lenses.
View original page 16Page 17 · Read text
t6

        Compose the
    picture in the view
     fiinder and press the
    shutter release but-
   ton slowly. .Do not
    press hard and do
   not press fast to
    avoide moving the
    carnera while the
    shutter is closing.
   Use a tripod or rest
    for  any  shutter
   speed slower than
    tl6o second.
View original page 17Page 18 · Read text
www.butkus.us
                                                             IT
              DEPTH OF FIELD
                               From the depth oF F;Jd scale._    D_epth .oF field is read directly
By deFinition, depth oF tield is rhar part oF the field. of view ot
the lens, measured from the camera/ which is in focus. Near and
far objects are generally ouL oF Focus with the middle distance
being in sharp tocus.
                  depends equally upon the lens opening (F : r.4, -   Depth of tieldf : 5.6, f : B, etc). and upon the Jistance trom the cameiu'to fh.
object uqon which the lens is Focused.
    To deLermine r,vhich object in the lens' f;eld of view will be
in focus in the finished picture, focus the camera upon the object
to^ be photographed.                           by means oF a light met", oi by                     .separately,reFerence to the film data usualy furnished by the Film manu-
facturer, deiermine the lens opening required tor the light condi-
tions preveiling. Set the lens opening as required.
    The depth oF fie{d can now be read From the the depth of tield
scale as trvo points, one representing the distance to the nearest
View original page 18Page 19 · Read text
{A

     objcct which will be in focus, the second representing the distance
     to  il-.e farthcst obiect which will be in focus rneasured from the
      canie ra.
            EXAAAPLE
               l. Focus the lens on an
     object 2o feet from the camera.
         2. Set the lens opening
     to f :8.
         3. Notice that the dot on
    the depth ct  tield scale is
     opposite 20 on the distance
       scale.
         4.  Reaci the depth oF
      field at the two "t  : B" markings
    on the depth of field scale.
    The nearest object in focus for
     this setting will be 12 teet                    Fig t7
View original page 19Page 20 · Read text
www.butkus.usI                                                                       tg
I
        trom the camera/ the farthest object which will be in tocus will
                                                                                                                                                                                                                                                                          ,       de 5o feet from the camera.
                                                     -)
              EVERYTHING EI-SE WILL BE OUT OF
                 FOCUS IN SOME DEOREE

         NOfE : Wide angle tenses, and standard 50 mm lenses,
        have greater depth oF tield than the telephoto lenses. Sincc the
       depth of tield, for a given lens, depends inversely upon the size
        of the lens ope.ning, always use the smallest lens opening possible.
       Note also, that the larger the ttFtt number, the smallei'the lens
        opening. The 5omm lens is wide open at "f : l.4" or at "f :2"  and
         nearly closed as "f :  l6't.
            This subject is of extreme importance if satisFactory pictures
        are to be taken. lt is suggested that depth oF field be thoroughly
        understood betore any pictures are.taken.
View original page 20Page 22 · Read text
www.butkus.us                2l

       REMOVING THE EXPOSED FILM
  A roll oF film--\  which has been only partially exposed can be                                      i
rewound and exposed again at a later date. To rewind a partially
or Fully exposed roll, turn the  ieversing levcr"(t, Fig r) tq "R"
and Lui'n the rewinding knob in the direction in which the engraved
arrow points. When the film
is completely rewound, resistance
is felt. Turn the rewinding knob
until this resisLance is no longer
Felt. The f;lm will now be com-
pletely rewound.
                                                          Fis  r8
View original page 22Page 23 · Read text
22

   TO CI-{ANGE LENSES
            lf   it is desired to remove
   the lens tcr dusting or to chan-
   ge lenses, set the dittance scale
   at intinicy, depress the barrel
   lock (m, Fis l) and hold down
   with the leFt thumb. Tqrn the
    barrel clockwise with the right
   hand until the red index mark
  on the barrel meets the red
   mark on the camera body.
  The lens barrcl may now be
   removed gently from the came-
   ra body                 Fig l9
View original page 23Page 24 · Read text
www.butkus.us
                                                             23
     In order to Fix telephoto or wide-angle lenses io the camera
body, set the range scales both oF camera and lenses at inFinity.
Push the lens into the opening of the camera body as far as it goes,
care being taken that the red mark on. the lens barrel is above thaL
oF the camera body.
      Tl.ren press and tilt the flulted piece (Fig 2o) toward you,
and turn the lens to the left (anti-clock-wise) until it stops with
a click.
   See thaL in this position
the red mark on the lens bar-
rcl resLs on the highest line oF
the barrel and that the fluted
piece returns to the original
position properly.
                                                        Fis 20
View original page 24Page 25 · Read text
24
          TO USE FLASH SYNCHRONIZER
      The Nikon Camera has a built-in duplex  f lash synchronizer,
   which lights automarically the tlash
    bulb on any marketed flash gun, when
    shutter is released.

   When fast shurter (r/zo-r/soo r...)
     is used, push the smaller plugs on the
    connecting cord into sockets marked
   "F" (q, Fig r) on the camera. When
   slow shutter (r-r/e sec.) is used, push
   the smaller plugs on the connecting
   ccid into sockets marked ttSIr (*,
   Fig Z) on the camera. For fast                                                       Fis 2l
View original page 25From the M. Butkus archive. Original publisher and archive notices are retained.
Check the model and edition against your equipment.
PDF verified 2026-10-10.