Flashes & lighting
Nikon SB-24 Flash Cards User manual
User manual for Nikon SB-24 Flash Cards. 24 pages in English. Read the original PDF, download or print a copy without registration.
24 pagesEnglish4.7 MB PDF
Loading your manual…Open PDF directly
Document details
- Brand
- Nikon
- Model / document
- Nikon SB-24 Flash Cards
- Document type
- User manual
- Language
- English
- Pages
- 24
- File size
- 4.7 MB
- Category
- Flashes & lighting
- Document date
- Not specified in catalog
Search available document text
Find a term, then jump to its page in the original PDF. Image-only pages may not be searchable; check the PDF for exact wording and diagrams.
Page 1 · Read text
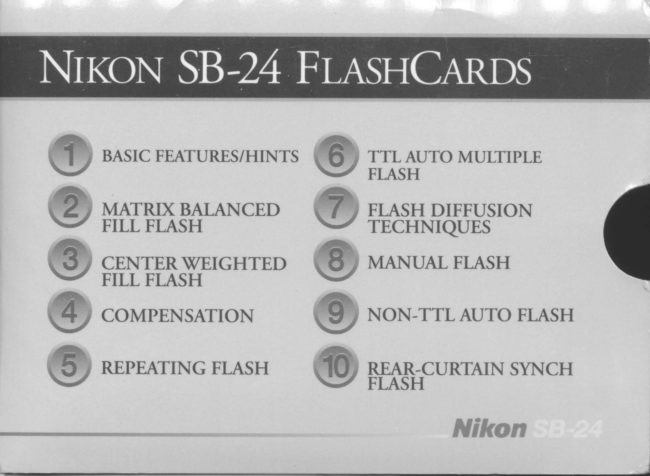
BASrc FEAT'RES/HrNr'               MULTT'LEe      @  ffitfruto
     MATRIX BALANCED ft'@' \/    FILL FLASH            \./  TECHNIQUESFLASH DIFFUSIoN
                         MANUALF'ASH@ ,.,?yF"1\wEIGHTED @
                           NON-TTL AUTO FLASH@  coMPENSArroN @
A
\Y  REPEATING FI.ASH         REAR-CURIAINFIASH       SYNCH
                            Nikon
View original page 1Page 2 · Read text
Venmo @mike-butkus-camera  Ph. 2083
www.butkus.usPayPal Name  Lynn@butkus.org      www.PayPal.me/lynnbutkus
View original page 2
Page 3 · Read text
Set the SB-24 on "Standby" instead         The flash-to-subject distance scale is
of "On". This conserves battery             on constantlv onlv when the flash
power. The SB-24 shuts down but is         head is aimed forward. In the -7" dk,                                                      'Wheninstantly activated when the camera's           the scale blinks.        using bo'.tnce,
shutter release is pressed.                       the scale is not displayed.


 The flash zoom head automatically         $(hen using any automatic exposure
 corresponds to the lens in use when        mode withTTL balanced fill flash,
 the SB-24 is mounted on an F4 or            there will be certain exposure
 N8008(s). The flash zoom head               limitations. If these limits prevent
 must be manually set by pressing             obtaining a correct ambient exposure
 the zoom button when using                 to balance with the flash, then the
 non-AF lenses or another camera            camerat TTL flash control will select
 body.                                        a correct "flash only" exposure.
                            Nikon
View original page 3Page 4 · Read text
Matrix-metering enables you to
automatically make photos with a
pleasing balance berween background
and foreground. Your camera will break
the scene into 5 zones, read the ambient
light and then vary the output of the
SB-24 to achieve a pleasing
natural-looking photograph.


                www.butkus.us                               Nikon
View original page 4Page 5 · Read text
Camera settings:              Speedlight settings:
   l. Meter: Matrix.                          1. Synch mode: Normal or Rear.
  2. Exposure mode: Nikkor AF or P     2. Flash mode: TTL.
  lenses allow use of any exposure                                             3. Man/Sun symbol: not  mode. For other lenses, use Aperture                                        blinking (if symbol is blinking,  or Manual.                                       touch the M button).
  3. Focus: AF or Manual.


 Note: The SB-24 will automatically provide the required compensation to balance the
 scene's ambient light with light from the flash in most situations.  If you wish to cancel
 compensation, adjust compensation, or set a manual-only  flash output, refer to the
 Compensation Flash Card.
View original page 5
Page 6 · Read text
Center-weighted  fill-flash allows you to
choose which area of the photograph you
want to emphasize.  \X,rhile the light meter
reads the entire scene, it concentrates its
reading on the center of rhe viewfinder.
The procedure for making this picture is
the same as for matrix-metered  fill flash,
excePt you must set the camera on
center-weighted metering.


                www.butkus.us                               Nikon
View original page 6Page 7 · Read text
Camera settings:              Speedlight settings:
   l. Meter: Centered Veighted.            1. Synch mode: Normal or Rear.
  2. F.xposure mode: Nikkor AF or P     2. Flash mode: TTL.
  lenses allow use of any exposure                                             3. Man/Sun symbol: not  mode. For other lenses, use Aperture                                        blinking (if symbol is blinking,  or Manual.                                       touch the M button).
  3. Focus: AF or Manual.


 Note: The SB-24 will automatically provide the required compensation to balance the
 scene's ambient light with light From the flash in most situations.  If you wish to cancel
 compensation, adj ust compensation, or set a manual-only  flash output, refer to the
 Compensation Flash Card.
View original page 7
Page 8 · Read text
Fllsh exposurc compensation  is any
adjtrstment madc eithcr mantrallv or
rrutomrrtically to the output of rhe f'lash.
'l'he u.se of manual flirsh compensation
alkrws you to rec{ucc or increasc thc
rurount of artificial light fialling on the
subjcct, to mcet your particul:rr
cxposurc objcctives.


                                      Without compensation      With compensation


                www.butkus.us                               Nikon
View original page 8Page 9 · Read text
Camera settings:              Speedlight settings:
   l. Set at vour discretion.                     l. Synch mode: Normal or Rear.
                                           2. Flash mode: TTL.
  To cancel automatic compensation:            3. Man/Sun symbol: \When this  Push the M button.'l'he M:rn/Sun                                    symbol is not blinking, the SB-24   synrbol will blink indicating you are r)ow
   shooring in standard TTL il'ash modc.          will automatically provide the
                                         required compensation to balance
  To manually adjust compensation: Push                                           the scenet existing light with   the SEL button. While +/- flashes, push
   the adjustnrent buttons up A or down V        light Fo- the flash in most   to vary the amount of flash compensation        sltuatl0ns.
  From +l to -3, in ll3 stops.

 Note: When the Man/Sun symbol is not blinking, any compensation displayed will
 be added to or subtracted from the automatic, computer-determined  setting.
  If the Man/Sun symbol is blinking, only the amount of manually-set compensation
 will be used.
View original page 9Page 10 · Read text
'fhis        is an outstrrncling flash technique to
illustrate nrovement. A series of
exposures is made on a single fiame of
filrn. Because of the longer shutter speeds
required, a tripod is recommended.


                www.butkus.us                  Nikon
View original page 10Page 11 · Read text
Camera settings:              Speedlight settings:
   1. Exposure mode: Manual.                          l. Synch mode: Normal.
   2. Shutter speed: Long enough so all the      2. Fiash mode: Repeating n"thhhl't.
   flashes will take place while the shutter is      3. M buaon: Push to change between
   open. To calculate this, divide the number     l/8 power (up to 4 flashes per firing)
   of flashes by the speed of the flashes (Hz).    or ll16 power (up to 8 flashes per
  (Exampb: lOHz will fire the flash l0 times     firing).
   in one second. Firing the flash five times at   4.7nom button: Adjusting the zoom
   10 Hz takes  I /2 second to occur, so the      head changes the recommended
   shutter speed should be ll2 second or         distance to the subject. The zoom head
   slower.)                                 must set to a focal length at least as
   3. Apernrre: Changing the aperture          wide as the focd lengtl of the lens you
  changes the distance to the subject on         are using to prevent vignetting.
                    Select according to             5. Push the down button V to adjust
  :nf.?panel.                          number of flashes.
   4. Focus: Manual.                              6. Push the up button A to set the
                                              frequency (Hz) of flashes.

  Note: Changing the power setting a.lso changes the recommended distance to the subject.
   Best results i,ifi thisiechnique  aii: obtained"using a black or darkened background.
View original page 11Page 12 · Read text
Multiple flash puts you in complete
control of your photographic  lighting.                                                     rIYou arrange your equipment (camera,
main flash unit, secondary flash units) to
achieve the desired effecr. Side-lighting,
back-lighting and rim-lighting can all
yield dramatically different-looking                           Subject
photographs.
(TTL Multi-flash Adapter AS-10
                                       Masterrequired when using more than 3 flash                                           Flashunits for TTL Multiple flash operation.)


                www.butkus.us                               Nikon
View original page 12Page 13 · Read text
Camera settings:                                (if symbol is blinking, touch the
   l. Meter: Matrix or Center Weighted. M button).
  2. Exposure mode: Nikkor AF or P     Note: The SB-24 will automaticallv
  lenses allow use of any exposure           give the required compensation to'
  mode. For other lenses, use Aperture     balance the scenet existing light with
  or Manual.                                    light from the flash in most situations.
                                    To cancel compensation, adjust  3. Focus: AF or manual.                                          compensation, or set a manual-only
Master Speedlight settings:          flash output, refer to the Compensation
                                              Flash Card. Please read the "TTL  Note: Adjustments to the masrer flash                                            Multiple Flash Photography'' section of  will determine the settings for the                                         your instruction book prior to setting  system. An SB-24, SB-23, SB-22,                                      up additional units for restrictions on  SB-21, or SB-20 must be used as the                                                   specific master unit/slave unit  master flash unit. Slave flashes should                                             combinations.  be set to "ON", not STBY (Standby).
 Do not use an SB-23 as a slave.             4. Cords: Using your flasht TTL
   l. Synch mode: Normal.                multiple flash terminals, connect up
  2. Flash mode: TTL.                    to five Speedlights together. The
   3. Man/Sun symbol: not blinking      master flash mav' be taken off(contd)
View original page 13Page 14 · Read text
camera by using an SC- l7 cord. To
attach additional units, use TTL
multi-flash synch cords SC-18
( 1 .5m) and SC- I 9 (3m). Connect
them into the speedlight's TTL
multiple flash terminal.
5. Speedlight placement: Vary
lighting ratios by moving the flashes
closer to or further away flrom the
subject, or by using more flash units
from one direction. Example: A
four-to-on e (4:l) lighting ratio can be
achieved by putting rwo flash units on
one side of the sub ject and one on the
other. Or one flash can be moved
rwice the distance from the subject as
compared to the other flash unit.

            www.butkus.us
View original page 14Page 16 · Read text
Camera settings: Photographer's       2. For greater movement of the
   choice.                                        flash, remove it from the camera
                                   and attach it to the SC-17 cordSpeedlight settings:                                           (1.5m). This cord will allow the
    l. Synch mode: Normal or Rear.(rlrl,     Speedlight to operate exactly as it
   2. Flash mode: A or TTL (M or        would if it were on the camera
   will require additional photographer     except the photographer can now
  determined compensation).               position the light at any angle.
Bounce Flash:                         Note: tVhen the flash head is tilted or
    l. After pressing the release levers,         rotated, the distance scale indicators
   either tilt or rotate the head of the        disappear. Your flash (not camera) to                                                subject distance, including the angle of  SB-24 so the flash beam will
  "bounce" off a surface adiacent to       bounce, should not exceed the distance                                                  as indicated on the LCD panel for   the subject. (Tilt and rotation may                                                     direct flash range . Example: If it is six
  be used in combination.) This can         feet from the flash to the bounce
  include a wall, or more commonly a      surface, and 10 feet From the bounce
   ceiling within a reasonable distance       surface to your subject, the actual
  overhead.                                    distance the light must travel is l6 feet.
               www.butkus.us                                                 (cont'd)
View original page 16Page 17 · Read text
3. Zoom head: Although an AF or P
Nikkor lens will automatically set
the zoom head to the nearest focal        to the maximum spread but would also
length, in bounce flash, manual           decrease the far limit distance.
zoom allows more creative lighting      Diffilsion:effects. By zooming to a longer focal                                                         If direct flash is required, or bouncinglength, more of the flash beam hits
                                        the flash is impractical (no nearbythe bounce surface in a tight pattern
and will diffuse the light within a         ceiling or wall bounce surfaces), use
                                   an additional diffusins material suchmore restricted area.
                                            as tracing paper placei over the flashExample: If you are bouncing flash off                                   head to soften the light. Zooming thean overhead ceiling 8-12 feet high and                                              flash head in combination with theyou are using a 50mm lens setting,
adjusting the zoom head to 70 or           use of diffusion material will vield
85mm will ensure eood diffusion and        different lighting effbcts.
yet still provide          amount of
               "nid.q,rateextending            Note: To protect the diffuser from burning,light without artificially
recycle times. Selecting a wider focal         be sure it does not come in direct contact
length, 28 or 24mm would diffuse light      with the face of the flash head.
View original page 17Page 18 · Read text
With nrrrnrral flesh, rhe c:rrnera operrltor
nranuallv scts thc .specd, apcrrurc and
powcr of thc flash accorcling to thc
distancc frorn the srrbject. Mirnual flash
is usccl to achio'c sonrc dcsircd cffbct
(usrrall-v undcr or ovcrcxposurc) since the
Nikon auton'rrltic flash operation is
dcsigrrccl to achieve a technically correct
cxposure.


                www.butkus.us                                            i$ff*an
View original page 18Page 19 · Read text
Camera settings:                         indicared on SB-24's LCD to lens.
    l. Meter: Photographer's  choice.            4.Lighdy press shutter release button so                                                  that distance and ISO information appear   2. Exposure mode: A or M.                                     on LCD.   3. Focus: AF or manual.                                                  5. SB-24 LCD will display ISO set, flash-
Speedlight settings:                     to-subject distance and aperture.
   (F4 and N8008(s) cameras)                    6. By turning lens aperture, flash-to-
    l. Flash mode: M.                           subject distance changes. Select and set
   2. Flash synch: Rear or normal.              aperture on lens that corresponds to the
   3. Press "M" button repeatedly                flash-to-subject distance (i.e., ISO 400, fill
   to select power ratio of full (lll),ll2,         at ll4 power, maximum shooting distance
   ll4.ll8 or l/16.                           l5 feet).
   For other Nikon cameras, the ISO          7.Take picture.
   information must be set in the SB-24
   manually. Press "SEL" button on             Note: lVith manual flash, a consranr amount of
                                                                                   is output so correct flash-to-subject  SB-24,ISO will blink. Then use YA          light
   butons to select film speed in use. Press       disrance (based on ISO, aperture and power
  "SEL" button on SB-24 again. "F" will         ratio) must be obtained.
   blink. Use button ts to adjust the
   aperture/distance. According to flash -
   subject distance, set the aperture as
View original page 19Page 20 · Read text
In non-TT[, automatic  flash operation,  a
flash sensor located on the flash itself
measures the illumination falling on the
scene. When enough light has reached
the subiect for proper exposure, the flash
abruptly shuts off.


                www.butkus.us                                Hikon
View original page 20Page 21 · Read text
Camera settings:                   (For other Nikon cameras)
   l. Meter: Photographert choice.            l. The ISO information must be
  2. Exposure mode: A or M.              set in the SB-24 manually. Press
                                   "SEL" button on SB-24, ISO will  3. Focus: AF or Manual.                                            blink. Use buttons YA to selecr
Speedlight settings:                  film speed in use. Press"SEL"
   (F4 and N8008(s) cameras)                 button again. "F" will blink. Use
   1. Flash mode: A.                      buttons to select aperture. Note
  2. Synch mode: Rear or Normal.        the changes in the distance scale.
  3. Lightly press the shutter release       2. Set aperture indicated in SB-24's
  button, -- ISO, distance, and       LCD to lens. Note maximum flash
  aperture information appears in         to subject distance.
  SB-24's LCD.                              3. Thke picture.
  4. Set aperture indicated in SB-24's
 LCD to lens. Note maximum flash
  to subject distance.
   5. Thke picture.
View original page 21Related documents and language editions
From the M. Butkus archive. Original publisher and archive notices are retained.
Check the model and edition against your equipment.
PDF verified 2026-10-10.