Film cameras
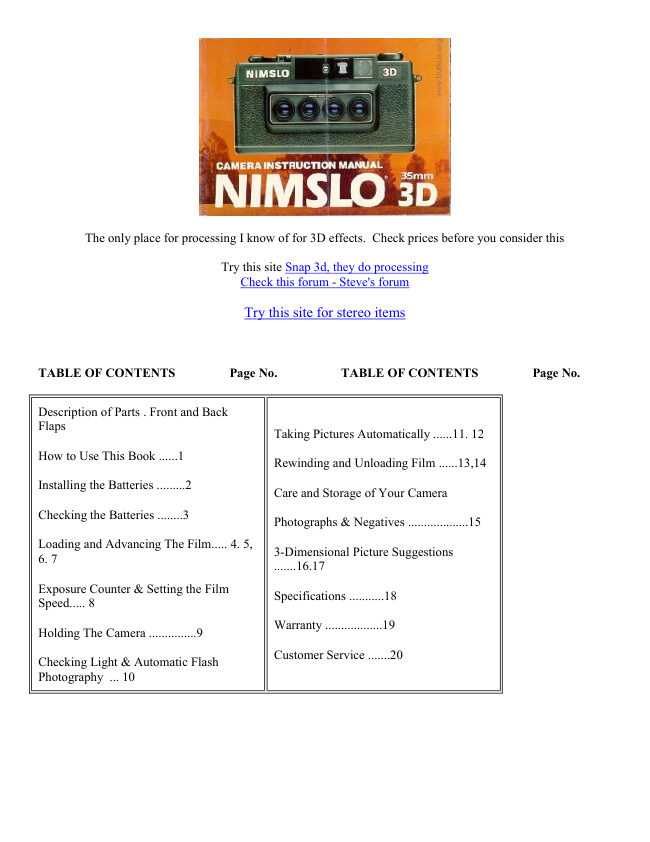
Nimslo 35mm 3D camera User manual
User manual for Nimslo 35mm 3D camera. 13 pages in English. Read the original PDF, download or print a copy without registration.
13 pagesEnglish0.9 MB PDF
Loading your manual…Open PDF directly
Document details
- Brand
- Nimslo
- Model / document
- Nimslo 35mm 3D camera
- Document type
- User manual
- Language
- English
- Pages
- 13
- File size
- 0.9 MB
- Category
- Film cameras
- Document date
- Not specified in catalog
Search available document text
Find a term, then jump to its page in the original PDF. Image-only pages may not be searchable; check the PDF for exact wording and diagrams.
Page 2 · Read text
The only place for processing I know of for 3D effects. Check prices before you consider this

                              Try this site Snap 3d, they do processing
                               Check this forum - Steve's forum

                              Try this site for stereo items


TABLE OF CONTENTS        Page No.       TABLE OF CONTENTS        Page No.


Description of Parts . Front and Back
Flaps
                                       Taking Pictures Automatically ......11. 12

How to Use This Book ......1
                                      Rewinding and Unloading Film ......13,14

Installing the Batteries .........2
                                       Care and Storage of Your Camera

Checking the Batteries ........3
                                         Photographs & Negatives ...................15

Loading and Advancing The Film..... 4. 5,
                                         3-Dimensional Picture Suggestions
6. 7
                                                        .......16.17

Exposure Counter & Setting the Film
                                              Specifications ...........18
Speed..... 8

                                       Warranty ..................19
Holding The Camera ...............9

                                      Customer Service .......20
Checking Light & Automatic Flash
Photography  ... 10
View original page 2Page 4 · Read text
INSTALLING THE BATTERIES


     1.           2.           3.           4.

1. The batteries
Three Eveready 386 silver oxide batteries have been packed separately in your camera package.

2. Opening the Battery Chamber
Insert a coin, or similar object, into the groove in the Battery Chamber Cover (23). Make a 1/3 turn, counter
clockwise, and remove.

3. Battery Insertion Procedure
Insert the batteries one on top of the other into the Battery Chamber with the plus mark (+ ) facing into the
camera. You may find more convenient to load the batteries by placing the flat plus (+) side of the battery
against the bottom of the camera and slide it toward the opening of the Battery Chamber, as illustrated. Let each
battery drop into the Battery Chamber until all three have been loaded. Return the Battery Chamber Cover and
tighten.


CHECKING THE BATTERIES


        1.               2.               3.               4.

1. Advance the Film Advance Lever Check the batteries each time before using the camera. Advance the Film
Advance Lever (1) to wind the shutter.

2. Depress the Shutter Release Button Then press the Shutter Release Button (2) lightly while looking into the
Viewfinder Eyepiece (15).

3. Green dot location In Viewfinder

4. Red dot location In Viewfinder
If a green dot appears at the bottom or a red dot in the center of the viewfinder, the batteries have
enough power to operate your camera.
View original page 4Page 5 · Read text
If neither signal appears, the batteries are either positioned incorrectly or have insufficient power and must be
replaced.


LOADING & ADVANCING THE FILM


       1.                2.                3.                4.

1. Uses 35mm color print film:
Your Nimslo Camera uses all popular brands of 35mm color print film with a rating of either ASA 100 or 400.
You may use any brand in 36, 24, 20 or 12exposure rolls. However, AGFA film is sold with pre-paid
processing mailers which cannot be redeemed by Nimslo.

2. Two 35mm frames produce one 3-Dimenslonal photograph:
The Nimslo 3-Dimensional process requires a group of four half-frame 35mm negative images to produce a 3-
Dimensional photograph.
Therefore, HALF THE NUMBER OF PICTURES STATED ON THE FILM CASSETTE WILL BE
PRODUCED ON ANY ROLL OF FILM USED IN YOUR NIMSLO CAMERA.

3. Opening the camera:
Open the Camera Back Cover (19) by pulling up firmly on the Film Rewind Knob (10) as far as it will go until
the back springs open.
Avoid direct sunlight when you load or unload the camera.

4. Place the film Into the Film Chamber:
Leave the Film Rewind Knob (10) in the up position and insert the film cassette with its lip pointed to the right
and the protruding end down, into the Film Chamber (21).


       5.                6.                7.               8.

5. Secure the film cassette and bring film to the Take-Up Spool
Press the Film Rewind Knob (10) down as illustrated. You may have to rotate the Film Rewind Knob slightly
for it to return to the down position.
Pull out just enough film to reach the Take-Up Spool (1 7).

6. Film can be inserted Into any slot of the Take-Up Spool
Insert the end of the film leader into a slot of the Take-Up Spool.
View original page 5Page 6 · Read text
7. Attach your film to the Take-Up Spool
Latch one of the film perforation holes on the bottom edge of the film onto the small Film Perforation Hole
Hook (26) at the base of the Take-Up Spool.

8. Tighten the film
Fold out the Film Rewind Crank (9) and gently turn it in the direction of the arrow to take up any slack in the
film. (Be careful not to "over" rewind the film back into the cassette!) Fold back the Film Rewind Crank to its
original position.


LOADING & ADVANCING THE FILM


        9.               10.                         11.

9. Engage the film on the Film Sprocket Gear
Make sure the film perforation holes on the lower edge of the film, latch (or "hook") onto, the Film Sprocket
Gear (24)-- located at the lower edge of the film leader to the left of the Take-Up Spool. (The film should not
obscure your view of the sprocket gear teeth.)

10. Close the Camera Back
Close the Camera Back Cover (19) by firmly pressing it into the locking position.

11. Advancing the film
Wind the Film Advance Lever (1 ) all the way. . . and release. . allowing it to return to its normal position.
Note, that as you wind the Film Advance Lever (1), the Film Rewind Knob (10) rotates in a counter clockwise
direction indicating that the film is advancing properly.

                                    12. Releasing the Shutter
                                     Press the Shutter Release Button (2).

                                    13. Advance to number ·1. for your first picture
                                Repeat both steps until the number "1" appears in
                                     the center of the Exposure Counter Window (13).
                             (You may have to repeat the sequence 1 or 2 times.)
View original page 6Page 7 · Read text
EXPOSURE COUNTER & SETTING THE FILM SPEED


       1.                2.                3.                4.


1. Exposure Counter Window
The Exposure Counter Window (13) tells you how many pictures you have taken. Since your camera uses two
"standard" exposures for every one 3-Dimensional picture, the counter will indicate a maximum of 18 pictures
(for a roll of 36 exposures.) Always keep in mind that the number of 3-Dimensional exposures available equals
1/2 of the exposures stated on the film box--with the Exposure Counter automatically keeping track. To further
remind you, the numbers 6, 12, and 18 are highlighted in red to indicate the end of the roll (for 12, 24, and 36
exposure rolls, respectively).

2. Numerical frame indication
Dots as well as numbers indicate the exposure count. You won't see consecutive numbers: 1 2 3 4 5678. You
will see: S 1 4 * 6 * 8 and so on.

3. Setting film speed
Move the Film Speed Selector (5) on top of the camera toward ASA 100 or 400 to match the film you have
loaded into your camera. As a reminder, keep the end flap of your film box and place it in the sticker holder on
your neck strap for quick reference of both your film speed and number of exposures.


                1.                                 2.

    1. CORRECT camera position
      Hold the camera firmly at the sides with both hands and bring it to your eye in a level position as shown
       above. KEEP YOUR FINGERS, AND ALL OTHER OBJECTS, AWAY FROM THE FRONT OF THE
     LENSES.

        2. INCORRECT camera position
       Pictures taken while holding camera in the position shown in illustration 2 (above) WILL PRODUCE
     NEGATIVES WHICH CANNOT BE PRINTED INTO 3-DIMENSIONAL PRINTS.
View original page 7Page 8 · Read text
CHECKING LIGHT & AUTOMATIC FLASH PHOTOGRAPHY


  1. Red Signal    2. Green signal         3.                4.

Look into the Viewfinder Eyepiece (15), and push down lightly on the shutter Release Button (2), being careful
not to depress the button all the way down for an exposure. When the button is partially depressed, you see
either a red or green dot. The Film Advance Lever (1) must be wound to indicates there is not enough light
available for a correctly exposed negative and that an Opti-Lite Flash should be used for additional lighting.
Once the flash is attached--and turned on--a green dot will soon appear in the viewfinder indicating the flash is
ready.

A green dot indicates/here is sufficient light available for a correctly exposed picture.

3. Nimslo Opti-Lite Electronic Flash For most indoor and evening photos, it is advisable to use the Nimslo
Opti-Lite Electronic Flash to provide the proper illumination or eliminate unwanted shadows.

4. The Nimslo 35mm 3-Dlmensional Camera and Opti-Lite Electronic Flash
The Nimslo Opti-Lite Electronic Flash has been exclusively designed for the Nimslo 35mm 3-Dimensional
Camera. It possesses a unique twin flash for both direct and "bounce" lighting to enhance all objects that add to
the depth of the picture.

TAKING PICTURES AUTOMATICALLY


       1.               2.                         3.

1. Taking pictures automatically
Sophisticated electronic circuitry built into the camera automatically controls the exposure allowing you to
concentrate only on framing and composition. Your camera will automatically select the best combination of
aperture and shutter speed to achieve a correctly exposed negative.

2. Framing the picture
Looking into the Viewfinder Eyepiece (15) you'll see a bright line frame--an outline of the image area in which
you can compose your photograph quickly and accurately. It is a guide to show you which objects in the scene
will actually be in your 3-Dimensional photograph.
View original page 8Page 9 · Read text
3. Viewing a typical 3-Dimensional scene
When composing your pictures move around while you are looking through the camera's Viewfinder. Take the
photograph when you see the most pleasing arrangement, making sure all your picture is inside the Bright Line
Frame. WHEN COMPOSING YOUR PICTURES YOU SHOULD AVOID SUBJECTS OR OBJECTS IN
THE SCENE CLOSER TO YOU THAN 6 FEET This will allow you to compose beautiful 3-Dimensional
photographs which are in sharp, crisp focus.


      4.              5.                6.


4. Now you and the camera are reedy to take pictures
Because the lenses are prefocused, no manual adjustments are required. Simply hold the camera steady and
press gently down on the Shutter Release Button (2) until you hear a click.

5. Advance the Film
Before you take the next picture, advance by moving the Film Advance Lever (1) one full stroke (and letting it
return to its original position.) Now you are ready to shoot again.

6. End of Roll
When all the exposures are used, you will see a red number in the Exposure Counter Window (13) and feel a
resistance indicating the end of the roll. DO NOT FORCE THE FILM ADVANCE LEVER at this point. It's
time to rewind and unload the film.

REWINDING AND UNLOADING FILM


       1.               2.                3.               4.

1. Film Rewind Release Button
To disengage your film when it is complete, depress the Film Rewind Release Button (25) on the bottom of the
camera.

2. Film Rewind Crank
Fold out the Film Rewind Crank (9) on top of the camera. Turn the crank in the direction of the arrow
(clockwise) to rewind the film back into the cassette. You will feel tension while rewinding. Continue to turn
the Film Rewind Crank until you feel no tension indicating that the film has been fully rewound.
View original page 9Page 10 · Read text
3. Unloading the Film
Pull up the Film Rewind Knob (10) to open the back of the camera and remove the film cassette.

4. Exposure Counter
The Exposure Counter (13) automatically will return to " S" when the Camera Back Cover is opened.


5. Film Process Identification Sticker

One of the red stickers supplied in the package with your camera
purchase must be placed on your film cassette to alert the store clerk
where you take your film for processing that SPECIAL NIMSLO
HANDLING is required to obtain 3-Dimensional pictures. Please write
your last name in the box provided on the film process identification
sticker, as an additional means of identification. A new supply of
Process Identification Stickers will be returned to you with each
finished roll of Nimslo processed pictures. They are also available at all
authorized Nimslo Professional Processing outlets.

6. Sticker Holder on Camera Neck Strap
Place a supply of Film Process Identification Stickers in the Sticker Holder on your camera neck strap for handy
use when loading film into your camera.

CARE AND STORAGE OF YOUR CAMERA, PHOTOGRAPHS & NEGATIVES

Camera


                          Do not drop the camera, knock it against
                                     anything solid or misuse it. Accidents and rough
                                     handling can easily damage the internal
                                mechanism of the Camera.
                               Your camera is not waterproof. Protect it from
                                    water splashes and rain.
                          Do not touch the lenses.
                                Always keep the viewfinder and lenses as clean
                                       as possible. To remove loose dust and dirt, clean
                                    with a lens brush or soft lint-free cotton cloth.
                          Do not try to wipe off granular dirt or dust by
                                 any other means or you may scratch the lenses.


Smudges, such as finger prints, should be carefully wiped away with a lens cleaning tissue. For difficult marks,
use a liquid lens cleaner and lens tissue.
When storing your camera, keep it in a cool, dry, clean, well-ventilated place.
If storing for a long period, the batteries should be removed from the battery chamber.
Do not leave your camera in the glove compartment or rear window deck of your car.
View original page 10Page 11 · Read text
Photographs
Nimslo photographs are made on a special material which is highly durable and resistant to extreme
temperatures. However, you should treat Nimslo 3-Dimensional photographs like any other photo sensitized
product and be careful to protect the surface from scratches and liquids which may leave a mark or smudge on
the material.

Negatives
A lint free wallet will be supplied with your developed negatives for safe storage. Please remember always to
HANDLE DEVELOPED NEGATIVE STRIPS BY THE EDGES. Oil from your skin and other substances
from your fingers usually ruin otherwise perfect negatives.

When you require reprinted copies of your 3-Dimensional prints you must supply the original negative groups
in strips to your Nimslo Dealer or your Nimslo Professional Film Processing Laboratory.

IMPORTANT a copy print cannot be made from your Nimslo 3-Dimensional Print, the laboratory must have
the original negative group.


3-DIMENSIONAL PICTURE SUGGESTIONS

·The world around you is three-dimensional and it is usually best to take pictures of subjects and objects just the
way they are naturally

·Look at the picture on the right. Scale and depth in the picture are provided by the relationship of each object to
the others, as well as the height, width and depth of objects. A variety of items in the picture will enhance the 3-
Dimensional effect. Bright colorful areas in pictures also add depth. You can achieve this by having your
subject wear colorful clothes or by taking pictures of colorful scenes.

·Frame your picture to include subject and background objects.

·For scenic pictures, include perhaps a tree, a person, etc., so that your picture has foreground interest as well as
background and scenery. FOR BEST RESULTS AVOID HAVING ANY OBJECTS CLOSER THAN 6 FEET
TO THE CAMERA.

·For best results outdoors, try to keep the sun over your shoulder while avoiding poses that have your subject
facing directly into the sun.

·Posing subjects directly against a wall, will result in flat pictures lacking depth. Move the subject to a more
interesting area--one with greater perspective--with more space between the subject and background.

·Pictures of scenes beyond 25 feet will not appear to have as much depth as you might anticipate. In this picture
taking situation, position a subject or object at least 10 feet from your camera and use the setting beyond 25 feet
as your background.
View original page 11
Page 12 · Read text
SPECIFICATIONS

Camera type:35mm, Automatic 3-Dimensional

Film Size/Type: 35mm Color Print ONLY

Film Speeds: ASA 100/DIN 21 ASA 400/DIN 27

Shutter: Automatic, Electronically Programmed Speeds from 1/30 to 1/500 Second

Lenses: Quadra Lens System: Four 30mm, f/5.6, Air Spaced Triplets, with Coated, High Index, Optical Glass
Elements Pre-focused 6' (2m) to infinity

Flash Synchronization: DeDedicated Hot Shoe Contact for Cordless Flash Connection to Nimslo Opti-Lite
Elec tronic Flash (Other Types of Flash Units May Be Used)

Viewfinder: Bright Frame, Vertical Format

Information: Green LED sufficient light and battery OK condition; Red LED low light warning.

Film Advance: Single-Stroke Film Advance Lever

Exposure Counter: Automatic Reset

Film Rewind: Rewind Crank lifts clear from body

ExExposure Control: CdS Cell measures light to program shutter speed and aperture size for best combi
nation to achieve correctly exposed negatives

Power Source. Three (3) No.386 Eveready or Duracell, Silver Oxide Batteries. Equivalent batteries are: Maxell
SR 43W, Panasonic WL11 and Ray-O-Vac RW24/44

Other Features: Built-in Double Exposure Prevention

Dimensions: 5 3/8 x 2 7/8 x 1 5/8"

Weight: 1212 ounces

Nimslo 35mm 3-Dimensional, Quadra Lens, Opti-Lite and the four suns visual are trademarks of Nimslo
Corporation
View original page 12
Page 13 · Read text
(INFORMATION BELOW IS OUTDATED AND THE COMPANY NO LONGER EXISTS)

WARRANTY Nimslo 35mm 3-Dimensional Camera Limited One Year Warranty
Your Nimslo camera is warranted against defects in workmanship and materials for a period of one year from
date of purchase. Please retain your dated sales slip or other proof of purchase date to validate the warranty
period. Without this information the warranty period will be determined from the manufacturing date of the
camera. If your camera proves to be defective within the warranty period we will repair or, at our option,
replace it with a fully reconditioned camera. The repaired or replaced unit will carry the remaining warranty
period applicable to the original camera. To obtain warranty service, the camera must be returned to or repaired
by a Nimslo Service Center or a Nimslo Authorized Service Center. You may also return the camera through
your Nimslo dealer If that is inconvenient for you or if you have any other questions, please contact your

Nimslo Customer Service Representative toll free at 1-800-554-2854 from anywhere in the continental United
States (in Georgia, please call 1-800-282-8988) Monday through Friday from 8:30 a.m. - 4:30 p.m. Eastern
Standard time.

THIS WARRANTY DOES NOT COVER DAMAGE CAUSED BY ACCIDENT, MISUSE OR TAMPERING
WITH THE CAMERA NOR DOES IT ALLOW FOR CONSEQUENTIAL DAMAGES. (SOME STATES DO
NOT ALLOW THE EXCLUSION OR LIMITATION OF INCIDENTAL OR CONSEQUENTIAL
DAMAGES, THEREFORE THE FOREGOING EXCLUSION OR LIMITATION MAY NOT APPLY TO
YOU.) THE ORIGINAL CONSUMER/PURCHASER IN RETURNING THIS NIMSLO CAMERA MUST
PREPAY ALL POSTAGE, SHI PPI NG, TRANSPORTATION INSURANCE AND DELIVERY COSTS TO
THE REPAIR

This warranty gives you specific legal rights and you may also have other rights which may vary from state to
state.


CUSTOMER SERVICE
Your satisfaction with your Nimslo 35mm 3-Dimensional Camera and pictures is important to us. If you have
any questions or problems, please call our toll free number ...1-800-554-2854 (1-800-282-8988) in Georgia).
Our Customer Service Department is open each weekday from 8:30 a.m. to 4:30 p.m. Eastern Standard Time to
answer your questions and to help you enjoy your Nimslo camera.

Corporate Office
Nimslo Corporation
One Nimslo Park 7--
Atlanta, Georgia 30338r

BrBranch Office
Nimslo Corporation
76 Watertown Roadr Thomaston, Connecticut 06787

Branch Office
Atlanta Regional Processing Center
3500 McCall Place
Atlanta, Georgia 30340
View original page 13
From the M. Butkus archive. Original publisher and archive notices are retained.
Check the model and edition against your equipment.
PDF verified 2026-10-10.