Film cameras
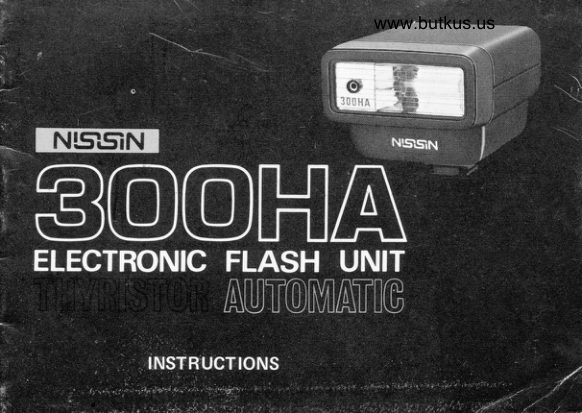
Nissin 300HA User manual
User manual for Nissin 300HA. 13 pages in English. Read the original PDF, download or print a copy without registration.
13 pagesEnglish1.5 MB PDF
Loading your manual…Open PDF directly
Document details
- Brand
- Nissin
- Model / document
- Nissin 300HA
- Document type
- User manual
- Language
- English
- Pages
- 13
- File size
- 1.5 MB
- Category
- Film cameras
- Document date
- Not specified in catalog
Search available document text
Find a term, then jump to its page in the original PDF. Image-only pages may not be searchable; check the PDF for exact wording and diagrams.
Page 2 · Read text
Please read this Owner's Manual carefully before you start to use your
      Nissin -]0i;HA Automatic Flash. Whenever you have questions on the use
     of your. flash, refer to this handy guide book. We are sure that you will
    find flash photography easy and enjoyable with this Nissin's new
     Computerized Electronic Flash.


*.LA.
View original page 2Page 4 · Read text
Venmo @mike-butkus-camera  Ph. 2083
PayPal Name  Lynn@butkus.org      www.PayPal.me/lynnbutkus
View original page 4
Page 5 · Read text
Inserting the Batteries

 1. Open the Barery Compartment Lid by pushing
   up the button to release from the bodv of
   the flash unit. Insert two AA size 1.5V bat-
    teries in the compartment according to the
   diagram inside. (lt  is recommended to use
    alkaline batteries to achieve best results and
    performance.)

2. Close the Battery Compartment Lid by pushing
     it back with a finger toward the flash unit until
      it clips in place.
View original page 5Page 6 · Read text
www.butkus.us
Checking the Batteries

1.  Slide the On-Off Switch to the "ON" position,
   so that you will hear a soft, high-pitched sound.

   ln about 12 seconds the Ready Lamp should
   glow, indicating the flash is ready to shoot.

   Replace the batteries when the Ready Lamp
   does not glow in 3O seconds or when no sound
     is heard after the flash is switched on.

   Push the Test Button to make sure vour flash
   unit works properly. lf the flash fires, then wait
    until the Ready Lamp glows again.
View original page 6Page 7 · Read text
Attaching Your Flash to the Camera
1. lf your camera has a hot shoe contact, insert
   the Mounting Foot of your flash into the
   camerais accessory shoe clip. Make sure it  is
   inserted all the way. Your flash is nowfully
   synchronized with the camera through the con'
    tacts in the shoe. In this case the Svnchro Cord
     is not necessary,
2.   lf the camera has not the hot shoe contact, use
   the Synchro Cord which comes with your flash
    unit. Insert the Mounting Foot into the acces-
   sory shoe clip like the procedure in the ff   1.
   Plug the pointed end of the Synchro Cord into
   the Synchro Cord Socket on the flash. Plug the
   other end of the cord into the camera's flash
   terminal marked "X".
     lf your camera is not provided with the "X"
   terminal, it is safe to set the shutter speed at
     1 /30 second.
(Read your camera owner's manual for details on
the flash synchronization.)
(HotShoe Contact: The term refers to the round
metal plate which you can find in the center of
your camera's accessory shoe clip.l
View original page 7Page 9 · Read text
Shooting AutomaticallY
(Automatic Operating Range: 1.1m to 4.5m  or 3.5ft to lsftl
1. Set your camera to the proper speed setting for
    electronic flash - usually 1/60, 1i30 second or
  mark "X".  (refer to your camera owner's
   manual.
2. Set the Auto-Manual Control Switch on the   back of your flash position to "A "
3. Read vour camera's proper aperture (f-stop) by    referring the ASA or DIN film speed you
    are using to the Distance Calculator Diagram on
    the back of vour flash.
 (Ex. When using ASA 100 film, set your camera's
 lens aperture at f4.  )
4. Set vour camera at the proper aperture you
    gained.
 5. Slide the On-Off Switch to "On". Focus your
    camera. Take the picture after the Ready Lamp
    glows.
When taking the picture of a subiect beyond the a.utomatic operating -range' the flash cannoi read correct         so that you will have to employ the manual
 ooeration.  )               "tposures
View original page 9Page 10 · Read text
www.butkus.us
        Manual Operation
          1. Set the Auto-Manual Control Switch to manual           marked "M".
         2. Set your camera to the correct shutter speed
             for electronic   f lash. (Refer to your camera
             owner's manual.)
         3. Focus your camera and estimate the distance
            from the flash to the subject.
         4. Read the proper f-stop on the Distance Catcula_
               tor Diagram by referring to the distance and the
         ASA or DIN  f ilm speed. Set this f-stop on your
            camera lens.
          (Ex. When using ASA 100 film and distance 1Oft.
ir          set lens aperture at f5.6)
         5. Slide the On-Off Switch to ,,ON,,.
         Aim your camera at the subject. Take the pic_
             ture when the Ready Lamp glows.
       when used with camera Equipped with Buirt-in Automatic Flash contror:
       some new cameras automaticaily sets the correct exposures for frash as you
          focus. When taking pictures with such a camera and your Nissin 3OOHA
          Flash, read carefully your camera owner's manual in advance. Then set the Auto-         Manual                  control                        switch of your flash to manual marked ,,M,'and repeat steps #.1,                    above.         #2,  .....
View original page 10Page 11 · Read text
SUGGESTIONS  for Manual Photography:
1. lf you wish to calculate the aperture yourself, you should use the formula below.
   Guide Number  ; Distance = Lens Aperture
   Example: With ASA 25 film at 10 ft                          30 + 10 !. t?'8                 '             With ASA 100 film atlO ft  .                                         . . . .60  -:- 15 = f4.
2. Lens aperture may vary depending on the background and the subiect. For dark
    non-reilective subiect in a bright background one f stop less'
3. Indoors, when you desire to get a softer effect, you may bounce the light from a
   wall or ceiling in normal sized rooms. For bounce photography, set the aperture
   about two stops larger than the usual photography.


Hints for Maintenance and Better Flash Photography:
a   lt is recommended that if you are not going to use the flash more than several
    hours, remove the batteries  f rom the Battery Compartment. The failure of a  f lash
    unit to function properly is mostly resulted from the negligence that the user has
     left the flash switch "ON" while the batteries are left in the battery compartme.nt.
   As a result it caused a battery drain which then corrodes the circuit plate inside
    the battery compartment and  f lash unit itself.
o  lt is a good idea to turn off the switch when you do not use it more than several
    minutes.
View original page 11Page 12 · Read text
www.butkus.us
     a To keep your flash unit in good condition,keep it free from dust and moisture.
           Leave the Ready Lamp glow and do not  f ire the  f lash unit before putting  it away.
          But make sure to turn the switch off. lt is better to leave the Ready Lamp Glow.
               It is advisable to charge up the capacitor and let the neon light up and fire off the
            flash once or twice a month.
     o When taking quick shots with this flash unit, alkaline batteries are recommended.


     To lmprove Your Outdoor Pictures:
.iI     To improve your outdoor pictures use your electronic flash. The use of flash outdoor
         will permit you to face the camera towards the sun. This will eliminate squinting and
        shadows.  lt will also help bring out natural facial expressions. on cloudy days,br in
        the shade the use of your flash will give you clearer and brighter pictures.

        Note:
     Do not use Ni-Cad battery.
     Do not open or attempt to repair the flash.  lt contains high voltage circuitry, which
       should be serviced only by our trained technichans. opening the unit voids the
        warranty. Return the unit to your photographic dealer.
View original page 12From the M. Butkus archive. Original publisher and archive notices are retained.
Check the model and edition against your equipment.
PDF verified 2026-10-10.