Film cameras
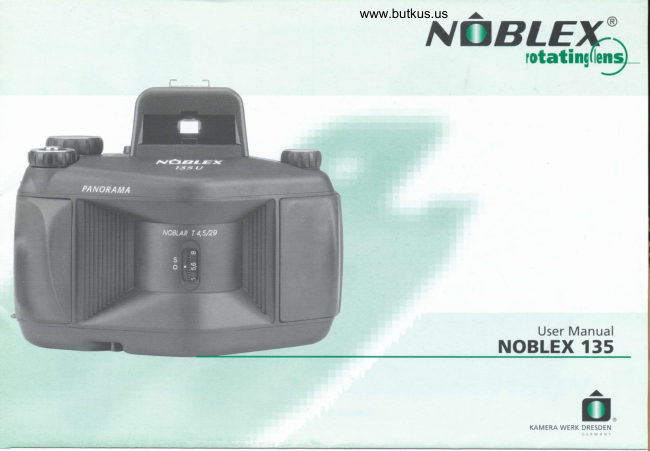
Noblex 135 User manual
User manual for Noblex 135. 19 pages in English. Read the original PDF, download or print a copy without registration.
19 pagesEnglish7.2 MB PDF
Loading your manual…Open PDF directly
Document details
- Brand
- Noblex
- Model / document
- Noblex 135
- Document type
- User manual
- Language
- English
- Pages
- 19
- File size
- 7.2 MB
- Category
- Film cameras
- Document date
- Not specified in catalog
Search available document text
Find a term, then jump to its page in the original PDF. Image-only pages may not be searchable; check the PDF for exact wording and diagrams.
Page 8 · Read text
www.butkus.us
 lntroduction                                                Table of Contents                               Page

 Congratulations on your purchase of a new NOBLEX camera. With the      a     Introduction                                            .1
 patented and unique operating principles of NOBLEX cameras you en-       a
 ter in a new world of dramatic and expanded photographic  applicati-      a    Designation of Parts and Operating Elements
 ons. As NOBLEX cameras drffer from traditional camera systems, we           (Front and Back Cover can be unfolded)
                                                                                                                                                                                                                                              . .............ffi......  1 recommend reading the operating instructions carefully before using         'S. r    Table of Contents                        ..
 the camera the first tlme.                                                         a
                                                                                              a   Standard Features                                                     --- z
Please note                                                                     1    Attaching the Camera Strap                       2
                                                              2    Inserting the Batteries                               2
These operating instructions are general instructions for    3    Inserting and Rewinding the Film --'.--              3
all 35MM NOBLEX cameras. Should you own a model not    4   Short Time Exposures                        4
having all features, you can omit certain chapters. please     5   Long Time Exposures                                5
refer to the table on the back cover for information on technical fea-      a   NOBLEX for Advanced Users                              5
tures of vour camera.                                                    6                                                                    5
                                                                                                                              6
                                                                   6                                                          6
                                                                                     a   PANOLUX                                            7
Special Features of NOBLEX                                      9    Designation of Parts and Operating Elements  -
                                                                       10     Inserting the Batteries                                    8
1) NOBLEX cameras use the principle of the lens rotating 360" for     11    Getting PANOLUX and NOBLEX Started                    8
     each exposure.                                                     12   PANOLUX in Reflective Mode                               B
2) The film, resting on a curved film plane, is exposed through a con-    13   PANOLUX in Incident, Automatic Exposure
      stantly moving shutter  slit.                                           Compensating Mode                                    9
3)  During the first half of the rotation the lens drum is accelerated to    14    The Inverse Function - INV                                 10
    a constant speed, insuring absolutely even exposure of the film    15   The Memory Function - MEM                                     -10
     during the second half of the rotation                                          a                                                              10
4)   This results in distortion free photographs with an angle of view of      a   What to do if your camera requires service...   -...................... ....  11
     136". What makes these pictures stand out are their remarkablv      a    Technrcal Features                                                                             ..1 1
    even edge to edge illumination and unsurpassed sharpness.
q\   The photographs correspond to the natural space perception of    the human eve.                                N[TBLE*'^.,                                                                                        rotatingfi,$
View original page 8Page 9 · Read text
-l    I


                                                                                                                                                                                                                                                                                                                                                                                                     I  lmportant Notes                                         Standard Features
                                                                   Camera StraP                                                                                                                        I  1) The camera is not waterproof and therefore not suited for use in   1. Attaching the
     wet envtronments, when raining or in snow. A camera dropped
       into the water by accrdent, should immediately send to the NoBLEX    Thread the camera strap in the lug (20).                                                                                               I
      Service Center. Protect your camera from seawater haze and from
ryt  high humidity. To properly clean your camera, use a dry cloth or a   2. Inserting the Batteries
       soft brush after taking pictures.
                                               35MM NOBLEX cameras require 4 batteries AAA (R03/UM4/LR)  1,5V.
                                                                your     Please use high-quality alkaline batteries. When insertrng the batteries 2) ln the event service is required, never try to repair
     camera yourself, contact the closest NOBLEX Service Station.           follow these instructions:
                                                  more than        (1) Open (24a) the battery compartment cover (24) with a small 3) Remove the batteries  if you will not use the camera for
     two weeKs.                                                                              coin.
  4)  When not using the camera store it in the case and keep the came-        (2) Remove the cover.
       ra in a cool, dry and dust-free location. Do not expose the camera
                                                                            (3) lnsert the new batteries. Pay attention to the right polarity.      to direct sunlight  if it is not necessary and avoid strong heat influ-
      ence (e.g. in trunk or glove compartments of cars).
                                                                                                         (4)  Insert the battery compartment cover in the camera.
   s)  Check all camera functions carefully after long storage.
                                                                                                      (s)  Close (24a) the cover with a small coin.
   6)   Batteries can leak or explode and have the potential to cause per-
       sonal harm. Do not open battery, expose to fire or high temperatu-
        re, recharge, put in backwards, or mix with any other battery type.
      Dispose of them properly and always avoid misuse.
    /)  As with any electronic item, pay attention to condensation
     when moving from a cold area to a warmer, as high humidity and
      dampness may occur
   R\    lf color film remains too long in the camera, you may experience                                      w* s N-q <a      a color shift. Always use fresh film.                    KOdak S**t*xc.              t
View original page 9Page 10 · Read text
www.butkus.us
Please note                                          (B) Bend over the first 0,5 ... 1 cm of the film and insert this end
                                                                                                into the slot of the take-up spool (18).
Never use batteries of different types and do not mix old batteries with
new ones. Do not use rechargeable batteries.  lf you do not use      (9) Tighten the film by turning the serrated edge (16) of the film
your camera for an extended time, remove the batteries                            take-up spool.
3. Inserting and Rewinding the Film                            (10) Close the camera back (25). The compartment cover must
                                                                                        audrbly engage.
NOBLEX 135 cameras require 35MM film rolls. When inserting and
rewinding the film please follow these instructions:                                         (l 1) Rotatethefilm advance knob (5) in the direction of thearrow
                                                                                                   until it reaches a stop.
Inserting the film
                                                                (12) Press the shutter release button (4) once.
    (1) Turn the camera off at the ON/OFF switch (10).
                                                                (13) Press the counter reset button (8a) to >0< (8).
    (2) Pull up the rewind knob (9) as far as possible.
                                                           Please note
    (3) Open the camera back (25).                                                           lf the perforation of the film should engage with the film transport
                                                                                            roller (17) while being pushed through, press the rewind button (14).
    (4) Insert the film roll in the film cartridge compartment (19) loca-     This releases the film transoort  roller
        ted on the left side of camera.                                      (17) and you can continue
                                                                                 inserting the film.
     r5l  Push the rewind knob (9) back to the starting position.

    (6)  Pull the film leader across the film plane.

     (7)  Push the leader under the film transport roller (17) until  it
        extends over the outside of the take-up spool (18).
                                           film cartridge compartment (19)
                                                                                                                                 serrated edge (16)
                                                                                                                         take-up spool (18)
                                                                                                                                 film transport  roller (17)
View original page 10Page 11 · Read text
Rewinding the film                                         Please note

   (1) Press the rewind button (14) until it is engaged.                                      lf the LED does not light, 1)check your shutter speed selection, 2)check
  Q\ Lift out the crank on the rewind button (9), turn the crank in    the condition and/or insertion of batteries.
        the direction of the arrow to rewind the film. Shortly before the    Pay attention to the proper holding of the camera. Otherwise your
         film is completely rewound resistance on the rewtnd knob (9)    hands may appear in the photograph.
        drops considerably.
    (3) Pull up the rewind knob (9) as far as possible.
    (4) Open the camera back (25) and remove the film roll.
4. Short Time Exposures

    (1) Turn the camera on at the ON/OFF switch (1O).

     (2)  Switch the double exposure button (6) to single exposure
         (not to position >M().

     (3)  Rotate the speed range selector (7) counter clockwise'

     (4)  Select your exposure time (1/30 - 1/500) and set it on the shut-
           ter speed setting knob (2). The LED indicator (3) should be green.
                                                                                                                       www.butkus.us
     (s)  Set the aperture desired on the aperture selector wheel (1).
                                                    When sighting the camera horizontally and vertically refer to the circular
      (6)  Turn the winding disk (5) in the direction of the arrow until  it stops.      level (12) mirrowed in the finder. lnclined skylines and converging verti-
                                                                                cal lines can thus be reliably avoided. The NOBLEX camera is a fixed-
    (7) After carefully viewing your subject depress the shutter release    focus camera. A distance setting is, therefore, not necessary. Please refer
         button (4).                                                              to the Technical Features on the cover or to the table on the back of your
                                                                  camera (25a)for depth of field figures. Mode >A< on the shutter speed
                                                                                 setting knob (2)can only be used toqetherwith a PANOLUX 135 expo-
                                                                           sure modul. Otherwise Inaccurate exposures may occur. lt is advisable to
                                                                          switch the camera off (1O)when not using the camera, to conserve bat-
                                                                                  terv life.NIIBLE)C.,            rotating(lr5l
View original page 11Page 12 · Read text
www.butkus.us
 5.  Long Time Exposures                             NOBIEX for Advanced Users
     (1) Turn the camera on at the ON/OFF switch (10).             6. Lens Shift
     (2) Switch the double exposure button (6) to single exposure   when using the lens shift the subject is moved upwards without tilting
          (not to position >M<)                                             the camera. converging lines can thus be avoided. In order to shift the
                                                                                lens follow these instructions:
      (3)  Rotate the speed range selector (7) clockwise.
                                                                          (1) Turn the aperture selector wheel  ('l) to aperture f=4.5.
      (4)  Select your exposure time between 1/'15 and 1sec. and set  it       (2) Push the whole aperture selector wheel (1) further upwaros
       on the shutter speed setting knob (2). The LED indicator (3)               until it reaches a stop: appr. 4mm.
        should be red.                                                     (3) The white dot will be in position >S< and the lens is shifted upwaros.
                                                                          (4) Select your aperture and set it on the aperture selector wheel (l).
      (s)  Set the aperture desired on the aperture selector wheel (l).
                                                           Please note
      (6)  Rotate the film advance knob (5) in the direction of the arrow  A >cutout< is provided in the viewfinder to help determine the top
          until it stops.                                            edge of the >shifted( photograph.
    (7) After carefully viewing your subject, depress the shutter release      In order to return the lens to its normal position follow these instructions:
         button (4).                                                         (1) Turn the aperture selector wheel (1) to aperture f=i 6.
                                                                          (2) Push the whole aperture selector wheel (1) further downwaros
                                                                                                 until it stops: appr. 4mm.
Please note                                                             (3) The white dot will be in position >O< now and the lens has its
Refer to the hints >4) Short Time Exposures(. When taking long time           normal position back.
exposures  it is always recommended to use a tripod.                         (4) Select your aperture and set it on the aperture selector wheel (1).

N[fBLE)C.,          otatinglnnd      -
View original page 12Page 13 · Read text
using a pair of7. Multiple Exposures                                    (B) Pick up the filter by the hole of the filter ring
                                                                          tweezers and insert it throuqh the shutter slit. Place the filter
In orderto expose one frame ot film more than once, switch the double       onto the lens. The filter is then magneticaly  held onto the front
exposure button (5) to posit on )M<. Press the shutter release knob (4)          of the lens.
once for a single exposure. This procedure can be repeated as often as   (9) Turn the lens drum back until it is engaged.
                                                                                                                                                (5) back to single exposure,  if desired.you wish. Keeping the shutter release knob (4) pressed, the lens will  (10) Push the double exposure button
                                                                                                         (1 1) When removing the filter follow the same procedurecontinue to rotate and the exposing process is repeated until you relea-
se the knob (4). The complete exposure time consists of all single expo-
sure times. You will find a corresponding table on page 12.


Please note
We recommend using a tripod and cable release for most applications
of multiple exposures.


8. Filters

As an accessory for NOBLEX cameras we offer a wide range of filters.
NOBLEX filters are specially designed with a magnetic ring on the back
surface of the filter. The filter can thus directly be fixed to the lens. For
inserting the filter follow these instructions:

(1) Turn the camera off at the ON/OFF switch (10).
(2) Push the double exposure button (5) to position >M<.              Please note
(3) Press the shutter release knob (4) and hold  it pressed.
(4) Turn the lens drum clockwise until the lens is visible.                  Step 5: lf you turn the drum counter clockwise here, the film is exposed
(5) Release the shutter release knob (4) now.                          and you lose one picture.
(6) Put the camera on it's back.
                                                                              Please be very careful when changing filters in order to avoid damage
                                                                             to the lens caused bv the tweezers.
View original page 13Page 14 · Read text
www.butkus.us
        PANOLUX 135                                        NtlBLE)C-,           The PANOLUX is an exposure metering and control module which you                                                 rotating(lms)-
           can purchase in addition to your NOBLEX. The PANOLUX automatically
             controls the exposure time of your camera. There are two measuring
I          methodsmetering forin directionthis: Apartoffromyour thesubjectconventional- the PANOLUXreflectivehasmeteringthe capability- light
              of automatic exposure compensation during lens rotation. When usingJ               this mode the PANOLUX corrects the exposing process and ensures a
             contrast compensation throughout the whole picture. This means that
            the lens drum moves more slowly in the darker part of the exposure and
          more quickly in the brighter part. This exclusive NOBLEX feature can
              effectively increase the film lattitude of transparencies by toning down
           the high lights while increasing the shadow detail. Our advanced elec-
             tronics guarantee the precise and absolutely even rotation of the lens
           orum.

            9. Designation of Pads
        and Operating Elements


                                                                                                                                white diffuser (807)
             front detector cell (808)                                                                                                                            (for incident readings)
               (for ref lected readings)                                                                                                                                 button >lNV< (8O5)
                                                                                                                                        button >MEM< (803)

                                                                                                                                                      button > l5O< (804)
             battery compartment                                                                                                                        measuring mode (801)            cover (813)
                                                                       button >k< (8O2)
View original page 14Page 15 · Read text
10. Inserting the Batteries                                                              (4)  Turn the PANOLUX on afterwards by chosing the measuring
                                                             mode (801) desired

The PANOLUX 135 requires 2 batteries LR 1, 1.5V. To insert the batte-
ries please follow these rnstructions.
                                                                                                            retlected mode (811) incident mode (812)
    (1) Open the battery compartment cover (813) by sliding the cover
          in the direction of the arrow.                              Please note
    (2) Insert the batteries. Pay attention to the right polarity.
    (3) Close the battery compartment cover (813) by sliding it against   Whenever you do not use the PANOLUX take it off the camera and
        the arrow marking.                                               switch  it off.

Please note                                          When taking photographs and the shutter speed setting knob (2) is not
                                                                                  in the >A< mode, the PANOLUX switches itself off. (Turn the shutter
Never use batteries of different types and do not mix old batteries with    speed setting knob (2) to >A<, switch the PANOLUX off and afterwards
new ones. Do not use rechargeable batteries.  lf you do not use    to the measuring method desired. The PANOLUX is now active again.)
your PANOLUX for an extended time, remove the batteries.
                                                                     12. PANOLUX in Reflected Mode (811)
11. Getting PANOLUX and NOBLEX started
                                                                             This form of measurement is always advantageous where the principal
                                                                             illumination of the sublect is even and diffuse, e.g. when the sky  is
    (1) Slide the PANOLUX onto the accessory shoe (13) on the     slightly overcast. lt is also advisable to apply this measuring method
      NOBLEX view finder from the back.                        when the main light source (sun) is directly situated behind the camera
    (2) Turn the shutter speed setting knob (2) of your camera to )A(.    when facing the subject. In order to avoid a overweighting of the bright
    (3) Turn the camera on at the ON/OFF switch (1O).                   sky portion, the measuring axis of the front detector cell (808) is ang-
                                                                                  led down by approximately 15'. When normally holding the camera, an
                                                                    area approximately 18 feet in front of the camera is measured. The
                                                                  measuring angle is approximately 33".

                                              When applying reflected light metering for taking pictures please
                                                                           follow these instructions:
                                                                          (1) Get the PANOLUX started as described in chapter  1 1.
                                                                                                               ::i'tir:i::::  l::i., :::,  :: rr,.,rr ::":: ri:   r:        (2) Set the aperture desired by pressing button >k< (802).        KOdak   il'rit".:i
View original page 15Page 16 · Read text
www.butkus.us
      The electroluminescent  display switches forward half a step        lf the PANOLUX gives an exposure time in the slow speed range (LED
       with each depression of the button. lf you keep the button     indicator shows red), the slow speed range must be set on the camera
        pressed constantly, this is an ongoing process. Half stop adjust-    by turning the speed range selector clockwise (7). lf the PANOLUX
       ments are possible by having 2 lights illuminated.                 afterwards shows an exposure time in the fast speed range again (LED
        Example: When both the f=B and f=11 bar is illuminated,     indicator shows green), the fast speed range must be set on the came-
        the PANOLUX is set for f=B and half a stoo.                        ra too by turning the speed range selector (7). The LED indicators on
                                                      PANOLUX and camera must show the same color. lf the colors differ,
    (3) When the aperture measurement desired shines, wait for appr.     this causes inaccurate exposures.
       4 seconds. The PANOLUX automaticallV saves the measurement.
                                                                                                                         lf your camera does not have the slow speed range (the indicator >t<
    (4) Set the sensitivity of the film by pressing the button )lSO(    shows green and red between the exposure times 1/30s and 1/15s),
        (804). The electroluminescent display switches forward half a    press button )MEM( (8O3) in order to chose the shutter speed range
        step with each depression of the button.  lf you keep the but-     definitely. Alternatively, you can chose a smaller aperture at the apertu-
        ton pressed constantly, this is an ongoing process.                   re selector wheel (1), if possible, so that the necessary exposure time  is
                                                                        shortened.
    (5) When the ISO measurement desired shines, wait for appr.
       4 seconds. The PANOLUX automaticallv saves the measurement.    13. PANOLUX in Incident, Automatic Exposure
                                                     Compensating Mode (812)
    (6) Rotate the aperture selector wheel (1) on the camera lens to
        the same desired settinq as used with the PANOLUX.              This form of measurement is especially suited for subjects with signifi-
                                                                             cant variations in the level of illumination and when the main light sour-
    (7) Now, the PANOLUX automatically controls the exposure speed.    ce (e.9. sun) is situated diagonally behind the camera when facing the
      To take a picture simply advance the winding disk (5) in the     object: Consequently for photographs where one side of the subject is
         direction of the arrow until it reaches a stoo and press the     brightly illuminated and the other is in dark shadow. The light metering
         shutter release button (4).                                       of your PANOLUX functions as follows: The light sensors are adjusted
                                                                   under the large white diffuser (8O7) and determine the direction of
Please note                                                               incidence and the intensity of the light. The PANOLUX then controls the
                                                          optimum shutter speed during the exposing process wrth an automati-
Pay attention to the fact that the aperture set on the PANOLUX is the     cally calculated speed correction for contrast compensation. This means
same as the aperture chosen on the aperture selector wheel (1). Other-     that the lens drum moves more slowly while taking the darker parts of
wise inaccurate exposures are possible.                                    the photograph and faster while taking the brighter ones. In the result
In this mode the camera  is now an aperture priority system - you chose    the darker parts are brightened, the centre is exposed normally and the
the aperture the PANOLUX will set the shutter rotation speed.               intensity of bright areas is reduced.
View original page 16Page 17 · Read text
When using the PANOLUX in incident mode follow the same Please note
                 instructions as for chaoter 1 1 and 12.
                                                                             The inverse function can only be used in incident mode. When the sun
                                                                                                                  is standing at one side of the axis between camera and subject, you
             Please note                                                        should, when taking vertical format photographs, ensure that the
                                                                          camera is always held with the measuring diffuser on the side facing
swry wrwffi+'r See 'Please note' of chapter 12.                                        towards the sun.

                    In orde. to maintain the typical character of a side-lit subject, no strong
                 )effect correction( takes place. Ihe PANOLUX in incident mode can  15. The Memory Fun<tion - MEM
              compensate exposure by an approximate total of 2/3 of a stop.
                                                                                                                                                                                                                                                  is saved                This extended film lattitude is highly advantageous when using trans- By pressing the memory button )MEM( (a03), a measurement    parencvrirms                                                                     f:J::,:ff1?i'^[1'l';lJi.:,",1,1#::.,::l,H':"ff"j::l:
                    In order to oblain correct measurements when using the incident mea- rement i5 automalically deleted
                 suring mode, you must ensure thatthe white diffuser (8o7)  is in no way
                 shielded from the light falling on the subject (e.9. shadow of the pho-
                tographer, of headgear, oi trees, etc.).                          Care of camera
                                 It you cannot avoid such situations, approach the subject and save your
              measurement by pressing button )MEM<- Afterwards you can take the   For high-quality photopraphs and reliable operation of your camera we
                 picture from a shaded area by using the saved measurement.    recommend you clean the camera regularly.
                                                                     Do not use organic solvents such as benzin, thinning or strong cLeaning
                                                                                               agents.
                                                                                                                                 non-shedinq brush.                14. Th€ lnveEe Function - l V                                      For removing dust and Jluff use a small and soft
                                                                                   Pav soecial attention to
           When pressing button >lNV< (805) the correction valLle calculated in
                                                                                        a clean drum slit                conjuction with the ncident mode is inverted. This inversion  is especial-  '
                      ly useful when taking vertical format photographs. The sky is darkened
              and the ground brightened. (similar to a graduated {ilter.)               a clean film compartment                                                                                                                                        '
                     In order to activate the inverse function, press button )lNV( (805) and
               expose the negative. After the exposure the inverse function is auto-   a clean film plane                                                                                                                                        '
                 maticallv deactivated.
View original page 17From the M. Butkus archive. Original publisher and archive notices are retained.
Check the model and edition against your equipment.
PDF verified 2026-10-10.