Film cameras
Noblex 135n, 135s, 135u User manual
User manual for Noblex 135n, 135s, 135u. 9 pages in German. Read the original PDF, download or print a copy without registration.
9 pagesGerman4.6 MB PDF
Loading your manual…Open PDF directly
Document details
- Brand
- Noblex
- Model / document
- Noblex 135n, 135s, 135u
- Document type
- User manual
- Language
- German
- Pages
- 9
- File size
- 4.6 MB
- Category
- Film cameras
- Document date
- Not specified in catalog
Search available document text
Find a term, then jump to its page in the original PDF. Image-only pages may not be searchable; check the PDF for exact wording and diagrams.
Page 1 · Read text
www.butkus.us

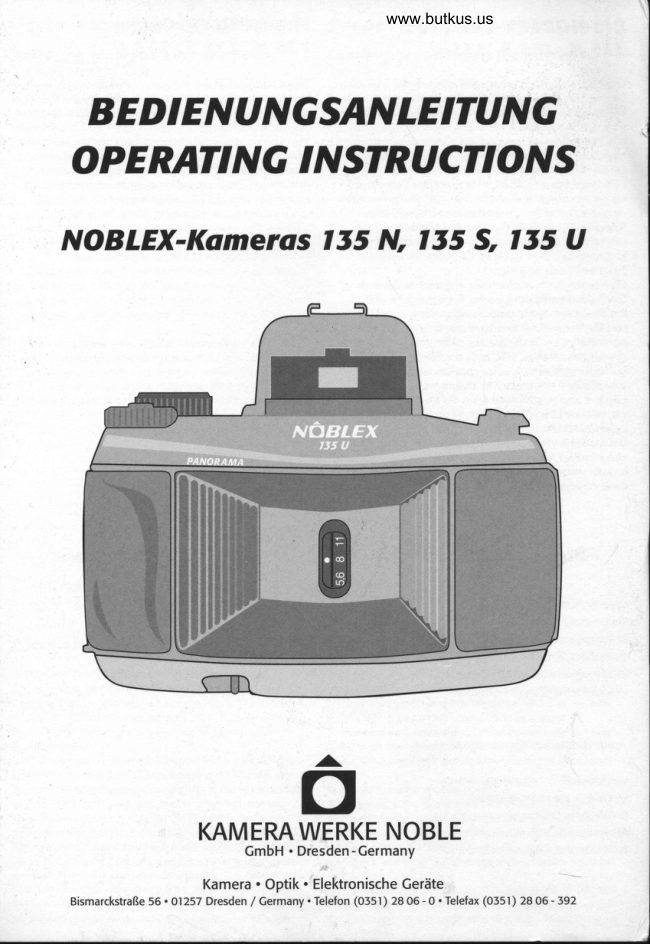
 BEDIENUNGSANLEITUNG
 O P E RATI N G I N STRU CTIOAIS

                                                                           I                              t5 UNOBLEX-Kameros I55 N,  I t5 S,


         KAMERA WERKE.^.o  NOBLE
                   GmbH . Dresden-Germany
                  Kamera . Optik. Elektronische Gerdte
  BismarckstraBe 56. 01257 Dresden / Germany. Telefon (0351) 28 06 -0. Telefax (0551) 2a06-392
View original page 1Page 2 · Read text
Die NOBLEx-Kameros        The NOBLEx-Comeros
                                   155 S, Ir5 Ul15 N, lt5 s, lt5 u                lt,  N,

Unter Nutzung des bewiihrten Prinzips und der Erfahrun-      The NOBLEX 135 series of 35 mm panoramic cameras
gen aus der professionellen  Mittelformat-Panorama           have been developed based on the principles and the
NOBLEX PRO wurde die Kleinbild-Panoramakamera              experience gained from the professional medium format
NOBLEX 135 entwickelt.                                  camera NOBLEX PRO.
Das Prinzip der scannerartigen  Belichtung des Bildes durch    The principle of scanning type exposure of the picture
ein rotierendes Objektiv mit konstantem VerschluBspalt        through a rotating lens with a constant shutter slit on a
auf den kreisfrirmig angeordneten Film fiihrt zu Super-         curved film plane creates super wide-angle pictures.
Weitwinkel-Fotos.  NOBLEX-Fotos  sind echte Panoramafo-      NOBLEX pictures are genuine panorama photographs  with
tos mit einem Aufnahmewinkel von l36o und entsprechen     an angle of view of 156" and corresponds to the natural
damit der nattirlichen raumerfassenden  menschlichen          space perception of the human vision. The NOBLEX came-
Sehweise. Die NOBLEX-Kameras  sind hervorragend  fiir           ras are exceptionally well suited for landscape, architectu-
Landschafts-, Landschaftsarchitektur-  und Reisefotografie,         ral landscape and travel photography,  for group portraits
fiir Cruppenportraits sowie  fiir den kreativen Einsatz in         as well as for creative use in art and advertising.
Kunst und Werbung geeignet.                             The rotating lens drum is driven by a high powered DC
Die rotierende Objektivtrommel, angetrieben durch einen      motor and makes one rotation per exposure. During the
Gleichstromhochleistungsmotor,  bewegt sich filr die                 first half the drum reaches a constant speed and will thus
Belichtung eine ganze Umdrehung. In der ersten Hdlfte        produce an absolutely even exposure during the second
wird die Trommel auf eine konstante Geschwindigkeit               half.
beschleunigt, um in der zweiten Hiilfte der Umdrehung die    The click stopped exposure speeds are created by variation
absolut gleichmiiBige Belichtung des Filmes zu bewirken.         in the drum speed.  lt is possible to produce different types
Die festeinstellbaren Belichtungszeiten werden mit unter-       of multiple exposures, for instance extremely long exposu-
schiedlicher Trommelgeschwindigkeit realisiert. Mit diesen        res, picture montage and stroboscopic  multi exposure.
Kameras sind verschiedene Arten der Mehrfachbelichtung,     The basic specifications may be expanded through a wide
z. B. extreme Langzeitbelichtung,  Bildmontage und strobos-     reaching accessory program.
kopartige Mehrfachbelichtung, moglich.
Das moderne ergonomische Design erlaubt ein sicheres
und schnelles Arbeiten. Variantenreiche  Grundausstattung
und ein entsprechendes Zubehorprogramm ergdnzen
diese interessanten Panoramakameras.

                                      ,t'.,
                          The NOBLEX  I t5 models   Die NOBLEX  t t5 Modelle /
                                 NOBTEX I55 N         NOBTEX r55 S         NOBTEX I55 U
Objektiv / Lens                                                                                   ,                   T 4,s/2e                 T 4,5/29            NOBLAR T 4,5/29
Shift, 4 mm / Shift, 4 mm -.{: ;        ..j                                               x                            x
Shiftmarkierung  / Shift indication   I
                                          '  :{ '    ,;                                                    x                            xim Sucher / in the finder
Belichtungszeiten  / exposure speeds
  Kurzzeitbereich/  Short exp. times              1/soo, 1/2so             1/5OO, 1/25O             1/5OO, 1/2sO
                                                                                            1 /125,  1 /60              1/125,1/60               1/125,1/60
                                                                        1/3O                     1/3O
 Langzeitbereich / Long exp. times                                                                      1/15, 1/8, 1/4,
                                                                                                            1/2,  1
WinderanschluB  / Winder attachment                                                x                            x
Steckschuh mit elektr.Konta kten
ftir Winder u. Belichtungsautomatik /
Accessory shoe with electrical contacts
for winder and exposure automation                                                                              x
View original page 2Page 3 · Read text
Vorbereitungen zur Aufnohme  Preporingwww.butkus.usto toke pictures
Bdtterien einlegen oder wechseln      Looding or replocing the bottefies
Verriegelung des Batteriefachdeckels  (siehe Abb.) mit einer    Unscrew the battery cover (see  ill.) with a suitable small
kleinen Miinze irffnen und den Deckel abnehmen. Legen        coin. Put four new batteries (Type LR 05 micro, aan) in
Sie vie-r neue Batterien (Typ LR 03 micro, AM) ein, und       and make sure the polarity (+ -) agrees with the signs in
achten Sie auf die Polaritiitskennzeichnung.  Danach           the battery compartment. Close the cover and tighten.
Deckel wieder einsetzen und mittels Schraube fest ver-       Remember that batteries are temperature sensitive and
schlieBen.                                                 should be suitably protected.
Gegen tiefe Temperaturen sind Batterien empfindlich und
sollten in geeigneter Weise geschiitzt werden.


                                                                                       Ose fiir Handschlaufe
                                            www.butkus.us                         Connection  for strap lug

Film einlegen                        Looding the film

Die Kurbel des Rtickspulknopfes  herausklappen und dann       Pull out the rewind crank and then pull the entire rewind
den gesamten R0ckspulknopf nach oben ziehen. In ausge-     knob up. lt is now possible to rotate the film reminder disc
zogenem Zusta nd liiBt sich die  Fi lmempfind  lich keits-Merk-     on the rewind knob and it is recommended that you now
scheibe am RUckspulknopf leicht einstellen. Zur besseren       set the film speed of the fresh film to be loaded.
Merkflihigkeit stellen Sie hier die Empfindlichkeit des         The camera back cover may now be opened. Put the film
neuen Filmes ein.                                                cassette on the left side, and gently push the rewind
Jetzt kcinnen Sie die Kamerariickwand 6ffnen, die Filmkas-     home, the rewind fork should enter the top of the casset-
 sette einlegen und den Riickspulknopf vorsichtig voll ein-        te.
drUcken. Der Mitnehmerschliissel greift in die Filmkassette     Then fold the rewind crank down.
 ein, und die Kurbel kann nun wieder umgelegt werden.       While pressing the film rewind button in, pull the film
AnschlieBend die Filmzunge auf die gewirlbte Bildbiihne        across the curved image plane and push the film under
 auflegen, dabeiden Riickspuldriicker bettitigen und den        the the transport sprocket  until  it the tongue aPPears on
 Film unter der Filmtransport-Zahnrolle hindurchschieben       the right side of the take-up spool. Take the tongue, make
 (siehe Abb.) bis die Filmzunge rechts neben der Aufwickel-    a nick in it and push this into one of the slots on the take
 spule erscheint. Filmzungenende  erfassen, umknicken und     up spool from left to right.
 den umgeknickten Filmteilvon  links nach rechts (entgegen     (Opposite the winding direction). Let go of the rewind but-
 der Aufwickelrichtung) in einen der vorgesehenen  Schlitze     ton and rotate the serrated edge of the take-up spool until
 der Aufwickelspule  einstecken. RtickspuldrUcker loslassen      the film is tought.  lt is preferable to put gentle pressure on
View original page 3Page 4 · Read text
Bitte spenden Sie 2,50 Euro, um diese Website über E-Bay zu unterstützen ... www.PayPal.me/butkusView original page 4
Page 5 · Read text
und durch Drehen der Aufwickelspule am REndelring          the cassefte when tightening to ensure that the sprockets
(siehe Abb.) den Filmanfang  straff aufwickeln.                engage correctly. Now close the camera back cover, and'
Empfehlenswert   ist bei diesem Vorgang, die Filmkassette       the pressure rollers ensure that the film automatically fol-
mit Film leicht festzuhalten, damit die Filmtransport-Zahn-      lows the film gate.
rolle gleichmtiBig  in die Filmperforation eingreifen kann.
Jetzt kiinnen Sie die RUckwand schlieBen, der Film wird
durch die Umlenkrolle der RUckwand automatisch um die
Bildbiihne gelegt.


        Riickspulkurbel
      Rewind crank

             Rtickspulknopf
           Rewind knob button


                                                                                                                                                                     Digitally signed by Mike Butkus
                                                                                                                            DN: cn=Mike Butkus, o=Butkus camera manuals,
                                                                                                                                          ou=butkus.org, email=mike@butkus.org, c=US                    Mike Butkus Date: 2023.02.07 20:06:02 -05'00'


                                                               Filmtransport-      Aufwickelspule
                                                                  zahnrolle      mit schlitzen
                                                     Transport sprocket     Take-up-spool

Filmtronsport
                                        Film odvonce to No I
Nach dem SchlieRen der Riickwand das Filmtransportrad
bis zum Anschlag drehen. Der Auslciseknopf wird freigege-      After closing the back cover press the release button, but
ben. Betiitigen Sie jetzt die Zdhlwerkrilckstelltaste, um das     do not switch on power yet. Wind on until the winding
Ztihlwerk auf "0" zu stellen. Nach einem erneuten Ausl6-        disc stops, press release button and then repeat sequence.
sen der Kamera und einem weiteren Filmtransport ist der      Press the release button again and set the frame counter
beim Einlegen des Filmes belichtete Teil aufgewickelt und      to "0". The next winding operation will take up all exposed
der Film bereit zur Belichtung. Das Bildziihlwerk zeigt die        film from the gate and the camera is ready to use. The
Zahl "l ". Jetzt kann die Kamera am Hauptschalter  einge-       fiame counter will show " I ".
schaltet werden.
Film riickspulen
lst der Film vollstiindig belichtet und soll er der Kamera ent-   Film rewind
nommen werden, so ist zuniichst die Rtickspulkurbel auszu-
klappen. Danach wird der RUckspuldriicker an der Untersei-    When the film has been exposed and is to be removed,
te der Kamera gedriickt und der Film mit der Riickspulkur-       unfold the rewind crank and, with continuous pressure on
bel zuriick in die Filmpatrone gespult. Der RUckspuldrUcker       the rewind button at the base of the camera, wind the film
ist wiihrend dieses Vorgangs gedrUckt zu halten.                back into the cassette.
Bei deutlichem Widerstand gegen das Rtickspulen wird sig-
nalisiert, daB genUgend weit zurtickgespult  ist. Die Ri.ick-
wand kann getiffnet werden.
View original page 5Page 6 · Read text
AufnohmeYorgong          Mokingwww.butkus.usexposure
Aufnahmen im Bereich I/tO s - l/5OO s,    Exposures in the I/tO - t/ilOl ronge,
Elnzelbildbellchtung                   none multi-exposures
 lm Bereich dieser Belichtungszeiten  stellen Sie zuniichst        Set range selector to "A" (see  ill.).
 den Umschaltknopf  in Stellung "A" (siehe Abb.).               With the power switch on, the LED shows green. The
 Nach dem Einschalten des Hauptschalters  leuchtet die        double exposure knob should be set away
 LED-Anzeige grUn auf. Der Knopf Doppelbelichtungssperre      from "'" (see  ill.).
 steht entfernt von der Position "." (siehe Abb.).                Rotate the speed dial to the chosen exposure time and set
 Sie wiihlen lhre Belichtungszeit durch Drehen des Belich-      the corresponding  f-stop on the aperture adjustment


                                                                       LCD-Anzeige
                                                                                              Bildzahl       Ziihlwerk-
                                                                                                                  riickstelltaste                                                                 LCD counter
                                                                                              Counter  reset button
        Filmempf indlich keits-
                merkscheibe                                                                                                        Ausl<iser
                   Film speed                                                                                           Release button
              reminder disk

                                                                                                                                              Drahta usliiseranschluR
                                                                                                                          Cable release socket
                                                                                                                                                                      Bel ichtungszeitenknopl
                                                                                                                         Exposure speed
                                                                                                                                          sefting knob


                                                                                                             lumschaltknopf
                                                                                                                                  (nur bei  I 35 U)
                                                                                                              Speed range selector
                                                                                                                 (l3s U only)
      Riickpulkurbel  mit         Steckschuh f0r                              Okular
    Rtickwandverriegelung      Belichtungsmodul - mit 2 Steuerkontakten        Finder          LED-Betriebsanzeige        Vorspannknopf
       Rewind crank with     Accessory shoe for                           eyepiece          (Ha u ptschalter-ein/aus)     Winding disk
     camera back release      exposure module  - with two contacts                        gr0n - Kuzzeitbereich
                                                                                                                                    -                                                                                                        Langzeitbereich                              o Doppelbelichtungssperre       rot                                                         I                                                                                LED                                                                                                          indicator
                                                         Double exposure  lock      green- speed range                                  tO-                                       (Power onlofD
                     t6  *'i;:ili:H',"J:      red- slow speed range


                                      www.butkus.us

                                                                               Rewind button

tungszeitenknopfes und die entsprechende Blende durch      wheel (see  ill.). The camera  is is now ready for an
Betiitigen des Blendeneinstellsegments   (siehe Abb.). Die       exPosure.
Kamera ist nun aufnahmebereit.                           The release button may released while the drum is
Der Auslciser kann wdhrend des Trommellaufes  losgelas-         rotating.
sen werden; er verbleibt im teilweise gedriickten Zustand       Note: With long interval between exposures  it is recom-
bis zum niichsten Filmtransport.                        mended that the power is switched off to conserve
Hinweis: Bei grriBeren Pausen zwischen den einzelnen           batteries.
Aufnahmen empfehlen wir, den Hauptschalter immer aus-
zuschalten. Sie schonen damit die Batterien.
View original page 6Page 7 · Read text
Aufnohmen im Bereich I s - I/15 s,      Exposures ln the I s - I/15 s ronge,
Einzelbildbelichtung                  none multi-exposures

lm Bereich dieser Aufnahmezeiten stellen Sie den              Set range selector to "8" (see  ill.).
Umschaltknopf  in Stellung "B" (siehe Abb.).                    With the power switch on, the LED shows red. The double
Nach dem Einschalten des Hauptschalters  leuchtet jetzt        exposure knob should be set away from "'" (see  ill.).
die LED-Anzeige rot auf. Der Knopf Doppelbelichtungs-         Rotate the speed dial to the chosen exposure time and
sperre steht entfernt von der Position "'" (siehe Abb.).           set the corresponding  f-stop on the aperture adjustment
Sie wiihlen lhre Belichtungszeit durch Drehen des Belich-      wheel (see  ill.). The camera  is now ready for an exposure.
tungszeitenknopfes  und die entsprechende Blende durch      The release button may released while the drum is
Drehung des Blendeneinstellsegments   (siehe Abb.).               rotating.
Die Kamera ist nun aufnahmebereit.                            Note: With long interval between exposures  it is recom-
Der Ausloser kann wdhrend des Trommellaufes  losgelas-      mended that the power is switched off to conserve
sen werden.                                                             batteries.
Hinweis: Bei griiBeren Pausen zwischen den einzelnen
Aufnahmen empfehlen wir, den Hauptschalter immer aus-
zuschalten. Sie schonen damit die Batterien.

Mehrfochbelichtung                    Multiple exposures

Fiir die Mehrfachbelichtung steht der Knopf Doppelbelich-      For multiple exposures the double exposure lock should
tungssperre nahe der Position "o" (siehe Abb.).               be set to tto" (s€€  ill.). With a single pressure on the relea-
Bei einmaligem Betiitigen des Ausliisers pro Trommellauf      se button for each drum rotation you can make multiple
k<innen Sie Mehrfachbelichtungen mit zeitlicher Unterbre-      exposures, pausing  if necessary. Uninterrupted multiexpo-
chung erzielen. Ununterbrochene Mehrfachbelichtungen       sures are possible  if the release button will be pressed
werden durch Festhalten des Ausliisers  liber einen liinge-      during longer time.
ren Zeitraum erreicht.                               A solid tripod and cable release is recommended.
Wir empfehlen den Gebrauch eines stabilen Statives und
eines Drahtauskisers.
View original page 7
Page 8 · Read text
Objektiv-Shift                Lens www.butkus.usshift
(nur bei NOBLEX 155 S und lt5 U)        (NOBLEX trl S ond lt1 U only)
Der objektiv-Shift ermriglicht ein Verlagern des Bildaus-       The lens shift permits a higher viewpoint without tilting the
 schnittes nach oben, ohne daB die Kamera dazu geneigt       camera.
werden muB.
                                                                          In order to shift the lens up the aperture is set to f 4,5 on
Um das Objektiv nach oben zu verschieben  (shiften), wird      the aperture adjustment wheel and then pushed 4 mm up
das Blendeneinstellungssegment  auf Blende 4,5 gestellt         until it stops. Now set the required aperture. To return the
und danach noch ca. 4 mm weiter nach oben bis zum          lens to the normal position, move the aperture adjustment
Anschlag geschoben. Jetzt kann wieder der gewiinschte       wheelto fl6 and push  it down 4 mm until  it stops. The
Blendenwert eingestellt werden.                                 lens is now in the normal position and the required aper-
Zum RUckstellen des Objektives  in die Normalposition          ture may be set.                                                                                      1
 stellt man das Blendeneinstellungssegment   auf Blende l6
und danach noch ca. 4 mm weiter nach unten bis zum
Anschlag. Das Objektiv befindet sich nun wieder in Nor-
malposition, und die gewiinschte Blende kann eingestellt
werden.

Pflege der Komers          Comero core
Die Panoramakameras NOBLEX 155 U. 135 S und 135 N      The Panorama cameras NOBLEX 155 U, 155 S and l55 N
sind nach modernsten Gesichtspunkten  wartungsfrei kon-      are virtually service free because of its up-to-date construc-
struiert.                                                                   tion.
Trotzdem einige Hinweise:                                  Never the less a few pointers:
. Die Kamera ist, als feinmechanisch-optisches Cerdt, vor
  extremen StciBen, Schliigen, Staub, Hitze und Feuchtigkeit         . This camera  is a High-tech optical instrument and there-
 zu schtitzen                                                      fore to be protected from extreme shocks, blows, dust,
. Bei Nichtbenutzung und Transport der Kamera die              heat and moisture.
  Ka meratasche venryenden                                                    . Please attach the camera case when the camera is not in
. Spulenraum und Filmbahn von Zeit zuZeit mit einem         use or during transport.
 weichen Pinsel siiubern                                                           . Please take the batteries out of the camera  if vou don't
. Keine organischen  Lirsungsmittel zum Reinig€fl V€rw€fl.        use the camera for a long time.
 den
. Sucherlinsen nur mit Linsenreinigungspapier  und             Please for note the following remarks:
  Optikpinsel reinigen                                    The guarantee is no longer in effect if the equipment has
. Bei ldngerer Nichtbenutzung der Panoramakamera  soll-      been tampered with or repaired by individuals not author-
 ten die Batterien entfernt werden                                 ized, also, when supplementary parts or accessories are
                                                   added which have not been intended for this equipment,
Wir bitten, alle Hinweise zu beachten.                          guarantee services will not be rendered.
Schiiden durch unsachgemiiBe Handhabung der Kamera
liegen auBerhalb unserer Garantieleistung.

Zubehiir                      Access ories
(nicht im Lieferumfong entholten)       (not included)
. Stativ                                                                                            . Tripods
. Drahtausldser                                                                     . Release cable
. Koffer                                                                                    . Camera case
. Winder                                      in Vorbereitung                . Winder                                     in preparation
. Filter und Vorsatzlinsen                   in Vorbereitung              . Filters and adapter lenses                in preparation
. BelichtungsmeBmodul                     in Vorbereitung              . Exposure module                         in preparation
View original page 8From the M. Butkus archive. Original publisher and archive notices are retained.
Check the model and edition against your equipment.
PDF verified 2026-10-10.