Film cameras
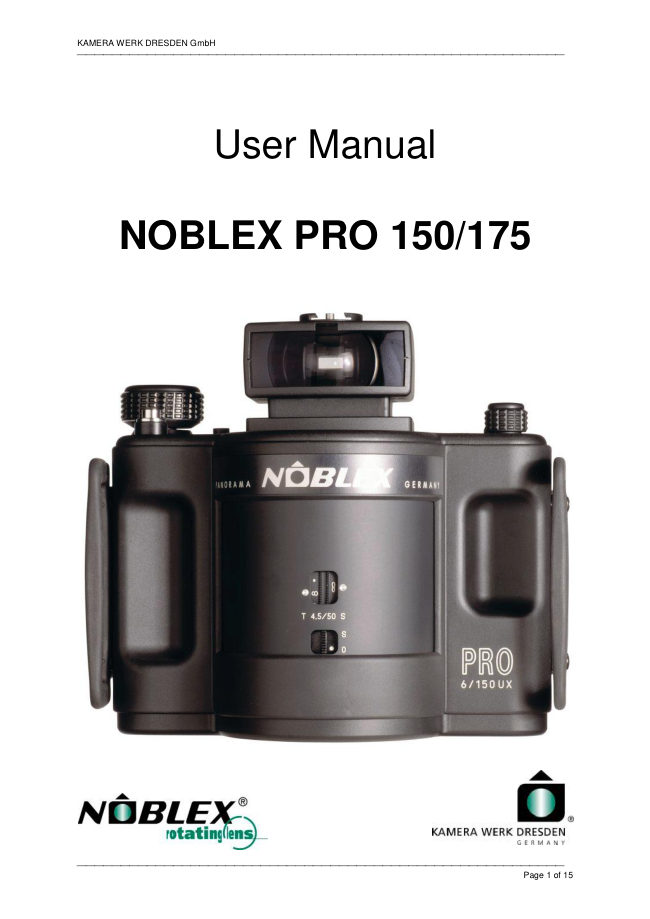
Noblex pro 150HS User manual
User manual for Noblex pro 150HS. 15 pages in English. Read the original PDF, download or print a copy without registration.
15 pagesEnglish0.5 MB PDF
Loading your manual…Open PDF directly
Document details
- Brand
- Noblex
- Model / document
- Noblex pro 150HS
- Document type
- User manual
- Language
- English
- Pages
- 15
- File size
- 0.5 MB
- Category
- Film cameras
- Document date
- Not specified in catalog
Search available document text
Find a term, then jump to its page in the original PDF. Image-only pages may not be searchable; check the PDF for exact wording and diagrams.
Page 3 · Read text
KAMERA WERK DRESDEN GmbH
Introduction
Congratulations on your purchase of a new NOBLEX camera. With the patented and unique operation
principle of NOBLEX cameras you enter in a new world of dramatic and expanded photographic
applications. As NOBLEX cameras vastly differ tram traditional camera systems, we recommend
reading the operating instructions carefully before using the camera the first time.
Please note:
These operating instructions are general instructions for all NOBLEX cameras for roll film.
Should you own a model not having all features, you can omit certain chapters.
Please refer to the table on page 13 for information on technical features of your camera.
Special Features of NOBLEX
1. NOBLEX cameras use the principle of the lens rotating 360° for each exposure.
2. The film, resting on a curved film plane, is exposed through the constantly moving shutter slit.
3. During the first half of the rotation the lens drum is accelerated to a constant speed insuring
absolutely even exposure of the film during the second half of the rotation.
4. This results in distortion free photographs with an angle of view of 146° when using a NOBLEX
PRO 6/150 and 138° when taking pictures with a NOBLEX PRO 175. What makes these pictures
stand out are their remarkably even edge to edge illumination and unsurpassed sharpness.
5. The photographs correspond to the natural space perception of the human eye.
Important Notes
1. The camera is not waterproof and therefore not suited for use in wet environments, when raining
or in snow. A camera dropped into the water by accident, should immediately send to the
NOBLEX Service Centre. Protect your camera tram seawater haze and tram high humidity. To
properly clean your camera, use a dry cloth or a soft brush after taking pictures.
2. In the event service is required, never try to repair your camera your-self, contact the closest
NOBLEX Service Station.
3. Remove the batteries if you will not use the camera for more than two weeks.
4. When not using the camera store it in the case and keep the camera in a cool, dry and dust-free
location. Do not expose the camera to direct sunlight if it is not necessary and avoid strong heat
influence (e.g. in trunk or glove compartments of cars).
5. Check all camera functions carefully after long storage.
6. Batteries can leak or explode and have the potential to cause personal harm. Do not open battery,
expose to fire or high temperature, recharge, put in backwards, or mix with any other battery type.
Dispose of them properly and always avoid misuse.
7. As with any electronic item, pay attention to condensation when moving tram a cold area to a
warmer, as high humidity and dampness may occur.
8. If colour film remains too long in the camera, you may experience a colour shift. Always use fresh
film.
9. Avoid taking photographs in the direction of a strong light source, e.g. the sun.
Page 3 of 15View original page 3Page 6 · Read text
KAMERA WERK DRESDEN GmbH
Attaching the Camera Strap
Thread the camera strap in the lug (8).
Inserting the Batteries
NOBLEX PRO cameras require 4 batteries AAA (RO3/UM4/LR) 1,5V. Please use high-quality alkaline
batteries, of course, with items ‚Photo/Audio‘, ‚Photo‘ or ‚Power‘. When inserting the batteries follow
these instructions:
1. Open the battery compartment cover (24) by pressing the
upper half of the cover slightly and push it upwards.
2. Open up the battery compartment cover (24).
3. Insert the new batteries. Pay attention to the right polarity
and position of the strips for removing the batteries.
4. Lift the battery compartment cover (24) down.
5. Close the cover by pressing the lower half of the cover
slightly and push it downwards at the same time until it is
engaged.
Please note
Never use batteries of different types and do not mix old batteries with new ones. Do not use
rechargeable batteries. If you do not use your camera for an extended time, remove the batteries for
this time.
Inserting and removing the film
NOBLEX PRO cameras require 120 roll film. To insert and change the film please follow these
instructions:
Inserting the film (NOBLEX PRO 150)
1. Turn the camera off at the ON/OFF switch (10).
2. Advance the winding disk (5) until the counter
(5a) reaches position »5«. (If necessary, press
the shutter release button (4) to advance to the
position »5«.)
3. Unlock the camera back (9) and open it.
4. Insert the film spool into the left-hand spring-
loaded compartment (14).
5. Insert the empty film spool into the right-hand
compartment (18). The spool must engage in the
upper catch (20).
6. Thread the tongue of the paper lead into the
take-up spool.
7. Turn the winding disk (5) until the double arrow
on the protective paper of the film is opposite the
red dot on the camera film guide (16). pay
attention to insure a tight winding of the film.
8. Close the camera back and lock it (9).
9. Press the start button (5b). The counter is
released with that. Remark: At older models the
start key (5b) isn't available yet. In this case the
shutter release button (4) has to be pushed.
10. Advance the winding disk (5) in the direction of
the arrow until it stops. The film counter should
be at the number 1. To take a picture turn the
camera on at the ON/OFF switch (10) and press
the shutter release button (4).
Page 6 of 15View original page 6Page 7 · Read text
KAMERA WERK DRESDEN GmbH
Removing the film (NOBLEX PRO 150)
1. Turn the camera off at the ON/OFF switch (10).
2. Advance the winding disk (5) until the counter (5a) reaches position »S« and the start button (5b)
moves out of the camera housing. Turn the film advance knob at least 4 times to avoid
unintentional incidence of light.
3. Unlock the camera back (9) and open it.
4. Press the film spool down until it can be swung out and removed.
Please note Do not change the film under a strong light source.
Inserting the film (NOBLEX PRO 175)
1. Turn the camera off at the ON/OFF switch (10).
2. Advance the winding disk (5) until the counter (5a)
reaches position »S«. (If necessary, press the shutter
release button (4) to advance to the position »S«.)
3. Unlock the camera back (9) and open it.
4. Insert the film spool into the left-hand compartment
(14) in the camera back.
5. Push the tongue of the paper lead under the pressure
roll (15).
6. Push the tongue of the paper lead under the fight
diversion roller (17) - it is located in the fight-hand
compartment behind the take-up spool (18) - and pull
it until the double arrow on the protective paper of the
film reaches the pressure roller (15).
7. Insert the take-up spool into the right-hand
compartment (18).
8. Thread the tongue of the paper lead into the empty
spool.
9. Turn the winding disk (5) until the double arrow on the
protective paper of the film is opposite the red dot on
the camera film guide (16). Make sure that the film is
wound snug onto the take up spool.
10. Close the camera back and at the
same time press the left diversion
roller (19) slightly to the back.
11. Lock the camera back (9).
12. Press the start button (5b). The
counter is released with that.
Remark: At older models the start
key (5b) isn't available yet. In this
case the shutter release button (4)
has to be pushed.
13. Advance the winding disk (5) in the
direction of the arrow until it stops.
The film counter should be at the
number 1. To take a picture turn the
camera on at the ON/OFF switch (10)
and press the shutter release button
(4).
Removing the film (NOBLEX PRO 175)
1. Turn the camera off at the ON/OFF switch (10).
2. Advance the winding disk (5) until the counter (5a) reaches position »S« and the start button (5b)
moves out of the camera housing. Turn the film advance knob at least 4 times to avoid
unintentional incidence of light.
3. Unlock the camera back (9) and open it.
4. Press the film spool down until it can be swung out and removed.
Page 7 of 15View original page 7Page 8 · Read text
KAMERA WERK DRESDEN GmbH
Please note Do not change the film under a strong light source.
Short Time Exposures
1. Turn the camera on at the ON/OFF switch (10). LED indicator shows green.
2. Switch the double exposure button (6) to single exposure (not to position
»M«).
3. Select your exposure time and set it on the shutter speed setting knob (2).
4. Set the aperture desired on the aperture setting wheel (1a).
5. Set the distance desired on the focusing wheel (1c) - this is not applicable on
NOBLEX PRO models 150 E2, 150 HS. Please refer to the table on the back 1a 1c
cover or to the camera back (25a) for the corresponding distance range.
6. Rotate the film advance knob (5) in the direction of the arrow until it stops.
7. After carefully viewing your subject depress the shutter release button (4).
Please note
Pay attention to the proper holding of the
camera. Otherwise your hands may appear in
the photograph.
When sighting the camera refer to the levels.
Inclined skylines and con-verging vertical
lines can thus be reliably avoided. Please
refer to the Technical Features on the back
cover or to the table (25a) on the back of your
camera for depth of field figures.
It is advisable to switch the camera off (10)
when there is a longer interval between two
exposures to conserve battery life.
Long Time Exposures
To use your NOBLEX PRO in the slow exposure range you require the slow exposure module. Please
turn to page 9 for this.
Use of ‘Lens Shift’ function
When using the lens shift the subject is moved upwards without tilting the camera.
Converging lines can thus be avoided. In order to shift the lens:
Set the shift setting wheel (1b) to marking »S«. Set the shift setting wheel (1b) to
marking »0« to return the lens to the normal position.
Please note A »cut-out« (7a) is provided in the viewfinder to help determine the
top edge of the »shifted« photograph. 1b
Multiple Exposures
In order to expose one frame of film more than once, switch the double exposure button (6) to position
»M«. Press the shutter release knob (4) once for a single exposure. This procedure can be repeated
as often as you wish. Keeping the shutter release knob (4) pressed, the lens will continue to rotate and
the exposing process is repeated until you release the knob (4). The complete exposure time consists
of all single exposure times. You will find a corresponding table on page 13.
Please note We recommend using a tripod and cable release for most applications of multiple
exposures.
Page 8 of 15View original page 8Page 9 · Read text
KAMERA WERK DRESDEN GmbH
Filters and Close-up Lenses
As accessories for NOBLEX cameras we offer a wide range of filters and close-up lenses. NOBLEX
filters an close-up lenses are specially designed with a magnetic ring on the back surface of the
filter/close-up lenses. They can thus directly be fixed to the lens. For inserting the filter or a close-up
lens follow these instructions:
1. Turn the camera off at the ON/OFF switch
(10).
2. Push the double exposure button (6) to
position »M«.
3. Press the shutter release button (4) and hold
it pressed.
4. Turn the lens drum anticlockwise until it
reaches a stop.
5. Release the shutter release button (4).
6. Put the camera on its back.
7. Pick up the filter or the close-up lens by the
hole of the filter ring using a pair of tweezers
and insert it through the shutter slit. Place the
filter onto the lens. The filter is magnetically
held onto the front of the lens.
8. Turn the lens drum back until it is engaged.
9. Push the double exposure button (6) back to
single exposure, if desired.
When removing the filter or the close-up lens follow the same procedure.
Please note
To step 5: If you turn the drum clockwise the film is exposed and you lose one picture. Please be very
careful when changing filters/close-up lenses in order to avoid damage to the lens caused
by the tweezers.
The Slow Exposure Module
The module for slow exposures offers you the opportunity to work comfortably with these NOBLEX
PRO cameras designed for the slow exposure module in the slow speed range. The necessary power
is supplied by the batteries of the camera.
Attaching to NOBLEX PRO
To attach the module to your camera please follow these instructions:
1. Remove the protective cap by turning the fastening knob (701) 704
clockwise. 703
2. Turn the camera off at the ON/OFF switch (10).
702
3. Turn the control ring (702) of the module until both white dots face
each other.
4. Attach the slow exposure module to the left-hand camera bottom so
that the guide pins (703) mesh with the inter-face (11) in the camera
bottom. At the same time the white dots of camera and slow speed
module must face each other.
5. Turn the fastening knob (701) until the module is tightly connected
with the NOBLEX camera.
To remove the module tram your camera please follow these instructions: 701
1. Turn the camera off at the ON/OFF switch (10).
2. Turn the control ring (702) of the module until both white dots face each other.
Page 9 of 15View original page 9Page 10 · Read text
KAMERA WERK DRESDEN GmbH
3. Disengage the module tram your NOBLEX by turning the fastening knob (701) and remove it.
4. We recommend put on the protective cap.
Operating and Exposing in the Slow Speed Range
When taking photographs in the slow exposure range, follow these instructions:
1. Attach the slow exposure module to your NOBLEX as described in previous chapter.
2. Turn the camera on at the ON/OFF switch (10).
3. Turn the control ring (702) until the white dot on the control ring (702) faces the red dot on the
camera. The LED indicator (3) will show red.
4. Set the exposure time desired at the shutter speed setting knob (2).
5. Set the aperture desired on the aperture setting wheel (1a).
6. Set the distance range desired on the focusing wheel (1c) (not applicable on camera models 150
E2, 150 HS). Please refer to the table on page 13 or to the back (25a) of your camera for the
corresponding depth of field figures.
7. Wind the film advance knob (5) until it stops.
8. After carefully viewing your subject, depress the shutter release button (4).
Please note
You can use the camera for taster exposures even when the slow exposure module is attached. Turn
the control ring (702) until the white dot of the adjustment ring faces the white dot of your NOBLEX.
The LED indicator (3) will show green.
The long time exposure module was designed to be as maintenance-free as possible. However,
protect the module tram extreme vibrations, damage, heat and moisture. Do not use organic solvents
for cleaning the module. Keep the drive shaft (704) clean and dry.
Page 10 of 15View original page 10Page 11 · Read text
KAMERA WERK DRESDEN GmbH
The PANOLUX 150
The PANOLUX 150 is an exposure metering and control module which you can purchase in addition
to your NOBLEX PRO 150/175. The PANOLUX automatically controls the exposure time of your
camera. There are two measuring methods for this: reflective metering (light metering in direction of
the subject), and metering of incident light. The incident light metering otters two different methods of
measuring: pure metering of incident light (metering of
the light falling on the subject and/or the white diffuser
independent of the reflection qualities of the subject) and
subject-oriented metering of incident light (simultaneous
reading with the front detector cell and the diffuser which
means that the reflections of the subject are taken into
consideration).
When working in reflective metering or subject-oriented
metering of incident light it is also possible to enter
correction factors into the PANOLUX which influence the
drum rotation speed during the exposure process.
According to the correction factor set on the PANOLUX,
the lens drum moves slower or taster in the Vorder- und Rückansicht des PANOLUX 150
corresponding parts of the exposure and different
exposure times are produced during one drum rotation. Typically, a slower rotation will ,brighten' that
area. ConverseIy, a taster rotation will ,darken' that portion of the photograph.
You find broader details on this in the operation instructions for the PANOLUX 150.
Care of Camera
For high-quality photographs and reliable operation of your camera we recommend you clean the
camera regularly. Do not use organic sol-vents such as petrol ether, thinning or strong cleaning
agents. For removing dust and fluff, use a small and soft photo brush. pay special attention to:
• a clean drum slit
• a clean film compartment
• a clean film plane
• a clean drive shaft (704) of the slow exposure module
What to do then your camera requires service?
Should you have any problems with your camera which you cannot clear with the hints given in the
operating instructions, please contact your dealer or importer.
Addresses of your closest camera repair centre are obtainable tram:
KAMERA WERK DRESDEN GmbH
Bismarckstraße 56
01257 Dresden
Germany
Tel. +49 (3 51) 28 06-0
Fax +49 ( 3 51) 28 06-392
E-mail: info@kamera-werk-dresden.de
Web: http://www.kamera-werk-dresden.de
Page 11 of 15View original page 11Page 15 · Read text
KAMERA WERK DRESDEN GmbH
All rights at KAMERA WERK Dresden GmbH.
Copies, also in an abridged version, only by approval of the KAMERA WERK Dresden GmbH.
NOBLEX and PANOLUX are typed in trademarks of the KAMERA WERK Dresden GmbH.
The KAMERA WERK Dresden GmbH reserves deviations in the illustrations and changes of the
technical piece of equipment equipment for herself.
KAMERA WERK DRESDEN GmbH
Bismarckstraße 56, 01257 Dresden
Tel. +49 (351) 2 80 60
Fax +49 (351) 2 80 63 92
E-Mail: info@kamera-werk-dresden.de
Web: www.kamera-werk-dresden.de
Page 15 of 15View original page 15Related documents and language editions

From the M. Butkus archive. Original publisher and archive notices are retained.
Check the model and edition against your equipment.
PDF verified 2026-10-10.