Flashes & lighting
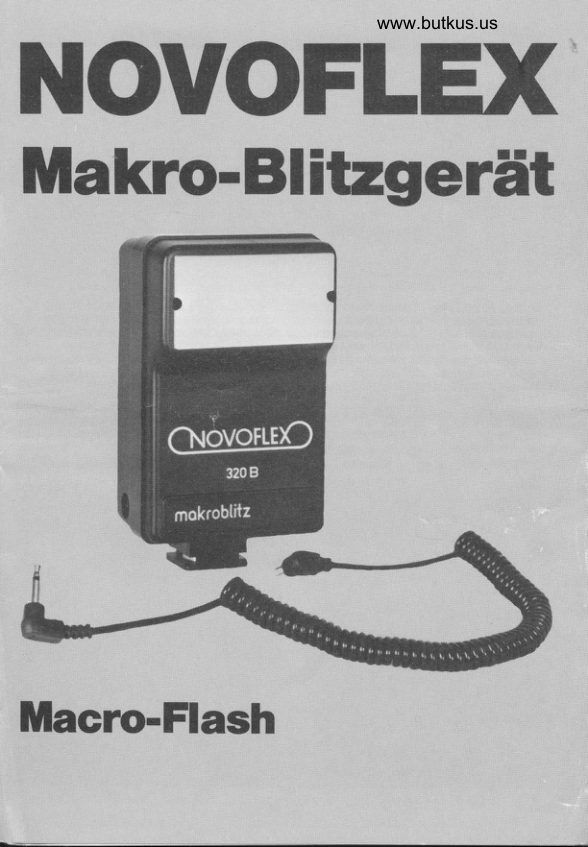
Novoflex Makro-Blitgerat User manual
User manual for Novoflex Makro-Blitgerat. 11 pages in English. Read the original PDF, download or print a copy without registration.
11 pagesEnglish2.0 MB PDF
Loading your manual…Open PDF directly
Document details
- Brand
- Novoflex
- Model / document
- Novoflex Makro-Blitgerat
- Document type
- User manual
- Language
- English
- Pages
- 11
- File size
- 2.0 MB
- Category
- Flashes & lighting
- Document date
- Not specified in catalog
Search available document text
Find a term, then jump to its page in the original PDF. Image-only pages may not be searchable; check the PDF for exact wording and diagrams.
Page 2 · Read text
Mike Butkus  Digitally                                                                                                                                                                        DN:ou=butkus.org,Date:cn=Mike2022.09.09signedButkus,email=mike@butkus.org,by19:32:57Mikeo=ButkusButkus-04'00'camera manuals,c=US


1) Blitz-Reflektor mit aufge-     '1) Macro-Flash with diffuser   1) Macroflash muni d'un      1) Riflettore del flash
   setzter Streuscheibe           disc attached                    diffuseu  r                   con li11ro dilfusore
2) Batteriefachdeckel          2) Cover for battery housing   2) Couvercle du logement     2) Coperchio dello scomparto
3) GeriitefuB                   3) Flash shoe                 des piles                        delle batterie
4) Blendenrechner   ftir Auf-    4) Exposure calculator         3) Sabot du flash              3) Supporto con contatlo
  nahmen  iiber 1,25 m        5) Flash ready and test        4) Calculateur d'exposition      caldo
5) Berertschaltsanzeige            button                      5) Signal de disponibilit6 de   4) Calcolatore per distanze
   und Testknopf              6) 0n/off switch                       l'6clair et bouton               superiori a 1,25 m
6) Ein/Ausschalter             7) Socket for spiral synch       pour 6clair d'essai          5) Indicatore sempre pronto
7) Steckbuchse fiir Spiral-       cable                       6) Intenupteur                e pulsante di controllo
   Synchro nkabel              8) Spiral synch cable          7) Prise pour cable de         6) Interruttore di accensione
B) Spiral-Synchronkabel                                        synchronisation  spiral6     7) Attacco  per cavetto sincro
                                                               8) Cable de synchronisation   8) Cavo sincro a sprrale
                                                                     spiral6


                                             Abb.: 2
View original page 2Page 3 · Read text
www.butkus.us
        N ovof   I ex M a kro-Bl itzgerdt (Bestel lwort  : BLITZ)
               1. Einsetzen der Batterie: Offnen Sie das Batteriefach  2) und setzen Sie 2 Batterien Typ
        AA (Mignon) gemAB den Schaubildern ein. SchlieBen Sie das Batteriefach.
          Achtung! Die Batterien mussen richtig eingesetzt werden, da sonst die Funktion des
           Ger€ites nicht gewiihrleistet  ist. Es kann zu Beschddigungen kommen!
              2. Das Blitzger€it wird entsprechend der Abbildung  'l am X-SHOE angebracht. Die not-
         wendigeVerbindung wird mit dem Spiralkabel  8) zwischen Steckbuchse 7) und Blitz-
           kontakt des Kameragehauses  hergestellt. Das Blitzgerdt istftirden normalen Gebrauch
            (siehe 5.) mit Mittenkontakt ausgerUstet, Kabel zuerst  in die Steckbuchse 7) stecken,
           sonst wird der Blitz unbeabsichtigt ausgeldst. Die Streuscheibe kann, je nach Bedarf,
            entfernt werden. Das eine Ende wird vorsichtig angehoben und die Scheibe von den
             Haltestiften  gel0st. Zum Einsetzen Scheibe schrag anlegen und zwischen die Stifte
          drUcken (siehe Abb. 2).
                 3' Zum Einschalten schieben Sie den Ein/Ausschalter6) auf stellung "1"' Ein leiserPfeif-
           ton zeigt an, daB das Geriit sich aufltidt. Nach einigen Sekunden leuchtet die Bereit-
           schaftsanzeige  auf, lhr Gertit ist blitzbereit. Mit dem Testknopf 5) konnen Sie einen Pro-
             beblitz auslosen. Nach Gebrauch Schalter auf "0" stellen.
         Beachten Sie die, f0r lhre Kamera, vorgeschriebene Belichtungszeit ftir Elektronen-
              blitzbetrieb!
               4. Fur den Gebrauch im Nah- und Makrobereich am X-SHOE, mUssen folgende Hinwei-
           se beachtet werden. Das Novoflex Makro-Blitzgeriit hat die Leitzahl (LZ) 20, bei 21 DIN/
          100 ASA Film.
           Diese Lichtsttirkewurdeaberim  Makrobereich  bereitsmiteinem 21 DIN Film zu Uberbe-
            lichtung fuhren, selbst die kleinsten Blenden konnten dies nicht verhindern. Die aufge-
            setzte Streuscheibe bietet gleich zweiVorteile: die in diesem Fall zu hohe LZ 20 wird auf
           die "Makro-LZ 15. reduziert, die Beleuchtung wird weicher und gleichmaBiger.  Die
         nachstehende Belichtungstabelle stutzt sich auf diese Blitz/Film-Kombination.   In Ver-
           bindung mit 21 DIN Film, den Novoflex Balgengeraten und den 105/60 mm Objektivkop-
             fen, kann sie ohne Umrechnung verwendet werden.
            Bei 18 DIN Film Blende um einen Wert Offnen oder die Streuscheibe entfernen.
            Bei 15 DIN Film Blende um einen Wert Offnen und die Streuscheibe entfernen.
           Eine hohere Filmempfindlichkeit,  als 21 DlN,  ist fur Makroauf nahmen nicht zu empfeh-
               len. Bedingt durch den kurzen Aufnahmeabstand  mit den 60 mm Objektivkopfen-und
          noch mehr bei Verwendung eines 50 - 60 mm Kameraobjektivs am Balgengerat -  ist            mitunter eine zweite Streuscheibe erforderlich (siehe Belichtu ngstabelle). Hierzu kann
            eine, der mit X-SHOE gelieferten, Streuscheiben genommen werden. Befestigung  mit
          einfachem Gummiring.
              5. Das Novoflex Makro-BlitzgerEit kann auch im normalen Aufnahmebereich  verwendet
           werden. Das Geriitwird in den Blitzschuh derKamera  gesteckt, die Streuscheibeabge-
         nommen. Die ursprungliche LZ 20 steht wieder zur Verftigung.
            Bei Kameras ohne Mittenkontakt wird das Spiral-Synchronkabel venrvendet.  Die erfor-
           dediche Blende kann uber den Blendenrechner  4) ermittelt werden, z. B. 21 DIN Film t
          5 m Entfernung: Blende 4.
             Trotz der nachstehenden  Tabelle mtissen bei der Makrofotografie  einige "Spielregeln"
            beherzigt werden. So sollen z. B. helle Bluten knapper als angegeben, dunkle Gegen-
           stande reichlicher belichtet werden. Von lohnenden Objekten sollten ohnehin mehrere
          Aufnahmen, mit unterschiedlicher Blende und Blitzstellung, gemacht werden. Es kOn-
:         nen die schdnsten und interessantesten Effekte entstehen!
I
View original page 3Page 4 · Read text
Venmo @mike-butkus-camera  Ph. 2083
PayPal Name  Lynn@butkus.org      www.PayPal.me/lynnbutkus
View original page 4
Page 5 · Read text
H            6. Das Makro-BlitzgerZit kann auch als Lichtquelle zum Diakopieren mit dem Diakopier-
        gerdtBALCOP-Koderdem Macro-Stand MACROverwendetwerden. Blitzgerat, mitan-
           gebrachter Streuscheibe, gegen die Opalglasscheibe  des Diakopierger€ites bzw. Mac-
         ro€tandes richten.
                              soll beim          DerAbstand
                                   Dia                                  21: DINBlendeFilm 1126; etwascm, beimunterbelichtetes18 DIN Film 20 Diacm,: beimBlende15 DIN8; leichtFilm 14uber-cm           betragen. Normales
            belichtetes Dia: Blende l6. Die nach einigen Probeaufnahmen  eventuell notwendigen
           Korrekturen  sollen durch Anderung des Blitzabstandes,  nicht Uber die Blende, erfol-
           gen.
           7 Garantie und Reparatur: lm Reparaturfall  bitte das Geriit - mit ausgefUllter Garantie-
            karte der Fa. Paffrath & Kemper - an die Firma Novoflex oder deren Vertretungen  ein-           schicken.
             8. Technische Daten:
            Leitzahl:         20 (DrN Z/ASA 100)
        Leuchtwinkel: 35 mm WW Objektiv, ca. 640
          Stromversorgung:  2 Batterien  1,5 V GrdBe M (Mignon)
            Blitzdauer:         1/1500 sec.
             Blitzfolge:         12 Sekunden,  je nach Art der Batterien
             Blitzzahl:            bis 120, mit einem Satz Batterien
                            Belichtungstabelle
          Gerdtezusammenstellung:  Novoflex BalgengerAt  mit Objektivkopf 60 bzw. 105 mm,
             BlitzhaltegerZit (X-SHOE) mit AnschluBring (X 52 etc.) und Makroblitz.
             105 mm Objektivkopf / Film 21 DIN/100 ASA  ' Makroblitz mit 1 Streuscheibe
       Auszugsliinge Blende       Objekt-Abstand Filmebene-Abstand
       A.           B.                         cm                cm
      128                22                   23                   44
      11         7     16-22                 26                   47
      106                 16                   30                   50
      9     5         1't -16                 36                   56      8     4         11                   44                   60
         Ende des Nahbereiches
             60 mm Obiektivkopf / Film 21 DIN/100 ASA  ' Makroblitz mit 2 Streuscheiben
                                                                        28                                16                    6     128                                                                    a                      7        22         1't     106               22                       7,5                   2726      95                22                    8                      25,5      84                22                    9                    26      73                22                     10                     26,5      62                22                       11                       .27      51                22                       12,5                    27,5      40                 16                     15                     28,5
            A. - Automatische BalgengerAteB.: Nichtautomatische Balgengerdte
            Alle Wefie fUr die Praxis abgerundet. Geringe Abweichungen, auch in der Gravur der
          FUhrungsstangen, sind moglich und ger€itebedingt. Bei Venrendung von 50 - 55 mm
          Kameraobjektiven  sind die Angaben vom 60 mm Objektivkopf  als Anhaltswerte zu be-
           trachten. Einige Probeaufnahmen   si nd erforderlich.
View original page 5Page 6 · Read text
www.butkus.us
Novoflex Macrc-flash (code: BLrTz)
 1. Inserting the battery: Open the battery housing  (2). Insert 2 AA size 1.5V batteries ac-
cording to the diagram. Close battery housing.
Note: Correct battery insertion is essential to avoid malfunction and damage.
2. Attach flash unit to X-SHOEaccording  to ill.1. Synch connection is made byconnect-
ing cable to camera synch socket. The flash-gun  is made with Hot-Shoe connection  for
normal use. First plug synch cable into flash socket (7), it may otherwiseflash acciden-
tally. When required, the diffusing disc can be detached by carefully lifting the disc at
oneend. Toattach thediffusing disc, hold itatan angle between the holding pinsandap-
ply pressure (see  lll. 2).
3. To switch on, push on/off switch (6) to position  "1". A faint whistling noise will indicate
that the flash  is charging up. After a few seconds the Flash-Ready button will light up.
The unit is now ready for use. Test flash by pressing the Test Button  (5). After use push
the on/off switch to "0".
Note from the camera instructions the correct shutter setting for "X" synchronisation.
4. For close-up and macro photography using the X-SHOE the Macro-flash has a GN of
20 m/60  ft when using 21 DIN/100 ASA Film. When working in the macro range, even
when using the smallest aperture settings, the high output of the flash may cause
overexposure. The attached  diffusi ng disc will reduce the effective GN  f rom 20 m/60  ft to
15 m/45  ft and the illumination  will be softer and more evenly distributed.
Our exposure table is based on combinations of Flash-21 DIN/100 ASA Film - Novof lex
Bellows - Lens Heads 105 and 60 mm. The table can be used without lurther calcula-
tions.
When using 18 DIN/50 ASA Film open-up'l stop or remove diffuser disc
When using 15 DIN/25 ASA Film open-up 1 stop and remove diffuser disc
For Macro work:  it is not advisableto usefilm with a higher rating than 21 DIN/100ASA.A
veryshortflash{o-object  distance results by using the Novoflex 60 mm lens head orca-
mera lenses of a focal length of 50 or 60 mm.  lt may be necessary to use the additional
diffuser disc supplied with the X-SHOE, this being held on to the flash reflector by the
simple rubber band supplied (see exposure  table).
5. The Novoflex Macro-flash can also be used for ordinary flash photography. Simply
push the flashgun onto the camera flash-shoe, detach the diffuserdisc and the original               .r
calculations  for 21 DIN/100 ASA film apply.
For cameras without hot-shoe contact, use the spiralsynch cable. Correctaperture set-
tings can be read from the exposure calculator (4). Example: 21 DIN/I00 ASA Film -                  IObject distance 5 m/15 ft: aperture setting f4.                                                                                                                                                                                                                                                                                                              l
The exposure ready-reckoner is not necessarily the answer. Obvious variations apply                 ,i
when the subject is very light in colour or, conversely very dark Bracket exposure  of
important shots with varying aperture settings. This could create interesting effects.
6. The Macro-flash  is also used as an illuminant for slide copying. Used in conjunction
with the Novoflex slide copying system BALCOP-K,  it is also suitable for use with the
Macrostand MACRO. Placetheflash-gun,  with diffuserdisc attached, facing the diffuser
of the slide copier BALCOP-K or the Macro stand.
21 DIN/100 ASA Film 26 cm/10t/q"
18 DIN/ 50 ASA Film 20 cm/ 7s/q"
15 DIN/ 25 ASA Film 14 cm/ 51/2"
For a normal density transparency use aperture  fl1
slightly under exposed transparency use aperture f8
slightly over exposed transparency use aperture  fl6
                                       ts
View original page 6Page 7 · Read text
Any necessary exposure adjustments are to be made by altering flash distance, not
aperture  settings.
7. Repairs and guarantee  repairs:
Send the equipmentwith completed guaranteecardto Paffrath & KemperorNovoflexor
alternatively  to their appointed representatives.
8. Technical Data
Guide No: 20 m/60  ft (21 DIN/100 ASA)
Angle of illumination: approx 64" with 35 mm WA lens
Power Supply: 2 x1.5 V AA size batteries
Flash Duration: 1/1500 sec.
Flash exposure frequence: 12 sec. according to type and state of batteries
Number of flashes per set of batteries: 120 approx


                    Exposure Table
Outfit-assembly consists of the following: - Novoflex Bellows, Lens heads 60 or 105mm, flash bracket (X-SHOE) with lens ring (X 52 etc.) and Macrojlash.
                           '105 mm Lens head / 100 ASA/21 DIN film
                               Macro-flash * 1 Diffuser
  Bellows Extension Aperture    Object Distance  Film plane Distance
A.                 B.                    cm               cm12822                                 23                  44
11           7   16-22             26                  47
            6      16                30                  50
            5   11- 16              36                  co 10II          4      11                44                  60
Limit of the close-up range
                   60 mm Lens head / 100 ASA/21 DIN film
                              Macro-flash * 2 diffusers
128                     16                o                   2811               7      22                7                   2710              6      22                   7,5                  26 95                    22                                        25,5 84                    22                                8I                   26 73                    22                 10                    26,5 62                    22                   11                   27 51                    22                 12,5                   27,5 40                    16                 15                    28,5A. : Automatic bellows                                      B. : Non-automatic bellows
For practical purposes  all calculations are stated at their lower values. Possible varia-
tions in the guide tube engraving are inherent in the production process. When using
camera lenses of afocal length of 50 - 55 mm (for guidance only) the data as for 60 mmlens head apply. A few test exposures are strongly recommended.
View original page 7Page 8 · Read text
www.butkus.us

Macroflash Novoflex (code: BLrrZ)
1. Mise en place des piles: ouvrir le logement des piles 2) et y introduire 2 piles du type
AA (mignon) dans le sens indiqu6 par le schdma. Refermer le logement.
Attention: les piles doivent etre orientees correctement, sinon I'appareil ne fonction-
ne pas et peut meme etre endommag6.
2. Fixer le flash sur le X-SHOE, comme le montre lafigure 1. A I'aide du cAble spiral€ 8),
6tablir  la liaison entre la prise 7) du flash et la prise de synchronisation de I'appareil
photo. Pour I'usage normal (voir sous 5),le flash est €quipd d'un contact central. Bran-
cher d'abord le cdble sur la prise 7) pour eviter un d6clenchement involontaire de
l'6clair. Le ditfuseur peut, si necessaire,  etre enleve. Pour cela, soulever legerement
I'une de ses extremites  et le degager des ergots qui le maintiennent. Pour le remettre
en place, I'engager de biais et le presser entre les deux ergots (fig. 2).
3. Pour la mise en service du flash, pousser I'interrupteur 6) sur "1". Un l€ger sifflement
indique que le  f lash se charge. Au bout de quelques secondes,  le signal de disponibili-
td de l'€clair s'allume: votre llash est pret. En appuyant sur le bouton 5), vous pouvez
ddclencher un eclair d'essai. Apres emploi, ramener l'interrupteur sur "0".
Ne pas oublier de 169ler I'appareil photo sur la vitesse d'obturation assurant la syn-
chronisation avec le flash 6lectronique.
4. Quand on utilise  le tlash mont€ sur le X-SHOE pour les prises de vues rapprochdes
et la macrophotographie,  tenircompte des indications suivantes. Le Macroflash Novo-
flex a un nombre-guide (NG) de 20 pour 21 DIN/100 ASA.
En macrophotographie, une telle puissance provoquerait  la surexposition mOme d'un
film de 21 DlN, et cela mdme aux plus petites ouvertures de diaphragme.  Le fait de fixer
devant le rdflecteur un diffuseuroffre deuxavantages:le NG 20, trop 6leve, est reduitau
NG "macro 15", et l'€clairement  devient plus doux et plus uniforme. La table d'exposi-
tion ci-aords est fond€e sur cette combinaison flash/film. Elle ne ndcessite aucun cal-
cul pour un film de 21 DIN utilis6 avec un soufflet Novoflex et les tdtes d'objectifs105/60
mm.
Pour un film de 18 DlN, ouvrir le diaphragme d'une valeur ou enlever le ditfuseur.
Pour un film de 16 DlN, ouvrir le diaphragme d'une valeur et enlever  le diffuser.
Une rapidit6 sup6rieure a 21 DIN n'est pas d conseiller pour la macrophotographie.
Compte tenu des courtes distances de prises de vues avec les tetes d'objectifs de 60
mm -distances encore r€duites quand on monte surle soufflet un objectif d'origine de
50 - 55 mm -, on doit parfois recourir d un second ditfuseur (voir table d'exposition).Utiliserd cet effet l'un des diffuseurs livr6s avec le X-SHOE:ils se fixent avec un simple
elastioue.
5. Le Macroflash Novoflex permet aussi les prises de vues courantes.    ll suffit de lefixer
dans la griffe porte-accessoires de I'appareiletd'enlever  le diffuseur. On disposealors
du NG primitif de 20.
Avec les appareils photo sans contact central, se servir du cable de synchronisation
spiral6 et ddterminer I'ouverture necessaire d I'aide du calculateur 4); p. ex: pour un
film de 21 DIN et une distance de 5 m, 169ler le diaphragme sur 4.
En d€pit de la table d'exposition ci-aprds,  il importe de respecter certaines regles en
macrophotographie. Pour des fleurs claires,  p. ex, on adoptera un temps plus court,
pou r des objets fonces un tem ps plus long q ue le tem ps ind ique. Quand le sujet en vaut
la peine, on n'h6sitera pas d prendre plusieurs vues, en modifiant chaque fois I'ouver-
ture et la position du flash. On peut ainsi rdaliser les effets les plus beaux et les plus in-
teressants.
View original page 8
Page 10 · Read text
www.butkus.us

Novoflex Macroflash  (codice: BLrrZ)
 1. Inserimento  delle batterie: Togliere   il coperchio 2) ed inserire due batterie tipo AA
(mignon). Chiudere  il coperchio.
Attenzione!Le batterie devono essere inserite  in modo co rretto altrim enti non d garan-
tito  il funzionamento  dell'apparecchio. Possono verificarsi anche danneggiamenti.
2.  ll flash puO essere collegato, conformemente all'illustrazione  (1), all'X-SHOE.  In tal
caso e necessario impiegare   il cavo sincro a spirale (8) che inserito nella presa (7) sta-
bilisce  il collegamento del flash e della fotocamera.
 ll diffusore pud essere tolto in qualsiasi momento sollevandolo delicatamente per ri-
muovere la polvere dal perno di supporto. Per applicarlo fare una leggera pressione
dopo averlo inserito tra  i perni di supporto (vedi pag. 2).
3. Perinserire  ilcircuito diaccensione posizionare  I'interruttore su "1". Sisentird un leg-
gero fischio e dopo alcunisecondisiaccenderd  I'indicatore  di "pronto":l'apparecchio
e ora pronto per lo scatto. Con  il pulsante dicontrollo  (5) potetefarealcuniscattidipro-
va. Dopo I'uso riportare l'interruttore su "0". Bisogna regolare sulla Vs. fotocamera    il
tempo di sincronizzazione per l'uso del flash elettronico.
4. Nelle foto rawicinate e in macrofoto bisogna prendere  in considerazione leseguenti
indicazioni;    il macro flash Novoflex ha un numero guido 20 per 21 DIN/100 ASA. In ma-
crofotog  raf ia si puO ottenere u na sovraesposizione  con u na pellicola d  i 21 DIN e cid non
pud essere evitato anche con pellicole meno sensibili.  ll filtro diffusore in dotazione
presenta    i seguenti vantagg i: il nu m ero g uida 20 verrd ridotto a 15 e I'illum inazione sard
piu uniforme e delicata. La tabella allegata d indicata per questa combinazione  pellico-
lalf lash.
Utilizzando'una pellicola2l DlN, ilflash Novollexed un obiettivol05/60 mm consoffiet-
to, si puo procedere senza alcun intervento.
Per pellicola 18 DIN aprire di un valore oppure togliere  il diffusore.
Per pellicola 15 DIN aprire di un valore e togliere  il diffusore.
Posizionarsi su distanze oiU corte con latesta d'obiettivo 60 mm o con I'uso del I'obiet-
tivo della fotocamera 50 - 60 mm; sarebbe altrimenti necessario un doppio ditfusore(vedi tabella). Pud eventualmente  essere utilizzato   il diffusore fornito con I'X-SHOE.
5.  ll macro  f lash Novoflex ouO essere anch e adooerato oerfoto normali. In tal caso d ne-
cessario togliere ilfiltro diffusore ed  il numero guida effettivo risulterd 20 per pellicole
di 21 DlN. Per le fotocamere senza contatto caldo, bisogna adoperare   il cavo sincro a
soirale.   ll diaf ramma da utilizzare deve essere rilevato sul calcolatore. Es. Pellicola 21
DIN a 5 m di distanza: diaframma  4.
Nonostante  la tabella allegata, d necessario tenere presente, per la macro foto, alcune
regole importanti.
Se si riprendono dei fiori molto chiari, bisogna illuminare molto lo sfondo piu scurcj.
6.  ll macro tlash pud essere anche adoperato come fonte di luce per duplicare con  il
BALCOP-K o con  il Macro-Stand MACRO.
La distanza
sitive      normali          deve: diaframmaessere per11;21 perDIN diapositive26 cm, per18leggermenteDIN 20 cm, per15sottoesposte:DIN 14 cm. diaframmaPerdiapo-
8; per diapositive leggermente sovraesposte - diaframma 16. Se dopo alcune ripresedi prova, non si ottengono buoni risultati bisogna seguire dei cambiamenti nella dis-
tanza e non nel diaframma  utilizzato.
7. Assistenza: Per eventuali riparazioni  inviare la garanzia al rappresentante Novoflex
per l'ltalia FRABE S. P. A - Via Vittoria Colonna, 7 - Milano.
View original page 10
From the M. Butkus archive. Original publisher and archive notices are retained.
Check the model and edition against your equipment.
PDF verified 2026-10-10.