Film cameras
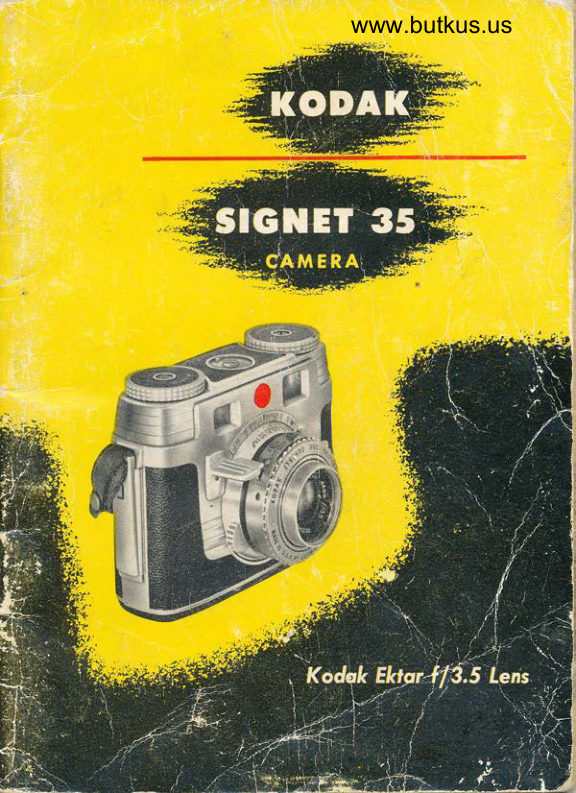
KODAK SIGNET 35 User manual
User manual for KODAK SIGNET 35. 35 pages in English. Read the original PDF, download or print a copy without registration.
35 pagesEnglish3.0 MB PDF
Loading your manual…Open PDF directly
Document details
- Brand
- Kodak
- Model / document
- KODAK SIGNET 35
- Document type
- User manual
- Language
- English
- Pages
- 35
- File size
- 3.0 MB
- Category
- Film cameras
- Document date
- Not specified in catalog
Search available document text
Find a term, then jump to its page in the original PDF. Image-only pages may not be searchable; check the PDF for exact wording and diagrams.
Page 4 · Read text
www.butkus.us

 o The fine appearance of this camera is matched by
 its performance and operation. Precision-built, sturdy,
and amazingly easy to use, the Kodak Signet 35
Camera has features that provide results comparable
with the finest cameras.
   Before using your camera, take a few minutes to get
acquainted with it. Go through this manual with the
camera, performing each operation as indicated. Then,
when the moment of picture making arrives, you will
be ready.
   Before making any important pictures-a trip, some
special event, or any pictures expected to prove valu-
able-you should shoot a roll or two of film and take a
few flash pictures. This will give you practice and pro-
vide a check on your equipment. If you have any
questions, your Kodak dealer will always be glad to
help you in any way he can.


The oulomolic double-exposure
prevenlion mechonism is  de-
signed lo work when the comero
is looded.  ll moy nol work wifh-
oul film in the comero.


T,M REG. U.S. PAT, OFF.
View original page 4
Page 8 · Read text
www.butkus.us

 $.  eend ihe film leoder between
 the first ond second perforotion;
 then insert the hooked end of the
 film into the slot of the toke-up
 reel, Do not try lo remove this
 ree  l.


       5.  Free the winding knob
     by pushing the REwtND TEVFR
       loword the rewind knob. Hold
       ihe lever ond lurn ihe winding
      knob r/a lurn. Then releose the
        lever ond lurn lhe winding knob
         unlil it locks. Do !his three times"


4.  Turn the WINDING KNOB
in lhe direction of ihe orrow un-
 f il the slock is removed from the
film. The leeth of the SPROCKET
must fit into the holes in the film.
Reploce the comero bock. Turn
the winding knob unf il  it locks.
                                            h 4"
                        r:

     6n Turn lhe film counler to bring
     36 to the index mqrk for o 36-
      exposure mogozine. Bring the
      20 to the index mork for o 2O-
      exposure mogozine. The counler
       will move o mork for eoch pic-
       lure ioken, lt shows lhe number
      of exposures remoining.
View original page 8Page 9 · Read text
for fine, occurote pictures


   A. Shutter Speed - Your Kodak Synchro 300 Shutter   has four snapshot speeds (l/25, I/50, 1/100 and
   1/300 second) and a "B" setting for longer exposures.
    Set on "B," the shutter stays open as long as the expo-
    sure release is held down. A tripod or other firm sup-
    port mdst be used for this setting.
    B. Lens Opening - The lens opening is smallest and    therefore lets through the least amount of light when
      it is set at  f /22. Each succeeding setting lets through
    twice as much light as the one before. For example,
   l/16 lets through twice the light of  f /22, and so on.
     The lens opening and shutter speed work together
    to give the right exposure. Set your shutter according
    to the exposure guide. Exposure tables for flash and
   food lamps are found on pages 19 and 21.
    C. Focus-When you superimpose the two
   images in the coupled range finder, the
    lens is automatically set for the sharpest
    focus. The illustrations show an enlarged
    center section of the finder. After you have
   focused your subject, and before making
   the exposure, be sure to check the com-
    position of the picture. This is done
-   through the same window as the focusing.
    8
View original page 9Page 10 · Read text
www.butkus.us
 A. Shutter Speed
 Move the knurled ring un-
 lil the pointer is ql fhe
desired shutter setting.
The poinler "click stops"
ot esch speed. The shut-
 ler musl be cocked for oll
setiings including "8."
Cock the shutter by press-
ing the COCKING LEVER
down os for os it will go
before eoch exposure.
Never oil the shuffer.
B. Lens Opening
The size of the lens open-
ing is chonged by moving
the lens pointer ocross
the scole. The pointer
"click stops" ol eoch
morked lens opening.
C. Focus
Look ihrough the eye-
piece of the ronge finder,
wifh the comero pressed
firmly ogoinsl lhe foce.
Select ony verticol line in
your subiecl ond move
lhe focusing ring until the
lwo imoges of the subiect
coincide. For oplirnum oc-
curocy, focus lhe subiect
direclly under the verlex
of the triongulor field.
View original page 10
Page 11 · Read text
The exposure guide on the back of the camera indi-
      cates, quickly and easily, the correct exposure for
    Kodak Films, with three common subject types under
      the three most common lighting conditions"
       The illustrations and descriptions below explain the
      subject types and lighting conditions covered by the
10   exposure guide on your Kodak Signet 35 Camera"


     Dork Subiects      Averoge Subiects   [ighr Sublects
      People in dork cloth-   Neor-by people, gor-   Distont scenery, neor-
        ing, dork folioge, flow-   dens, houses, scenes   by people in morine,
        ers, onimols, buildings.    not in shode. Lighf ond   beoch, snow scenes.
                            dork obiects in oboul   Iight-colored  obiects
                            equol proporiions. Use   dom inoti ng,
                                  lhis closs if in doubt.
      %


           Brighr Sun       Hczy Sun        Cloudy Bright
       Strong Shqdows  Soft Shodows      No Shodows
View original page 11Page 12 · Read text
www.butkus.us


 Set fhe exposure guide for            Set the light condition dot
 film used. (lf  Kodce hrome              opposite the subiect dot. {lf
 Fifm, sel Day tor Doylighf,            Kodcchrome Filmu use light
A for Type A.! line up dot               holf ot subiect seole.)
 wilh orrowheod.


Reod lhe lens opening obove
the selecled shutler speed.
Your choice should be gov-
erned by  subiect speed,
depth of field, elc.

ln this exomple, using Kodo-
chrome Film Doylight Typ*,
the settings would be ot the                   www.butkus.us
red dot between  f /5.6  c,nd
fl8 at I/50 second"
View original page 12Page 13 · Read text
ffi   *t* sx     G6:u*v"o'


Depth-of-Field Scole
Focus the lens. Selecl o lens opening. Above the selecled lens
opening (the red figures) on eqch side of lhe scole, reod the dis-
lonces of lhe neqresl ond fqrthesl obiects in focus"
I2
View original page 13
Page 14 · Read text
www.butkus.us
Af!-"I you have focused on your subject, that subject
wili be sharp in the_picture. However, other objects
in-the picture area, both in front of and beyond the
subject, will also in focus. This is ,urrg" of lppear sharpness or "depth of field."
The method of determining depth of field by the
scale is shown in the illustrated &le to the left.
Subject focused on is at 15 feet; calls for a "rpoi.,r" lens opening of f /8.
Look for the lens openings on the depth_of_field
scale. There is one on each side of the distince arrow.
The one to the right of the arrow is at B feet on the
focusing scale. Th'e other, to the left of the arrow, is
near 50 feet. These show that all objects from g to
50 feet will be sharp and clear. tB
A lorge lens opening wqs used lo
obloin o shollow depth of field. )
A smqll lens opening wqs used io
oblqin o greqt deplh of fteld"View original page 14Page 15 · Read text
box comero simplicity


"Load, Aim and Shoot'l have long been the principles
of operation for the box camera. Your Kodak Signet 35
Camera can be operated with the same simplicity.
  You will notice on the shutter that the l/11 lens
opening is in red and that there is a red dot between
the  f /5.6 and  f /8lens openings. Also the l/50-second
shutter speed is in red.
Setting for Kodochrome Film Doylight Type - When thepointers are set on the red dot and the l/S0-second
speed, the lens and shutter provide the basic exposure
for average subjects in bright, direct sunlight.
Setting for Block-qnd-White  Film - The exposure f/11and 1/50 sebond is the basic exposure for average sub-
jects in bright sunlight with Kodak Plus-X Film.
  After you have made either of these basic settings,
all you need do is focus and snap the picture. It's as
easy as that.
Averoge Focus - Vury of your pictures will fall intothe 8- to 50-foot range. With Kodachrome Film Duy-
light Type, set the focusing scale at "15" and the lens
opening on the red dot between   f /5.6 andf /8.
L4
View original page 15
Page 17 · Read text
The Finder
     Hold the camera firmly against the face. To frame the                       I
      picture, hold the camera at that distance from the eye                 ,l
     which allows you to superimpose the rear finder frame
     on the front finder frame (see diagram below). If you
     cannot superimpose the frame all around, move the
     camera from one side to the other in front of your eye
      so that you see first the left and then the right edge of
     the front frame. Center the eye in this manner and
     keep it centered. To compose the picture, move the
     camera and your head simultaneously.
       The view finder is designed for correct aiming of the
     camera throughout the entire focusing range, provided
16  the eye is positioned as suggested above.


                       lll'il1ffi'*                                  :l:i,ffi
View original page 17Page 18 · Read text
www.butkus.us

        The range ffnder triangle usually helps to center
       your eye.
       The illustrations show the most practical manner
        of holding the camera to guard against camera move_
il     ment at the moment of exposure. With the camera
        steadied_against  the face, depress the exposure release
I      with a slow, squeezing action.
       Note: The release u;ill remain locked if the shutter is
       not cocked, or the film has not been atloanced. to an
      unexposed fran"te. It sometimes maA be necessary after
      an exposure to tr-n'n back the uoinding knob a trifle to
       release the uinding mechanisnt.                      L7


       Rewind the film into the mogozine by holding the REwtND TEVER
        loword the REwtND xNog while lurning lhe rewind knob in the
         direction of the qrrow. continue rurning untir the wrNDrNc KN.B
         slops lurning. Now remove fhe comero bock, pull up the rewind
        knob, ond remove the film mogozine.
                 It's o good ideo to hove your
       exposed film processed soon     liiaiit:l:l-l
         ofler exposure.  lt is olso o good
       plon to relood the cqmero os
       soon os lhe exposed film hos
       been removed, lo be reody for
        the nexl picture.


                                               LEvER                           lifiG-D
View original page 18Page 19 · Read text
You can make snapshots at night, in full color or.
black and white, because the shutter on your Kodak
 Signet 35 Camera has built-in flash contacts. AII you
need is the Kodak Flnsholder N{odel B, batteries and
lamps. For color, use Kodachrome Film Type A.
   'fo attach the flasholder, screw the thumbscrew on
the standard brtrcket into the tripod socket of your
camera. Connect the cord to the POST on the rim of
the shutter. Flashing of the lamp is controlled by the
                          svnchro feature of the
                                  shutter.
                          Use Class M (such as
                       No. 5 or No. 25) flash
                           lamps only. These lamps
                           can be used at all shut-
                                   ter speeds. Class F flash
                           lamps such as SM or SF
                           should not be used.

Cqulion: Since lomps moy shofter when floshed, the use of o
Kodok 2-Woy Floshguord or other shield over the reflector  is
recommended. Do not flosh  f he lomps in on explosive otmosphere.
  Do not inserl flosh lomps in the reflector  if the shutter is open                                                                      -the lomp moy flosh ond o serious burn moy result.
1B
View original page 19Page 20 · Read text
www.butkus.us


    Exposure Guide Numbers con be used lo delermine
    exposure. Divide lhe numbers in the tqble below by
    the distqnce in feel from lomp to subiect to find
    f-number. For exomple, using Kodqchrome Film
   Type A with the shuller set ot l/300 second, ond
    lhe subiecl 4 leet owoy, lhe correcl lens opening
   woufdbe32+4orf/8.

                 I ama                     No. 5 or 25
   Shulter Speed                 1 /3OO            1 /1OO          t /25or"8"
Kodqchrome Type A*       32         55          70
Ponotomic-X              50         75         100
Plus-X                   70         100         140
Super-XX                  95         140         200
    *With Kodochrome Film Type A ond o No. 5 lomp, use o
    Kodqk Light Boloncins Filter No.8lC; wiih o No.25 lomp,
     use o No. 8lD Filier. These filters give wormer lones lhon
    when no filter is used.


    Flosh Exposures-The following toble provides ex-
    posure informolion for Kodochrome Film Type A
     in reody-reference form for overoge indoor comero-
    to-subiect dislonces, with the shuller set ot 1f 25
    second.
           f /3.5      f /4   {/5.6      f /8   {/rr  f/r6  r/22
   20tt  17 fi   12tr    9 fr   6t/, tt  4y2 tt 3rA tl
    Nole: These numbers opply when lhe lomps ore in 4- to
     5-inch sotin-finished  reflectors such os fhe Kodok Flosholder
    Model B.

                                            19
View original page 20Page 21 · Read text
Flood lamps, mounted in Kodak Vari_Beam Stand_  lights
          _or          Clamplights, provide an efficient means of
  controlled lighting.
  _  A good basic arrangement of lights is illustrated in
 !.he__d]agram.            Turn the control rinlg on both Ugfrts io STILL. Place one licht beside
 the camera a little hi-gher than   D
                                                F' thethe  crthio^f'osubject's o.,o-eyes. FlacePt^^^   .r^^the     t
 other light on the other side of
 the camera but higher. Tilt
 the reflector to shinJ the light
 directly at the subiect. To set
 a stronger highlight, turn tie                                      ;                                      t control ring on this lisht to
SPOT.
  Choose simple back_                                       ,ff3grounds, light in tone for
youngsters, darker for adults.
  The distance from the ends of the bulbs to the sub_
ject determines the exposure.
  to -*:,             color pictur:es with flood Iamps, use Koda-  ,
:l^toT""o'il1,Type 1. Jfpi"ul exposures using two       flood tamps in Kodak Vari-Beam light"s aresnownly_ -, on next page.
20
View original page 21Page 22 · Read text
www.butkus.us


:w
 '#u,+.fi


       Exposure Toble for Kodqchrome Film Type A
             with Two No. 2 Flood lomps in
         Kodok Vori-Beom lights set ot STILL

    31/2 teet               8 feet                           I I feet
l/25 second ot         /2 second* ol            I second* qf
     f/4.5                   f/8                   f/8

+Shutter set ot ''8."
Included with the Kodok Vori-Beom Lights is on instruction
monuol which is complele with tobles, suggeslions, ond
piciure-toking orrongemenls.
View original page 22Page 23 · Read text
Sundown, dark days, or dark interiors need not mark
the end of picture taking. You can still make good
pictures by using longer exposure or by using flood
or flash lamps.
IONG EXPOSURES FOR STILT SUBJECTS
The "B" setting on your shutter enables you to keep
the shutter open for as long as required. Excellent
night pictures can be made by using long exposures.
Many novel pictures are made by the reflection of
lighted buildings or
monuments on wet
pavement or fireworks,
fireside scenes, etc.
   Botl't, catnera and
subiect must be still
22
       Silhouelles cqn  be
        striking when o  liltle
       forethought goes inlo
        their composition.
View original page 23Page 24 · Read text
www.butkus.us

   during tl'te exposure. IJse a tripod such as the Kodak
   Eye-Level Tripod or other firm support.
    To make a long exposure (the focus and lens open-
   ing having been set), set the shutter on "B." Cock the
   shutter. Press the release and hold it down for the
   exposure required; then let the release spring back.
  Avoid jarring the camera. The Kodak TBI Cable Re-
   lease No. 2 is useful for longer exposures.
    To advance the film when a cable releurse is used,
   press and hold the rewind lever (see page 7) and
   rotate the winding knob li ilrn; then release the lever
  and turn the knob until it locks.

Refleciions  f rom wet
povements or bodies
of woter ore spectocu-
lor. Ploce your comercr
on o solid support or
lripod, oim ond open,
ond hold lhe shufter
on "B" for the expo-
sure required. In this
cose 30 seconds lo  I
minute.


                              How could grondmo
                                         be more choroclerisli-
                                                colly portroyed thon
                                                 with o flosh shot like
                                                                           th is?


           www.butkus.us
View original page 24Page 25 · Read text
Kodochrome  Film  For superb color                     -picfures. The film is processed, ol no
odditionol cosl. of on Eostmon Kodok
Loborotory. The resulting fronsporencies
ore relurned to you, mounled (unless
olherwise specified) for prolection or
viewing. They con olso be used lo obloin
Kodochrome Prinfs. Kodochrome Prinls
ore full-color enlorgemenls ovoiloble in
five slondord sizes. Speciol sizes ore
olso qvoilqble. They must be ordered
lhrough your Kodok deoler.
  Use Kodochrome Film Doylight Type
for doylight picfures ond Kodochrome
Film Type A {or flood or flosh piclures.
2O or 36 exposures.
  To selecl fronsporencies  for printing,
hold eoch fronspqrency ot on angle
neqr o sheel of white poper, in brighf
light, so lhot if is illuminoted by light
reflected from lhe poper. This will show
you how lhe picture will look when re-
produced os o Kodochrome Prinf or En-
lorgemenl. ln generol, ony good lrons-
porency will yield o good Print or
Enlorgement. Selecf only ironsporencies
which ore (l) cleor ond shorp, ond (2)
evenly lighfed -  noi conlrosly.
OA
View original page 25Page 26 · Read text
www.butkus.us

Kodok Plus-X Ponchromqtic Film - An
excellenl film for generol outdoor ond
well-lighted inlerior use. The low groini-
ness ond high resolving power Permil
high-quolity enlorgemenls. 2O or 36
exDoSures.


Kodok Super-XX Ponchromofic Film -
A very high-speed film for use when the
 lighf is poor. Especiolly voluoble for use
with orlificiol light. 20 or 36 exposures.


Kodok Ponolomic-X Ponchromolic Film
 -Becouse of its ultrofine groin.this  is lhe
 film to use when exfreme deloil or tex-
 lure is required. Produces lhe moximum-
 sized enlorgemenls.20 or 36 exposures.


 Kodok Micro-File Film - An exlrenely
 fine-groin, slow, ponchromotic film for
 moking copies of printed moller, moPs.
 documents, elc. 36 exPosures.
View original page 26
Page 27 · Read text
for better pictures


 Tell a Story
The besl piclures qre
fhose which tell o simple
story ond tell  it  ol o
glonce. You'll lreosure
piclures of doy-lo-doy oc-
tivities qround lhe home,
perhops including some
enlirely unposed ones.
Bul whotever  f he subject,
o momenl spenl in ex-
pressing on ideo will re-
poy you mony times in
sotisfoclion with your fin-
ished prinfs.


26
View original page 27
Related documents and language editions
From the M. Butkus archive. Original publisher and archive notices are retained.
Check the model and edition against your equipment.
PDF verified 2026-10-10.