Camera accessories
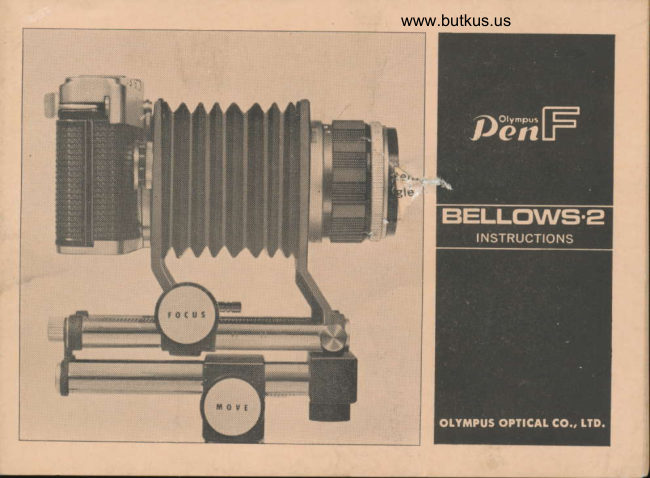
Olympus Pen F Bellows-2 User manual
User manual for Olympus Pen F Bellows-2. 27 pages in English. Read the original PDF, download or print a copy without registration.
27 pagesEnglish4.5 MB PDF
Loading your manual…Open PDF directly
Document details
- Brand
- Olympus
- Model / document
- Olympus Pen F Bellows-2
- Document type
- User manual
- Language
- English
- Pages
- 27
- File size
- 4.5 MB
- Category
- Camera accessories
- Document date
- Not specified in catalog
Search available document text
Find a term, then jump to its page in the original PDF. Image-only pages may not be searchable; check the PDF for exact wording and diagrams.
Page 2 · Read text
EIELLOWS.z

                             MAIN FEATURES:
                                     Camera: Olympus Pen FT/FV/F
                                       Lens: Olympus interchangeable lenses
 ln close-up photography, extension rings and   Lens movement range: 2.4-lO.Ocm, with
close-up lenses are usually used, but for ex-         scale in centimeter
treme close-ups and maximum  versatility,    Structure: Two tracks; rack & pinion system;
the Bellows-2 is an essential instrument.              ca,i.era removal by knob
The Bellows-2  is the most practical accessory   Clamp sysiem.: By lever
that enables any photographer to make    Camera afigle: Vertical-horizontal  (V-H) lock-
necessary adjustments for fine close.ups over         ing
a wide range of magnifications.                 Duplicating indicator: Mark "P" (=Pen) for
The Bellows can be used for close-up photo-          half frame film (24x18mml; Mark ,.L"
graphy as a single accessory, but when used          (:Leica) for full frame film (36x24mm)
in connection with the Camera Slider (sliding    Auxiliary accessories: Camera Slider-2
rail), the Bellows can be operated most                               (Sliding  rail)
effectively.                                                             Slide Copier-2
lf it is used with the Slide Copier, slide copying                          Reverse Ring
can be easily carried out.                        Size & weight :  78.7 x 103.6x 1l4.9mm (3x4x
When you take a close-up more than l:1, a         4.5 inchesl; 37Q gr. (13 oz.)
reversal ring is necessary.
View original page 2Page 4 · Read text
Venmo @mike-butkus-camera  Ph. 2083
PayPal Name  Lynn@butkus.org      www.PayPal.me/lynnbutkus
View original page 4
Page 6 · Read text
ETELLclWSi.El                             www.butkus.us

HOW TO USE                             3) Attach the lens to the Bellows
1) Attach the Bellows to the TriPod             Line up the red dot on the lens mount
   Screw the tripod screw into the tripod        with the red mark on the lens, and turn
   socket beneath the FOCUS knob tiehtly.        the lens till  it clicks in the same way as
                                       when mounting the lens to your camera2) Select the proper lens
    Referring to the table for close-up photo'         body.
   graphy, select the lens suitable for the
   purpose ofyour photography. The Bellows
   has two tracks; one is marked with scale
    to indicate the length of the Bellows in
   operation in centimeter.


                         6
View original page 6Page 7 · Read text
BELLOWSi.z
4) Attach the Camera to the Bellows        When you align these two dots,the camera
     lf you loosen the V-H locking screw by      release lever comes to the top.
   turning it counterclockwise,  the camera     Tighten the V-H locking screw, and fix
   body mount of the bellows will be turned     the camera to the camera body mount.
   round tnrough 90". This camera body     Set both the red dots on the camera body
   mount has the camera release lever and    mount and the camera lens mount in
   a small red dot. Another similar red dot      line and turn the camera body counter-
    is put on the Bellows mount. These two      clockwise as viewed from the back of the
   dots are used as eye marks when you     camera body  till   it clicks. Once more
   attach the camera to the camera body      loosening the V-H locking screw, turn the
   mount.                                 camera body at your preferred angle.
View original page 7Page 9 · Read text
BELLOWS.E
    6) The three methods of bellows photo-       b) Determination of the magnif ication.
       graphy                                          This method is based on the magnif ica-
        a) By a predetermined area to be covered.         tion of the subject. First you refer to
         b) By a predetermined magnification.           the table.  For example, when your
         c) By a predetermined distance between         intended magnif ication  is 0.8X with Fl.8
          the front of the lens to the subject.        f:38mm standard lens, see the magni-li        a) Deterrninatien of the area to be covered.         fication column in the table (p. l6) for
         Measure the size of the subject, then          0.8x.
rl          refer to the table 1p. l5).  lf you are        Hence, you can get the following data.
         going to take a close-up of a subject,         Length of the bellows   3cm
          sized 38.0x27.7mm with the standard          Front surface of lens to subject
          lens F1.8  f :38mm, then you can see            distance              6.79cm
         from the table, that the length of the      When you apply these data to  the
          bellows must be 2.4cm. So, set the red         bellows, the full size of the subject re-
           triangle (      ) marked under the clamp                    f lected on the film will be. ...  .  .
           lever at 2.4cm on the scale. At the                                     30.0 x 21.9m m.
         same time, you take the lens-to-subiect
          distance at 8.05mm on the bellows.

        vlagnif icatio n   Length([ens movemenlof Bellows range)      Dislancesurlace ofbetweenlens andfrontsublecl   Subject area covered     mExposuu ltiplere
           0.63           2.4 cm            8.05 cm         38.0X27.7mm         x 2.7
            0.7             2.7 cm            7.47 cm          34.3x25.0 mm         x 2.9
           0.8            3.O cm            6.79 cm           30.0X21.9 mm         x 3.2
                             9
View original page 9Page 10 · Read text
ETELLO\ rsi.e                          www.butkus.us
 c) Determination of the distance bet-
   ween the  f ront surface of the lens to
   the subject.                                     For example, in case the lens-to.subject
   This method is preferable when a cer-          distance is about 100cm, select the
   tain distance is required between the          telephoto lens F4 f :150mm. By set-
   lens and subject.                                 ing the length of the bellows at 2.4cm,
   Measure the distance from the front         you can get an about 0.16X picture.
   of the lens to the subject. Based on
    this measurement, obtain other neces-
   sary data by the table (p. 25).


                                  10
View original page 10Page 13 · Read text
EIELLOWS.E
   .
   one.stop9l- ll'g contrarv,when thelnglg?iegreatesi-p-Ji6iti"exposure                                      by    lO)Operate the Shutter Release
    subject is btackish, 6r in j  OEif,'t"""il        Be caref ul not to move the camera body,
9) Check the focusing                     when you press tne shutter button. lt is
   Look through the viewf inder after setting     recommended to use a cable release, con-
   the exposure, and you may notice that      nected to the shutter release button.  lf
   the focus is a litile deeper this time than     no cable release is available, use the self-   at full lens opening. This is the actuar       timer, instead.
   depth of focus to be photographed.
   In close-up photography, the depth of
   focus becomes extremely shallow.


                                    t
                                                                il


                                  13
View original page 13Page 25 · Read text
BELLCNMSi.z

I  Reverse Ring:
   For close-up photography more than 1:1,
  the Reverse Ring is used in conjunction
  with the Bellows and Extension Ring. The
   Reverse Ring improves the better resolving
  power of the lens under these conditions.


I  Slide Copier-2
   This Slide Copier is an instrument to be
  used with Bellows-2 for film duplication.
  With this, you can copV colour slides of
   both half and  f ull  f rame  f ilms in a simplest
  but most satisfactory way.


I Gamera Slider-2
  Camera Slider-2 is an essential accessory
   for close-ups, when you have to move the
   entire camera body without changing the
   position of the tripod.  lf you attach the
  Camera Slider to your tripod or pen Stand.
  you can easily operate the camera up and
  down, right and left, as you like continually.
                        re
View original page 25Page 26 · Read text
www.butkus.usETELLOWSi-2

I Angle Finder
   Fix the Angle Finder on the viewfinder of
  the camera, and you can look through
  the viewfinder from any angle you like
  with ease. This is especially convenient
  when the camera  is situated considerably
   in a low position.
I  Magnifier
  This is used when extremely accurate
  focusing is required in close-ups. Through
   this Magnifier, you can observe the central
  part of the subject, magnified by 2.8X.
   Parallax adjustment is also possible, when
  used with the Angle Finder.
I Angle Magnifier
  This is a combination of the Angle Finder
  and Magnifier. lt functions like a magni-
   fier, but as it turns freely, you can look
  through the viewfinder from any angle.
I Pen Stand (Pen F copy stand)
  The Pen Stand is a full-scaled duplication
   instrument, designed for expert use, espe-
   cially fit for the superb facilities of Pen
  FT for close-ups.
View original page 26
Page 27 · Read text
p,ffiF

                    lflflfriillrillfl
OTYMPUS OPTICAT CO., LTD. TOKYO, JAPAN


                             Printed in Japan IEBE O 0668.0.6M8
View original page 27From the M. Butkus archive. Original publisher and archive notices are retained.
Check the model and edition against your equipment.
PDF verified 2026-10-10.