Film cameras
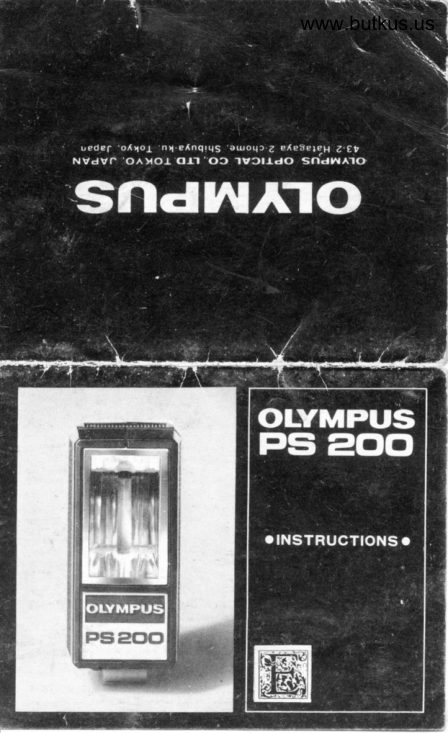
Olympus PS200 User manual
User manual for Olympus PS200. 7 pages in English. Read the original PDF, download or print a copy without registration.
7 pagesEnglish1.1 MB PDF
Loading your manual…Open PDF directly
Document details
- Brand
- Olympus
- Model / document
- Olympus PS200
- Document type
- User manual
- Language
- English
- Pages
- 7
- File size
- 1.1 MB
- Category
- Film cameras
- Document date
- Not specified in catalog
Search available document text
Find a term, then jump to its page in the original PDF. Image-only pages may not be searchable; check the PDF for exact wording and diagrams.
Page 2 · Read text
You are now the proud owner of the Olympus
 Electronic Flash Unit PS200 designed for pro-
 fessional as well as amateur photographers.
 The PS200 operates on penlight batteries for use
 with all the current Olympus cameras and any other
 cameras with hot shoe contact.
I Specifications
Contact:           Hot shoe (center contact)
Power Source:     2 pcs. l.5V penlight batteries, alkaline or carbon/zinc.
Guide Number:     14 in case of meter (or 45 in case of feet) 8G1OO
              ASA color and B & lt.
Color Temperature:   5,800'K, suitable to daylight type color films.
Coverage Angles:    70' vertical, 56t' horizontal
 Recycling Time:    7 sec. with set of fresh alkaline batteries.
 Flash Duration:       l,/1000 sec.
 Number of 'Flash:    About 200 flashes with fresh alkaline batteries.
 Dimensions:     31mmx55mmX64mm                           (l t/4" x_2 L/8" x 2 L/2"  )
 Weight.         75 gr. (2'3/8 otl      .


          @-
                          lrdkotes            Trbngle
                               itGTiilncd *ith.
                                                     cerilcr lirp on botl€ry
                                      comportmenf wt|en lo
                                           close cover
            Center  lirp                       Botlery ComPortmcnt 6evgl


                               ON-OFF Switch


                                                                cn=Mike                                                                                    Butkus,                                                                                o=Butkus          Mike                         DigitallyDN:camera signed by Mike Butkus                                                                          manuals,                                                                                    ou=butkus.org,
          Butkus               email=mike@butkus.org,Date: 2021.04.17 18:18:46c=US-04'00'
                                                    Exposwe
                                                           Cokuhtirp
                                                          €cole


                                                Reody Light
                                                           (PrLOr)
                                                             Attochmcnt
                                                          Fool
View original page 2Page 4 · Read text
I  Insort Battorios           www.butkus.us
O Slide the battery compartment cover in the    direction of the arrow to open it.
@ Insert 2 penlight batteries observing correct    polarity according to the (+) and (-)   signs
    inside the compartment.          .              o
@ nlign the triangle on cover to the center line on
   the compartment, and pressing down the cover
   against the battery seat, slide it back until  it
    clicks into place.


                                                      'r..,

 I  C hock Flash
     www.butkus.us
         @ Slide ON-OFF switch to
                  ON position, and You will
                              .  hear cycling tone and
                       ready light (PILOT) will
                     glow in seconds. The
                           unit is now ready to be
                                                             f ired.
o Do not leave switch in ON position after use
   as the batteries will continue to drain.
    (Generally the pilot light of an ordinary electro-
   nic  f lash goes on for a while even af ter switch-
    ing off, which makes the user uncertain whether'
                                            P S200   the current is on or of f , while the
   incorporates a ready light which goes of f
   immediately after switch is off.)
View original page 4Page 5 · Read text
I Mount Unit
@ The PS200 is fixed on the accessory clip of
   any hot shoe (direct contact) type cameras,
   which makes automatic electrical contact. To
   smoothly mount, push the lower end of the unit
    into the hot shoe with fingers from the unit's
   .back.
@ To remove, push back the lower end of the unit
   from the  f ront side (opposite direction)   .


I   Alkaline Battsriss
Afkaline batteries are highly recommended for
electronic flash unit.
The increased number of flashes as well as long
shelf life makes the alkaline battery more econo-
mical to use.
View original page 5Page 6 · Read text
I Synchronization             www.butkus.us

                                                                                                                          ; Dotormine shuttor sprod
 o The PS2OO synchronizes at all shutter  speedsi
    with any camera when the camera is set at "X"I
    contact.
O lf an E E camera without shutter speed indica-
    tion is used, set the camera  to the  f lash
     position.
 o  lf a focal plane shutter camera is used, the
   PS200 synchronizes at all shutter speeds slower
    than L/60 sec. or L/L25 sec., depending on the
   camera in use.
 * Be sure the camera is set at "X" contact or
    flash position on automatic cameras.


{,..:             i-,'!'                     ir              fi''I.  ,J                !n,f
 I Exposure
 F/stop Galculation
o To determine proper exposure tor your flash
   pictures, first measure the flash-to-subject
   distance and refer to the chart on the unit by
        f inding the F/stop that corresponds to   f ilm
   speed and distance.   '.   For example, when a filrn of speed ASA25 is
                                            (11 ft),   .andused, the aperture would be t/2at 3.5m
   "              f /4 at L.7m (5.5 ft).
             Guide Numbers
                                                                     7 -5.5,,   2.5,8,,   3.5.1I     '5- r6"             I0.3 3     GN.  GN  ',  o'            0.8.2.5,'   |.2^4,,    l
         7    23     25 32        8         5.6                   2.8       2          1.4
             45    80 100       l6        1l       8       56                   2.8        2          I.4
       20    65     160 200     22       16          II       8         5.6                   2.8       2
                                           22       l6            ll        8         5.6                   2.8       28   90    360 400    ,,..
View original page 6Page 7 · Read text
I Daylight Synchronization        -   .
 When the subject is illuminated from the opposite
 side of the camera (i. e. backlight), or the subject
 is against a bright window, or there is a sharp
 contrast between the subject and surroundings,
  f lash is effective for better pictures.
.The exposure is based on the daylight, and decided
 by the film speed and distance to the sirbject by
 using the GN chart on unit (see the table above).
 For this use, the camera must have an adjustable
 aperture and shutter speed control.
 With the P5200 you can adjust the daylight-flash
 relationship by changing the shutter speed,  f or
 electronic flash exposure at given distance is
 controlled by the  f /stop only. Changing the exposure
  f rom t/ll  at l/L25 to   f /16 at L/6O will give the
 same exposure as far as daylight is concerned but
 will reduce the exposure from the flash.
        (to be continued)

Exposure calculation begins with determination of
the exposure for the daylight; then measure the
distance from the flash to the subject. This
distance gives an f/stop, on which depends a proper
shutter speed. For instance, when the exposure is
t/5.6 at L/25O with ASA80 film, measure the
distance to the subject. lf the distance is 2m, you
can obtain   f /8  f rom the GN table provided. Then
you can adjust the shutter speed to L/L25.
O In focal plane shutter cameras the shutter speed
   should be set at l/60 sec. or below "X".

  G a utionI
The PS2O0 is to be used only bn camera with hot shoe.
Remove the batteries from the compartment  if the unit is being kept unused
for a long period. Avoid moisture, rain and sea water. When the batteries
are replaced, replace both batteries. Do not leave the unit in a high tempe-
rature above 50"C (L22" F) and if used below freezing point the unit should
be warmed up before use.
View original page 7From the M. Butkus archive. Original publisher and archive notices are retained.
Check the model and edition against your equipment.
PDF verified 2026-10-10.