Film cameras
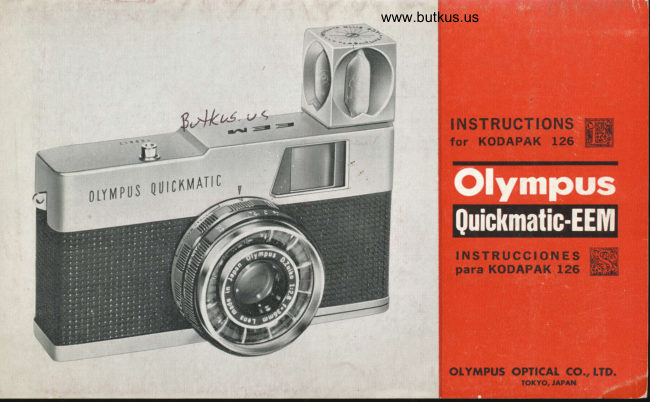
Olympus Quickmatic-EEM User manual
User manual for Olympus Quickmatic-EEM. 14 pages in English. Read the original PDF, download or print a copy without registration.
14 pagesEnglish5.3 MB PDF
Loading your manual…Open PDF directly
Document details
- Brand
- Olympus
- Model / document
- Olympus Quickmatic-EEM
- Document type
- User manual
- Language
- English
- Pages
- 14
- File size
- 5.3 MB
- Category
- Film cameras
- Document date
- Not specified in catalog
Search available document text
Find a term, then jump to its page in the original PDF. Image-only pages may not be searchable; check the PDF for exact wording and diagrams.
Page 3 · Read text
(11 First open the battery compartment and insert
       two AA (1.5 volt) dry batteries correctly in accord-       ance with the engraved terminal marks (+) (-).       The batteries are to serve the film advance motor
       and flash photography.


      (11 Abre al primer el compartimiento de la pila yI     encaje correctamente dos pilas AA (1.5 volt) de       acuerdo con las marcas (+) (-) gravadas en los       terminales. La pilas sirven para el motor enro-         llador de la pelfcula y para el rel5m,pago.
View original page 3Page 5 · Read text
(5t Turn the Auto ring and set the red A (automatic)
    letter to the red center mark Y

(51 Viremi6tico)aroel  a laAutomarcay pongaroia delacentro.letra roja A (auto.
View original page 5Page 7 · Read text
{71 Hold the camera steady and look through the                            viewfinder to compose your picture. Take care
                            to have your subject fully occupy the inside area                            of the white light  f rame.                     When setting the distance to the portrait symbol
                                           ( ll  or to the shorter range than I m, have your                            subjectoccupy  the area enclosed by small indices
                               in the light frame"                     When your subject is too dim or too bright, the                           shutter cannot be activated and a red warning
                        mark appears.
                     When it's too dim, practice flash photography.                     When it's too bright, use an ND4X filter  (Diam.
                            43"5 or 45mml
                               (71 Sostenga la ctmara firmemente y componga su
                                fotograf ia por ver a trav6s de la ventana de visor.
                          Cuide de que el objeto ocupe enteramente la 5rea
                             interna del manco blanco alumbrado.
                                Al fotografiar el objeto m6rs cercado de I m, cuide                        de que el objeto ocupe la 6rea cercada por los
                              indices pequefros dentro del marco blanco alum-
                               brado.
                      Cuando el obieto estS obscuro demasiado  o                               brillante demasiado, no se puede disparar   el                          obturador y aparece la marca roja de alcance de
                             enfoque"
                       Cuando este obscuro demasiado" use la luz re-
                         l5mpago (flash). Cuando est6 brillante demasiado,
                         use el filtro ND4X.

This camera advances film automatically from beginning to end.
DON'T PRESS the shutter release button while film is moving.
Esta cemara transporota la pelicula autom6ticame,nte desde el
principio hasta el  f in. NO PRESIONE el bot6n de di.spar:ador mientras
la pelicula esta en movimiento automatico"
View original page 7Page 8 · Read text
www.butkus.us
        (81 When the entire roll has been exposed, the film
            is advanced again automatically until the yellow
         paoer with X's has been moved past the window,
         then the motor stops.        (NOTE) Don't open the rear cover so long as the
        window shows the yellow paper, otherwise several
         exposu res "l ight-fogged".

         (8) Cuando se ha expuesto la pelicula intera, se         avance autom5ticamente la pellcula hasta el fin        y despu6s se para el motor.          * No abre la tapa trasera mientras se indica el        papel amarillo en la ventana indicadora del       n0mero de exposici6n, la aparici6n del papel          amarillo indica que la c6mara est6 avanzandose.


        (91 Open the rear coverand take out thef ilm cartridge
         having the cartridge almost drop onto your palm.


        (91 Despu6s de terminar enrollamiento de la pellcula,
         abre la tapa trasera y quite el cartucho en manera
        de dejar lo caer sobre su palma.0
View original page 8Page 10 · Read text
www.butkus.us


Replace the batteries when they have  Trueque las pitas con nuevas cuando ellas
run out and the fitm cannot be advanced se gastan y la pelicula no ha enrolladosesmoothly.                            suavemente.
IMPONTAilI IMPONTAIIIIWhen not using your camera for long  Guando no se usa la camera durante un
periods of time, remove the batteries periodo largo, rem-ueva las pilas y guardelas                                            SeCO y fresco.and store them in a cool dry place.     en lugar
View original page 10
Page 11 · Read text
fMain features  !
Film                     Kodapak 126Film rating             ASA 64,80, 125, 160
Picture size              26x26m.mLens                 D Zuiko L:2.8, f:36mm
Shutter                 Programmed EE system (1/40, U200 sec.l                           Flashmatic photography (1/40 sec.)
Viewfinder                   Bright fram'e finder (magnification 0.6) with parallax correction                           marks, red warnning marks to prevent inadequate exposures,
                        and zone focus marks
Film advancing             Automatic advance (electric motor driven); "idle advance"Power source           Two AA (1.5 volt) dry batteries serving the film advance                        and flash photographyFocusing                 O.9m (3ft.l to infinity (o), 1m,3m, (15m) with a click stop deviceExposure setting           Automatic setting with the light meter (EE system); shutter                              release locking system to-prevent_ inadequate exposures
Rear cover                 Hinge type, puslr button for openingFlash photography           Flash-maticFlash-matic svstemsystem withwith Flash-cubeFlash-cubeSize, weight                 127(width)x127(width)x 67(heieht)67(height) xx 59(depthl59(depth) mm mm 550 gr. (with the batteriesl
I Especificaciones principales   :
Pelicula                                               :  Kodapak 126Glasificacitin de pelicula   : ASA 64, 80, 125, 160Tamafro de fotografia           : 26x26mmLente                                                      :  D. Zuiko L:2,8,  f :36mmObturador                                         :  Sistema EE de tipo programa                              Flash-maticFlash-matic (especial(especial parapara culcubo de rel5mpagol
Ventana del visor                    :  VentanaVentanaventana conconcon marcomarcomarco blancoDtancoblanco aramDraooalambradoalambrado (maqnif(magnif(magnrTrcacronicaci6n 0.61,u.b,, tala mar(marca                        dede correcci6ncorrecci6n porpor paraparalaje, la marca roja de aviso a la exposici6n                            impropia y la marca indicadora de alcance
Enrollamiento de pelicula  :  Enrollamiento automatico (motor el6ctrico)
                         Avance autom5tico en vacioAlimentaci6n                                 :  Dos pilas AA (1.5 Volt) para el motor de enrollamiento y                                la luz rel5mpago
EnfoqueAjuste      de exposicidn           ::  Q,9qElEl ajusteajuste(9 pieslautom5ticoautom5tico1m., 3m por(15m)exposimetrocon parado.r(EE);4e sistemagatillazo.de cerradura
                         dede disparadordisparador aa lala exexpsoici6n impropiaTapa trasera                                :  Tipo bisagra con bot6n abridorRelampago                                 :  El-usoEl uso deldel cubocubo dede rel5moago,rel5mpago, sistemasistema dede rel6moaeorel6mpago autom6ticeautom6tico
                         de continuaci6n, sistema de Flash-maticDimensiones y peso             :  127(anchol x 67(alto)x 59(fondo) mm 550 gr (inclue pilas)
View original page 11Page 12 · Read text
www.butkus.us


                                  This camera advances film automaticatly from beiinning
                                              the shutter retease button w'rrire rirm is
                               ii:ffi1-ESSNOTE
                                  Esta c6mara transporota la pelicula autom6ticamente
                                desde el principio hasta el fin.
                          NO PRESIONE  el bot6n de dispar:ador mientras la pelicula
                                    est5 en movimiento autom5tico.NOTA
                                                                             o;t,,
                                                                :,T iJ'' : :'"     5:'LiJ,lls  i' Tl;
                        nr*ru ;ii1-.ffiN OT E
View original page 12Page 13 · Read text
BEFORE LOADING THE CAMERA
                        DO NOT wind the advance lever before
                                         the camera is loaded with a fresh Kod:iirak
                                           cartridge. The ADVANCE LEVER does not
                                       function when the camera is not loaded.

                       WHEN UNLOADING THE CAMERAI]Y|PORTANT  On completion of the last exposure, wind
                                   the advance lever SLOWLY until it comes
                                     to a stop. The advance lever ceases to
                                       function after the last letter of "X" on
                                       yellow paper has been appeared in the
                                   window, so DO NOT force the advance
                                         lever for further winding.
View original page 13Page 14 · Read text
www.butkus.us

                          BE SURE TO HAVE THE 4 WINGS OF THE FLASH.CUBE
                            STEM ALIGNED WITH THE CROSS AROUND THE SOCKET
                          HOB, THEN PRESS DOWN THE FLASH.CUBE UNTIL IT
                                SNAP.LOCKS.
          (FLASH-CUBE INSERTION)  DO NOT rotate or twist the FLASH-CUBE to a clockwise
                                      direction (opposite direction of the arrow mark) under
                              any circumstances, as it will damage the socket.NOTE  Confirme que las cuatro alas- del 'tronco del cubo de
                                re16mpago est6n alineadas con la cruz en redor de la
   (lnsercidn del cubo de rel5mpago)  fresa del enchufe. En seguida, empuje el cubo de re'NOTA                                16mpago hasta que cierre con golpe.
                           No vire o tuerza nunca el cubo del rel6mpago hacia la
                                      direcci6n dextrorsa (la direcci6n contraria de la marca de
                                        flecha) en cualquier caso, porque ello daf,ari el enchufe.
View original page 14From the M. Butkus archive. Original publisher and archive notices are retained.
Check the model and edition against your equipment.
PDF verified 2026-10-10.