Film cameras
Olympus Trip 35 User manual
User manual for Olympus Trip 35. 13 pages in English. Read the original PDF, download or print a copy without registration.
13 pagesEnglish1.5 MB PDF

Loading your manual…Open PDF directly
Document details
- Brand
- Olympus
- Model / document
- Olympus Trip 35
- Document type
- User manual
- Language
- English
- Pages
- 13
- File size
- 1.5 MB
- Category
- Film cameras
- Document date
- Not specified in catalog
Search available document text
Find a term, then jump to its page in the original PDF. Image-only pages may not be searchable; check the PDF for exact wording and diagrams.
Page 3 · Read text
1 ) Se t the cam er a  to m anual  system
                     Tu rn  the  F stop   r ing  tc, m ove the  "A" m .:r k
                        (A UT O) off the  r ed line m ier ked in  fr ont  of view-
                              fin d er . T he Auto system  is switched to m anual
                     system .  Set any one of the  F num ber s  to the
                          re d line. T he shutter can be  r eleased fr eely  r e-
                         g a r d l e s s o f   l i g h t c o n d i t i o n .


                               t) Umschaltung  der Kam er a  liiz m anuelle  Blen-
                        d e n e i n s t e l l u n g
                M a n d r e h t d e n B l e n d e n r i n g v o n d e r  " A " - M a r k e
                   w e g . D a m i t w i r d d i e A u t o m a t i k a b g e s c h a l t e t u n d
                m a n  k a n n d i e B l e n d e n v o n H a n d  e i n s t e l l e n ,   I    in d e m  einfach  der  gewtr nschte Blendenwer t
                        g e g e n die r ote Linie gestellt wir d. Der Ver schluR
                                                             l ; i B t s i c h d a b e i o h n e R u c k s i c h t a u f d i e L i c h t v e r .
                        h i i l t n i s s e i m m e r a u s l 6 s e n u n d b e l i c h t e t  l ' 4 0 " .


                     2 ) O p e n  t h e  r e a r c o v e r                                     .
                    P u l l o u t  t h e r e a r c o v e r l o c k . T h e c o v e r w i l l o o e n
                        a u t o m a t i c a l l y .


                     2 ) Offn en  der Rtckwand
                M a n  z i e h t d i e R u c k w a n d v e r r i e g e l u n g h e r a u s ,
                        b i s d i e R U c k w a n d s i c h a u t o m a t i s c h 6 f f n e t .

www.orphancameras.com
                                                                   1
View original page 3Page 4 · Read text
3) Load the  carneia  with  film
   P u ll up the  r ewinding knob. Put the film cassette
    in to the film com par tm ent.  Push the  r ewinding
   kn o b  in.  lf the knob cannot be pushed in com -
    p le tely, tur n   it  slightly clockwise  or  counter -
    clo ck wise, while m aintaining  pr essur e.


4',tEn e a ge  the  film  end with  the take- up spool
   n o t-OT ne cam er a fir m ly  with your  left hand and
   h o ld  t he film cassette with the thum b  of the left
   h a n d . W i t h  t h e  r i g h t h a n d , p u l l o u t  t h e  f i l m e n d
   to su ch extent that  it r eaches the take- up spool.
   In se rt the end of film  into any of the six slots
   o n th e take- up spool.                                                        '


   Be fe stigen  des F ilm anfangs  an der Aufwick-
   e l s p u l e
  M a n  n i m m t  d i e K a m e r a   i n d i e   l i n k e H a n d u n d
   h Zilt dabei m it dem Daum en  die  F ilm patr one
    fe st. M it der  r echten Hand zieht m an den F ilm -
   a n fa ng soweit aus der Patr one  her aus, daB er
      r e i c h l i c h b i s a n d i e A u f w i c k e l s p u l e g e h t . N u n
   wird  der  F ilm anfang  einfach  in  einen  der  6
   Sch litze an der Aufwickelspule eingesteckt.
View original page 4Page 6 · Read text
7 ) AS A  film  speed setting
  Ro ta te the ASA setting  r ing  in  f r ont of the lens
   b a r r e l u n t i l  t h e A S A n u m b e r o f  t h e   f i l m  b e i n g
   u se d appear s in the ASA window.
  Wh e n using ASA 32  film , you m ay set  at ASA
   40 dot.

 7 )' E i n s t e u e r u n g  d e r F i l m e m p f i n d l i c h k e i t
  M a n d r e h t d e n A S A - E | n s t e l l r i n gv o r  d e r O b j e k '
    tivfa ssung, bis in dem kleinen F enster die er for '
    d e r l i c h e A S A - Z a h l s i c h t b a r w i r d .  ( A u s G r i i n d e n
    d e r besser en U ber sichtlichkeit hat  die T r ip 35
    n u r  e i n e A S A - M a r k i e r u n g . J e d e F i l m p a c k u n g
    triig t aber neben der DIN- Angabe auch den Cnt-
   sp rE chenden ASA'Wer t, so  daB dieser  leicht
    u b e rtr agen wer den kann.
  We n n Sie einen ASA 32 F ilm gebr auchen, konnen
   S ie die F ilm em pfindlichkeit  auf ASA 40 stellen.


   Set the camera   to Auto  system            :
   T u r n   t h e F s t o p  r i n g u n t i l  t h e  " A " m a r k  c l i c k s
    a n d stops at the  r ed line.


   E in s tellung  auf Autom atik
   Ma n dr eht den Blendenr ing, bis die M ar ke "A"
    a m  r oten Indexstr ich einr astet.
View original page 6Page 7 · Read text
(th e lower r ight hand side) , in which the distance
                    symbol will appear as you tur n the focusing  r ing.
                    Th is per m its  to set the distance sym bol  while
                             lo o king thr ough  the viewfinder .
                    Fo r flash photogr aphy  andlor for cr iticalfocus-
                             in g , use the m eter or foot scale pr ovided on the
                             lo we r  par t  of the  focussing   r ing.  Sim ply  set
                        a p p ropr iate scale num ber  to the  r ed line.
                      Remarks: The focussing  ring rotates within the
                                                                      .  r ange of distance sym bol and m eter /
                                      foot  scale m ar k    r espectively, but
                         DOES NOT rotate 360..


                     9 ) Sch a r feinstellung
                   De r Schiir fenr ing  ist m it Entfer nungssym bolen
                          (g e lbe) und 2 Skalen m ar kier t: die weiBe Skala f ur
                        n r, d ie gelbe  fr ir feet. M an br aucht die Entfer -
                        n u n g nur einiger m aBen zu schdtzen und an der
                    Ska la entspr echend einzustellen.                i
                      lm  Sucher feld -  r echts  unten -  ist  ein  kleines
                    Fe n ster sichtbar , im dem das jeweils eingestel-
                            Ite E ntfer nungssym bol  sichtbar wir d.  So kann
                m a n  a u f  d i e  S y m b o l e  e i n s t e l l e n , o h n e  d i e
                   Ka mer a absetzen zu m ussen.
                             Frir genaue  Einstellung dienen die  Meterffeet-
                    S ka len.
                     A chtung:  Der Schdr fenr ing l?iBtsich Uber den
                                   Bereich der Symbole  (bzw.l  Meter/
                                       feet- Skalen dr ehen,  nicht  aber um
                                     360'
www.orphancameras.com
View original page 7Page 9 · Read text
1 1 ) Re wind the  film
                 Wh e n a  r oll of film  is com pletely exposed,  r e.
                       win d the film . DO NOT attem pt  to advance the
                            film.  T he film  is com pletely gxposed when the
                           film counter indicates the num ber  36. 20 or L2
                         d e p ending upon the length of film  usel.
                       Press the rewind  button  on  the  bottom  of  the
                       ca mer a body. Lift the  r ewind cr ank and tui- ;i it
                              in  the  dir ection  of  ar r ow.  T he cr ank  is  tight
                   wh ile the film  is being  r ewound, but when  the
                         e n d  of  the  film  leaves the  take- up spool, the
                        cra nk  will becom e loose.
                   Op e n the fear cover and pull out the film  r ewind
                       kn o b.  T hen   r em ove the film , keeping   it away
                            fro m  dir ect sunlight.


                      1 ) Riic kspulen  des F ilm s
                       Je nach der Lange des eingelegten F ilm s  r st der
                        Film voll belichtet. wenn  das Z iihlwer k  36. 20
                         o d e r 12 anzeigt. Der F ilm m uB nun in die Patr one
                         zurrickgespult  werden, bevor die Kamera  geoff-
                          net werden  darf.                                             I
                  Ma n  dr uckt  den  Rr ickspul- F r eilaufknopf am
                     B o d en der Kam er a Eanz ein, klappt die Rijck-
                       sp u lkur bel aus und dr eht diese in Pfeilr ichtung.
                   Da s Ende der Rr ickspulung ist leicht  dar an zu
                         e rkennen. daB sich die Kur bel wesentlich leichter
                         d re hen  15Bt, wenn  sich  der  F ilm anfang vom
                    Ke rn der Aufwickelspule geldst hat.
                  Ma n offnet nun die Kam er ar r ,ickwand. zieht die
                        Rr-ickspulkur bel bis zum  Anschlag  her aus und
                         e n tnim m t  der Kam er a die F ilm patr one.
                      A chtung:  F ilm wechsel  sollte nicht  in  pr aller
                                Sonne, sonder n zum indest im Schat-
www.orphancameras.com      ten des eigenen Kor per s er folgen!
View original page 9Page 10 · Read text
Flash photography
     (1 ) Th e  use  of  either  flash bulbs or an  electr onic
          fla sh  is  r ecom m ended,  if  r ed war ning signal ap-
        p e a rs in the viewf inder .
     We recom m end you our com pact style Pen F lash
      CL w hich  accepts AG- l  and AG- l8    ( for  color
        p h o togr aphy) .


     Blitz.Auf nahmenI  (l) In V er bindung m it der T r ip 35 lassen sich sowohl
        Kolbenblitze,  Blitzwi.irfel und Elektronenblitzge.
         ra te ver wenden. Blitzen ist im m er dann  angezeigt,
      we n n im Sucher das  r ote War nsignal  er scheint
        u n d sich der Ausloser nicht m ehr  dr ilcken  liiBt.


     t2l S e t thc cam er a to m anual system by tur ning the       F stop  r ing  ( see "1"  in pr eceding page}. Set the
       F n u m ber  instr ucted on your flash bulb package.
       Th e shutter speed is autom atically set at 1/40 sec.


      D i e K a m e r a w i r d a u f m a n u e l l e E i n s t e l l u n g u m -
        g e schaltet, indem m an den Blendenr ing von "A"2.,we g stellt und die notige Blende wEihlt,die auf der
       B litzpackung angegeben  ist. Die Ver schluBzeit
        betragt dabei automatisch  immer  ll$O't.
View original page 10Page 11 · Read text
(3 1 Th e Olvm pus  Pen F lash CL can be connected
                     simp l y by slipping its foot on to theaccessor yshoe
                                        { in cor por ate the cor dless contact) pr ovided on top
                        o f th e cam er a.  T o obtain pr oper  lens opening,
                   wh ich is calculated by cam er a- to- subject distance,
                        p le a se  r efer  to  the exposur e char t  pr ovided on
                           th e  r ear of the flash unit"


                  D i e T r i p 3 5 h a t e i n e n S u c h e r s c h u h m i t e i n g e b a u -
                           te m Mittenkontakt. Blitzger dte m it M ittenkontakt    fr-  z.  B. der Olym pus  Pen- Blitzer CL - br auchen
                        e i n f a c h n u r   i n d e n Z u b e h o r s c h u h e i n g e s t e c k t z u
                  we rd en. Z ur Er m ittlung der  r ichtigen Blende hiilt
                m a n s i c h a n d i e a n g e g e b e n e n L e i t z a h l e n , d i e d a s
                    P r o d u k t a u s E n t f e r n u n g x B l e n d e a n g e b e n . V i e l e
                    B litzger Z ite haben  Belichtungstabellen  auf dem
                  Geh Ziu se.


              W h e n u s i n g o r d i n a r y f l a s h g u n o r e l e c t r o n i c f l a s h ,
                           slip the foot of the unit on to the accessor y shoe
                        a n d attach the flash connecting plug to the syn-
                      ch ro nizing socket on the cam er a.


                    B e i Ver wendung von  Blitzger 2iten ohne M itten-
                      ko n takt wir d das Ver bindungskabel dieser Ger Z ite
                m i t d e m K o n t a k t n i p p e l a n d e r K a m e r a v e r b u n d e n .

www.orphancameras.com
View original page 11Related documents and language editions
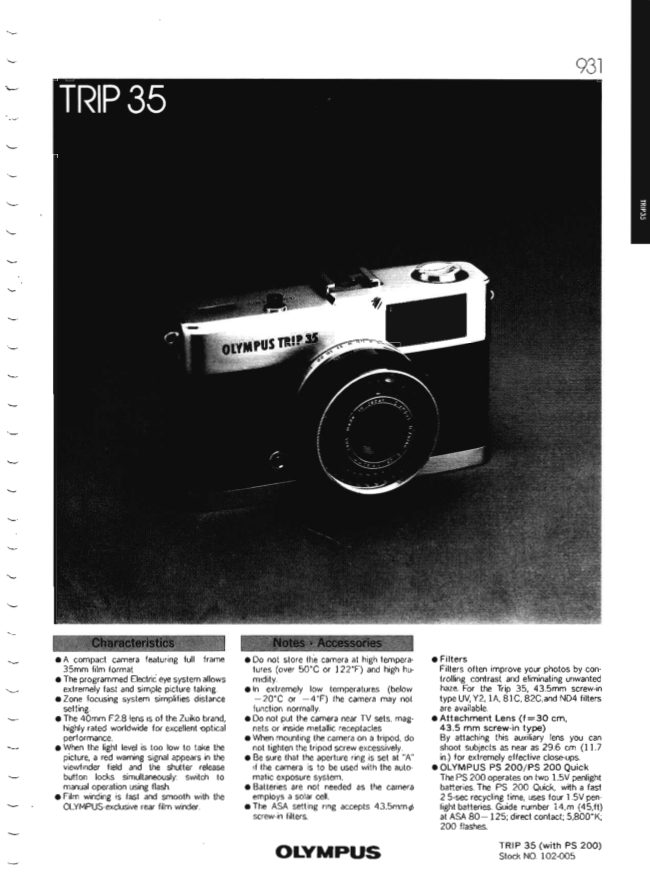
From the M. Butkus archive. Original publisher and archive notices are retained.
Check the model and edition against your equipment.
PDF verified 2026-10-10.