Film & darkroom
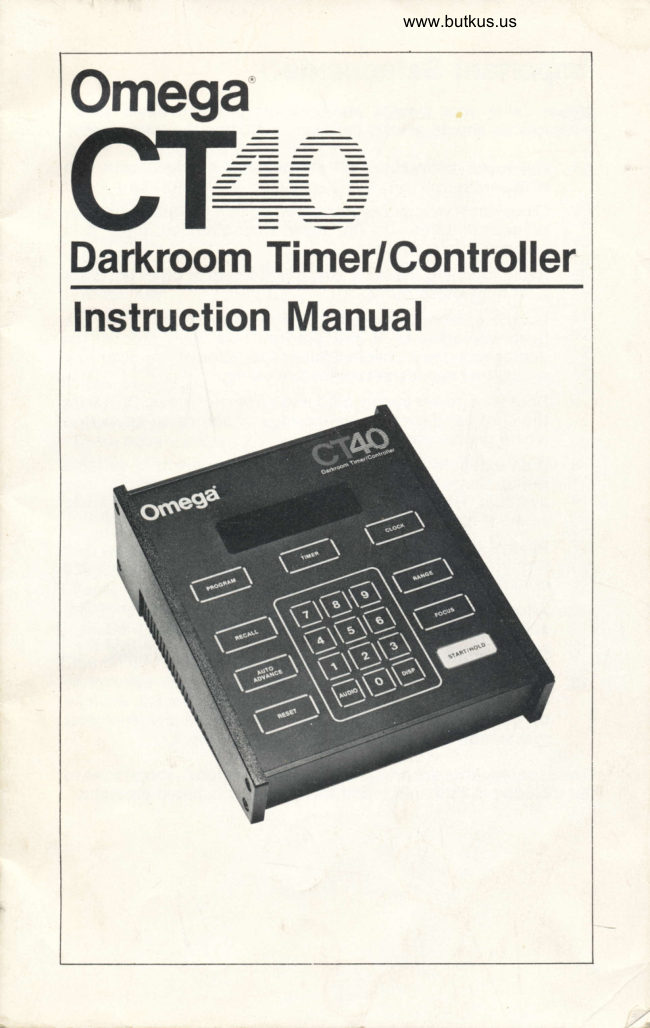
Omega CT40 Darkroom Timer User manual
User manual for Omega CT40 Darkroom Timer. 27 pages in English. Read the original PDF, download or print a copy without registration.
27 pagesEnglish1.9 MB PDF
Loading your manual…Open PDF directly
Document details
- Brand
- Omega
- Model / document
- Omega CT40 Darkroom Timer
- Document type
- User manual
- Language
- English
- Pages
- 27
- File size
- 1.9 MB
- Category
- Film & darkroom
- Document date
- Not specified in catalog
Search available document text
Find a term, then jump to its page in the original PDF. Image-only pages may not be searchable; check the PDF for exact wording and diagrams.
Page 2 · Read text
lmportant Safeguards
     When using your Omega photographic product, basic safety
        precautions should always be taken, including the following:
       1. Read and understand all instructions provided with this
             product.
       2. Close supervision  is necessary when this product is used by
          or near children. Do not leave it unattended while it is
           plugged into an outlet.
       3. Avoid touching the lamp area of enlargers or other hot parts
           as it may cause burns.
       4. Do not operate this product if the power supply cord has
         been damaged or if the product has been dropped or
          damaged. Have it checked out and repaired, if necessary, by
           a qualified service person before using.
       5. Route the power supply cord away  f rom hot areas. Do not let
           the cord hang over a counter edge or across an open area
          where people pass.
       6.  lf an extension cord is necessary, use one with a suitable
              rating. Cords rated for less amperage than the product may
            overheat. Route the extension cord away from open areas
          where it may be tripped over or pulled.
      7. Always unplug the product after use. Grasp the plug and
             firmly pull from the outlet to disconnect. Never yank the
           cord from the outlet.
      8. Allow the product to cool to room temperature before
              storing. Wrap the power cord loosely around the product.
     L  Do not immerse this product in water or other liquids.
      10. To reduce the risk of electric shocks, do not attempt to
           disassemble or repair this product. Always have it serviced
         by qualified service personnel when necessary. Incorrect
         ,   reassembly can cause electric shock hazards.
      These safeguards are prescribed by Underwriters Laboratories to
      be included in this instruction manual for U.L. listed products.


       2


\              .rs;;,ii;;
View original page 2Page 4 · Read text
Introduction
      The CT40 Darkroom Timer/Controller is a microprocessor based
       instrument which will perform almost all of the normal darkroom
       timing, measurement, and calculation functions. The CT40 is
       simple to use and within a few minutes after reading Chapter 1,
      you will be able to use the basic functions of the CT40 for both
        printing and processing . . . automatically and accurately.
      The CT40 is five instruments in one.
         1) A completely automatic enlarging timer.
         2) A user-programmable automatically sequencing process-
             ing timer.
         3) An automatically programmed processing timer.
         4) A versatile measuring instrument for temperature, exposure
            determination, and pH content.
         5) A clock.
         All of these five functions can be easily and independently used.
      The Quick Use Guides outline the basic timer functions in a brief
      manner with simple-to-follow instructions so the CT40 can be
      used immediately.


        4

[ ,  .,,..*.-
View original page 4Page 5 · Read text
Venmo @mike-butkus-camera  Ph. 2083
PayPal Name  Lynn@butkus.org      www.PayPal.me/lynnbutkus
View original page 5
Page 11 · Read text
DISPLAY
       The time display can show up to four digits. The numbers entered
       appear in the right hand digit and move left one digit as a new
      number is entered. The fifth number entered sequentially will
        automatically clear the display and will be displayed in the right
       hand digit. For example:
            1) Press            , display reads            tr         rrl                                           , display reads           2) Press @
                         -121r3l                                           , display reads    l'r           3) Press @
                                           , display reads           4) Press @       @                                           bl                                           , display reads           5) Press @                             t
        Therefore, to clear an error, just enter numbers until the display
          is full and the fifth number entered should be the  f irst number of
        the correct entry. This action will clear the error from the display.
     The display, when in the program mode, will show the
      programmed step numbers in the two digits to the right of the
       time display.
      Numeral Keys 1) through I
                                                                   1) for entering      The numeral keys @  through @   are used
         printing and processing times into the timer; 2) in conjunction
                                                                             of       with the CmOmATn and @        keys for coding
                                                                  X"y      memory locations; and 3) in conjunction with the GUDIO-)
         for specific audio modes.

     RANGE Key
       The CT40 has two timing ranges: 1) minutes:seconds.tenths of
       seconds (i.e. W3A1 ), and 2) minutes.seconds  (i.e. |734'l  ).
                                 pressed will switch alternately trom     The [Rf NGill key when
       one timing range to the other. ln the "minutes.second" range a
        decimal  (.) is used to differentiate between minutes and seconds
        instead of a colon (:). Note: switching from one range to
        another will change the time drastically (i.e. a time of I5:lm-l
       5 minutes and 15 seconds      becomelstso-'l 51                                   -will
      minutesand50secclnds).P|easeusetherRAclkeywith
                e.
[,*]i'
View original page 11Page 12 · Read text
www.butkus.us

AUDIO Key
The AUDIO key, when used in conjunction with the numeral keys
                                   , selects various audio modes. See Figure 2.O  through OThe CT40 is automatically set to audio mode 1  when turned
                                                              aon. To select another audio mode, press tAUDi-O and then
numeral key from @  through @

Audio          Key  End of Time 1 Second 30 Second 15 Second
Modes         Tones Warning Metronome Mettonome Warning

AUDIO  1                Yes            No'         No         No         No
AUDIO 2                Yes          Yes         No          No          No
                                                        No         NoAUDIO 3       Yes      Yes          Yes
AUDIO 4              Yes         Yes         No         No          Yes
AUDIO 5                Yes          Yes          No          Yes         No
 AUDIO 6                Yes          Yes         No          Yes          No
 AUDIO 7                No          No         No         No         No
 AUDIO O            displays the current audio mode

                                      Figure 2
                           Description of Audio Modes


AUDIO Modes
"Key tones" are short (1/1Oth of a second) beeps you will hear
whehever you press a key. This insures you have entered infor'
mation into the timer. This tone will be heard even if the key
 pressed is not entered because the timer is performing one of its
 f unctions such as pressing fF:ffil    when the CT40 is timing.
"End of time warning" is a long (1 second) tone that signals the
completion of a timing cycle. "One second metronome" tones
are medium-length (3/10 second) tones which signal gvery
second during attive timing. These tones are most useful in
dodging and burning to keep track of elapsed time. The "30 second metronome" signals every thirty seconds as a re'
 minder to agitate a tank or tray. Note: both the one second and
                                                             the30 second metronome 9!g-nals- are synchronized with starting time or, if the IHOLD I  function is used, they are
 synchronized with the restarting time. The "15 second warning"
 aie continuous short beeps that start 15 seconds prior to the end
 of a timing cycle. This warning that the timing cycle is about to -
end is useful to indicate the time for emptying the processing
tank (when immediate attention is required).                       11
View original page 12Page 13 · Read text
DISP (Display) Key
      The t@     key will turn the CT40's LED display on or off when
            it is pressed. This key is useful when highly red sensitive color
        materials are used within four feet of the CT40's display. Turning
         off the display has no effect on the CT40's other functions.

    PROGRAM Key
       The               key is used in conjunction with the numeral
      keys and the                key to enter user defined
       programs up to 16 steps long. When entering a program, the user
      must enter the time to be programmed by pressing the numeral
      keys corresponding to that desired time, then press the
            f PRbmM I  key followed by a two digit step number (typically
       the step numbers will be sequential). This key sequence stores
       the program into the CT40 memory. Once a program has been
       stored and set to the beginning, pressing ITnOCnTtr4-l anO
      then [STAnlnOLD-l will start the program in sequence  in
       which it was entered. fnr CFndC-nAV-l key is also used in con-
        junction with the ferc-en key to set the clock's time.

     RESET Key
                                   pressed, will turn off the enlarger,      fne [TEf  J key, when
        turn on the safelight, and will reset the timer to the starting time
       of the interrupted step. Note: in the program mode, the single
      step time will be displayed, but pressing |..ffi]]
     aSTF-mdLD-l will start the timer at the interrupted step.

     START/HOLD Key
       The   START/H O LD   key is an alternate action key. When the
      CT40 is nof running and the   START/H O LD   key is pressed,
               it will start counting down  f rom the value in the display. When the
       CT40 is running,  it will stop timing, turn off the enlarger, turn on
        the safelight, and freeze the displayed value. Any  f ractional parts
        of a second that have elapsed but vrere not displayed (such as
        1/100th of a second) will be preserved internally by the CT40.
        Therefore, a timing cycle can be alternately started and stopped
       as many times as the user wishes without any cumulative error.
      rne @             key is also used in conjunction with the
    -^fmorcfRAm12-           key to begin a stored program.

L   , ,,*..
View original page 13Page 14 · Read text
www.butkus.us
FOCUS Key
The rcml     key will turn the enlarger on and the safelight off
so focusing and composing can be performed. Whenever the
CT40 is in the focus mode, an indicator lamp (Figure 1)on the
display will be illuminated indicating this mode. No other CT40
functions will operate when it is in the focus mode.

RECALL Key
The fRfJ-mfn key is used in conjunction with the numeral
keys to recall and display the time stored in a specific program
step. This will also advance the program sequence to this specif ic
                                                           recall stepstep. For example, pressing fRmfn@  tr   will
5 from memory and display the step's time. lf you now press
                               the CT40 win start timing step 5fmEm   fsm]                     ,
and subsequent program steps. Note: at all times when entering
step numbers into the CT40, two digits must be entered (i.e. for
step 5 enter @)E  l.

AUTO ADVANCE Key
The @                key witt automatically start the CT40
ten seconds after the end of a timing cycle. This feature can be
used in either the program or single step mode. When used in the
program mode, the CT40 will automatically advance through all
programmed steps with a ten second pause between steps.
Pressing [ETA.R-T/F|O-LD-]  will begin the next programmed step
immediately. This feature is very useful for total "hands free"
operation. When used in the single step mode, the single timing
cycle will be repeated ten seconds after its completion. This
feature is usef ul for creating test strips or for multiple prints   f rom
the same negative. An indicator is provided on the display to
indicate that auto advance mode has been selected (Figure  1).


CLOCK Key
The t-CLOCKI key, when pressed, displays the time-of-day and
will not interfere with the CT40's operation. Therefore, you can
preSStffi|whi|etimingaprintandeven|eavethec|ock
                                                                             13
View original page 14Page 15 · Read text
displayed without affecting the timing cycle, its accuracy,  its
  audio signals, or the automatic control of the entargei  or
   safelight outlets.

  TIM ER Key
  The FffiER]  key, when pressed, will display the time interval
   previously entered, the program step number if the timer is in the
  program mode, and the function indicators.


          CHAPTER 2

   Enlarging Timer (Single.Step Mode)
   Plug the cr40 into any AC power ouilet. Plug the enrarger and
   safelight into the timer's ENLARGER and SAFELIGHT ouilets,
   respectively, on the reat of the cr40. Please observe the
  maximum power ratings for these ouilets which is printed
  underneath the respective outlets.
  whenever the cr40 is connected to AC power, either the enlarger
   or safelight will be on, but never both.  lf the enlarger is off, press
  (FoctJS I  to turn it on and to turn the safelight off. compose
  and focus your image. Press ( Foduill to turn the enlarger
   off, the safelight on, and the disptay will read |                                                               #.'##^0 ## | (# indi-
  cates a blank digit). set the cr40 for a 12.5 second exposure time.
                                               . The cr40 win dispray                                                           indicating                               I  Press e@@            @
  0 minutes and 12.5 seconds.                                                               T
  Press   STA RT/H O LD   The enlarger will go on, the safelight          U
   will go off, and the timer will count down  f rom the set time of 12.5
  seconds toward zero. when the timer completes the timing cycle
  itwi||disp|ayw,turntheen|argeroff,thesafe|ighton
  and then automatically reset to                       another
  enlarging time of 12.5 seconds, press               again.
                                          =!
  To change time, simply clear the display of the old time and enter
.,o th. new time.
View original page 15Page 16 · Read text
www.butkus.us

        Since the CT40 has a fixed decimal point, there is never a need to
         worry about the decimal point placement. However, this requires
        entering a trailing zero if tenths of a second are zero. For
        example, setting the CT40 for 10.0 seconds, requires pressing
                                                                               for   O@@.                  For 1 minute exactty, press C@@@
I         1:00.0. As a convenience, the CT40 has no rules about times       above 59.9 seconds. Therefore, you can enter 11/z minutes as
          1:30.0 or 90.0.
      Note:usingthe@keydoesnotchangethenumera|s
           in the display but only changes the range. For example, I7m5l
          will be read E1.55 I when the range is changed by pressing
      thetffi|key'Thiscandrastica||ychangeyourtime
        so care should be used with this key.
       The CT40 is designed to be as simple to operate as possible and
         yet offer the user maximum versatility and functionality. Many
        key functions are inoperative while the CT40 is in other specific
                                                                inoperative      modes. For example, the @       key is
       whenever the CT4O is timing. Conversely, the
      key is inoperative whenever the CT40 is in the focus
      mode. When the CT40 is timing, the CT40 will prevent
        changing ranges, focusing, using tn" @          or @
        keys, or setting audio modes. Control of the (-UTF-] (Ois-
       ptay),(-ct-i-cK--1,(Ttn---],('Res ,@
                                      possible during timing. Even     and m            keys is
       though some functions are inoperative during other function
       modes, the CT40 will still signal "Key Tones" (except for audio
      mode 7). This insures the key has been pressed, but will not
        perform the function.
       You are now ready to use the CT40 for printing or other simple
        timing functions. As you read through other chapters, you will
         learn to use the more advanced features of the CT40.
View original page 16Page 17 · Read text
CHAPTER 3
 Processing Timer (Multi.Step Mode)
 The cr40 can be used to create a sequence of individuar timing
 cycles of up to 16 steps. This multi-step mode is normally used
 for  f ilm or paper processing but is certainly not limited to ihis. In
 fact, this mode can be used to create test strips in enlarger
 timing or any other multi-step processes.
 The cr40 contains 16 memory locations. These rocations are
 called 01 through 16 and are programmed using tne fffinnllr-]
 key in conjunction with the numeral keys. As an example, a
 simple program to process a roll of black and white  f ilm might be
 as described in Figure 3. The actual processing steps and their
 respective times are shown along with the keys needed to be
 pressed on the CT40 and their precise sequence.

STEP         TIM E        PRESS
Developer   61/zmin.          @@@@mOmmn@O
Stop bath     30 seconds   @@@t-PffiAM-r@tr
Fixer        5 min.   @@ @@fPRocRAM]@O
Rinse        8 min.   @@ @@ft*oc.*ott@@
                                 Figure 3
To use the program just created press (ffiill@                    , wh ich                            0
 will reset the program to its first step. step 1 will be shown on
the disptay as lJsol-bt  I . rt, however, another step is
                                                             to usedesired other than step 1, press IF-ECAIn@ @
just the fixer and rinse steps. Now start the program by pressing
                                                                   . The 61/z minute deveropertime wirlf-PRocRAM'|(ffiDl
run until completion. After 61/z minutes have elapsed, the timer
will turn the enlarger off, the safelight on, and automatically ad-
vance to the next step. To continue at step 2, simply press
FTAFTffiiD. Continue this procedure using tne[SAEffil
key until you have finished the last step. The CT40 will
automatically advance from step 4 to step 5. However, step 5
isempty(thedisp|aywi||showw)signa|ingthecT4o
to   automatically reset to step 1 when th. @             r"y   pressed.is
View original page 17Page 18 · Read text
www.butkus.us

To recall a step from memory and use it without the remarnrng
program, you can press the following key sequence:  fFEcA-n
step number   START/HOLD    Pressing        /HOLD     tn-
stead of [mOCFmI]tSTA-RilFiOD-l  , wilt cause the CT 40 to
handle the step as a single step mode time and not start the
multi-step sequence


         CHAPTER 4
           Time Clock
The CT40 contains a six digit clock.  lt can be set once and will
maintain correct time as long as the CT40 is connected to AC
power. Using the clock will not restrict or interfere with other
uses of the CT40 in any way.
When the CT40 is first connected to an AC power outlet, the
clock is automatically set as h2^0-0--00]on the disptay for Hours.
Minutes Seconds. To set the clock for a desired time, press the
numera|keysforthedesiredtimeandthenpreSSrffil
t-CaOC-K].l. Note: time can only be entered in hours and minutes,
so enter the next full'minute. Press fClml     at the precise
full minute and the clock will begin keeping correct time from
that point. To return to the timer mode, press aTf MERf


         CHAPTER 5

        Expansion Interface
            (Optional Accessory)
The Expansion Interface accessory increases the versatility of
the CT40 by expanding memory and allows for utilization of a
variety of darkroom accessories. The Expansion lnterface has
                                                                             17
View original page 18Page 19 · Read text
four basic functions:
   1) A tester for the CT40;
   2l  Automatically enters and stores into the CT40 a program for
        the Kodak Ektaflex negative process;
   3)  Automatically enters and stores into the CT40 various
        photographic developing processes from Pre-programmed
       Memory Cartridges;
   4)  Connects directly to the CT40 a variety of darkroom ac-
         cessories.
  When connecting the Expansion Interface to the CT40, it does
   not matter what you may have performed in the CT40 or what
    function mode the CT40 has been left in from its previous use.
    Caref ully insert the connector tab of the Expansion Interface into
   the socket labeled EXPANSION INTERFACE on the rear of the
   CT40. Note: the Expansion Interface's keyboard must be facing
   up for proper operation. Be sure to push the Expansion Interface
   forward until it is flush with the CT40 rear panel.
   Press the (m'F-i-l key on the Expansion Interface and the
   CT40 will befr-ilitest procedure. The testing activates each
   keyboard function, all of the timing and control functions, all of
   the display digits, the audio tones, and the ENLARGER and
   SAFELIGHT outlets.
   Following is what will be displayed as the CT40 proceeds
   through this test:
  IsEaear-tW
  I56,iBTrTl
  l5oddTF-Tl
                                                   th ro us h lffi-T61. lmmril Wl-FF#-5'C-l
              Displays dual timing range and shows the last time IrmdFl
  l#1ro #Ill entered into the timer.
  l#roJ ##:l Focusffiming and Auto Advance Indicators (respec-
                tively located) are on.
  I#10.6 ##-l Enlarger outtet on and safelight ouilet off, then en-
               larger outlet off and safelight ouilet on.
  l#:10.0 #.#l Times down with one second metronome and end of
             time warning.                     <

                                   |  I-#.JO^or-l    ##18
View original page 19Page 20 · Read text
www.butkus.us

      Presstn.@keyontheExpansion|nterfaceagain.This
       timp the Expansion Interface will automatically program the
       CT40 for Kodak's Ektaflex negative process. The display will
        blank and the following program times will be stored into the
a       CT4O:
   I      STEP 1: Soak of 20 seconds
q      STEP 2: Lamination of 9 minutes
       Audio mode 5 will be stored (see Figure 2)
              lf the[SfnnTlfey is pressed again, the Expansion lnterface will
        run through-the test program again. Each time thefSfl-ffilkey is
         pressed, when no other accessories are connected to the Expan-
        sion Interface, either the test program or the Ektaflex process
          will be entered alternately.
       To use the Ektaf lex process, press fPRo-dFEMl
       on the CT40 keyboard. After the 20.0 second soak time (step 1)
        the CT40 will advance to the lamination step (step 2). To start
         this step, if you have not selected  AUTO ADVANCE    , press
  @


            CHAPTER 6
     Pre-programmed Memory Cartridges
                   (O pti on al Accessories)
      The Pre-programmed Memory Cartridges are a group of ac-
        cessories that when connected to the CT40 can automatically
         store in its memory various photographic developing processes
        and allow for their quick and easy use. Each Memory Cartridge is
       programmed with a specific developing process, such as:
        Ektachrome E-6 or Cibachrome. By not having to program a time
         or reset a single-step timer for the most popular developing pro-
        cesses, you can save your valuable printing time and eliminate
        costly errors, thus increasing your productivity substantially.
       These Memory Cartridges even contain the various developing
        times for different temperatures and allow you to choose the ap-
         propriate program for the temperature at which you choose to
        work (i.e. Cibachrome). Each Pre-programmed Memory Cartridge
       comes with an instruction sheet detailing process steps and
        times of the particular development process.
View original page 20Page 21 · Read text
lf you have a Pre-programmed Memory Cartridge, insert its con-
 nector tab into the Expansion Interface's rear accessory socket.
 Note: plerase ensure the label side of the pre-programmed
 Memory cartridge is facing up. lf you accidentaliy cbnnect  it
 backwards, no damage will occur to the cr40 or its accessories,
 but it will not operate.
Presstn"@keyontheExpansion|nterface.Thiswi||
 automatically enter the process p,ogram, which will appear on
 the display as it is being stored into the CT40's memory. Once
 the program is entered, the first step will appear on the display
and be ready for operation. To start the program, press
tmdcmm@                   . At the conclusion of each step,
 press
 is in the  AUTO ADVAN     mode, then the CT40 will automa-
 tically begin the next step 10 seconds after completing the prior
 step.
 lf the program in the Pre-programmed Memory Cartridge is not
exactly as you want it, you can modify the program in the CT40
memory. This does not dafiage or alter the pre-programmed
Memory Cartridge in any way. Press [SfnnT) on the Expan-
sion Interface and load the program into the cr40. press the
numera|keysforthedesirednewtime,thenpres'@
and the numeral keys of the step you want to modify. press
fREECAfn@O to set the beginning of the process and then
press IPR-OGRRM)@to       begin the process pro-
gram which will contain the modified step's new time.
N-ote: all process programs entered from pre-programmed
Memory cartridges are set for audio mode 6 Lnd the
minute:seconds.tenths of seconds (#:##.#) timing range. pressing
            change to the minute.second (##.##) timing@il      to
range after entering a program from a memory cartridge can
change the process time drastically.
View original page 21Page 22 · Read text
www.butkus.us

         CHAPTER 7

     Measurement Accessories
             (O pti on al Accessories)
The CT40 with the Expansion Interface can be used with a wide
variety of measurement accessories, which  f urther increases the
versatility and usefulness of this CT40 Darkroom Timer/Con-
troller.
Thermometer
The thermometer consists of a cartridge and a probe. Connect
the cartridge to the Expansion Interface as described earlier
for the Pre-programmed Memory Cartridge. Press tn" CSfnnT]
key on the Expansion Interface once and the thermometer is
ready for use. Insert the thermometer probe into the liquid to be
measured. Please consult the instruction sheet supplied with the
thermometer for proper use of the probe. To measure
temperature, press either the C or F key on the thermometer car-
tridge for temperature readings in Celsius or Farenheit, respec-
tively. The display will show the temperature in the selected
scale. Releasing the C or F key will return the display to the nor-
mal CT40 functions. Note: when the thermometer is used, the
other  f unctions of the CT40 will be interrupted. Therefore, it is not
recommended the thermometer be used while timing.

Exposure Meter
The exposure meter also consists of a cartridge and a probe.
Connect the cartridge to the Expansion lnterface as described                                 .)
earlier. Press the [-S-fnnf   key on the Expansion Interface and
the exposure meter is ready for use. Set the meter's probe onto
the enlarging easel or baseboard. Please consult the instruction
sheet supplied with the exposure meter for proper use of the
probe. The exposure meter will measure the relative levels of
light. The CT40's display will show this relative reading of the
light level. The brighter the light, the higher the reading. To use
this exposure meter to automatically recalculate'printing  time,
follow the procedure listed below:

1) Make a perfectly exposed print and note all of the param.,.rl
contributing to the perfect print, such as: lens aperture, exposure
View original page 22Page 23 · Read text
time, magnification, developer/paper combination, etc.
 2) under the conditions noted in #1 above, set the probe on the
 easel, press (FdCUill on the CT4o (to be in the (f@l
 mode) and press the fffi]      button on the meter. The dis-
 play will show a relative light level. Record this rever. Now
 press    IEnTIME-| on the exposure meter cartridge (set
 standard rime). The display will blank. Enter the correct expo-
 sure time used in making your perfect print (must be entered in
 minutes:seconds.tenths timing range) on the cr40 keyboard
 then press ITFOGnAD. Then press (-SETnf on the
 exposure meter cartridge (set Standard Light Level). The display
 will again blank and you can enter the rerative lighi
 level measurement, recorded earlier, into the CT4O key-
                                     programs the expo- board. Then press tTROmEm . This
 sure meter with the necessary information for the perfect print.
 p) ChalOe any of the variables which effect the original tight
 level of the perfect print (such as: magnification, lens aperture or
 filtration) or insert a new negative. Set the probe
 at an appropriate location on the easel and press (cALcfllvlE-l
on the exposure meter cartridge. The cr40 will automatically be
 reprogrammed for the new exposure time which will be
 displayed. Note: insure the timing range is set for minutes:
 seconds. tenths of seconds since this is how the time will be
 reprogrammed. This step can be repeated for as many changes
to light level as needed as long as the paper and chemicals do
 not change.
4) Mark the paper box with the standard rime and standard
 Light Level of the perfect print. when you wish to use this parti-
cular paper and chemical combination at another time, you can
press  l' SET n-l   anci set the Standard Light Level and
then press tFTMil     and set the standard rime. you
need only insert an unknown negative, focus and using the probe
on the easel to read the light level while the Ct+o.is  in
             press   CALC TIME   . The new proper timet'Focutl
will be calculated and automatically entered into the cr40
without referring back to the stantJard test negative.

pH Meter
The pH meter consists of a cartridge and probe. Connect
View original page 23Page 24 · Read text
www.butkus.us
      the cartridge to the Expansion Interface. Press (ffiRT]
                                     pH probe into the l-    and the pH meter is ready for use. Insert the
        solution to be measured. Observe the detailed operating instruc-
        tions packed with the pH meter accessory. When the pH button
  I         is pressed on the cartridge, the display on the CT40 will show the
l     pH of the solution. When the pH button is released, the CT40's
        display will return to its normal function. The pH meter should
 I       not be used when the CT40 is timing since this accessory when
       operated interrupts the timing function of the CT40.


            CHAPTER 8

             Footswitch Control
                   (Optional Accessory)

      The dual footswitch (Catalog No. 461-058) controls both the
      asflntlHo-to-l and f-Focutl  functions. To use this foot-
       switch control, connect the plug from the footswitch to the
      FOOTSWITCH accessory jack on the rear of the CT40. Note that
       the plug has four pins that are not evenly spaced and therefore
          fits into the jack only one way. lf the plug does not go into the
        jack easily, do not force it. Inspect the plug and jack for a proper
            fit and try again.


            CHAPTER 9

     Gare of the CT40 and Accessories
      The CT40 and its accessories should require only normal care to
       offer you years of trouble-free service. Certain precautions -       should be taken to assure proper safety when using the CT40 or
      any electrical device.                                                                                    ,,
View original page 24Page 25 · Read text
. Be sure to connect the CT40 only to a suitable power source. In
   the United States, this means the CT40 should only be
    connected to a three prong AC receptacle or a two prong AC
    receptacle when used with a UL listed three prong to two prong
    adapter with the ground clip on the adapter connected to a wall
    plate mounting screw.
   . Under normal operating conditions (with an enlarger and
    safelight hookup), the CT40 may require a maximum of 600
    Watts or 5 Amperes.
   . Observe the maximum wattage ratings on the ENLARGER and
   SAFELIGHT outlets.
  o Do not use the CT40 in or near water. The CT40 is designed for
    indoor use only.
   . The rear of the CT40 has a small group of slots located to the
    right of the identification label. These slots are provided for
    ventilation. Do not block these slots.
  The keyboard of the CT40 hds been designed to resist liquid and
  dust contamination. The keyboard elements are sealed under a
  polycarbonate top sheet which is not normally affected by photo
  chemicals. Should this top sheet become dirty or stained, use a
 damp cloth (damp, not wet) to wipe the top. A few drops of liquid
  detergent may help. The lens area over the display can be
  cleaned using a good photographic lens cleaner.
  Metal contacts, such as the connector tabs of the Expansion
  Interface, Pre-programmed Memory Cartridges and accessory
  cartridges, can be contaminated by chemicals and finger oils.
  Therefore, avoid touching these contact surfaces. Should these
  connectors become tarnished, you should disconnect them from
  the CT40 and clean them with a soft pencil eraser or a cotton
  swab dampened with clean alcohol. This will normally return the
  contacts to proper operating condition.
 The keyboard utilizes the rnost modern key switch technology
  available. The flexible membrane switches only need a moderate
  touch with the finger tip. Avoid using sharp, pointed implements
  such as pencil and pen points. The lens area is treated with a
  protective coating to resist scratches. However, avoid touching
  the lens with sharp or abrasive objects.
 The CT40 was designed for years of trouble free service and
  contains no user serviceable parts. There is no reason for you to _  ever open the CT40 case. Opening the CT40 case should only be
 done by Omega service personnel. Opening the CT40 by
24
View original page 25Page 26 · Read text
www.butkus.us
unauthorized personnel voids all warranties and relieves Omega
of all product liability.
The CT40 utilizes a modern power supply design. However,
strong electrical fields can disturb the operation or accuracy of
the CT40. Care should be taken to avoid the use of the CT40 near
large electrical motors, light dimmers, variable speed motors,
welding equipment, high power transmitters, or X-ray equipment.
View original page 26
From the M. Butkus archive. Original publisher and archive notices are retained.
Check the model and edition against your equipment.
PDF verified 2026-10-10.