Film cameras
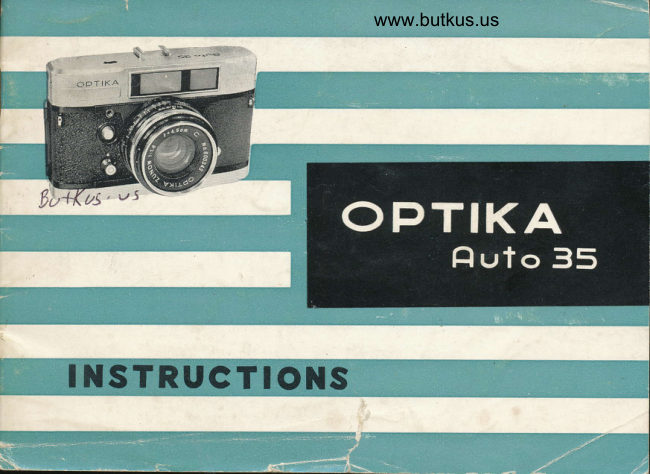
OPTIKA auto 35 User manual
User manual for OPTIKA auto 35. 25 pages in English. Read the original PDF, download or print a copy without registration.
25 pagesEnglish9.0 MB PDF
Loading your manual…Open PDF directly
Document details
- Brand
- Optika
- Model / document
- OPTIKA auto 35
- Document type
- User manual
- Language
- English
- Pages
- 25
- File size
- 9.0 MB
- Category
- Film cameras
- Document date
- Not specified in catalog
Search available document text
Find a term, then jump to its page in the original PDF. Image-only pages may not be searchable; check the PDF for exact wording and diagrams.
Page 3 · Read text
We congratulate you on your selecting the Optika Auto 35 camera.
Please let us explain to you few more details of the camera.
This camera is considered to be the first lens shutter type camera coupl-
ed with amazing "One-Touch-Magic-System"  which will enable you to opera-
te the camera with one button. By merely pressing the shutter release
button, Touch-O-Matic will release the shutter and take picture. When
finger is released from the shutter release button,  spring power will
automatical ly transport the exposed frame, cocks the shutter reflectively
to be ready to take another frame. This is very TOUCH-O-MATIC./
By taking good care of this Optika Auto 35,  we sincerely hope that
it proves to be a good eompanion to you for a  long time. Please read
the instructions contained in booklet and try to handle the camera pro-
perly. We explain to you proper methods page after page.
View original page 3
Page 5 · Read text
Digitally signed by mike butkusmike            DN: cn=mike butkus,
                               o=orphancameras, ou=29,
                                email=mike@butkus.org, c=US
                                   Date: 2018.12.27 14:15:35 -05'00'butkus
View original page 5Page 6 · Read text
www.butkus.us


O  Exposure Counter          @ setr-timer
@ Accessory Shoe           @ M-X Synchronization Lever
@ Film Position Lined Mark       @ F lash Terminal
@ Range Finder Window        @ Range Focusing Lever
@ Bright Optical Frame        @ Tripod Bush
@ View Finder Window         @ Power Charging Knob
@ Neck Strap Rilg          @ Rewinding Carnk Handle
                                                      Opening and Closing@ Calbe Release Hole         @ Back Lid
@ Shutter Release Button                     Button
@ Exposure Safty Knob          @ Film Cartridge Chamber
@ Light Value Scale           @ Finder Eye Piece
@ Shutter Speed Scale          @  Fi lm Indicator
@ Shutter-aperture Coupling Ring     @ Sprocket
@ Lens Aperture Scale          @ Take-up Spool
@ Depth of Field Scale          @ Film Pressure Plate
@ Distance Scale             @ Cartridge Pressure Spring
View original page 6Page 7 · Read text
1) How ,to load film
                                    It is advisable to load and unload
                     camera in shade.

a) Depress the back lid opening and closing button (20) and open
  the back lid.  Insert the end of film into slit of take-up
   spool (26) in arrow pointing direction.  If the slit is not in
   proper position to insert film,  turn the spool with finger
   in the direction of the arrow.
View original page 7Page 8 · Read text
www.butkus.us
                                                                c) Slowly stretch out the  f i lm
                                                enough length and put the film
                                                    cartridge into film chamber(25).
b) Be sure to have the sprocket gear            Be sure to have the  f i lm perfbra-
   (28) engaged into perforation of               tion engaged into sprocket gear..
      f ilm. By turning the spool with
    finger, wind the  f ilm one complete
   turn on the spool.
View original page 8Page 9 · Read text
d) Replace the back lid bY gentlY
   pressing the lid. The exPosure
   counter(1) will then point the
    starting mark " S".


e) By turning power charging  lcrob
   (22) a few times and charge the
   power. Press the shutter re-
   Iease button (9) two times.
  With this operation, the ex-
   posure counter will register the
   first dot on the exposure coun-
    ter. With each exposure, coun-
   ter will advance to  next dot
   automatical ly.
View original page 9Page 10 · Read text
www.butkus.us
2) Shutter and Shutter Release
       Shutter very reliable coPAL svl-  with shutter speed of B, 1-1,/500
                     value.index figures 1--17 and aperture oiening" of 1.g,2.g,4,         9e^coldr]ight-        5.6,8,11 and 16. Self-timer is equipped with this shutter. when you       need to set self-timer, M-X synchronization lever(l8) hasto turntoihe      X, otherwise self-timer can not work- The COPAL  synchronizaticin
              . deviec has two kinds of connecting points,M for the M-class flashbulbs,
        fully synchronized at all shutter speeds up to l/soo second, and x'        for the electronic flash, or strobe-light at all shutter speeds.  The        lever has always to set at X except M-class flashbulb picture-takings.
      With the aid of Touch-O-Matic installed in the shutter, photographing
       can be done by mere button pressing. Shutter release button iJtocatel       at suitable position-and slight presiure will release the shutter,there-
       fore less chance of- shaking the camere while picture is taken.   If        thu button is pressed but shutter failed to respond,this is eausedeither      by exhausted p_ower or exposure safty knob in?'S" position. Have the        safty knob in "A" position when photLgraphing.
View original page 10Page 11 · Read text
3) Determining the Aperture Opening of Lens
    To set the desired shutter speed, for example %0,
     turn  the  light  value  scale  (11) right or  left  to
     coincide the A mark with the shutter  speed.
      Similarly  by turning the light  value scale  right
     or left, coincide your desired aperture opening e.g.
           f $ with A mark. This   I ight value shutter can set
     the speed and aperture without changing the hand
     and it  is popularly called the one hand svstem.


     With the aid of exposure meter,  it  is more sim-
      ple to gain your         exposure' Just read the                              "r.titubl.                     as shown by the exposure me-       light value number
       tei and have theVmark  coincide with the figure
     as given by the exposure meter.   I{ you desire to
     change the shutter speed,hold the shutter-aperture
                  ring(l3)  with  fingers and turn'    The
      "orrplingshutter speed is coupled with the aperture open-
      ing so the change in shutter speed will  automa-
       tical ly  adjust the aperture opening'            :r
         If  you utilize   the light value index table, shown    b
                                                                  a      at page 10, it  is the most simple way to  take
     good picture.  Jast put your reasonable light   va-       l,re inde* figure on the light  value scale,   then  ffi     determining the aperture opening of lens is over'
View original page 11Page 13 · Read text
6) About the Range-View Finder
     Range-view  f inder is the three window type.    In
     looking through the eye piece(26),you will find adia-
    mond shape frame in the center of finder. Focus the
     object and if two images coincide each other and one
     image appeared, the distance between the fi lm surface
     and the object is properly adjusted.
    The bright-line frame visible in theview-range finder
     (A) shows the area of the picture appear on the ne-
      gative. When taking close-up pictures, the area of the
     picture will show in(B) frame. The (B) frame is the
     position of parallax correction boarder.
View original page 13Page 14 · Read text
www.butkus.us

          7) The Spring Motor
                                                          power                                                  source                                    used                                                       of                                        as main
                                                   of spring                                         tension                                           may                                                              vary                                                                                     atI        Highlyfor thistestedcamera.steelAlthoughspring theis
I        eachof a windinggovernor,ofwhichspringwillbutensurethis isevenbeingtransportationofregulated by meansfilm                                               'Thus the          regardless of strength of tension on the"spri4g.
           film will flow at even speed and prevents the creation of
           static electricity which may damage the film surface.
          Fully wound spring will have the enough power to operate
          for even frames of pictures.
          Spring motor is confined in moisture free, dust freecasing
         and it  is free from breakage in normal use.


l
I
View original page 14Page 15 · Read text
The Spring Power   +
     o

     o
      GI

   a

   R
    I
          I

unefftctive power                   Charge
                      D ischarge
           r",fr        powerl*               to wind    -\Spring power is used        Thew ind filn.safg mxinun power b            r  fil4  coc}     within these limits.
          and release the
            shutter.
View original page 15Page 17 · Read text
c) When exposure counter returned to "S" mark, it
   shows that film is almost comletely wound into
   the original cartridge. By turning another one
   or two times, end of the film will become free
   from the take-up spool.


d) Replace the crank handle to its original
   position and open the back lid  by
   depressing the back lid opening button.
   Take out the film cartiridge.
View original page 17
Page 19 · Read text
10) Depth of Field
As shown by scale, the  depth of field of  focus
increases in proportion to the smallness of   the
opening of aperture and decreases in proportion to
its largeness. This range is commonly known as the
depth of lield.

                      Consequently you will have to make sure of your object in
                     sharp focus, giving full  consideration to  this important
                         factor. For instance, in taking a picture of a person, the blur.
                       ring of the background by use of a wide opening aperture which
                        will bring out the person distinctly. On the other hand, when
                        taking a group picture where people are standing or    sitting
                       in rows a small opening becomes necessary to ensure that the
                       focus is sharp on every subject.

                     Constant Focus
                 When the lens aperture scale is reduced to F 11 and constant
                       focus mark (Red point) on the distance scale is met with the
                      center of the depth of field scale, you can easily enj oy a
                       picture-taking from 9 feet 5 inch (2. g0-) to the infinity with-
                        out focusing.
View original page 19Page 20 · Read text
--'].--.
                          www.butkus.us


                                                                   YouTo keep the Optika Auto 35 as your long lasting companion,
should always take proper care of it.
    a) After you have used the camera, dust the lens surface ligh-
                                                 exposed to wet        tly with a lens brush. When the camera is
       weather or salty air,. see that is clean before putting your
      camera away. wipe the camera with soft cloth and wipe
       the lens with lens brush.
    b) When the camera is not in use, adjust the synchronization
        lever at X and shutter speed at 7/25. Adjust the distance
       in infinitY.
    c) Have the sPring motor unwound'

    d) Store the camera in'dry and moisture free place'


                                                                                           18
View original page 20Page 23 · Read text
Grip Motor    This Pack will permit to operate for  20
                continuous exposures. This power pack is
              so designed to use as a grip.
View original page 23Page 24 · Read text
1   www.butkus.us
Aux. Lenses           You c14r- sTread your photo-  f ield  longer
     Telephoto &          and wider by using Aux. Lenses.
      Wideangle.
View original page 24From the M. Butkus archive. Original publisher and archive notices are retained.
Check the model and edition against your equipment.
PDF verified 2026-10-10.