Film cameras
OSRAM S 18 User manual
User manual for OSRAM S 18. 15 pages in French, Spanish, Dutch, Swedish. Read the original PDF, download or print a copy without registration.
15 pagesFrench, Spanish, Dutch, Swedish1.2 MB PDF
Loading your manual…Open PDF directly
Document details
- Brand
- Osram
- Model / document
- OSRAM S 18
- Document type
- User manual
- Language
- French, Spanish, Dutch, Swedish
- Pages
- 15
- File size
- 1.2 MB
- Category
- Film cameras
- Document date
- Not specified in catalog
Search available document text
Find a term, then jump to its page in the original PDF. Image-only pages may not be searchable; check the PDF for exact wording and diagrams.
Page 2 · Read text
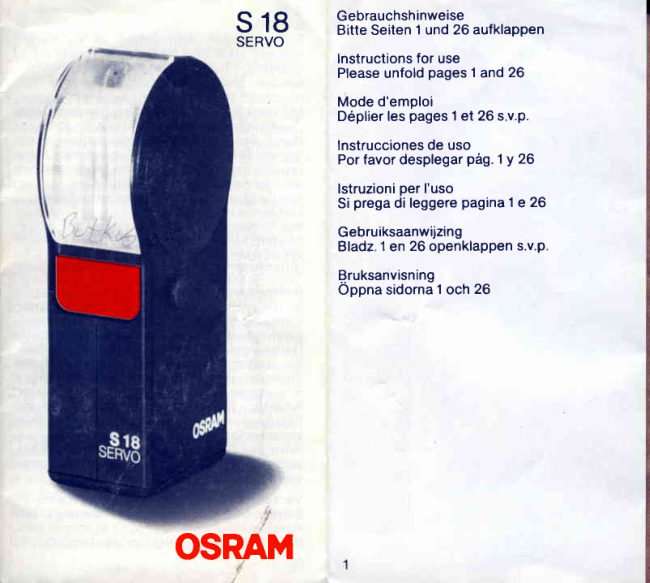
Gebrauchshinweise   s18      BitteSeiten1 und26 aufklappen      SERVO
                     Instructionsfor use
                   Pleaseunfoldpages1 and 26
                Moded'emploi
                    D6plierles pages1 et 26 s v.p.
                    Instruccionesde uso
                   Porfavordesplegarpag.1 y 26
                       lstruzioniper I'uso
                      Si pregadi leggerepagina1 e 26
                   Gebruiksaanwijzing
                   Bladz1 en 26 openklappens.v.P
                   Bruksanvisning
                Oppnasidorna1 och 26


OSRAIII
View original page 2Page 3 · Read text
s18
                          SERVO
                                          Bei geblitzten Aufnahmen ist es vorzu-o                                       ziehen, statt nur einer zwei voneinander
                                          getrennt positionierteLichtquelleneinzu-
                                          setzen. Die Bildergebnissesind in deno                                     meisten Fdllenbesser.
                                             Mit dem S 18 SERVOhaben Sie das ideale
                                              Zusatzlicht. Dieses Gerdt kann kabellos
                                        durch den Lichtimpulseines anderenElek-
                                               tronenblitzgeriitesausgelostwerden.Damit
                                      ergeben sich eine Fi.illevon Moglichkeiten
                                          der individuellenBildgestaltung.                                                                                                  -                               -                                             Mit Licht variieren  Schhtten aufhellen
                                              Lichteffektesetzen.oo                                          Bei Verwendungeiner Kamera mit einge-
                                     bautem Elektronenblitzgerdtist diese Tech-
                                               nik besondersleicht zu handhaben.
                                   S 18 SERVOeinfachaufstellenund blitzen!
                                                 Batterie einsetzen
                                   S 18 SERVO wird mit 2 Alkali-Mangan-
                                           Batterien1,5V, GroBeAA, betrieben.
                                         EntriegelungsknopfO driicken.G leichzeitig
                                        HaltebUgel@ so weit nach unten schieben,
                                               bis Batterieraum@ frei zugdnglich.Beim
                                        Einlegen der Batterien Polmarkierungen
                                                     +l-  genau beachten.
                                             Wichtig: Batterien erneuern, sobald die
                                                Blitzfolgezeitmehr als 60 sec betrdgt. Bat-
                                                terien sofort satzweiseaustauschen.
                                        Wird das Gerdt ldngere Zett nicht beniitzt,
                                              sollten die  Batterien herausgenommen
                                       werden.
                                             VerschluBzeit-Einstellungan der Kamera
                                      Siehe auch  Bedienungsanleitungder
                                     Kamera.
                                          Bei Kamerasmit Belichtungsautomatik1/30
                                          3
                                www.butkus.us
View original page 3Page 4 · Read text
s 1 8
SERVO                                         sec oder ?-Symbol. Bei Kameras ohne Be-Bei geblitzten Aufnahmen ist es vorzu-                                           lichtungsautomatikist zu empfehlen: mitziehen, statt nur einer zwei voneinander                                           ZentralverschluB 11125 sec, mit Schlitz-getrennt positionierte Lichtquelleneinzu-                                          verschluB1/30 oder 1/60 sec.setzen. Die Bildergebnisse sind in den
meisten Fdllen besser.                          Blitzgerdt einschalten
Mit dem S 18 SERVO haben Sie das ideale     Betriebsschalter@ nach links schieben,ein
Zusatzlicht. Dieses Gerdt kann kabellos     rotes Feld wird sichtbar, ein Summton
durch den Lichtimpulseines anderenElek-     hdrbar,das Gerdt ist eingeschaltet.Das Auf -
tronenblitzgerdtesausgelostwerden.Dam it      leuchten der Kontroll-Lam.pe@ zeigt die
ergeben sich eine Fiille von Moglichkeiten     Blitzbereitschaft.Ein Druck auf die Kontroll-
der individuellenBildgestaltung.            Lampe, die zugleich Handausloserist, l6st
Mit Licht variieren - Schhtten aufhellen -      unabhdngig von einem Fremdblitz einen
Lichteffekte setzen.                             Testblitzaus.
Bei Verwendungeiner Kamera mit einge-                                               Einsatzmiiglichkeiten des S 18 SERVObautem Elektronenblitzgerdtist diese Tech-                                      Es gibt kaum eine Aufnahmesituation,beinik besondersleicht zu handhaben.                                            der das G erdt nicht eingesetztwerden kann.S 18 SERVOeinfach aufstellenund blitzen!                                       Es ist nur darauf zu achten, daB der SERVO-
Batterie einsetzen                               Blitzer nicht direkt in die Kamera blitzt.
S 18 SERVO wird mit 2 Alkali-Mangan-    Der Sensor @ reagiert auf das lmpulslicht
Batterien1,5V, GrdBe AA, betrieben           eines zweiten Elektronenblitzgerdtes.Es
Entriegelungsknopfe driicken.G leichzeitig      lost den S 18 SERVObis zu einer Entfernung
HaltebUgel@so weit nach unten schieben,    von 5-6 m und einem Anblitzwinkelvon ca.
bis Batterieraum @ frei zugiinglich. Beim     45o aus. (Die Blitzreichweiteliegt je nach
Einlegen der  Batterien Polmarkierungen    Filmempfindlichkeit und Lichtstdrke des
*/-  genau beachten.                        Objektives bei ca. 6 m, Blendentabelle@
Wichtig: Batterien erneuern, sobald die     beachten.)MaBgebendfiir die Einstellwerte
Blitzfolgezeitmehr als 60 sec betrdgt. Bat-     der Kamera ist der Kamerablitz.Korrektu-
terien sofort satzweiseaustauschen.           ren, bedingt durch den Zweitblitz,sind nicht
Wird das Gerdt ldngere Zeit nicht beniitzt,     erforderlich.
sollten die  Batterien herausgenommen    Beachte: bis zu einem Objektabstandvon
werden.                                    4 m sollte der SERVO-Blitzernicht niiher als
                                            der Ausloseblitzeraufgestelltwerden.VerschluBzeit-Einstellungan der Kamera
Siehe auch  Bedienungsanleitung der     Das Geriit kann frei aufgestelltwerden oder                                                                            i   liber den HaltebUgel@ angeklemmt wer-Kamera.
Bei Kamerasmit Belichtungsautomatik1/30                                                                                             iI 3
                                                       {
View original page 4Page 5 · Read text
I   s 1 8                                                      Iden. Hierzu ist der EntriegelungsknopfO zu   SERVO
drlicken und gleichzeitig der Haltebtigel    To obtain the best results when taking flash                                               pictures it is usually preferable to use twonach unten zu schieben.Nach dem Aufset-
zen,z.B.auf Kamera,wird der HaltebUgelbis   1   bources of light at different positionsinstead
zum Anschlag zurUckgeschoben. S  18      of only one source.                                      The S 18 SERVOis the ideal supplementarySERVO ist fixiert.                                                       light.This unit can be triggered by the light
Technische Daten                           putse of another electronic flash unit, with-
Leitzahlbei 21DlN/100ASA  18                out using a cord. Thanks to this, a large
Energiequelle            2x1,SVAlkali-   number of possibilitieseXist for producing
                       Mangan,AA        pictures according to individual taste.
Blitzfolgezeit             7 sec              Lighting variations - "soft" shadows - light
Blitzzahl                1 5 0                effects.
Farbtemperatur         5600 K               All this is particularly easy to achieve if a
SERVO-Funktion                        camera with built-in electronic flash unit.is
                                          used.
                                               Just set up the S 18 SERVO and flash.
                                                  Inserting the batteries
                                       The S 18 SERVO is operated with two 1.5 V
                                          alkaline-manganesebatteries (size AA).
                                         Press unlocking button O. At the same time
                                       push bracket@down untilbattery compart-
                                  ment@ is freely accessible.Pay attention to
                                              the pole markings */-  when insertingthe
                                                  batteries.
                                               lmportant: Replace both batteries at the
                                   same time as soon as the recycling time
                                        exceeds 60 sec.
                                                                                 lf the unit is not used forsome lengthof time,
                                               the batteries should be removed.
                                                 Setting the shutter speed on the camera
                                     See also the instructions for. use of the
                                          camera. For cameras with automatic ex-
                                         posure control:1/30 sec. or the 2 symbol.
                                           For cameras without automatic exposure
                                               control the following settings are recom-
                                                                                  6
                             www.butkus.usi',|
View original page 5Page 6 · Read text
mended: with central shutter 1/125 sec.,     back up to the stop. The S 18 SERVO is now
with focal plane shutter 1/30 or 1/60 sec.         fixed in place.
Switching on the flash unit                  Technicaldata
Push operating switch @ to the left, causing    GuideNo.for21DIN/
a red panelto become visibleand a buzzing    lOOASA              1 8 -
tone to be heard - the unit is switched on.    Powersupply          2 x 1 . 5V
When pilot lamp @ lights up the unit is ready                             alkaline-
to operate. Upon depression of the pilot                        manganese,AA
lamp, which at the same time is a facilityfor     Recyctingtime          7 sec.
manual release, a  trial flash is triggered    Numberof flashes     150
independentof another flash.                Colortemperature      5600 K
                             SERVOfunction
Applicatlon of the S 18 SERVO
There is virtuallyno picture-takingsituation
in which the unit cannot be used. lt must be
insured, however, that the SERVOflash unit
does not flash directly into the camera.
The sensor@respondsto the light pulse of a
second electronic flash unit. This triggers
the S 18 SERVO from a distance of up to
5-6 m and at a flashingangle of approx.45o.
(Theflash range is approx.6 m dependingon
the film speed and number of the lens; see
aperture table @.)Decisive for the camera
settings is the camera flash. Corrections on
account of the second flash are not neces.
sary.
Note: up to a distance of 4 m from the object,
the SERVOf lash unit should not be nearerto
the object than the flash unit connected to
the camera.
The unit can be set up on its own or attached
with bracket @. To do this, unlocking button
O must be pressedand at the same time the
bracket pushed down. After attachment
(e.g. to the camera) the bracket is pushed
7                                                                    i
View original page 6Page 7 · Read text
s 1 8
SERVO
Lorsqu'onprend des photosau flash,il est    R6glage du temps  d'obturation  sur I'ap-
pr6f6rabled'utiliserdeuxsourceslumineu-    pareil-photo
ses s6par6esI'unede I'autreau lieud'une.    Voir 6galement les instructionsde service
Dans la plupart des cas le r6sultatest    de I'appareil-photo.
meilleur.                                Sur les appareils-photosdot6s d'un systdme
Le S 18 SERVOest la lumidre compl6men-    automatique de mise au point de l'6claire-
taire id6ale.Cet appareilse d6clenchesans    ment, utiliser1/30 de sec. ou le symbole f.
cdble de synchronisation par I'impulsion   Pour les appareils ne disposant pas de ce
lumineuse d'un autre flash electronique.   systdme nous recommandons:pour obtura-
Ainsi s'offre une multitude de possibilit6s    teur central11125de sec. et pour obturateur
pour concevoir une image de faqon toute     d lamelles1/30 ou 1/60 de sec.
personnelle.                                 Mettre le flash 6lectronique en marche
Composer avec de la lumidre,- 6clairer les    Pousserle bouton de mise@en marchevers
ombres, - poser des accents de lumidre.        la gauche, une plage rouge devient visible,
En utilisantun appareil-photoa flash 6lec-    un bourdonnement se fait entendre, l'ap-
tronique incorpor6,il est facile de poss6der    pareilest branch6.Lorsquela lampe-t6moin
cette technique.               @ s'allume,I'appareilest prdt d d6clencher
Poser tout simplementvotre S 18 SERVOet    un 6clair. En appuyant sur cette lampe-
flash !                                      t6moin, qui est en m6me temps un d6clen-
Mise en place des piles                     cheur manuel, ind6pendamment du flash
Le S 18 SERVO fonctionne avec 2 piles    6lectronique,on peut d6clencher un 6clair-
alcalino-mangandsede 1,5 V, grandeur AA.     test.
Appuyer sur le bouton de blocage O. En     Possibilit6s d'utilisation du S 18 SERVO
m6me temps pousser l'6trier de fixation @         ll n'existe pratiquement aucune situation
suffisamment vers le bas pour que I'em-    dans laquelle  il ne  serait pas possible
placementdes piles @ soit bien accessible.    d'utilisercet appareil.ll faut seulementfaire
Lors de la mise en place des piles bien     attention d ce que l'6clairSERVOne soit pas
respecter la polarite */-.                        dirige directementsur I'appareil-photo.
lmportant: Changerles piles,dds que l'6cart    Le Sensor @ r6agit d I'impulsionlumineuse
entre deux 6clairs est sup6rieur d 60 sec.    d'un deuxidme flash 6lectronique.Celui-ci
Changerimm6diatementtoutle jeu de piles.    peut d6clencher le S 18 SERVOjusqu'd une
Au cas ou I'appareil resterait longtemps    distance de 5-6 m. et un angle de projection
sans 6tre utilis6,enlever les piles.           de l'6clairde 45oenviron.(La port6e du flash
                                              est d'environ 6 m. suivant la sensibilit6du
                                                   film employ6 et la puissancelumineusede
I                                                                 10                            www.butkus.us
View original page 7Page 8 · Read text
s 1 8
                           SERVO
 I'objectif, consulter le tableau des  dia-      Nelle fotografie a lampo d da preferire
phragmes @.) Le flash reli6 a I'appareil-     invece di una sola, I'impiegodi due fonti di
photo est celui qui d6termine les val'eursd      luce posizionatee distaccate.Nella maggior
 re.porter sur I'appareil-photo. ll n'est pas      parte dei casisi ottengonomiglioririsultati.
 ndcessairede proceder d des correctionsa     Con  il S 18 SERVO avete la luce ausiliaria
cause du deuxidme flash.                       ideale. Questo apparecchio puo essere
Attention: jusqu'a une distance de 4 m. de      azionatosenzacavo con I'inrpulsodi un altro
 I'objectde prise de vues, le flash SERVOne      lampeggiatore elettronico. Con cio si ha
 doit pas etre mis plus pres que le flash     maggior possibilitddi azione.          ,6lectroniquequi donne I'impulsion.           Variare con la luce - schiarire le ombre -
L'appareil peut 6tre pos6 sur toute surface      mettere effetti di luce.
plane ou au moyen de l'6trier de fixation @     Con I'impiego di una macchina fotografica
6tre serr6. Pour effectuer cette operation     con lampeggiatoreelettronico incorporato                                          questa tecnica d facile da maneggiare.appuyer sur le bouton de blocageO tout en
poussanten m6me temps l'6trierversle bas.     Mettere semplicemente il S 18-SERVO in                                            posizionee lampeggiare!Apres I'avoir pos6 (par exemple sur un
appa.reil-photg) repousser l' 6trier j usqu'd ce      Introduzione delle batterie
qu'il bute. Le S 18 SERVOest fix6.                            ll lampeggiatoreS 18 SERVOfunziona con 2
                                                     pile da 1,5 V alcali-manganese,dimensionDonn6es techniques
Nombre-guidepour                         AA.
21 DIN/1OOASA          1 8               Premere il bottone d'arresto O e nel con-
Source d'alimentation   2 x 1 , 5V           tempo spingere verso il basso la staffa di
6nerg6tique             alcalino-          sostegno@ sino acchd il vano delle batterie
                       AA   @ d libero. Fare bene attenzioneall'indica
Recyctased'6ctairs     73:3"""te'         zione di polarita*/-.
Nombred'6clairs      150                lmportante: Cambiare le batteriequando il
Temp6raturede couleur  5600K            tempo di ricaricad superiorea G0 s. - Cam-
DispositifSERVO                             biare immediatamentele batteriescariche.
                                             Toglierele batterie se il lampeggiatorenon
                                            viene usato per lungo tempo.
                                            Regolazione  del tempo  di  esposizione
                                                nell'apparecchio fotograf ico
                                       Vedere anche le istruzioniper I'uso dell'ap-
                                          parecch io fotografico.
                                          Per apparecchi con esposizione automa-
11                                                                               1 2
View original page 8Page 9 · Read text
tica: 1/30 s oppure posizione l.  Per ap-       Attenzione: fino ad una distanza dal sog-
 parecchi senza esposizione automatica si       getto di 4 metri, non  si deve mettere  il
 consiglia: con otturatore centrale 1/125 s,      SERVO-flashpiir vicino del lampeggiatore
 con otturatorea tendina1/30oppure1/60s.        principale.
Funzionamento del lampeggiatore              L'apparecchio puo stare da solo oppgrg
Spingere  I'interruttore @ verso  sinistra;       fissato con la staffa di sostegno @. A cio d
compare una zona rossa, si ode un ronzio,      necessario premere il bottone d'arresto O e
 I'apparecchio6 inserito.Quando siaccende       nel contempo spingere verso. il basso la
                                                     staffa di sostegno. Dopo la messa in sede, la lampada di controllo @, I'apparecchiod 1 pronto e funziona. Una pressione sulla      per esempio sulla macchina fotografica,la
lampada di prova, che funziona centempo-       staffa di sostegno deve essere spinta in-                                                        )                                                  dietro sino al collegamento.ll lampeggia-raneamenteda interruttorea mano, provoca
un lampodiprova indipendentementeda un        tore S 18 SERVO d ora fissato.
 altro lampo.                                      Datitecnici   (3r1 .6,u5
 Possibilitd  d'impiego  del lampeggiatore      Numero guida per 21DIN/
s 18 SERVO                         1OOASA               1 8
Non esistono situazioniin cui il lampeggia-     Sorgente di energia      2 pileda 1,5V
tore non possa venire impiegato per foto-                                 alcali-
grafare. Bisogna soltanto fare attenzione                          manganese,AA
che il SERVO-lampeggiatoresia puntato sul     Tempo di carica          7 secondi
soggetto da fotografare e di non lampeg-     Numero di lampi        150
giare direttamente nella macchina foto-      Temperaturadi colore    5600 K
 grafica.                                    Funzione SERVO                1
 ll sensore@ reagiscesull'impulsodella luce
 di un secondo lampeggiatoreelettronico.   )Esso fa scattare il lampeggiatoreS 1SSERVO
fino ad una distanzada 5 a 6 m ed un angolo
di.lampeggiodi 45o. (La profonditd di lam-
peggio d di circa 6 m, secondo la sensibilita
della pellicolae la luminositddell'obiettivo;
osservare la  tabella dei diaframmu @.)
Determinante per la messa a fuoco della
macchina fotografica d   il lampeggiatore
incorporato. Non sono necessarie corre-
zioni per il secondo lampeggiatore.
13                                                                   14                               www.butkus.us
View original page 9Page 10 · Read text
s18                                                      t
  SERVO                                                                      I
   Al hacer fotografias con flash es preferible     ,   En cdmaras con exposimetro autom6tico
  usar en vez de una fuente de  luz, dos       poner 1/30 seg. o simbolo 2.En cdmarassin
  separadas una de la otra, ya que asi se       exposimetro automdtico se recomienda
  consigue un mejor resultado.                            i,   con obturador centrall1125seg.,con obtu-
  Con el S 18 SERVO Ud. tiene la luz ideal       rador de cortinilla1/30 o 1/60 seg.
  suplementaria.Este aparato funciona sin       Conectar el flash
  cable mediante el impulso de luz.de otro        i   Empujarel interruptorde servicio@ hacia la
  flash electr6nico.                     &    izquierda: campo rojo visible, se oye un
  Con esto se consigue una enorme variedad      suave zumbido, ef aparato estd conectado
  en la forma individualde la fotografia.          La ldmpara de cont?ol@encendida ensefra
  Variedad con la luz, - esclarecer sombras, -  -     que se puede disparar. Haciendo presion  poner efectos de luz.                                                        i                                             sobre la ldmpara de control, que tiene al
  Al usar una cdmara con flash electr6nico      mismo tiempo la funci6n de un disparado
  esta t6cnica es de fdcil manejo.                de mano, se efect0a, independientement
  iS 18 SERVOmontarlo simplementey hacer       de un flash ajeno, un flash de prueba.  flash !
                                                  Posibilidades de empleo delS 18 SERVO  Colocar las pilas                                            Para cualquier momento donde se quiera
  S 18 SERVOfunciona con 2 pitas de dlcali-       hacer una fotografia, este aparato le servird
  manganesode 1,5V, tamafio AA.                 a su plena satisfaccion.Solo hay que tomar
  Apretar el boton descerrajadorO. Al mismo       en cuenta, que eISERVO-flashest6 dirigido
  tiempo empujar la abrazaderade sujecion@       hacia el objeto que se fotogratia y no  hacia                 que       abajo hasta                      se quede                                   abierta                                                  la                                                             a la cAmara.                                               directamente                                      t       portapilas  caja             @. Af                    meter                                 poner                               las pifas                                                     El                                                                    a la luz de impulsode                                               sensor@ reacciona
  atenci6n a los polos marcados */-.              un segundo flash electr6nico,disparandoel
  lmportante: Renovar las pilas si la secuen-        i   S 18 SERVOhasta una distanciade 5-6 m y
  cia de destelloses mayor a 60 seg. Cambiar   $   con un dngulode iluminacionde aprox.45o
  inmediatamente todo el juego d-e las pilas       (Elalcancedelflashes de aprox.6 m, seg0n  desgastadas.                                                                                                                       '         la sensibilidadde la peliculay la intensidad
 En caso de que el aparato no se use durante        luminicadelobjectivo,atenciona latabladel
  un prolongadotiempo,se recomiendasacar       diafragma @.)Decisivo para los valores de  las pilas.                                            enfoque de la cdmara es el flash de la
  Ajustar  el tiempo  del  obturador  en  la       c6mara.Correcciones,a raz6n delsegundo
 camara                                             flash, no son necesarias.
 V6asetambi6n la instrucci6n para elservicio        Atencion: hasta una distancia de 4 m, el
 de la cdmara.                              SERVO-flash no deberia estar mas cerca
,'45                                                                         16
View original page 10Page 12 · Read text
zonder ingebouwdebelichtingsmeterwordt         gelijktijdigde beugelhoudernaar beneden
voor toestellen met centrale sluiter 11125      schuiven. N4 het aanbrengen,b.v. op een
sec., en voor toestellenmet sluiteropening,     camera, woidt de beugelhouder tot de
1/30 of 1/60 sec. aanbevolen.                  aanslag teruggeschoven. De S 18 SERVO is
                                             gereed.Flitsapparaat inschakelen
Schakelaar@ naar links schuiven tot rood       Technische gegevens
veld zichtbaaren zoemtoon hoorbaarwordt.       Richtgetal bij 21 DIN/
Nu is het apparaatingeschakeld.Het oplich-    1OOASA                  1 8
ten van het controlelampje @ betekent:       Batterijen                2x1,5VAlkali-
flitsklaar.Een druk op het controlelampje,                           Mangaan,AA
wat tevens handontlader is, maakt flitstest,      Flitsopvolging           7 sec.
onafhankelijkvan de camera, mogelijk.          Aantalflitsen           150
                                         Kleurtemperatuur        5600 KMogeliikheden van de S 18 SERYO                                      SERVO-functieEr doen zich praktisch geen situatiesvoor,
waarbij de S 18 SERVO niet gebruikt kan
worden. Men heeft slechts op te letten, dat
het flitsa'pparaatniet in de camera flitst.
De sensor@ reageertop het impulslichtvan
een tweede electronischflitsapparaat.Het
maakt de S 18 SERVO mogelijk op een
afstand van 5-6 m  te werken met een
stralingshoek.van45o. (De flitsreikwijdteis
naar gelang de filmgevoeligheiden licht-
sterkte van het objektief bij ca. 6 m, dia-
f ragmatabel@in acht te nemen.)Beslissend
voor de instelwaardevan de camera is de
flitser. Korrigeren, afhankelijk van  de
tweede flitser,is niet noodzakelijk.
N.B.: Tot een afstand van 4 m mag de
SERVO-flitser niet dichter  bij het objekt
opgesteld worden dan de ontstekende
f litser.
Het apparaat kan los opgesteld of op de
beugelhouder@ geklemd worden. Hiervoor
de ontgrendelingsknopO indrukken, en
19                                                                     20
View original page 12Page 13 · Read text
s 1 8
SERVO                                              1 1125sfdr centralslutare och 1/30 eller 1/60 sVid blixtupptagningariir det ofta biittre att                                                         fdr ridilslutare.anvdnda tv6 separat placerade blixtar dn
 bara en. Resultatet blir   i de flesta fall      Koppla pi blixtaggregatet
 viisentligt bdttre.                               Skjut tillkopplingsknappen@ till vdnster.Ett
Med S 18 SERVO har Ni det idealiska till-        rdtt ftilt syns nu och en summerton hOrs
satsljuset.Denna blixt kan, utan hjdlp av       Aggregatet dr nu inkopplat. Ndr kontroll-
kabelanslutning,tiindas genom blixtimpul-      lampan @ lyser iir aggregatet blixtberett.Ett
sen frAn det andra elektronblixtaggregatet.       tryck pd kontrollampan, vilken dven  iir
Diirmed har Ni stora mojligheter att pA biista       manuell utldsare, utloser oberoende av
sdtt anpassaljuset till Era bilder.              ndgon annan blixt en testblixt.
Anvdnd ljuset for att skapa variation, - ldtta
upp skuggor - skapa ljuseffekter.                Anvdndningsmiijligheter  fiir S 18 SERVO                                            Det finns knappast n6got fotograferingstill-Fdr kameror med inbyggt elektronblixt-                                                          fdlle dd inte aggregatet kan anvdndas. Managgregat dr denna teknik speciellt liitt att                                                      skall bara se till att SERVO-blixtendr riktatanvdnda.
                                               mot,objektet och inte direkt in i kameran.Stdll helt enkelt S 18 SERVOpA ldmplig plats                                          Sensorn @ reagerar pd impulsljusetfrAn enoch blixtra!                                        annan elektronblixt.Det utlciserS 18 SERVO
lsdttning av batteJier                        upp till ett avstAnd p6 5-6 m och inom en
S 18 SERVOskall drivas av 2 Alkali-Mangan-      vinkel pA 45o. (Blixtens rdckvidd liggerbatterier 1,5 V, storlek AA.          'i  beroende pA filmkdnslighet och objektivets
Tryck pA spdrrknappenO samtidigt som Ni        ljusstyrkapd ca 6 m. V. g. se bldndartabellen
skjuter hdllarbygeln@ sA l6ngt ner att bat-   f.  @.)
teriutrymmet@ blir tillgdngligt.Vid isdttning      Mdttgivande fdr kamerans instdllning dr
av batterier v.g. beakta polmarkeringarna      kamerablixten. Korrektion fdr den andra
+t-.                                               blixten dr inte nodvdndig.
Viktigt:Satt i nya batterierniir uppladd-     Obs.: Ar objektavstdndei mindre dn 4 m, bor
ningstidenmellan blixtarnablir mer iin 60 s.      SERVO-b|ixteninte st6 ndrmare objektet dn
Byt alltid batterierna parvis. Om aggregatet      den utlosandeblixten.
inte anvdnds under en ltingre tid, tag ur       Aggregatet kan stdllas fritt eller kldmmas
batterierna.                                         fast med hdllarbygeln @. Hdrvid skall man
                                          dd trycka pd spiirrknappen O och samtidigtStdll in slutartiden p6 kameran                                                   fora hdllarbygeln neddt. Efter montaget,Se dven kameransbruksanvisning.                                                                               t. ex. pA kameran, skallhdllarbygeln skjutasFor kameror med exponeringsautomatik,                                                      tillbaka till stoppldget. S 18 SERVO iir dA1/30 s eller f-symbolen. FOr kameror utan                                                                                           f ixerad.exponeringsautomatik: rekommenderas
21                                                                 22                              www.butkus.ust
View original page 13Page 14 · Read text
Tekniska data
Ledtal vid 21DlN/100 ASA   1 8
Batterier                2 x 1 , 5 Y
                      Alkali-Mangan
                          storlekAA.
Uppladdningstid         7 s
Antal blixtar per batterisats 1 5 0 s t
Ftirgtemperatur         5600 K
SERVO-funktion


                                              h


2 3                                  24
View original page 14From the M. Butkus archive. Original publisher and archive notices are retained.
Check the model and edition against your equipment.
PDF verified 2026-10-10.