Light meters
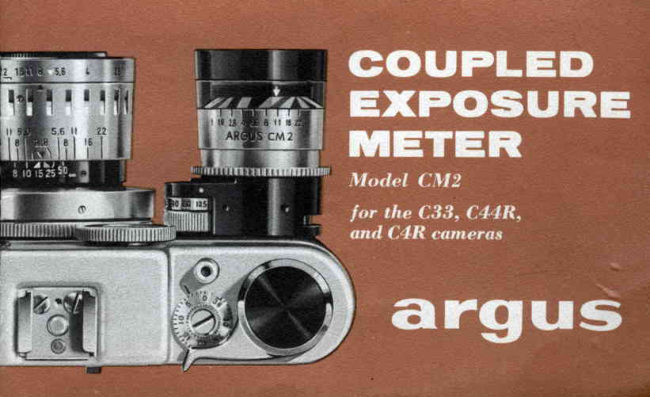
Argus Coupled Exposure Meter User manual
User manual for Argus Coupled Exposure Meter. 13 pages in English. Read the original PDF, download or print a copy without registration.
13 pagesEnglish1.3 MB PDF
Loading your manual…Open PDF directly
Document details
- Brand
- Argus
- Model / document
- Argus Coupled Exposure Meter
- Document type
- User manual
- Language
- English
- Pages
- 13
- File size
- 1.3 MB
- Category
- Light meters
- Document date
- Not specified in catalog
Search available document text
Find a term, then jump to its page in the original PDF. Image-only pages may not be searchable; check the PDF for exact wording and diagrams.
Page 3 · Read text
FUNCTIONAL    PARTS

    SHUTTERSPEEDSCATEAI{D11{DEX
            IENSOPENIIIGSCATE
              LIGHTCHAT{NEtS
             METERPOIIITER
          UGHTCEt[WlilDoW


                              EXPOSUREI}IDEXWINDOW
                               SHUTTERDIATCOUPTER
                                        irouilTrNGtocK
                                    }IOUNTINGLOCKLEYER
                          www.orphancameras.com
View original page 3Page 4 · Read text
I N T R O D U G T I O    N
 Your Argus Coupled Exposure Meter  takes  all the
 mystery  out  of  fine- pictures.  You  merely  set  the
 exposure-_indexand shutter speed you wanf, and the
meter  tells you what  lens opening  io use.                                    G O N T E N T S
For  perfect  pictures,  every  time,  just  follow  these             Par tsof the M eter .       .......1
srmple Eteps:                                                                             lntr oductionand Contents........2
      l. Sel the exporureindexof yourfilm on the meter(seepoge4).         MSettingo u n tthei nt ghFilm'se M e t e r . . . . . . . . . . . . . . 3
    2. Seletlfie rhutterspeedocrordinglo the pidure subierl(see           E x p o s u Ir ne d e x..             . . . . . . . . 4
     poge 5).                                                      S h u t t eSr p e e d s .          . . . . . . . . . 5
                                                          Howto Aim the M eter .. . . . ......6
    3. Aim the meter ct the subierl-set the (omero lens lo the opening             Pointerson Usingthe Meter.. ....7
      the meler pointer indiroles (see pcge 8).                                Readingthe Meterand
                                                                                 Settingthe Lens...            . . .. .. .8
The  opposit-e  pa_ge shows  the  important    parts   of  the              Usingthe Meter
meter  and  their  location.  You  wifl  want  to  familiarize                    in DifferentWays...            . ..9, l0
ygurqelf^  with   the  meter,   and   try-or a  practice    roll   of                                    Back
film   before  you  leave  on  a  trip        tike   pictures    of             Z e r oA d j u s t m e n t .. .. .. . . . . . . C 0 v e r
an important    event
Because   Afg.r"   products    are  constantly    being   im-
proved,   minor   changes   in  the  appearance    of- vour
meter  may  not  be intluded    in  thG-instruction     b-ook.
View original page 4Page 5 · Read text
MOUNTING   THE  METER  ON YOUR  CAMERA
                                  When  meter  is eeated on shutter  dial
                                        and  mounting   shoe,  lock  meter-- bY
                                             Dreesing  levei  down  firmly   (eee iUus-
                                                            irationl.   Meter    is  now  couPled  to
                                           camera's shutter.  Whenever you move
                                              meter'g  ehutter  epeed scale, camera'e
                                                  shutter  will change.


                         www.orphancameras.com
View original page 5Page 7 · Read text
GHANGING              C H O ( } S I N G     T H E  F I I G H T
SHUTTEFl SPEED        S H U T ] T E R    S P H E i l }

Turn   the  large  knurled   ring  on
the meter  to change the camera's          F 0 R A V E R A G E P I C T U R E S ,w h e r e   t h e r e    i s n o
shutter  speed.  The   illustration             appreciable  action  or movement   of the subject,
shows  L25  (L lI25  second )  set.          use 60 (L /60 second).
The red numbers  (1, 2, 4, 8) are
speeds on the C33 camera only.         FOR ACTI0N PICTURES,in which  the  subject  is
                                           moving,  use L25, or even 300. The  faster  the
                                                    shuttei  speed, the  less motion   will  be evident
                                                          in the  picture.

                                                       lF LIGHT lS DlM, and a faster speed isn't possible,
                                          use 30, 15, or even lower. Always  use a tripod
                                                    or  other  support   with  speeds slower  than  30
                                             so  that  camera   will   not  be  moved   during
                            t f l u                                exposure.
            A


                             www.orphancameras.comthe  film  you  are using.
View original page 7Page 8 · Read text
HOW  TC) AlM THE METER

 Your  camera  and  meter  are now  used as a
 single  unit.  Hold  the camera  at  chest  level  and
 aim  the meter  at  your  subject.  The
 light  sensitive   cell  will  measure  the  amount
 of light  and  will   tell  you  which  lens opening   to
use for  correct  exposure.  Point  the  meter
slightly  downward  when  taking  outdoor
"readings"   to avoid  "reading"   too much  sky.
Remember   that  the  meter  takes  in  or  "reads"
approximately    the same area  that   will  be
in your  picture.   Therefore,   aim  the  meter
so that    it  will  cover  the same  area as
the camera  lens.
Regular  meter  readings  from  where  you  are
going  to  take  the  picture    will  be  accurate   as
long as the area read  is of an average  tone,
or consists  almost  equally   of dark  and
light  areas.
For more  information   on aiming  the  meter,
see pages 7, 9, and  10.
View original page 8
Page 9 · Read text
POINTERS     ON  USING    THE   METER

An exposure meter  cannot  tell  which       the subject and the background.  This
part  of a picture  you wish  to expose     would  tend  to  overexpose  the  light
for.  For  instance,  you may  want  to       subjedt.  Therefore,   take  a  close-up
photograph  a  light  subject  against  a      reading   of  the   subject.  The  same
dark background. A general meter read-      technique  would  be used  for  a dark
ing from the camera position  will  give       subject  against a light  backgound   to
an exposure recornrnendation  for both       avoid underexposing the  subject.

                  !\
          = y l                                   Never  take a meter  reading  with
                                                                          the sun  striking   the
                                                                                   light   cell window,  8s this
                                                                                                  will  give you an
                                                                         inaccurate  exposure
                                                                  recommendation.

           4/4              www.orphancameras.com
View original page 9Page 10 · Read text
READING  THE METER AND  SETTING  LENS

When the camera and meter are airt'ed
at  the  subject,  the  pointer   will  come
to rest  at   i  black  or white  channel  or
on part of a channel. Follaw the channel
to tlw lcns opening  to use.
The oointer mav-edgepoint  to the center of
a chinnel,  the         of a channel,  or
between channels.  Follow  the  pointer
position,  wherever    it may  be,  to  the
View original page 10
Page 11 · Read text
AVERAGE  OUTDOOR  SCENES

Aim  the  meter  directly   at  the  subject  and
slightly  downward   to minimize   the  effpct  of
the  bright   sky.    If  possible,  read  average
tones  or  take  readings  from  both   light  and
dark  areas and average  the  pointer  position.
Shade  the  light   cell window  from  the  sun
if it is to the side of the picture-taking   position.


SUBSTITUTION  METHOD
 I f   it  isn't  possible  to  approach  subject   to
get an accurate  reading   (this  often  happens
when using a telephoto  lens), use this method.
Take  reading  from  the  back  of  your  hand
held  about  4 inches away  from  the  meter
and at the same angle  to the sun as subject.
Be  careful  not   to  read  your  own  or  the
                         www.orphancameras.comcamera's shadow.
View original page 11Page 12 · Read text
CLOSE-I',P  READINGS

Use  the  meter  at  close range   if  the  subject
 is average  but  the  surroundings   are  lighter
or darker than average;  for example, a person
on a beach  or a person  standing  beside dark
foliage. When  taking  close readings,  be care-
ful  not  to  read  your  own  or  the  camera's
shadow.


DIM LIGHT  PIGTURES

When  taking  pictures  in dim  light,  you may
find  that  the pointer  does not move  into  the
range  of usable lens openings  with  the shutter
speed you have  set. In  this case, use a slower
shutter  speed. Always  use a tripod  or other
support  when  using speeds slower  than  30.
View original page 12
Page 13 · Read text
O'f       '
                J/ffettmefiunrnntee                  JU
                                          Your  Argus Coupled Exposure  Meter  was
                                              manulactured,   inspected, and  tested by  skilled
                                                craftsmen.    It   is automatically   guaranteed  when
                                            purchased   to  be  lree   of  delects   in  workmanship
                                                    or  material  during   its lifetime.    If  any  servicing
                                                               is necessary because ol  imperlections   in
                                                material  or  workmanship,  your  exposure meter
ZERO  ADA.|USTMENT                        will be lactory  serviced  without  charge,
                                          Argus equipment  which has been damaged,
You  can  check  your  meter             mishandled,   or  worn  lrom   extensive  use  will  be
occaeionally   by  completely              lactory  serviced  at established rates. Equipment
covering the light  cell window            purchased as used or rebuilt  is not covered
so that  no  light   strikes  the            by  this guorantee.
cell.   If  the  pointer  does not             For  inlormation,   servicing,  or replacement  parts, see
rest on the "O"  line, turn  the             your  local Argus  dealer  or  write  to:
zero adjustment  screw until   it           CUSTOfiIERSERVICEDEPARTNTENT
does. This  screw  is on  the         ARGUS CATIERAS,INC., ANN ARBOR, TITICHIGAN
                                                Subsidiary   ol  Sylvania  Electric  Products  Inc.lower  left-hand   side  of  the
meter when you are looking  at               In  Canada,  write  to:                                ARGUSCAmERASOF CANADA, tTD., TOnONTO, ONTARTO
the meter from  top.                  When  writing,  be sure to mention you have the Argus
See illustratinn.                www.orphancameras.comCoupled  Exposure  Meter,  Model  CM2.
View original page 13From the M. Butkus archive. Original publisher and archive notices are retained.
Check the model and edition against your equipment.
PDF verified 2026-10-10.