Film cameras
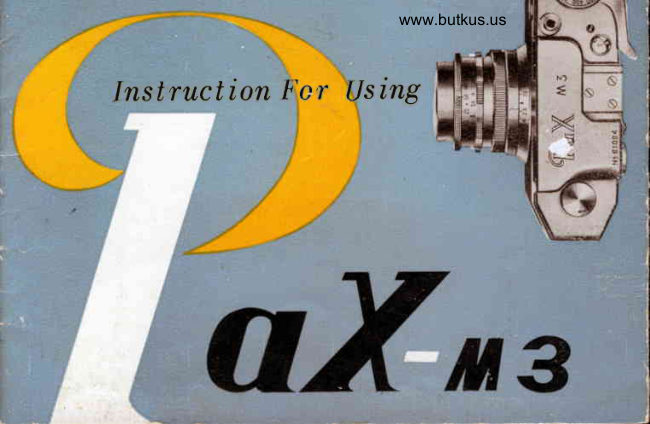
PAX - M3 User manual
User manual for PAX - M3. 28 pages in English. Read the original PDF, download or print a copy without registration.
28 pagesEnglish2.1 MB PDF
Loading your manual…Open PDF directly
Document details
- Brand
- Pax
- Model / document
- PAX - M3
- Document type
- User manual
- Language
- English
- Pages
- 28
- File size
- 2.1 MB
- Category
- Film cameras
- Document date
- Not specified in catalog
Search available document text
Find a term, then jump to its page in the original PDF. Image-only pages may not be searchable; check the PDF for exact wording and diagrams.
Page 3 · Read text
www.butkus.us


Mike Butkus  DigitallyDN:org,Date:cn=Mikeemail=mike@butkus.org,2025.12.21signedButkus,by21:44:41Mikeo, ou=Butkus.Butkus-05'00'c=US
View original page 3
Page 6 · Read text
o     lt  is eosy to  cerry, simple to ope-
rote ond  beoutiful  to see. The  :'esuits
ycu con obtoin with   it ore surprisirrg
ond with proper core  it  will bring you
hoppines ond joy  for mony yeors. All
ccntrols ore simple to operote, yet  th,.
comero hos such  versotility os  will
meet  the  requirements of  exocting
photcg rophers.
o  The  most  importont  port   of  o
comero  is  its  lens. The Pox-M3  lens
is the  cooted  " Lum inor"     f :  2.8  F:
45 mm  which hos excellent depth  of
focus, unequolled  brilliont  definition,
ond  is highly color corrected. When
using color  f ilm you will be convinced
of  its exceptionol qr.rolity.


                                      2
View original page 6Page 7 · Read text
www.butkus.us


     o   The Pox-M3  is equipped with  o coupled combined view-ond  ronge-fincjer,
'    moking   it  eosy ond speedy to  focus ond  compose the  subiect.  With  every

     picture you con  h,e certoin  of exoct focusing.

     o   lngeniousiy designed with  single thumb-stroke film  winding ond  shutter

    cocking  iever wlrrch helps  in  fost sequence shooting ond  prevents the donger

     of double exposure.
.
     o   The exposure counter with on eosily reodoble scole under o built-in mognifier

     outomot'icolly records every exposuref ond reverts to  its zero position when the
IItut    bock of comero  is opened for film  relooding.


                                                           - 3 -
                  :,.;*:,
View original page 7Page 8 · Read text
.    Your Pox-M3 is provided with built.-in

F-X  synchrcnizotion for  use with  both
floshbulb ond electronic flosh.
o   The  h igh quo lity  of  the Pox-fr13 rs
guoronteed ogoinst  defects  in  motericl
or workmonship  for one yeor from dote
o{ purchose.
 o,   Before looding the comero with  film,
reod the following instructions corefullv.


                                                                   - 4 -
View original page 8Page 9 · Read text
www.butkus.us


HOW TO USE PAX-M3
l. Loodingthe Comero
( D o n o t    l c , o d f i l m    i n  d i r e c t s u n l i g h t )
           I        I o cpen the comero, turn  the  lock lever (Q) cn the bcttom  cf  tlre
                                          ' t L t t   ( l o c k )  t o   t t O t t  ( o p e n )  i n   t h e  d i r e c t i o n o f  o r r o w , o n d  s l i d ec o m e r o  f r o m
the bock  of comero slowly towords the bottom  for obout one  inch.  Then
slide cornerc bcck  of f  of body.

                                        5
View original page 9Page 10 · Read text
2   Pox-M3 tokes stondord 35 mm  film.   Ploce the looded film  cortridge
in the   f ilm chomber.   Pull out  the   f ilm leoder obout 4  inches  f rom cortridge
towords the   f ilm toke-up spool (U) ot opposite side. Insert the leoder into  slit
in film toke-up spool.
     3   Turn the film winding lever (F) slightly until both sides of the sprocket
wheel securely engoge the  performotions in  the  film  morgin. Then, complete
o  full turn  of the winding lever, wotching  to see thot the film  is being wound
prop::rly.  Relecser the shutter.

                                    _ - 6 -
View original page 10Page 11 · Read text
www.butkus.us


     4   SliCe the bock of comero into its former ploce with o slight downwo rd
                                                                                                                                  -l
pressLrreof  tlre right thumb. The comero bock  is now securely in ploce.  he

outomotic exposure counter sets itself to 5  (stort).  Next,  turn  the  lock lever

                                            t t       'on  the bottom   f rom   O'   to   " L" .

                                                             - 7     -
View original page 11Page 12 · Read text
www.butkus.us


     5   Turn  tlre winding lever until  it stops. Releose the shutter.

Repeot thege operotions once more. Now, the exposure counter indicotes      i

ond yo'r ore recdy to snop your  first picture.


                                                                       - 8 -
View original page 12Page 13 · Read text
www.butkus.us


     6   As o film reminder, set the fitrn type indicoting diol (C) with  fb;  dot

occordirrg to the type of film you ore using.  lf you ore using o film ot other thon

its roted speeci(soy Tri-X. ot 400 insteod of 20O ASA), set the diol os o reminder.


                                                             - 9 -
View original page 13Page 14 · Read text
I l. Toking pictures


     I    Determinotion  of shutter speed ond lens opening:
     Correct shutter speed ond lens opening ore criticol foctcrs. Cornpute them
correctly.  After  delermining these foctors, move the shutter speed diol (M)  to
proper selting ond set lens of correct lens opening (N).  Your Pox-M3 permits
these operotions to  be  possible of   oll  times, either before  or  ofter  cocking
the  shr.rtter. The  red dot (O) indicotes when the shutter  is cocked.

                                                            - 1 0 -
View original page 14Page 15 · Read text
www.butkus.us


             2   Focusing  with  view-ond  ronge-
\                   finder:

               Ploce your right eye ot the view-or:dI        ronge-finder eyepiece (R), ond oim ot the
           subject. In the center of the  field of the
            finder, you will see o rectongulor oreo in
         which  there  is  o  double imoge  of  the
           subject.  By moving  the  focusing lever
           (A)  with  index   f inger  of  the   left hondt         the two imoges con  be mode  to merge
            into one.
             The  lens  is now  in perfect focus.


                                          11
View original page 15Page 16 · Read text
3   Holding  the ccmelo ond  releosing the  shutter:
      o)  The  Pox-M3  should be held  firmly,  but  not  rigidly  in  both honds.
Core shoulC be token  to prevent movement of  the comero while pressing the
releose button.   Press elbow to body  for odded support.
      b)  Push the shutter releose button using steody even pressure with  ycur
index finger, when ycu copture desired composition ond  figure of  the subject.
Do NoT "SNAP" YOURSHorS; SQUEEZETHE BUTTONSLowLy.

                                                            - 7 2 -
View original page 16Page 19 · Read text
www.butkus.us


                                                          | | l. Removing the Exposed Film


      After  entire  rotl  of  film  hos been exposed, the  film  winding knob  will
not  turrn furthcr.  Do not force  it beyond this  point.  Now the  film  must be
rewound into criginol cortridge from the toke-up spool.
     Press the rewinding button (E) ond pull out the rewinding knob (L). Turn the
rewinding knob  clockwise until    f ilm  hos been completely rewound  into  the
cortricJge. Then open the comero bock ond toke out the cortridge  for develop-
ment.   (Note:  Film exposure counter  will  outomoticolly  return to Zero when
you open bock ct comero.)

                                  1 5 _
View original page 19Page 20 · Read text
SMALLACCESSORIES

 I .   Filters.

   Your  Pox-M3  lens  will  give You
pictures of excellent shorpness: But ihe
mood of picture con often be improved
by using  filters. The  ultro-violet filter
obsorbs u ltro-violet  roys  ond  mo kes
your pictures cleor  in  both color ond
block-ond-white pictures. lt  is especiol-
 fy  useful  on  hozy  doys  ond  when
photogrophing distont scenes. lt  is olso
protects your comero  lens.

                                     1 6 _
View original page 20Page 21 · Read text
www.butkus.us


      Yellow  filters help  to  bring  out

  the clouds ond ore o "rnust"  for snow

  scenes ond scenes of  the  seo shore.

     Green filters lighten red color ond

   will  bring  out greens in londscopes.

     They  o re  o lso recommended   f or

  out-door portro its.


I {
View original page 21Page 22 · Read text
l l .  Lens Hood

    The lens hood is o voluoble lens occessoryond self-timer ottochment should
be used whenever possible. The Pox-M3  is designed to use o selftimer on tlre
top of shutter releose button.
    The shutter releose coble is olso screwed onto the some port, ond  it prevents
stroy light form entering the lens ond gives pictures thot  crisp look.


                                              1 8
View original page 22Page 23 · Read text
www.butkus.us
Flosh Photogrophy


   Y o u r P o x - M 3   i s e q u i p p e d w i t h b u i l t - i n
F-X synchronizotion to meet olmost etety
pu rpose.
    Flosh  photogrophy  is  of ten  the
                                            "niy
woy in which noturol, unposed pictures ccn
be mode. For indcor sports, such os bosl<et
b o l l , b o x i n g , w r e s t l i n g , e t c . , s y n c h r o . f l o s h
photogrophy is  ideol.
         I t    i s o l s o s u i t e d  f o r p h o t c g r o p h i n g t h e
b o b y ,  c h i l d r e n , o n d  p e t s  c o t c h i n g   t h e i r
u n p r e d i c t o b l e o c t i v i t i e s , p r o t e c t i n g   t h e m
o g o i n s t  t h e u n c o m f o r t o b l : h e o t o n d g l o r e
of  photof loods.

    1 9
View original page 23Page 24 · Read text
FloshSynchrowith Flosh Bulb
Colculoting exposure for  f losh
   Determing correct exposure for flosh  is
very simple. With  o given flosh bulb ond
o g iven   f ilm speed, the distonce in  feet
 (f rom subject to   f losh) multiplied by the
stop number equols o constont foctor. This
 f octor system hos been worked out by the
monufocturers of flosh bulbs, who in their
exposure guides provide o  foctor number
 (usuolly referred to os Guide Number)  of
o ll bu lbs.
    As on exomple of how  it works, let us
ossume thot you hove decided to use o
 ffosh-bulb with o Guide Number of 80, ot
 I 0  feet. Divide   I 0  (the distonce in  feet)
 into 80 (the Guide Number) ond you get 8
 (or  f i U,  the correct lens opening to use.

                                                            - 2 0 -
View original page 24Page 25 · Read text
www.butkus.us
S e l e c t i n g F l c s h b u l b s
      for you Pox-M3
    T h c r c   o r c     t h r e c  g e n c r o l   c l o s s c s  o f
 f l o s h b u l b s , F  ( F o s t ) M   ( M c d i u n r ) o n d   t - P
L F o c c l P l o n c ) ,
    T h c  P o x - M 3   c o m c r o   h o s   b c c n    r l c
s i g n c c j  t o  u s c  F  c l o s s b u b s  W i t h     t h e : e
b u l b s  ( s u c h o s N o  S S o r S \ A / ) i t    i s p o s s i b l c
 t o   t o l < c f l o : h p i c t u r c s o t o l l s h u t t c r s p u c d s
U s c  o f M   c l o s s  b u l b s w i t h     t h c  P o x M 3
 i s o l s o p o s si b l c
    H c w c v c r ,  w h c n  u s i n g M  b u l b s   r s u c h
o s  P r c s s N o   5  o r  P r c s s N c   2 5 )     f i c s h
p i c t u r c s  s h c u l d  c n l y  b c  m o d c  o t       i      l 0
o r    I 2 5   o f  o  s c c o n d
    F  P  b u l b s  ( s u c h o s N o   6  o r N o       ' ) 2 i
o r c  d c s i g n c d    f o r  u s c  w i t h  F o c o l  P l c n c
S h u t t c r  C o m c r o s ,   o n d   o r c   n o t     r c c o r r r -
m c n d c d    f o r  u s c w i t h    t h c P o x - M 3

    '21
View original page 25Page 26 · Read text
Step by step procedure for   f losh
pictures with flosh bulbs.
 o Set F-X  synchro selection lever  ot
         t ' F t t
             s e t t i n g .
  .  Focus Pox-M3 on subject with ronqe-
       f i n d e r .
 o Reod off  the distonce to the subjcct.
 o Set shutter speed.
  . C o l c u l o t e  t h e     l e e n s s t o p u s i n g   t h e
       f l o s h b u l b G u i d e N u m b e r , S e t t h e   l e n s                                                                                                                                                                                fl
   stoP.                                                                              J
 o    l n s e r t f l o s h b u l b o n d  t o l < e t h e p i c t t r r e -                                                                                                                               If
To ovoid misfire
      ( l )   B o t t e r i e ss h o u l d o l w o y s b e  f r e s h
 ond when  not  in  use, removed frcm
  f l o s h gu n .
   Q)  The  socket  of  floshgun  ond
  f loshbulb  bo ses must  be     f ree    f rom
 o x i d i z o t i o n . S c r o p c o n t o c t s u n f o c e s w i t h
 o  knife or  file   if  necessory.
                                 22
View original page 26From the M. Butkus archive. Original publisher and archive notices are retained.
Check the model and edition against your equipment.
PDF verified 2026-10-10.