Film cameras
PEARL RIVER 4-S User manual
User manual for PEARL RIVER 4-S. 10 pages in English. Read the original PDF, download or print a copy without registration.
10 pagesEnglish1.4 MB PDF
Loading your manual…Open PDF directly
Document details
- Brand
- Pearl River
- Model / document
- PEARL RIVER 4-S
- Document type
- User manual
- Language
- English
- Pages
- 10
- File size
- 1.4 MB
- Category
- Film cameras
- Document date
- Not specified in catalog
Search available document text
Find a term, then jump to its page in the original PDF. Image-only pages may not be searchable; check the PDF for exact wording and diagrams.
Page 2 · Read text
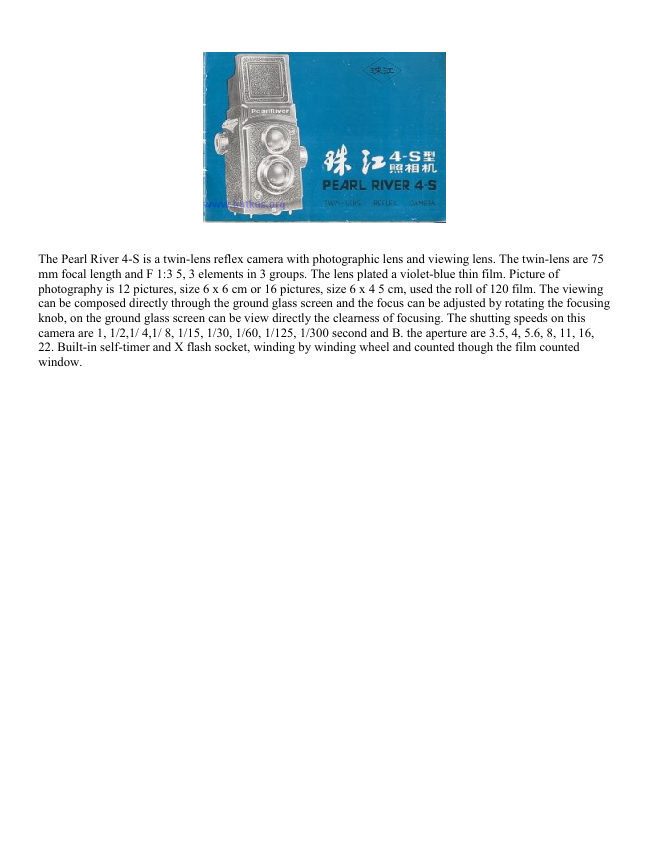
The Pearl River 4-S is a twin-lens reflex camera with photographic lens and viewing lens. The twin-lens are 75
mm focal length and F 1:3 5, 3 elements in 3 groups. The lens plated a violet-blue thin film. Picture of
photography is 12 pictures, size 6 x 6 cm or 16 pictures, size 6 x 4 5 cm, used the roll of 120 film. The viewing
can be composed directly through the ground glass screen and the focus can be adjusted by rotating the focusing
knob, on the ground glass screen can be view directly the clearness of focusing. The shutting speeds on this
camera are 1, 1/2,1/ 4,1/ 8, 1/15, 1/30, 1/60, 1/125, 1/300 second and B. the aperture are 3.5, 4, 5.6, 8, 11, 16,
22. Built-in self-timer and X flash socket, winding by winding wheel and counted though the film counted
window.
View original page 2
Page 4 · Read text
1. Magnifier
2. Viewfinder cover
3 Direct viewing cover
4. Viewing lens
5 Shutter tensioning lever
6. Photographic lens
7. Shutter speed dish
8. Shutter release button
9, Front masking 8 cover
10. Upper film spool knob
11. X Flash socket
12. Depth of field scale
13, Focusing knob
14, Aperture adjusting lever
15. Lower film spool knob
16. Self-timer lever
17. Back cover locking hook
18. Directly viewing window of vision
19. Releasing button for viewfinder cover
20. Winding wheel
21. 12 Pictures film counted window
22. 16 Pictures film counted window23.
Tripod bush
24. Back cover switch knob
25. Film-pressure plate
26. Upper film chamber
27. Lower film chamber
View original page 4
Page 5 · Read text
www.butkus.us

LOADING FILM


                                             1. Turn the back cover switch knob in the
                                           direction of "0" arrow mark and let locking
                                          lever extend forward. Then open the back
                                         cover. (Fig 1)

                                  2 With 16 pictures for take photo, must put 16
                                           pictures frame into back frame of body, if 12
                                           pictures for take photo, then take 16 pictures
                                    frame away from back frame of body. (Fig 2)

                                             3. Pull out the lower film spool knob and
                                              insert the roll film into the fixed spool knob.
                                 Then press down the roll film and push the
                                     lower film spool knob inward. (Fig 3)


                                             4. Draw out the front of protective paper of
                                         film and insert it into the longer slot of the
                                    winding spool core in the upper chamber.
                                 Then tighten the protective paper by turning
                                          the winding wheel about a round. (Fig 4)

                                             5. Close the back cover. Then turn the back
                                      cover switch knob in the direction of "C"
                                     arrow mark and let the locking lever move
                                    back-ward until the back cover in fastened.
View original page 5Page 6 · Read text
6. Pull out the cover of film counter window.
                               Advance the film by turning the winding wheel.
                           When 16 pictures for take photo, look at the film
                                   counted window of 16 pictures, if 12 pictures for
                                      take photo, look at the film counter window of
                                12 pictures, until the number "1" appears in the
                                     counter window. It shows the first picture is
                                       ready. (Fig 5)

                                           7. After the first picture is taken. you can turn the
                                  winding wheel continuously for the next picture
                                            until the final picture is completed.

                                           8. After the picture having been taken, turn the
                                  winding wheel continuously about 6~7 rounds.
                               Then open the back cover, pull out the upper
                                      film spool knob and take off the roll film. (Fig 6)


VIEWING AND FOCUSING


                                          1. Open the viewfinder cover as shown in Fig 7.

                                          2. View the subject appearing on the ground
                                        glass screen and rotate the focusing knob until
                                       the subject on the screen is sharp, thus the focus
                                               is well adjusted. The subject was contained
                                 between two red line in ground glass screen are
                                       the photographic range of 16 pictures. The
                                       subject was contained on whole ground glass
                                     screen are the photographic range of 12 pictures.
View original page 6Page 7 · Read text
www.butkus.us


                                      3. Use the magnifier for finding a sharper image. The magnifier
                                     will be raised up by pressing the direct viewing cover inward and
                                                    it will spring to its original position by pressing down the
                                 magnifier frame.


                                      4. When the small square hole for viewing is adopted, press
                          down the direct viewing cover until it clicks into place of the rear
                              masking cover is opened. (Fig 9)

                                      5. Compose your picture through the small square hole of the
                                     rear masking cover for viewing, when 16 pictures for take photo
                                           is not used.

                                      6. After taking picture press the releasing button at the lower part
                                   of the rear masking cover and let the direct viewing cover spring
                                     to original position. (Fig 10)


SETTING SHUTTER


                                Turn the shutter speed dish and set the red mark
                                         to the required speed value on the speed scale.
                                      (Fig 11)
View original page 7Page 8 · Read text
RELEASING SHUTTER


                                        1. Tension the shutter by pulling down the shutter tensioning
                                     lever to the bottom until a click is heard. (Fig 12)

                                        2. After tensioning shutter press the shutter release button gently
                               and then a picture taking is accomplished. (Fig 13)

                                        3. When a cable release is used, on the shutter release button
                                screw in the cable release.


                       SETTING APERTURE

                                     Pull the aperture setting lever and set the arrow mark to the
                                    required aperture number. (Fig 14)


                                               Examples of aperture at each F/stop
View original page 8Page 9 · Read text
www.butkus.us


DEPTH OF FIELD


                            When you focus the camera on a subject there
                                                  is a certain range extending in front and behind
                                         the subject within which other objects will also
                                      appear sharp. This range is called the 'Depth of
                                         Field" and it varies with aperture. The larger
                                         the aperture, the shorter the Depth of Field, and
                                         the smaller the aperture, the longer the Depth
                                        of Field. The value on the Depth of Field scale
                                          indicate the aperture number and on the
                                       focusing knob designate the distance in meter.


After focusing the distance value pointed by the same two aperture number indicates the Depth of Field in the
condition of that aperture number. For instance, if the camera is focused to 3 metres with aperture number 16,
the Depth of Field is approximately from 2.3 to 5 meter.


FLASH PHOTOGRAPHY


                            Pearl River 4-S Camera can be used in conjunction with
                            Electronic Flash in 1/60 second or slower shutter speed to
                         photography in synchronization. Insert the cable plug into
                            the flash socket and choose the distance and aperture
                          according to the Flash guide number. For instance, the
                            Electronic Flash guide number is 16, ASA 100 (21 DIN)
                              film, on the Exposure Table of Flash designated: the
                            distance of subject is 2 meter, then the aperture is 8.


SELF- TIMER
When the self-timer is applied the camera should be stabilized with a tripod. Pull down the shutter-tensioning
lever first then push the self-timer lever under, the shutter will go into action at the time 8~12 seconds after
pressing the shutter button.
View original page 9Related documents and language editions

From the M. Butkus archive. Original publisher and archive notices are retained.
Check the model and edition against your equipment.
PDF verified 2026-10-10.