Film cameras
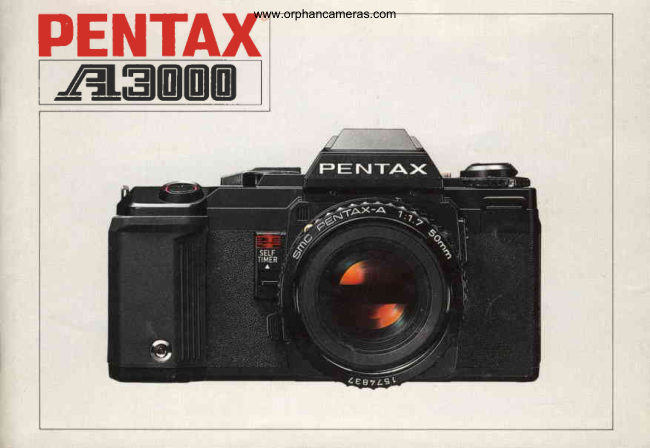
PENTAX A 3000 User manual
User manual for PENTAX A 3000. 49 pages in English. Read the original PDF, download or print a copy without registration.
49 pagesEnglish3.8 MB PDF
Loading your manual…Open PDF directly
Document details
- Brand
- Pentax
- Model / document
- PENTAX A 3000
- Document type
- User manual
- Language
- English
- Pages
- 49
- File size
- 3.8 MB
- Category
- Film cameras
- Document date
- Not specified in catalog
Search available document text
Find a term, then jump to its page in the original PDF. Image-only pages may not be searchable; check the PDF for exact wording and diagrams.
Page 2 · Read text
www.orphancameras.com

Thank you very much for choosing one of the world's most popular
Pentax 35mm SLR's.
As you may already know,  this programmed camera offers you
three auto exposure modes, auto film-speed setting, auto film
winding, etc., which are the most desiredfeatures by the photogra-
pher. Before you start to operate the camera, be sure to read this
operating manual very carefully and familiarize yourself with every
detail of this camera's features and functions so that you can fully
enjoy the long-lasting, reliable serviceit ought to offer.
When using this booklet, it is a good idea to read the inside pages
with  the front and back flaps unfolded for easy reference to the
camera'sworking parts.
View original page 2
Page 5 · Read text
www.orphancameras.com
TABLE OF CONTENTS

Features                            ADVANCED OPERATIONS
                                           Exposure compensation ----..------        30
PREPARATIONS                          U s i n g s e l f - t i m e r                        3 1
Loading batteries; battery check             5   Using 60 t  (1,260sec.)                 32
Attaching and detaching lens               6   UsingB (bulb)                        33
Mode selector, shutter button, shutter            Depth of field                         34
                                       7    Infrared index mark  --------              37
                                       9   Programmed AE diagram, metering range
Loading film .......-...                     1 0   and shutter / aperlure coupling range       38
Rewinding film  ..--------------------------.        1 3   Attaching strap; soft case                 40
                                                  Diopter correction                       4 1
BASIC OPERATIONS                         Mount adapter K .--.......------            41
Viewfinder displays                   1 6   Precautionson accessories ---------        42
Focusing                           1 8   Precautionson batteries ---.----.-.-.        43
Holding camera                       1 8   Specifications --..---------                44
"A"  lens; mode selector               20   Taking care of your camera -------------.     46
Warning indications in viewfinder .....-------------2 1   Warranty policy                       48
Using Programmed AE mode            22
Using Aperture-priorityAE mode         24
Using Pentax dedicated auto flash units ---.-.--26
Using Programmed Auto Flash mode      27


                                                                                              1 .
View original page 5Page 6 · Read text
FEATURES                 www.orphancameras.com
fti'

When an SMC Pentax-A lens is used with this     Programmed AE Mode
camera, you can use all the three exposure       The camera automatically selects the most
modes: Programmed AE, Aperture-priority AE      appropriatecombination of shutter speed and
and Programmed Auto Flash. When the            aperture to obtain correct exposure,
conventional K- or Kf-mount lens is used, you       s i m u l t a n e o u s l yc h a n g i n g t h e m a c c o r d i n gt o t h e
can use this camera in the Aperture-priorityand    brightness of the subject. This mode is most
conventional Auto Flash modes.                    suitable for those who do not want to be
                                                bothered by setting exposure controls or those
                                              wanting to take "action" pictures (Refer to pp.
                                              22/23  for details.)

                                                     Aperture-priority AE Mode
                                     When you set the aperture manually, the shutter
                                           speed is automatically adjusted according to the
                                                  brightness of the subject to provide correct
                                              exposure. Use this mode for ordinary picture-
                                                  taking or portraiture,or when depth of f ield is
                                                  important for your picture (Refer to pp. 24/251.

                                         Programmed Auto Flash Mode
                                     When you use a Pentax dedicatedAuto Flash
                                      U n i t w i t h t h i s c a m e r a i n t h e P r o g r a m m e dA E
                                          mode, the camera automatically selects the
                                               proper aperture and shutter speed to control
                                                                                                    f f a s h o u t p u t ( R e f e rt o p . 2 7 1 .


o 2
View original page 6Page 7 · Read text
www.orphancameras.com


The questions and answers on what you should know  first about this camera
O..:  I have depressedthe shutter button but   A . : This camera doesn't operate if the
    why has the shutter not been released?        batteries are not loaded properly. Check
                                         how they are loaded before operating.(For
                                                        details, refer to P. 5.)
O..: What kind of batteries should I use?     A . : Use two AA-size Alkaline batteries.No
                                                   other kinds can be used. (Refer to p. 5.)
O.: How many rolls of film can I shoot with    A . : About 50 rolls of 36-exposure f ilm with a
     this camera?                                     set of fresh batteries.
O.: Can I use an electronic flash with this    A . : You can use all the Pentax dedicatedflash
    camera?                                          units. But, with the flash unit featuring
                                          TTL Auto Flash operation, you cannot use
                                                    the TTL Auto Flash mode. (Refer to pp.
                                               26/27 /28.1
O.: How can  I take better pictures?         A . : Focusing is very important. Focus as
                                                  accurately as possible, using the split-
                                            image or microprism in the viewfinder.
                                                    Also, use a shutter speed faster than
                                                    1,/60 sec. to prevent camera shake that
                                             causes blurred pictures, and always take
                                                    the picture with the camera hteldf irmly.
                                                  (Refer to pp. 18/19.1

                                                                                           3 o
View original page 7Page 8 · Read text
LOADING BATTERIES            www.orphancameras.com


T h i s c a m e r a n e e d s t w o p e n l i g h t( A A - s i z e ,1 . 5 - V ) A l k a l i n e
batteriesof the same brand to function properly. Manganese
batteries are not recommended as their life is shorter. Do not
use Ni-Cd batteries.
Because the battery discharges a small amount of energy even
when not in use, those supplied with your camera may be
slightly below f ull cqpacity as it has taken some time to reach
you.

o Open the battery-chambercover by sliding it in the direction of
the arrow; use a finger-nail in the groove to push and raise the
cover.
o Insert two batteries into the chamber so that their (+) and (-)
marks face those indicated on the back of the cover. Close the
cover by pushing it back.


Battery check
As illustrated,turn the mode selector to BATT. C. so that the
white dot is aligned with the red-line index. lf the battery check
lamp glows, the batteries are properly loaded; if not, they are
incorrectlyloaded or the battery power is insuff icient. When the
f ilm advancing time gets apparently slower, it indicatesthat the
batteries are getting weaker. Replacethe batterieswith fresh
ones.
View original page 8
Page 10 · Read text
www.orphancameras.com  ATTACHING AND DETACHING LENS


To mount or interchange Pentax K, Kn and Kf mount lenses
follow the steps below.

. Remove the body mount cap and the rear lens cap. lf the f inder
cap is still on the eyepiece,remove it.
o Align the red dot on the camera body with the red dot on the
 l e n s ( S e e A ,  { 9 ) . S e a t t h e  l e n s i n t h e b o d y m o u n t a n d t u r n  i t
clockwise until the lens locks with a click. When mounting the
lens in dim light, method (O) is recommended.This method
allows lens mounting by touch.
Align the raised node on lens barrel with the lens release by
touch. Then turn and lock as above.
o To remove the lens cap, press in on the notches at both sides.
o To remove the lens, press the lens release lever toward the
camera body while turning the lens counter-clockwise.
o After removing a lens from the carnera body, replace the front
and rear lens caps to protect the lens from dust and stains.


Note: Don't damage or stain the electricalcontact points on the
mount face. When they become stained, wipe them with a clean,
dry cloth.
View original page 10Page 11 · Read text
MODE SELECTOR,SHUTTERBUTTON,www.orphancameras.comSHUTTERBUTTONLOCK


Mode Selector
T u r n t h e m o d e s e l e c t o rb y u s i n g t h e  l e v e r a n d s e t t h e d i a l t o y o u r
desired mode
B : B u l b ( L o n g - t i m ee x p o s u r e )
6 0 :  1 / 6 0 s e c . ( F l a s h - s y n cs p e e d )
P R O G R A M : P r o g r a m m e dA E m o d e ( L e n s l o c k e da t " A " )
             Aperture-priorityAE mode: (Lens set at any f-stop)
LOCK: Shutter button is locked
BATT. C.: Battery Check

Shutter Button
A s y o u s e t t h e m o d e s e l e c t o rt o " P R O G R A M " a n d p a r t i a l l y
depress the shutter button. the exoosure meter will be switched
o n a n d d e p r e s s i n gt h e b u t t o n f u r t h e r w i l l r e l e a s et h e s h u t t e r . l f
you take your finger from the shutter button, the meter will be
automatically switched off .

Shutter Button Lock
lf you turn the mode selector to "LOCK," the shutter button is
locked so that the shutter cannot be released.Use this device
w h e n t h e c a m e r a i s n o t i n u s e f o r s o m e t r m e
View original page 11Page 13 · Read text
S E T T I N G I S O F I L M S P E E D         www.orphancameras.com


N O N - D X F I L M
It is very important to set the ISO dial to the f ilm
speed indicated on the film package to obtain
correct exposure.While depressing the ISO dial
 l o c k r e l e a s e .t u r n t h e I S O d i a l u n t i l t h e I S O
n u m b e r o f y o u r f i l m  i s a l i g n e dw i t h t h e r e d - l i n e
index. Make sure that the dial is locked in
position, by releasing the lock release and
slightly rotating the dial from side to side.
T h e u s a b l e I S O r a n g e o f t h e o r d i n a r yf i l m w i t h
t h i s c a m e r a i s f r o m 2 5 -  1 6 0 0 .
                                                          25r  t O  r  l  r  .40a  l  r s0l  r a   80   125160  2s0320  500640800  1250
                                        32  M  100  200  400    10001600

DX FILM
When this camera is loaded with DX film, its ISO
f              is                            by                                the                                camera, ilm speed            automatically                           set                                       no    ColorFilm  cdilF!matter      what                         on                               the                             ISO                                             dial.             setting                 appears
W h e n u s i n g D X f i l m , m a k e s u r e t h a t t h e f i l m
does have a DX mark or the cassette has a DX                                       o o o o o o o o o o l i i
information panel, since there are also non-DX
f ilms available,of the same type. The usable film
speed of the DX f ilm with this camera ranges
from ISO 25 - 1600.
View original page 13Page 14 · Read text
LOADINGFILM             www.orphancameras.com

                        2


                                                                 www.butkus.us

Always load or unload film in the camera in a
shady spot, or shield it from direct sunlight with
your body.

1. As illustrated,unfold the rewind crank by
p u s h i n g i t w i t h y o u r f i n g e r - n a i l .
2.  Pull the rewind knob upwards until the back
cover snaps open.                                                               { }  f itm cham ber       @ Spool teeth
3 . S l i d e t h e f i l m c a r t r i d g ei n t o t h e f i l m c h a m b e r       { } Gu id e r ails                 €}f itm leader end m ar k
with the flat side up. Lock the cartridge in place   @ Sprocket teeth      @ DX- infor m ation pins
by pushing the rewind knob down, rotating it
s l i g h t l y m a k i n g s u r e t h a t  i t g r i p s t h e s p o o l .                                          Keep the DX-information  pins free from
                                                   scratches, dirt, dust, etc.
o 1 0
View original page 14Page 15 · Read text
www.orphancameras.com


4 . A s  i l l u s t r a t e d p, u l l t h e f i l m  l e a d e ro u t s o t h a t
 i t s e n d a l i g n s w i t h t h e O  f i t m  l e a d e r e n d m a r k
(red bar); in other words, bring the film leader
end within the length of the bar.
o Make sure that the perforationson the bottom
side of the film have engaged the €) sprocket
teeth as well as the O spool teeth.
o Also make sure that the f ilm is properly placed
between the two €) guide rails.
o Take up any slack left in the film so that the
f ilm is flat as shown, by rewinding it slightly into
the cartridge.
o W h e n a f i l m w i t h a h i g h e r I S O n u m b e r i s
loaded,do not leave the camera out of the case
f o r a  l o n g t i m e .
View original page 15
Page 16 · Read text
www.orphancameras.com


                                      5. Close the back cover, making sure that it snaps firmly into
                                   place. As you depress the shutter button, the camera will
                                 automatically continue releasing the shutter and advancing the
                                                                   f ilm until "1 " appears on the frame counter. Whilst this istaking
                                  place, the film advance lamp is on. (ln whatever position the
                           mode selector is, the shutter in this case will be released at
                          1/1OOO sec., making blank exposures until "1" appears on the
                              frame counter.)

                                       6. lf the rewind knob turns in the direction of the arrow while
                                  the film is being transported. it indicatesthat the film is
                               advancing properly.


                                        7. When the frame counter is set to "1 ," You are now ready to
                                      start shooting. The film-loaded indicator on the back cover helps
                              you check if the film is loaded or not.


o 1 2
View original page 16Page 17 · Read text
R E W I N D I N G F I L M              www.orphancameras.com


When the last frame of the roll is exposed,the motor will
automatically stop. Now, do not open the back cover, but
rewind the film into the cartridge immediately in the following
ways:

o Depress the film rewind button. lf the button does not stay
depressed,keep it depressed until the next step is finished.

o Unfold the rewind crank, and turn  it in the direction of the
arrow, until the exposure counter returns to "1" or you
simultaneously f eel no pressure on the rewind crank.


o When the rewind crank feels loose, it indicatesthat the film
leader has been released from the take-up spool. Pull the rewind
knob upwards to make the back cover snap open. Remove the
cartridge from the chamber.


                                                                                             1 3 0
View original page 17Page 20 · Read text
www.orphancameras.com VIEWFINDER DISPLAYS
                                                                                  .#

Visible on the left-hand side of the viewf inder       Flickering3O  Underexposure (Flickers eight
are shutter-speed LED's, exposure information                     times per second); slow-shutter-
in the Programmed AE and Aperture-priority AE                  speed warning (Flickers two
modes, flash information, slow-shutter-speed                      times per second)
warn i ng, out-of -shutter,/aperture-coupling-                        .Over- and underexposure
range indication, error in mode,/aperture                           displays also indicate exposure
combination, etc.                                               combinations bevond the
. LED = Light Emitting Diode                                     shutter/aperture coupling
                                                             range or beyond the metering
                                                              range.
                                                            .The  f lickering "100O" is
                                                         accompanied by a beeping
                                                          sou nd.
P          ProgrammedAE mode
                                                  Flickering I     indicates the completion of f lash
lOOO-30     Shutterspeedinformation.                    charging and the autd-flash
                                  l OOOstandsfor 1,/1OOOsec.;                   exposure conf irmation with a
           3O standslor 1/3O sec.Shutter                   dedicated flash.
            speedsare displayedin full stop
             increments.(1OOO-60in green;   Flickering"P"  indicates the combination of
            30 in yellow)                             mode selector dial and aDerture
Flickering                                                                           is not appropriate.
1 000        Overexposure(Flickerseight
              times per second)


r 1 6                                                                                                     .,,ire;                                                                                     "r$&its&*
View original page 20Page 24 · Read text
www.orphancameras.com
  "A" LENS;MODE SELECTOR


                                                    www.butkus.us
,,A"    LENS                              Mode Selector Dial
To set the lens in the "A" position, match the A-    Depending on where the mode selector is set,
 i n d e x ( g r e e n l i n e ) o n t h e a p e r t u r e r i n g t o t h e                t h e f o l l o w i n g m o d e s a r e a v a i l a b l e :
 o index mark while depressingthe aperture     PROGRAM          Programmed AE mode
auto-lock button Release the button to lock the                               Aperture-priorityAE
lens in the "A" position.To release the lock,                         mode
rotate the aperture ring towards the aperture     60 r...                 Flash-syncspeed
scale with the button depressed.            B        . . . . .           B u l b
Depending on where the lens aperture is set,
the following modes are available:
A (Auto) setting       ProgrammedAE mode
f-number setting        Aperture-priorityAE
               m o d e 6 0 t . B


 t ) O
View original page 24Page 25 · Read text
WARNING INDICATIONSIN VIEWFINDER                                                                                                                                              !!Rtq!.jaa:::::J'r:j                                  www.orphancameras.com


  Shutter speed display    What  it means

     P   1000           This combination is beyond the meter coupling range in the Programmed AE mode. Results in
                                   incorrect exposure. "10OO" or "3O" flickers fast to warn vou of the error.
      P     30

                                  Indicates the exposure combination  is beyond the metering range.or shutter,/aperture coupling
         1000           range. When beyond the metering range, you can shoot by changing the f-stop. When beyond the
                               shutter/aperture coupling range, the flickering will continue even if the f-stop is changed.
                               Shooting with  this warning on display will result in incorrect exposure. "100O"  or "3O" flickers at a
            30              fast speed.

      P      30         When the subject is dark, "30"  flickers slowly, warning you against camera shake.
           30

     P                  When the lens is A-locked and the mode selector is set at "B"  or "60,"  "P"  flickers, warning you of
                                 tne error

.   Various warnings are indicated by the glowing of       Shutter,/Aperture Coupling Range.
the LED's in the viewfinder, or by the beeping sound.       o  Th e t,  , . , ,, sym bol in the table indicatesflicker ing.
.  The out-of-metering-range refers to the exposure      Out of metering range
situation in which the subject is too dark or too bright     When the viewfinder indicates this warning, you are
for the camera's meter to measure the light.            recommended to take the following measures to obtain
.  The out-of-shutter  / apefture-coupling-range  refers      proper exposure:
to the situation in which the combination of shutter        o  When the sub.iectis too bright. use an ND filter
speed and aperture is beyond the limit of use even        which enables you to control the amount of light.
when  it is within the metering range.                      o  When the subject is too dark, use a flash or some
o  Refer to page for Metering Range and                  o th e r lig h tin g s.

                                                                                            2 1 c
View original page 25Page 26 · Read text
U S I N G P R O G R A M M E D A E M O D E                               www.orphancameras.com

                                 o W h i l e d e p r e s s i n gt h e a p e r t u r e a u t o - l o c kb u t t o n o n y o u r S M C
                              Pentax-A lens, rotate the aperture ring until the A-index (green
                                                                                    l i n e ) c l i c k - s t o p sa t o r a l i g n s w i t h  t h e a a p e r t u r e / d i s t a n c ei n d e x
                      m a r K .


                                  o Set the mode selector at "PROGRAM" by moving its lever.


                                                                   . Depress the shutter button partially,and "P" and a shutter
                             speed will be shown in the viewfinder. Depress the shutter
                                 button all the way to release the shutter. The film will
                                 automaticallyadvance to the next frame


o22
View original page 26Page 27 · Read text
www.orphancameras.com

 I   lf you remove your finger from the shutter button as soon as
the shutter has been released,a single-frame exposure is made.
Likewise, if you keep depressing the button, continuous
shootingtakes place.


. When the subject is too bright or too dark, the shutter speed
"1000" or "30"  in the viewfinder flickers and the PCV sound is
also heard when the "1000"   f lickers,warning you of the
problem.When the subject is too dark and "30" flickers, use a
flash to obtain correct exposure.For details, refer to p.21 .


                                                                                 23o
View original page 27Page 28 · Read text
USING APERTURE-PRIORITYAE MODE                             www.orphancameras.com

                                  o First make sure that the lens is not locked at the "A" position.
                               Turn the aperture ring to your desired f-stop.


                                  o Set the mode selector to PROGRAM.


             www.butkus.us
                                  o Depress the shutter button half-way, and the shutter speed
                          w i l l b e  i n d i c a t e di n t h e viewf inder. As you depress the shutter
                                 button completely,the shutter will be releasedto take a picture.


o 2 4
View original page 28Page 29 · Read text
www.orphancameras.com

o When the subject is too bright or too dark, the shutter speed
"1000" or "30"  in the viewfinder flickers and the PCV sound is
also heard when the "1000" flickers,warning you of the
problem. In this case, open the lens aperture to a larger f-stop or
close it to a smaller f-stop, so that the flickering may disappear
and you may obtain correct exposure. When the subject is too
dark, use a flash to obtain correct exposure.Refer to p.21 for
d e t a i l e dw a r n i n g i n d i c a t i o n .


                                                                                 25o
View original page 29Page 30 · Read text
USING PENTAX DEDICATEDAUTO FLASH UNITS
                              www.orphancameras.com


Using the AF200Sn flash unit with this camera
easily allows the ProgrammedAuto Flash
photographywith the ca mera set to the
ProgrammedAE mode. Set the camera's mode
selectorto PROGRAM, and turn the flash to ON.
Furthermore, the AF2OOT, AF28OTand AF4OOT
can also be used with this camera in the
ProgrammedAuto Flash mode. The table
indicates what dedicated f u nctions work when
the camera is used with Pentax dedicated auto
f l a s h u n i t s .

o  lf the AF2OOT,AF280T or AF400T is used with
the camera in the TTL Auto Flash mode, the            Dedicated Functions (ln ProgrammedAuto
dedicatedfunctions are indicated in the                F lash mode)
viewfinder, but the flash emits the full light          1  Flash-readyindication by the lightingof   ,
output, resulting in incorrect exposure.               mark.
o The AF200Sn does not provide the dedicated      2  As soon as f lash is ready, shutter speed is
function described in 3.                               automaticallyset at X(1/60 sec.)for flash
o AF080C, AF2OOS,AF160 and earlier Pentax          sync.
flashes apply to 1 and 2 only in the table, when      3 When f lash has worked properly, I mark in
the camera is used in the Aperture-priorityAE           viewfinder disappearsfor an instant and
mode.                                                      lightsup againor f lickers,indicatingthat
o When the Pentax dedicated auto f lash is used         proper f lash sync has been made.
in its M or MS mode, the dedicated f unctions in      4   In ProgrammedAE mode, aperture is also
                                                          set automatically.the Programmed AE mode do not work.
o 2 6
View original page 30From the M. Butkus archive. Original publisher and archive notices are retained.
Check the model and edition against your equipment.
PDF verified 2026-10-10.