Camera accessories
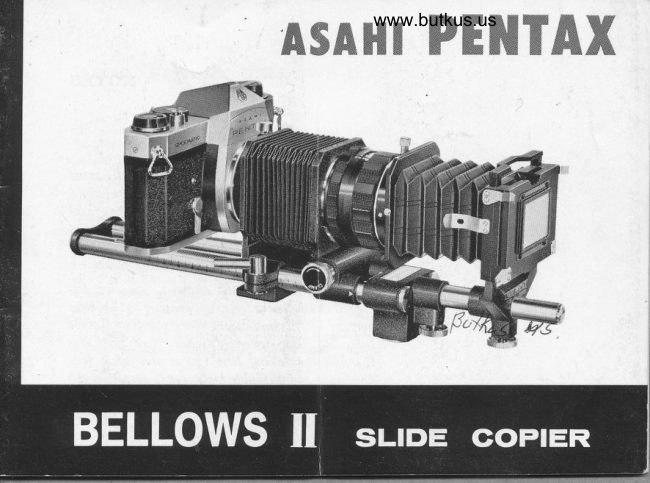
PENTAX BELLOWS II Slide Copier User manual
User manual for PENTAX BELLOWS II Slide Copier. 27 pages in English. Read the original PDF, download or print a copy without registration.
27 pagesEnglish3.2 MB PDF
Loading your manual…Open PDF directly
Document details
- Brand
- Pentax
- Model / document
- PENTAX BELLOWS II Slide Copier
- Document type
- User manual
- Language
- English
- Pages
- 27
- File size
- 3.2 MB
- Category
- Camera accessories
- Document date
- Not specified in catalog
Search available document text
Find a term, then jump to its page in the original PDF. Image-only pages may not be searchable; check the PDF for exact wording and diagrams.
Page 3 · Read text
NOTES


The Asahi Pentax carneras are identically same
as the Honeywell Pentax cameras ruhich are sold
in the U.S.A. and Mexico throttgh Honeywell
Ittc. This operating ntanwal therefore applies
also to the Honeyruell Pentax cameras without
uny modificatiott.
If you orun a Spotncatic camera, you can dis'
regard the exposure factors appearing in the latter
portion of this manttal. Since the Spotmatic's
itttegral meter correctly reads yoLtr exposures
througlt the taking lens (no matter what lens
you use) and through whateuer accessories yott
use on the lens or between the lens and the cam-
era body, no exposure adjustments are required.
View original page 3
Page 4 · Read text
www.butkus.us

ASAHI PENTA>( BELLOWS II


 With this bellows unit inserted between your Asahi
 Pentax camera body and one of your Takumar
 lenses, you can take close-ups and macro-photo-
 graphs continuously at a wide range of magnifi-
 caiions. The range of magni{ications, however,
 varies depending upon the focal length of the
 lens used.
While this unit enables you to take such extreme
close-ups and macro-photographs  as are unattainable
with close-up lenses or extension tubes, the dlstance
of subject that can be closed up when this unit is
folded to its shortest width is not more than the
distance ol subject that can be closed up with the
Asahi Pentax extension tubes f I and # 3. (The
thickness of this unit when lolded is 37mm, which
is the combined thickness of the extension tubes
f]  andf3.)
Available lor this unit is a shde copier attachment
which enables you to make duplicates ol your
colour slides.
                                                       2
View original page 4Page 8 · Read text
www.butkus.us


2. Screw the lens to ihe lens mount (3).       exposure foctors and magni{ications
  Loosen the clamp lever (B), pull the       from L0 up to 3.0 for use with the
   rear board (4) attached to your cam-      55mm lens when the front board (5)
  era body to the end of the scale rods.           is extended to the farther end of the
  and fasten the lever (B).                    scale rods, such as when using the
3. Loosen the clamp knob (7), and move         slide copier unit.
   the bellows back and forth by rotating      4. Looking through the viewfinder of
   the extension "Movement" knob (6).        your camera, extend the bellows by
 On the riqht hand scale rod there        turning the "Movement" knob, and
  are engraved numbers from 4 to lB.      when your sublect is in sharp focus,
  These numbers represent the "Bellows         or when you have reached the desired
  Length" which is given in centimeters.         magnification, stop the bellows move-
  These numbers are used when usrng         ment, and tighten the clamp knob (7).
  the tables starting on page 18. The      5. To be positively sure that your subject
  other lelt scale rod (J.0) has a calibra-         is in sharp focus, turn the distance
   tion engraved for exposure factors and        scale ring of your lens.
   magnifications lrom 1.0 (life size) up      6. Look at either one of the seale rods
  to 3.0 for the focal length of 55mm.        (9, 10), depending upon the focal
  Note that on this lelt scale rod, you        length of the lens used, and obtain
  also lind a red-coloured calibration         the exposure factor and magnilicatron
  marked in the opposite direction  Ior         Iigures. The left scale rod is for the

                                                                                                     /
                                                           e
View original page 8Page 9 · Read text
{ocal length of 100mm. For the focal       or Super-Takumar lenses does not
   lengths other than 55mm and 100mm,        operate automatically with ihis bel-
   re{er to the tables of data appearing         lows unit. Compose and focus with the
  elsewhere in this manual.                 diaphragm fully open, and manually
7. Remember ihat the depth ol field  is         close it down before releasing shutter.
  extremely shallow in close-up and
  macro-photography. Close down your
  diaphragm to obtain sufficient depth
   ol field, and use a rigid tripod to
   avoid camera movement.
8. When using an exposure meter, point
  your meter as close to the subject as
   possible, to avoid unwanted liqht hit-
   ting your meter cell. Multiply the
  meter reading by the exposure factor.
    (If your meter gives a reading ol f/5.6
   at 1/125, the actual exposure should
  be f/5.6 at 1/60  if the given exposure
   factor is 2.)
9. The automaiic dialragm o{ the Auto-
View original page 9Page 12 · Read text
www.butkus.us


  The copier rod can be detached from       stop at the desired magnification.
   the copier unit. When inserting it into        Tighten the clamp lever (B).
  the copier base, keep its flat side       6. For composing and focusing your
  down, place the side marked I.O to        colour slide, loosen the slide copier
   the diffuser cover side, and the side        clamp screw (16), and move the copier
  marked 1.5 to the lens side. The lens         portion back and forth.
   side of the rod should be inserted       ?. You can move the slide copier portion
   into the receptacle  (II).                   up and down along the central frame,
2. Loosen the clamp knob (7) and lever        for proper cropping of your colour
   (B), and move the bellows portion to          slides. To keep the copier unit co-axial
  the forward end of the scale rods.        with the taking lens, bring the top of
   Tlghten the clamp knob (?).               the unit up or down to the white
3. Release the spring arms (19), pull out        centre dot (17).
  the lens   f ront receptacle ring  (14),       8. The two red scales (1.0 & 1.5) on the
  attach it to the front frame of the        slide copier retainer rod (I2) are"
   lens, and tighten the lens clamp screw        approximate guide of magnification
    (20).                               when duplicating your colour slides.*
4. Insert your colour slide into the slit      When the rear board (4) is extended
    (rs).                                     as Iar as the red scale 1.5, this slide
5. Look at the red calibration on the left        copier rod should also be stopped
  scale rod. Back up your camera, and      down at its red calibration I.5.

                                                                                        1()
View original page 12Page 15 · Read text
Uee Dtffused Light                       at the same shutter speed at between     When duplicating colour slides with your          I/LI and I/16, and the oiher at the same       t
      slide copier, do not point your lens       speed at between f/II and I/8.
       directly against the source of light. Try
       to point your lens directly against evenly
       diflused light, or against a plane surlace     evenly illuminated from an angle of     Glose-Up and Macrophoto-      about 45".                      graPhy
     Gorreotlon  of  Over- or  flnder-                                           Wrth the standard lens on your Asahi     exPosure                                                 Pentax, you can take photographs as         II you are duplicating over- or under-                                                      close as lB inches (45cm) from the lens.     exposed colour slides, you can correct                                                 Photographs of sublects closer than this     them by under- or over-exposing these                                         minimum distance can be easily ta.ken
        slides.                                          with your camera by use of the extension
                                                                               between                                                    tubes                                                                            inserted     Blenket             Exposures                                                      or bellows                                                                       unit                                                                                              thus         l                                                                   body,    When duplicating                                                          eamera                                            the lens                                            and the                       colour slides, it   is
     recommended ihat you give blanket       extending the lens lorward from the
      exposures: if your meter reads 1/8 sec.       camera body.
      at the lens aperture o{ I/11, take one      The object distance for copying to a
       picture at this exposure setting, another        given scale is given in the equation:  -

18
View original page 15Page 16 · Read text
www.butkus.us


               i,_                                                     with a 55mm lens is:          .------Fr-F(M+1)
                                                            55 (9's=                                                                     * tl                                                                   = 165mm           where u  : Distance of object lrom lens                                                                                          u.)
            F = Focal length of lens                                         The extension ol the lens beyond the          M = Scale of reproduction                                                                       infinity setting is given by the equation: -
        The scale of reproduction is always the      d=FM
           ratio of image size/object size. If  the       Where d = Focusing extension beyond
        image is smaller than the object, the                        infinity setting
            scale ol reproduction will be a reduction.          F = Focal length of lens
         For instance, if the object is {our times         M - Scale of reproduction
       as large as the image, the scale of      For example, when copying on a scale
         reproCuction is 0.25, or Il4, or 1:4. if      of 0.5 with a 55mm lens, the locusing
          the image is larger than the object, the       extension beyond the infinity setting is: -
          scale o{ reproduction is greater than 1,             55mmx0.5=27.5mm
       and represents a  magnification. For     At such close guarters, the obiect dis-
           instance, if the image is twice as large      tance is measured lrom the front node
           as the object, this is expressed as magnifi-      of the lens. For a single lens, this is          cation 2:I, or 2lI, or 2.                       approximately one-third the actual thick-
         Example: The object distance for copying       ness of the lens behind the front surface.
       on a scale of 0.5 (a reduction of 1:2)       In practice, it is not possible to guarantee

f$                                                                   L1
View original page 16Page 17 · Read text
sharp focus lrom calculaiion and measure-        extension iubes and/or bellows unit is: -
                                                                                                                                                                                                                   ,.1     ment. The flnal adjustment is done by                                           M:      inspecting the image on the ground glass                                --:-r
      ol the camera.                            Where M = Scale of reproduction
     The scale o{ reproduction at any object            d = Focusing extension beyond
      distance cern be found from the egu-                          lnfinity settrng
       ation: -                                 F : Focal length of lens
                F-      pr$rc.u>           If your PENTAX lens is extended with       M=                 u-r                        the bellows unit by 55mm, the same
      Where M = Scale of reproduction            length as the focal length ol the lens,
          F = Focal length of lens            the scale of reproduction will be I: I,
          u : Object distance {rom lens       which is a life-size reproduction.
    So {or an object 220mm away from a      DEPTII OF FIELD. As the camera
    55mm lens, the scale reproduction is:  -         geis closer to the subject, the zone o{
                   55                               sharpness shrinks closer and closer to
        -m_SS  =u.JJ or l:J               the actual locused distance. The ellect
        i.e., the image is one-third ihe size of      can be compensated ior-up  to a point
      the object.                                       stopping down the lens, but dt                                            -by     The scale of reproduction obtainable with       close distance a very narrolv zone of
     the camera lens fully extended with       sharp Iocus must be accepted as inevi-

15
View original page 17Page 18 · Read text
www.butkus.us


table. As the depth of field decreases,      TIrt  SIUBJECTS. Sublects for close-
depth of locus increases.               up photography must be as nearly as
E)(POSUR,E. Where the camera ex-      possible in one plane if they are to be
tension is increased (by bellows or ex-      sharp because the depth of field at short
tension tubes), the marked lens aperture      distances is very small. On the other
has to be increased in proportion to      hand, the depth of focus increases and
incr'eased lens-{ilm distance, requirrng      the image on the ground glass changes
extra exposure. In addiilon, a further      only very slowly Irom sharp to unsharp
exposure increase is necessary with near      during Iocusing.
shots because the shadow areas become     (The foregoing paragraphs are excerpts
more important when they are seen     from The Focal Encyclopedia of Photo-
close at hand.                            graphy, pages 196 - 198, published by
When comparatively long camera ex-      the FOCAL PRESS, London, U.K. Some
tensions are used for taking close-ups,      sentences were modilied io  suit this
the relative lens aperture (f number)        booklet.)
must be multiplied by a correction lactor
to give the correct value Ior calculating
exposure. This correction factor depends
on the scale of reproduction.


                                                             16
View original page 18From the M. Butkus archive. Original publisher and archive notices are retained.
Check the model and edition against your equipment.
PDF verified 2026-10-10.