Film cameras
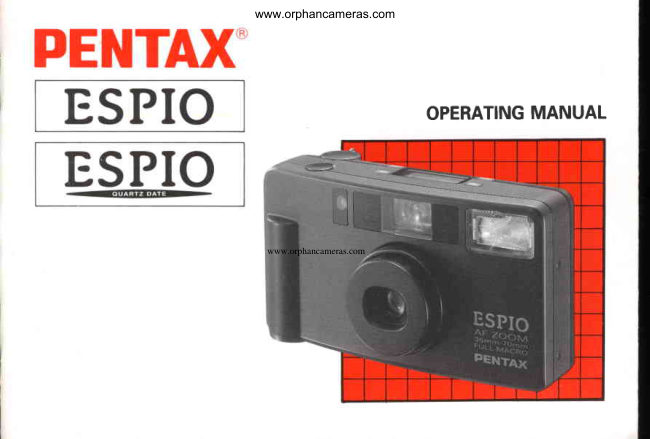
Pentax ESPIO / ESPIO date User manual
User manual for Pentax ESPIO / ESPIO date. 43 pages in English. Read the original PDF, download or print a copy without registration.
43 pagesEnglish3.7 MB PDF
Loading your manual…Open PDF directly
Document details
- Brand
- Pentax
- Model / document
- Pentax ESPIO / ESPIO date
- Document type
- User manual
- Language
- English
- Pages
- 43
- File size
- 3.7 MB
- Category
- Film cameras
- Document date
- Not specified in catalog
Search available document text
Find a term, then jump to its page in the original PDF. Image-only pages may not be searchable; check the PDF for exact wording and diagrams.
Page 2 · Read text
www.orphancameras.com


Congratulationson your purchaseof Pentax   lcon indicators used in this manual        WESPIOand welcome to the world of Pentax
zoom compact photography! Your compact,
light weight camera is a great companion to     Operation direction               .-
preserveyour favorite memories. lts built-in
35-70mmzoom lens gives you the freedom to     Automatic operation              frrrrfframe everything from breathtakingland-
scapes to family portraits, even detailed                                                                                                                                          ,  lclose-ups.The built-in auto flash helpsyou to     Attention
capturesubjectsin dimly-lit placesor to pho-
tograph indoor scenes with clarity and bril-    Lamp lightingliance. lt functions as a fill-in flash for day-
light flash-syncphotography.Since most of
the operations- includingfilm loading,film    Lamp blinking
speed setting,winding/rewinding,focus and
exposure control - are automatic,you can     Correcttake great pictures with little effort. The DATE                     omodel makes it easy to remember the dates
when you took pictures.                       lncorrect                          X
. Pleaseread this manual carefully before
  operating the camera to take consistently   The names of the camera'sworking parts are
  superior pictures.                              listed on the front and back flaps of this man-
. Pay specialattentionto the cautions and    ual. Keep the flaps unfolded for quick refer-
  notes in this Operating Manual. Pictures   encewhile readingthe manual.
  and illustrationsshown herein may differ
  from the camera'sactual appearance.
View original page 2
Page 3 · Read text
www.orphancameras.com
OUTLINE OF BASIC OPERATIONS                       ,A
                f-,_J


Open the back cover L o a d    t h e    f i l m  a n d The film will automati- Push the main switch
(see page 8).            c l o s e  t h e b a c k c o v e r  cally advance to the to switch on power
                        (see page 9).             first frame (see page (see page 4).
                                     e.)


F r a m e y o u r s u b j e c t Focuson your subject Depressthe shutter re- When the film reaches
and operatethe zoom- (seepage 12).        lease button. ln dark   i t s e n d , t h e c a m e r a
ing lever to compose                        c o n d i t i o n s ,t h e f l a s h will automaticallyre-
the shot (see page 6).                 w i l l d i s c h a r g e a u t o - wind it (seepage 16).
                            m a t i c a l l y ( s e e p a g e
                                         1 3 ) .
View original page 3Page 5 · Read text
www.orphancameras.com


CAUTIONS                      PRECAUTIONSFOR BATTERY
. The electric circuitry inside the camera       o The misuse of battery can cause hazards
  c o n t a i n s h i g h v o l t a g e w o r k i n g  p a r t s .        such as leakage, overheating, explosions,
  Never attempt to disassemble the camera.           etc. Battery should be inserted with the "+"
. Be careful not to drop or subject the cam-        and "-" sides facing correctly.
  era to strong vibrations, shock or pressure.       o Never try to disassemble, short or re-
o Do not apply force to the zoom lens; do not         charge the battery. Also, do not dispose of
  p l a c e t h e c a m e r a w i t h  t h e   l e n s  f a c i n g          the battery in a fire, as the battery may
  down.                                         explode.
o Never attempt to manually open the lens       o B a t t e r y p e r f o r m a n c e m a y b e h i n d e r e d
  cover: it will automatically open and close         temporarily in low temperatures, but it will
  as the main switch is turned on and off.            recover in normal temperatures.
o Make sure not to obstruct the autofocus       o Keep a spare battery on hand for conve-
  window, lens, light sensor window, or the         nience when shooting outdoors or while
   built-in flash with your fingers or hair.               traveling.
.  Avoid leaving the camera for extended pe-       o Keep the battery out of reach of children.
   riods of time where temperature and hu-       o When the camera is in a bag, make sure
  midity are high such as in a car.                    the main switch  is off: otherwise, battery
.  Dirt, mud, sand, moisture, toxic gas, water,         power may be wasted if the shutter release
   salt water, etc., penetrating the inside of          button is pushed accidentally.
  the camera may cause damage or render it
   inoperable.Therefore, handle it with great
  care.
o Never use solvents such as paint thinner,
  alcohol or benzine to clean the camera.
View original page 5
Page 6 · Read text
TABLEOF CONTENTS www.orphancameras.com

. Names of working parts .........     Flaps   TAKING BETTER PHOTOGRAPHS
o Introduction...........       Frontfoldout   How to selectmodes
o Outlineof basicoperations....Insidecover     /Red-eyereductionflash mode...............18
r Cautions                       ..................1 Daylight-synchroshooting            .......19
                                        Takingpicturesat slow shutterspeed.......20
PREPARATIONS BEFORE TAKING          Slow-shutter-speedsynchro shootin g .......20
PHOTOGRAPHS                         Backlight compensation..............................2'l
1. Strapattachment.......................................3Bulb shootin9............       .................22
2. Main switch and batterycheck.................4 Bulb-synchroshooting           ..............22
3. How to hold the camera            ..........5  Self-timershooting            ....................23
4. Operating35 - 70mm zoom lens ..............6  Dual-frameself timer shootin9 ..................23
                                       Auto tele-wideself-timer............................24
TAKING PHOTOGRAPHS                 Consecutiveshooting            ................25
1. Usablefilm ..........         ..-...-....-.........7Multi-exposureshoo1in9.......................,.,...26
2. Film loading                       ...........8  lntervalshooting                      ......27
3. Viewfinderdisplaysand shooting            lnfinity-landscapeshooting           ......28
  ranges                       ...................10Datemodel................       .................30
4. Green/redlamps            ....................11
5. Ordinaryphotography.............................1 1   MAINTENANCE CONSIDERATIONS
6. Takingpictures                      .....12   Batteryexhaustionwarning           .....32
7. Focus-lockshoo1in9.................................14        I nstalling/Replacing the battery..................33
8. Unloadingfilm                      .....16   Takingcareof your camera........................34
                                       Troubleshooting........         ................36
                                          Specifications...........         ..................38
                                       Warrantypolicy                       .......40
2                                LCD panel                Backfoldout
View original page 6Page 8 · Read text
2. MAIN SWITCHAND BATTERYwww.orphancameras.comCHECK


Main switch                                    Battery check
To switchon, pushthe main switch button.The    After you turn the main switch ON, the lens
lensextendsslightlyto the wide-angle35mm    slightly extends and the lens cover opens.
settingand LCDpanelis on. To switch off, push   Then, you are ready to shoot. (See page 32
the main switch button again.Make sure the   when the batte^ryexhaustionsymbol (!  ) ap-
camerais switchedoffwhen not in use.        pearson the LCD panel.)
o Use one 3V lithium battery,type DL123Aor     *  lf the camera is on and left unusedfor over
  CR123A.Do not removethe batterybeforeit      3 minutes, the lens automaticallyretracts
   is exhausted,sinceit is also usedbythe date     and the power switches off to save battery
  functionon the DATEmodelto keepconstant     power.
  trackof time.                                                         lf the main switch is turned on within 30
o The lens cover automaticallyopens and     minutes of auto-power off, the previous
  closeswhen the main switch is on and off.      settingwill return.
  Neverattemptto open the lenscover manu-
   ally.                                                                         .  Refer to page 33 for directions on battery4                                                 insertion.
View original page 8
Page 9 · Read text
3. HOWTO HOLDTHECAMERAwww.orphancameras.com


When shooting, hold the camera securely   Gaution:
with both hands. Keep the camera as still as   Do not hold the zoom lens becauseit moves
possible,and gently depress the shutter re-   back and forth when zooming.
leasebutton. (lf too much force is applied,the
camerais likelyto shake,and the picturewill    Note:
be blurred.)Try to braceyour elbows against   o Make sure not to obstruct the autofocus
your body, or support yourself and the cam-     window, lens, light sensor window or the
era againsta stable,stationaryobject,such as       built-inflash with your fingersor hair.a wall.
When using the flash with the camera posi-
tioned vertically,hold the camera so that the
flash is above the lens.
View original page 9
Page 11 · Read text
www.orphancameras.com
                                     1. USABLEFILM
                                                                                                                                                   ^ - . s ; i * e " .
TAKING PHOTOGRAPHS   JI
                                 DX FILM
After familiarizingyourself*itf, oper"- 1lg                   Perforations Filmcartridge
tions on the cameraby readingthis in-"1$
structionmanual,you'rereadyto insert;J
the film.


                                           Film speed(lSO rating)
Notes:
 When buying DX-coded films, make sure    Automatic  film speed setting
  the packagebearsthe "DX" mark.           This camera is designed to use DX-coded
  Non-DXcoded film cannot be used.           films with ISO ratings trom 25 to 3200.When
  Use high-speedfilm with an ISO rating of    any of thesefilms are loaded,the proper film
  1000or higher mainlyfor shootingindoors   speed is automaticallyset for the camera.
  or in dimly-litconditions.
View original page 11Page 13 · Read text
www.orphancameras.com


                                          E
                                                 tt
                                                          l_j
                                                                                                                                                                  i ,                                                                                                                                      , r ,                                                                      _ a

                                          5 When ( I ) appearsin the exposurecounter
                                        on the LCD panel, the film automatically
                                           stops winding. The indicationappearsas
                                      shown above.lf ( I ) does not appearon the
                                  LCD panel, it indicatesthat the film is not
                                              properly loaded. lf this occurs, reload the
4 After the backcover is closed,the film auto-           f i l m .  l f ( t ) U t i n t c os n  t h e L C D p a n e l , i t
  maticallyadvancesto the first frame.        meansthe film is not properlyloaded.
* Even if no film is loaded, the motor oper-     * The exposure counter indication will re-
  ates for a second or two after the back     main on even if the main switch is turned
  cover is closed.                                            off.

  Make sure the film is taut as illustratedon previous page.Take up any slack in the film by
  pushing it back into the cartridge.
o  lf the end of the film leader is extremely bent, straightenit or cut off the bent portion.
View original page 13Page 15 · Read text
4. GREEN/REDLAMPS   www.orphancameras.com5. ORDINARYPHOTOGRAPHY

                   When you de-                       When the
                         pressthe shut-                           power is
                               ter releasebut-                             switchedon by
                          ton halfway,                              depressingthe
                          the lamps Q                             main switch
                         and/or @ light                                 button, the [EpHl^up or blinkas                           camera auto-
                     shown at left.      matically selectsthe Auto and Single-Frame
                                        Shooting modes and the exposurecounter
tl) Green lamp: When the subject is in focus,    indicationremainson even if the main switch
                         it will light up to indicatethat     is turned off. These modes are usedfor taking
               y o u c a n t a k e t h e P i c t u r e ;   ordinary pictures.The built-inflash will dis-
           when the subject is not in   charge automaticallywhen the subject is
    ,            focus,it will blink, indicating   poorly illuminated.
                that you cannot take the Pic-
               ture becausethe camera-to-   o When the LbD panel displayed is different
              subjectdistanceis too close.     from the one shown above (which indi-
@ Red lamp:  When the flash is ready to      cates the other modes are set), switching
              d i s c h a r g e i, t w i l l  l i g h t u P .     power OFF and then ON restoresthe Auto
        W h e n    t h e  f l a s h  i s b e i n g     and Single-FrameShootingmodes.
             charged,it will blink.
                                                             * When the built-in flash automaticallydis-
Notes:                                      charges,the camera usesthe shutterspeed
o  lf the subject is too close, the green lamp      approx. 1/40thsec. (when lSO100film is
  blinks. Adjust the camera-to-subjectdis-      used).
  tance so that the green lamp lights con-
  tinuously,then releasethe shutter.
o  lf the subjectis even closer (approx.30cm),
  the green lamp may light continuously.
                                                                               1 1
View original page 15Page 16 · Read text
www.orphancameras.com


                                          2 Checking the lamp indication
                                       Depressthe shutter release button half-
                                   way.When your subject is in focus, the
                                         green lamp will light up. lf the subject is
1 Composingthe shot                        closerthan 0.6 meter (2ftl,the green lamp
  After zooming the lens and composing       will blink.In this case,lengthenthe camera-
  your shot, focus on the subject with the      to-subjectdistance.
  autofocusframe in the center of the view-
  finder.                                  o When the red lamp lights up, it indicates
                                                  that the built-inflash will discharge.Make
                                            sure that you are within the flash effective
                                         range beforeshooting.(seepage 13.)


12
View original page 16Page 17 · Read text
www.orphancameras.com


                                          Automatic Flash Emission
                                When taking pictures in low light, the flash
                                                      will automaticallydischarge.Whenthe shut-
                                                    ter releasebutton is depressedhalfway in low
                                                    light, the red lamp will light up, indicatingthe
                                              flash is ready to discharge.lf the red lamp
                                                blinks,this indicatesthat the built-inflash is
                                         being charged.Therefore,make sure the red
                                     lamp lights continuouslybefore taking pic-
                                                   tu res.
                                        Red-eye
3 Shooting                               Shootingportraitswith the flash may resultin
  Depress the shutter release button fully,    "red-eye",the red dot in your subject's eye.
  and the shutter will release.Then, the film    This camera includesa red-eye reduction
  automatically advances to the next frame.     flash function,which suppressesthe red-eye
                                  phenomenonby using preflash.See page 18
                                                   for details.Notes:
o When the shutter is released, the self-timer    Flash effective ranges (Nega-colorfilm used)
  lamp lights up momentarily to indicate that                                                    Lens      lso     100         240        400
  a picture has been taken.
.   lf you wish to focus on another subject, lift        Wide-angle    0.6-4.3m     0.6-6.0m   0.6-8.6m
                                            35mm
  your finger off the shutter release button           tlf  l  I  a n d d e p r e s s  t h e s h u t t e r  r e l e a s e b u t t o n
  ha lfway aga in.                                       Telephoto     0.6-2.7m    0.6-3.8m   0.6-5.4m
o The shutter cannot be released while the       70mm
      l e n s i s z o o m i n g .                                         ( f )
                                                                               1 3
View original page 17Page 18 · Read text
www.orphancameras.com

                                                                                                                    I                              at


lf you shoot without positioning the autofo-   1 Focuson the subjectwith the autofocus
cus frame (t l) on the main subjectof the pic-    frame(t I ).
ture as shown above, only the background    When you wish to focus on the face,which
will be in focus.When the main subjectis off     appearsvery small in the viewfinder,focus
the autofocus frame in the center of the     on the chest insteadto fill the focus frame
viewfinder,use the focus-locktechnique.         with more of the subject.
( Focus-lockis the function to lock focus.)       2 When the sh utter release button is de-
                                          pressedhalfway down, the green lamp on
                                              the right-handside of the viewfinderlights
                                        up and the exposureand focus are tempo-
                                                       rarily locked.


1 4
View original page 18Page 19 · Read text
www.orphancameras.com


                              Ha rd-to-autofocus subiects
                                                    Like many other autofocus cameras,the cam-
                                                      era's autofocus system is highly precise, but
                                                    not perfect. Some subjects may not be fo-
                                            cused as you wish. In such a case, use the
                                                 focus-lock technique on a subject near the
                                                 actual one and equidistant from the lens.
                                                 Subjects which may fool the system include:

                                                           1. Black objects like hair, which don't reflect
                                          much light (and therefore don't reflect in-
                                                       frared autofocus beams).
3 While depressingthe shutter releasebut-      2. Wire netting, latticework, iron exercise-
  ton halfway, re-aimthe camera or recom-        bars, etc.
  pose the picture,then releasethe shutter.       3. Flickeringlight sourcessuch as neon signs,
                                                                                                        f l u o r e s c e n t l a m p s , T V   i m a g e s , s u n l i g h t
                                              coming through trees, etc. and subjects il-Note:
o You can releasefocus-locksimply by lifting       luminated by these light sources.
  your finger off the shutter releasebutton.        4. Glossy and reflective surfaces like glass,                                                         mirrors, car bodies, etc.
                                                           5. Fast-moving objects, like trains or automo-
                                                         biles in motion.
                                                          6. Water jets, water surface, smoke, flame,
                                                        fireworks, etc., which have no distinct or
                                                     consistent form, or a subject in mist.
                                                                               1 5
View original page 19Page 20 · Read text
{Be surewww.orphancameras.comto remove the film from the camera in
8. UNLOADING  FILM  the shade or by using your body to shade the camera.l
  I                                                               a,
       ffiFAi                      t'


1 Rewinding  the film                       2 Unloading the film
  After you have exposed the last frame of     Open the back cover, and remove the car-
  the roll, the film rewinds aulomatically.     tridge from the chamberby pullingthe top
  Then, the motor stops, and (0  ) Otintsds      out first with your finger.
  shown to indicatethat the film has been re-
  wound.                                    Notes:
o 24-exposureroll of film takesabout 20 sec-   o The shutter may be releaseda frame or two
  onds to be rewound.                      even after the specifiednumber of frames
o During rewinding, the exposure counter     have been used up as indicated by the
  counts frame numbers in reverse.           number of shots shown on the film canis-
r The entire roll of film including the film       ter. lf this occurs,those frames may not be
  leaderis always rewound into the cartridge     developed.
  to prevent any parts of the film being ex-    o Never open the back cover until the whole
  posed to light.                                   film roll is rewound.
1 6
View original page 20Page 21 · Read text
www.orphancameras.com

                                                                                                   ,t
I-.na


Rewinding a film in mid'roll                2 Depressing the shutter release button
lf you wish to unload a film before exposing      while holding the drive button down starts
all the frames, follow the proceduresas fol-      the rewinding.When the roll of film is re-
lows.                                 wound to its end, the motor stops and the
                                                   (0) Otints indicatingthat the back cover
1 Turn the main switch ON and keep the     may be opened safely.
  drive button depressedfor more than 3
  sec., the rewind mode will be set and the
   ( llO   ) mark appearson the LCDpanel.The
  (.)mark will also blink on the LCD panel.


                                                                               1 7
View original page 21Page 22 · Read text
www.orphancameras.comHOW TO SELECTMODES/RED.EYERE-TAKING BETTERPHOTOGRAPHS DUcTIoNFLAsHMoDE                                                                                                     ,     .:..
To select various exposure modes, depress the mode button O.


                                                       . Depress buttons O and/or @ in successionto set the re-
                              quired modes. oE[                                              . For normal use, set the Auto and Single-Framemodes as    lr----T{lE       shown.When the power is switchedon, the Auto and Single-         -,JEft                         FrameShootingmodes are automaticallyset. El.,-                                                       .   l! any exposureand/orshootingmode, if the button O and
                @ is depressedafter the shutter is released,the Auto and
                              Singleframe modeswill return respectively.
                            o To reduce the red-eye phenomenon in the picture, depress
                               the red-eyereductionflash button ( O  )@. Wittr this mode,
                              the flash dischargestwo consecutivetimes, reducing the
                                   possibilitiesof the red-eyeeffect significantly.To cancelthe
                          mode, depressthe red-eyereductionbutton again.
To select the desired shooting modes, depress the drive button €).
View original page 22Page 23 · Read text
DAYLIGHT-SYNCHROSHOOTINGwww.orphancameras.com

                      Depressthe
                    mode button
                         u n t i tl h e ( + l
                      appearson the
                   LCDpanel.The
                           flashwill dis-
charge both in dark and bright conditions.
When a portrait is taken with the subject in a
backlit situation, the front of your subject may
be cast in shadow. In such a case, use the
Daylight-Synchro Shooting mode (Flash-ON
mode) within the appropriate flash effective    Without Daylight-Sync
range to take pictures.This will ensure that a
picture is well exposed without any shadow.
The flash will always discharge in this mode.

Notes:
o Make sure  the red lamp on the left-hand
  side of the viewfinder eye-piece lights up
  w h e n   t h e s h u t t e r  r e l e a s e b u t t o n   i s d e -
  pressed halfway down before shooting. A
  red lamp blinking indicates that the flash is
  being charged.
. Make sure you're within the flash effective
  range even when you use the built-in flash    With Daylight-Sync
  as a fill-in flash in daytime. (see page 13.)
View original page 23Page 24 · Read text
TAKING PICTURESAT SLOWwww.orphancameras.comSHUTTER SPEEB

                       Slow  Shutter                         Slow-Speed-
                      Speed (Flash-                         Synchro-
                      OFF}                                 Shooting
                       Depressthe                             (Flash-Onl
                    mode button                         Depressthe
                             untilthe (g O)                     modebuttonto
symbol appearson the LCD panel. In this    set a slow-speed-syncmode until the (g   ll
mode, the flash does not discharge,and a   symbol appearson the LCD panel. lt is pos-
picture is taken at a slow shutter speed up to    sible to take a pictureof subjects and back-
approx. 115second. Use it in placeswhere   ground in a balancedway, as shown in the
using flash is prohibited,such as in theaters,   photo, by using the built-inflash to properly
m useums, etc. Furthermore, th is mode is   expose the foreground subject and a slow-
also useful for soft-lighted pictures with a    shutter-speedto expose the low light back-
naturalatmosphere.                      ground.

Notes:
. When shooting in darkness,the shutter
  speed gets slower, and camera shake is
  more likely to blur your picture,so use a
  tripod.


20
View original page 24Page 25 · Read text
www.orphancameras.com


                            Portraitswith a
                       window, blue
                         sky or other
                            bright back-
                       ground often
                           resultsin
underexposurebecausethe exposureis auto-
maticallyset for the background.Backlight
Compensationmakes good use of natural
lighting to improve the balanceof light be-
tween the subject and the rest of the picture.
Also use this mode to shoot scenery.         With BacklightCompensation
Depressthe mode button until the (O EI) in-
dicationappearson the LCD panel.

Note:
o When using BacklightCompensationin a
  dimly-litplace,the shutterspeedmay be so
  slow that you should use a tripod to pre-
  vent camerashake.


                                         Without BacklightCompensation
View original page 25From the M. Butkus archive. Original publisher and archive notices are retained.
Check the model and edition against your equipment.
PDF verified 2026-10-10.