Film cameras
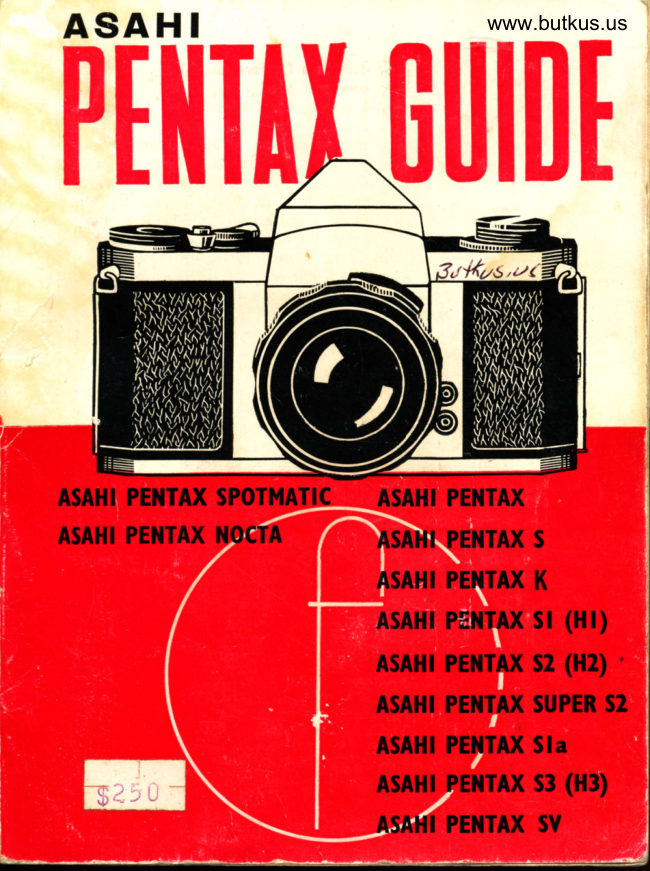
Pentax Guide Reference guide
Reference guide for Pentax Guide. 58 pages in English. Read the original PDF, download or print a copy without registration.
58 pagesEnglish4.1 MB PDF
Loading your manual…Open PDF directly
Document details
- Brand
- Pentax
- Model / document
- Pentax Guide
- Document type
- Reference guide
- Language
- English
- Pages
- 58
- File size
- 4.1 MB
- Category
- Film cameras
- Document date
- Not specified in catalog
Search available document text
Find a term, then jump to its page in the original PDF. Image-only pages may not be searchable; check the PDF for exact wording and diagrams.
Page 3 · Read text
www.butkus.us

                    The Green Section between pages 16 and 17         Page
          TIIE PENTAX: MODEL BY MODEL
          The Pentax Spotmatic
             Loading 4 - Unloading 4 -Shooting 4 - Self Timer 5 - Flash             5 - Points to Note 5
         The Pentax.SJ (1{3), SV and Saper 52
            Loading 9 - Unloading 9- Shooting 9- Self-timer t0
          The Pentax S2 (H2), SI (HI) and Sla  .  .                            II
            Loading ll - Unloading t3 - Shooting t3
          The Pentax K                                                       T4
            Loading 14 - Unloading f4-Shooting14
          The Pentax and Pentax S                                          ,7
           Loading 17 - Unloading 17 - Shooting t7
          The Pentax Nocta                                              20
             Construction 20 - Operation 20 - Shooting Sequence 2l -
             Accessories 22
          Pentax Lenses and Accessories                                 23
            Aperture Control Systems 23 - Standard Lenses 23 - Wide-
            Angle and Long Focus Lenses 24 - Supplementary Lenses for
           Close-Ups 26 -  Extension Tubes 26 -  pentax Copying
          Equipment 28 - Extension Bellows 28 - The Microscope
           Attachment29  - Right-Angle Finder Eyepiece 29 - Focusing
             Magnffier 29 - Accessory Shoe 29
                                                                                                                                                      !t'         The Pentax Exposure Meter                                    30               F:
            Fixing the Meter to the Camera 30 - Taking the Meter off
            the Camera 30 - Using the Pentax Meter 30 - Testing and
            Replacing Battery 32
              Some items of equipment or certoin materiols mentioned jn this
              book m.oy not be freely avoiloble in every country. lmport ond
               marketing conditions.vory widely, ond ore outside the iontrot of
               the photo graphi c deo  I e r.
                       1967 Edition @ Focal Press Ltd., 1960
              Printed and bound 1967 in Great Britain by Staples printers Limited, Rochestor, Kent.
                                         3                                                                                                                                                                                                                                                                                                                                                                                                                                   i{
rl
View original page 3Page 4 · Read text
7

             THE PENTAX SYSTEM
            The Pentax is a 35 mm. single lens eye-level reflex camera
            with a viewing system designed for accurate focusing and
                    viewing.I            exact                 body is die-cast with hinged-on back, and is leather            The
             covered. The metal parts are black anodised or satin chrome
               finished. In place of the chromium trim, the camera is also
              available with black anodised finish throughout, which is
            popular among press photographers. The camera- _yields
            36 negatives I x 1{ in. (24x36 mm.) on perforated 35 mm.
                film.
                     It has an eye-level reflex finder which shows the image in
             natural size. The built-in pentaprism produces an upright
           and right-way-round view. The centre of the reflex finder
            area cbntains a micro-prism zone permitting ultra fine
             focusing. The image ia extremely brilliant and evenly
              illuminated right intb the corners with the aid of a Fresnel
                field lens. Tha mirror is of the instant-return type, giving
             almost continuous vision through the vievfinder.
             The taking lens itself is used to form the finder image; in
             consequence, the finder shows exactly the same field as will
           be obfained on the film without any parallax. The reflex
            image remains fully correct at any distance with any lens,
              including close-up supplementary lenses.
            The sirew-mounted lens is interchangeable and a wide
             range of lenses from 18 mm. to 1,000 mm. is available, the
            Taliumar series, made by the manufacturer of the camera.
             In addition, lenses designed for other cameras (e.g. Edixa
              Reflex, Contax S, D, Hexacon, Pentacon and Praktica)
                 will fit the Pentax.
           An internal link between the shutter release and the lens
          mount on the current Pentax models couples with lenses
            which have automatic pre-selector diaphragm control. Some
              of the Takumar lenses have a manual pre-set diaphragm.
            The lens mount carries a depth of field indicator and
               distances in both feet and metres. Focusing is effected by a
              rapid helical movement which is part of the lens mount.
View original page 4Page 6 · Read text
r

            The shutter of the Pentax is a self-capping focal plane
             type travelling across the film from right to left. "Self-
             capping" means that the shutter remains closed whilst being
           wound up ensuring full protection of the film; "focal plane"
            means that it moves right in front of the negative material.
            With this type of shutter, lenses can be changed while the
            camera is lcaded.
             The shutter is synchronised for flash bulbs and electronic
                flash with separate standard co-axial outlets on the body.
            The Pentax Spotmatic features additionally a built-in
               light meter which measures the light through the taking
                 lens.
            The back of the Pentax is hinged on. It takes standard
            35 mm. cassettes. The film runs from the cassette to the
             take up spool and is re-wound after exposure. The film
               transport is effected by a lever; one swing advances the film
           and the film counter arranged around the centre shaft of
              the transport lever. The same action also tensions the focal
              plane shutter. Unintentional double or blank exposures are
             automatically avoided. The rewind knob incorporates a
              folding crank for convenient and rapid rewinding of the
             exposed film.
         A film speed indicator surrounds the rewind knob, three
               differently coloured scales of figures permit identification
               of film type as well.
         A tripod bush is placed centrally below the lens in the
            camera base. The shutter release is on the camera top and
               carries in its centre a cable release socket. The dimensions
             of the camera are 5f x3; )<3{- in. with standard lens. The
             weight is 24 oz. (body only) and about 30 oz. complete with
             standard lens.
             Pentax Evolution
           THE FORERUNNER of the Pentax was the Asahiflex camera
                introduced in 1952, also known under the name Tower in the U.S.A.,
              wnich was fitted with a waist level viewfinder and interchangeable lens
                of different screw thread from the Pentax. Model I was fitted with a
             50 mm. Takumar /3.5 lens with pre-set diaphragm and focal plane
                  shutter from l/25 to 1/500 sec. In 1953, the Asahiflex IA with a simpler
View original page 6Page 7 · Read text
www.butkus.us
              focal.plane_shutter (lPl tg 1/500 sec.) appeared, to be followed by
             Asahiflex IIB fitted with /3.5 or f 2.4 Takumar-lens as the world,s                   first camera with instant re]urn mirror (November,1954).In February,
                195-5, the Asahiflex was fitted with a focal plane shutter from f i6           1/5@ sec., marketed as model IIA.
                                                                                                                    is                fitted- THEwithPENTAX,an eye-levelbuilt onpentaprismthe experienceand wasgainedfirstwithproducedthe Asahiflex,in 1957.
                    . Slight ghalggs in slrutter speed calibration and speed range dis-
              tinguish the different Pentax models. On the optical iide, lensds with
            semi-automatic and fully automatic aperture sefting appedred.
             In 1965, the Spotmatic was introiluced, with a Urriitt-in exposure
            meter that measures the brightness of the image on the focusing screen
              ary! i9 coupled directly to shutter and film speed settings.
               Full details of the Pentax models which are being produced or have
           been madqin the past are found on the green pagei irf tnis guide.
               In the United States, the camera was originblly marketedunder  the
         name of Heiland Pentax, now Honeywell Pentax; elsewhere it  is
          known as the Asahi Pentax, the manufabturers being the Asahi Optical
          Company of Tokyo, Japan.
            In J-apan, and in Japanese-produced  sales literature, operating
             ma-nggls, etc., the later models are referred to as the Pentai 51, 52
          and 53. In Great Britain and America these models were known, up to
             1961, as the Pentax Hl,H2 and H3 respectively. Throughout thisb6ok,
              tferg!91-e,-instructions referring to the "S" models apply equally td
            the "H"-designated models.


                                                                                                                                                                                                                                                       i',.*


--F*,.u,*eg,.!.blbrrr-4-*
View original page 7Page 8 · Read text
HANDLING THE PENTAX
             In order to simplify the desuiption and handling of the
           Pentax camera without being confused by dffirent features
           of individual models, this guide is divided into a general
              section which applies to all Pentax models, while the individual
            requirements and dffirent handling of each model are found
          on the green pages.
              For convenience, a symbolic reference system is also used in the
               general section. Wherever the sign I  appears, further details will be
            found in the camera pages of the green section for each camera
              (Pentax K, S, H2, etc.). The sign O refers to lens and accessories
                details in the green section. The appropriate pages are marked ac-
               cordingly in the bottom left or right-hand corner.

            Holding
                    It is obvious that the camera should be held as steady as
            possible as the slightest shake, even if not seen in the
             negative, will become visible in the enlargement.
       FOR HORIZONTAL PHOTOGRAPHS hold the
           camera in the palm of both hands, the fingers gripping the
            front of the body, the thumbs against the back. Use the
            middle flnger of the left hand to move the lens focusing
           mount, and the index finger of the right hand to operate the
              release button. Keep the elbows pressed against the body
             Either the right or the left eye may be used on the finder.
             Always stand with your legs apart.
        FOR VERTICAL PHOTOGRAPHS turn the camera
            through 90' so that the left hand presses the camera against
          your forehead from above. Use the thumb and the index
              finger to move the focusing mount. The right hand holds the
           camera from below with the thumb on the release button.
              It is of no consequence if the position of the hands is
             reversed; you can suit your own convenience.
          To release the shutter, press the release button with the
              ball of the finger (or thumb). Use finger pressure only, and
            keep the hand and its grip on the camera steady. The actual
            pressing down will have to be done slowly and smoothly.
                                          8

\"
View original page 8Page 9 · Read text
www.butkus.us
                                           H OLDI NG
For horizontal shots hold
the camera in the palm
of both hands, the fingers
gripping the front of the
body, and the thumbs
against the back, Focus
the lens with the middle
 finger of the left hand.
                                                                      Press the elbows
                                                                                    close to the body,


                           ..:::::::::::::::::.:.-
                                                            always stand with
                   $i,i'i,i'i,i,i,i'i'iii'i;                                     your legs well apart,
                              For upright shots turn
                                  the camcra through 90o
                            so that the  left hand
                                   supports  it from under-
                                neath.    Alternatively,
                                        turn  it round in the other
                                    direction. so that  the
                                            left hand presses the
                                 camera against the fore-
                                 head from above. In this
                                   case the thumb of the
                                            right hand presses on the
                                release button,  while          and hold ouite still
                                the palm of the  right            while you release.
                                    hand supports the weight
                                         of the camera.        tr-
Eelow: With the Pentax it is specially important to keep the camera really steady during the exposur€,
and for a fraction of a second after pressing the release button. Whenever possible su.pport your body
against something  solid, such as a iree oiwall or prop up your hands against your kne-e-s or a table;
pirticularly withllow speeds. Use a cable release for time exposures from a tripod (p'33).
View original page 9Page 10 · Read text
The slower the exposure time, the smoother must be the
  release.
   For slow exposures in the hand, it is advisable to rest the
 elbows or at least to lean the body against some support in
 order to avoid shake. In this w&y, ll15,1/8 and everr t74 sec.
 can be risked without incurring camera shake.
   Such _a support is also desirable for faster exposures, as
 quite a lot of movements take place inside the camera after
 pressing.-the release button. A slightly unsteady hold may
 thus easily lead to blurred pictures.
  The use of a tripod is necessary when taking time
 exposures and it is also recommended for speeds from t/tS
 to      sec. For upright photographs from the tripod use a   _1
 ball-and-socket head to allow changing from hoiizontal to
 vertical position.

 Carrying
  To be ready for quick action, it is best to carry the
 camera on a short strap round the neck so that it lies on
 your chest. Lifting it to the eye then takes a split second.
   For convenience and protection, the Pentax should always
 be carried in its ever-ready case. This case is designed lo
 hold the camera ready for use. The flap of the case is
 removable when the camera is in continuous use to enable
quicker working.

 Viewing and Focasing
  locus only afte,r cocking the rapid-wind lever, never before
otherwise the reflex mirror is slightly out of position.
   . T4. image reflected by the lens on to the screen is always-
visible with the exception of the actual instant of release.
  The brilliant image appears in natural size, free from
parailax. A Fresnel field lens ensures even illumination into
the.very corners. A viewing pentaprism shows the image
upright and right-way-round at eye-level.
                            l0
View original page 10Page 11 · Read text
www.butkus.us
                     THE PENTAX VIEWING SYSTEM


 Above: The viewfinder of the Pentax shows the image upright and the right way round. lt remains
 upright and.the-_right way round even when the camera'is held for vertical shois (right). Wirh the
 standard.2'$  in' (55 mm.) lens the image also appears in approximately natural viewin!  size'(in fact it is very slightly enlarged).


                                             -...+


Above (left): The Pentax viewing screen consists ofa ground glass screen and a central focusing area.
Most of the screen is covered with a Fresnel-type field lens to ensure even image brilliance alI over,
right into the corners of the field. The central focusing area is actually two concentric circles. The
outer circle is plain ground gl'ass, without any Fresnel rings, to facilitate focusing of texture and flne
detail on the ground glass.
  The central area is the micro-prism zone which acts as a kind of multiple rangefinder. When the
!Tage  is sharply focused, the pattern of lines or, on some models, dots virtually disappears (centre),When the image is out of focus  it appears blurred; the pattern is then strongly visible. lt remains
visible even as the image approaches sharpness, breaking up the picture rather like the lines of a
television screen (right) or an engraver's screen. The disappearance of the pattern at the point of
maximum focus is quite abrupt, and thus provides a really accurate means of checking the exact
image sharpness. While the ground glass screen is more suitable for fine texture detail, the micro-
prism focusing zone is particularly effective with distinct outlines of the subject especially when
they are borders between light and dark parts of the picture.
                                        1l
View original page 11Page 12 · Read text
The best way to arrive at critical definition is to turn the
 focusing mount of thelens slowly to and fro while observing
 on the grould glass the subject-to be focused. As you turi
 the mount, the image b_ecomeg more and more sharp up to
 a certain point, beyond which it will again lose definition.
 At this "bgyond" st_age, tuln the mount back again,
 narrowing doy-n the degree of movement until you airive
 at the point of best definition. Earlier Pentax models have a
 mggnifier-bqitt int_o the ground glass to determine the point
 of best definition. Later ones have a micro-split image centre
 showing distinctly fuzzy outlines while itre lens- is not
 accurately focused to become a clear one on setting the lens
 correctlv.-"becoming
   This             clear" is rather different in character
 from the normal ground glass image. Just before the image
 becomes                   appe-ars broken up by the superimposjd            .r.hurp, it
 diagonal line pattern of the micro-scieen-someirhat in the
 nature of a televtsioq. screen image. The moment the image
 is really sharp, this^lige pattern beccmes invisible. Alwals
 have the lens at full aperture when focusing with tfie
 micro-screen.
  The orthodox way of focusing with the ground glass may
 be. adopted for taking photographs of Jubjects-that are
 fairly stationary. A differbnt method of focusing-using the
micro-screen-is required when taking subjecti in moTion.
set the lens to a distance at which the subl=ect will be in a
given mome_nt, or focus at some spot which it actually has
to pass, a:rd press the release button when the subj6ct is
reaching the pre-focused point.
   W_ith subjects liable to react self-consciously (e.g. children)
set the lens to a suitable distance, and then.ipproach th6
subject, exposing as soon as the micro-screen image appears
sharp.
 ,. Alternatively, focus at some object which is at the same
distance from the camera as the subject, but in a different
direction. When you have found the-range swing round to
press the release button as soon as the viitim slils into the
field of view of the finder.
View original page 12
Page 13 · Read text
www.butkus.us
rl          Shooting t
              Practise the following operations first with an empty
          camera until you can do them practically automatically.
           1. Work the film transport. This advances the film and film
             counter and tensions the shutter ready for the next
               exposure.
           2. Set the exposure. Adjust the shutter for the right amount
r{              of light for the subject conditions (p. 3l).
           3. Select the aperture, smaller aperture for greater depth of
                  field (p.37).
           4. Focus and determine the picture area to obtain a sharp
               picture and the view you want.
ll          5. Release the shutter gently (p. 9).

tl


                                                                                                                                                                                                                                                                                   i.j;i


                                            t3
View original page 13Page 14 · Read text
LOADING AND I.INLOADING
   The pentax uses_ stanct4rd perforated cine film, 35 mm.
 wide,      as used               in the majority                              of                                 other 35                              mm.                                                 -i"iut"i. cameras.               It is available                           in various                                  packings                                                 (see                                                   also                                                    p. lg),
 the most convenient being standard dayHglt iassettes. Theie
 are ligh!-lignt- containers with a reid{ cut and trimmed
 length of film for 36 or 20 exposures and are loaded into ihe
 camera in daylight.
   Avoid loading or unloading the camera in brilliant
 sunlight, though; choose a shady spot or do it in the shadow
 of-your own body if nothing betteiis available.
 Looding t
 1.          the camera back pv nulhng out the sriding catch at   Qneq
    the side of the camera bbdy.
 2.   Po{ up lle rewind knob as-far as it will go, then place a    loaded film cassette into the empty nh Ehimuer iueiow
    the rewind kngb) with its hollow-part towards rewin'd key.
   The mouth of the cassette withihe film end must point
   towards the take-up spool. push the rewind knob track.
 3. Attach the fiIm teadei to the take-up spool. Hold the
    c.assette iq position with the left thumb, while pulling with
                                                      crir.; of dh fr5m  it.    lhe.ns.ht land 4 lo !* in. (10 to il   Push the free end of the film into one or tne slots in the
   take-up spool of the camera. The take-up spool .un b.
   turned on its axis by its serrated lower flingb to bring a
    slot into the most convenient position for Tnserting ine
    film. Turn the flange of the tate-up spool until the-film
   slack is taken up. Before closing the cimera back, maki
   sqrg t$.t the perforations of the film engage in the teeth
   ot the trlm transport sprockets.
4. close the camera_back by pressing the hinged back on to
   the body and slide the locking tarch back-to secure it in   this position.
5. wind 6n ffis film and release the shutter twice. This
   advances the first two frames which have been exposed to
                            t4
View original page 14Page 15 · Read text
www.butkus.us
                             LOADING THE PENTAX


Top row: Open the camera back (left); pull up the rewind knob and insert the film cassette in the
clssette chamber (centre); and fix the film leader to the take-up spool (right).
Lower row: Close the camera back and lock it (left); press the shutter release and advance the film twice
over to bring a fresh_portion of unexposed film into position behind the tens (centre); and set the
film counter in the winding lever (right),


                                          U NLOADI NG


De.press.the reversing button in the camera base-and keep it depressed on some models (/eft);
unlold the crank in the rewind knob and rewind the film into its cassette (centre);  finally open'ttid
camera back, pull up the rewind knob and remove the cassette with the exlosed fitm lrigtrt;.
                                     t5
View original page 15Page 16 · Read text
the light while inserting the film into the camera. These
            two iasted leader frames do not count as part of the
            number of exPosures on the film.
            6. Set the film [ounter on top of the film transport lever.
            Turn the disc in the dire-ction of the arrow until the
              engraved arrow head on the rim points to "O" (not on
              thi latest self-setting model SV). Now wind the lever
              once more and the first film frame is ready.
          When inserting the film, check it is properly loade-d by
                                                                      the            observing the rJwind knob (a1 1he opposite end of           camera t'o the transport lever). When you advance the filq,
              t[e rewind knob sh6uld turn in the opposite direction to the
                                       proves that ihe film is being pulled          uit* engraved on it. This           out of th"e cassette on to ihe take-up spool. In the case of
              films shorter than 36 exposures,  it is advisable to take up lhg
             possible film slack in the cassette by first turning the rewind
          knob in the direction of the arro\{t until a resistance is felt.
            ?. set the fiIm indicator on the base of the rewind knob by
                pulling up the knob and turning. the disc.by its serrated
              iim uitil^ the speed of the film-inserted is opposite the
               index mark. tn the case of colour daylight film use the
               green figures,                     -and 'forfor colour artificial ligFt film use the red                 figut.t          black-and-white film use the white
                  fifures. Push the rewind knob back.
              u'nloading t
               After all exposures have been made (the _nu!-rber of the
             exposures taken is automatically shown on the film counter
               disc), unload the camera.
            1. Set for rewinding. Depress rewinding knob in base of
              camera, this disEngagis the transport sprocket in the
                camera.
            2. Rewind the film. Rewind the film into its original cassette
              by unfolding the rewind crank and turning it clock-wise.
               Wittdiog be;omes distinctly easier the moment the film
                    is fully wound back.
                   Main text continued on p.17 after the green section.

                                                                                                                                                                                          )                                         t6                                                         A
                                                                                                                                                                                                                                                  II
                                                                                                                                                            "lL!dbiq**gr*iiie*-''''*'l',.',*''.  - . ..-,o!*il$iili"*gE&8r., .'o'-    ,'"-  .  . "   "' -' '^""''.
View original page 16Page 17 · Read text
www.butkus.us
  THE PENTAX: MODEL BY MODEL
   These green pages deal with the individual pentaxes in
 detail.
                                 e,ach model cover points                                                       oJ                                                                                 - - Self-contqine! sections for loading, unloading, shooting and specific controls.
   For a fuller explanation of aspects common to all pentax
 comeras, compare these sections with the same headings in the
 main text.

 The Pentax Spotmatic                Operation                20
  Loading          4     Shooting sequence          2I
  Unloading        4     Accessories                22  Shooting                4
  Self-timer        5   Pentax Lenses and Accessories
  Flash            5    Aperture Control Systems  23
   Points to Note       5    Standard Lenses           23
 The Pentax               (H3), SV and   Wide-Angle and Long             ^SiSuper 52                            Focus Lenses           21
  Loading          9    Supplementary Lenses for
                                      Close-UPs               25  Unloading        g
                                                               26  Shooting         9     Extension Tubes
                                    Pentax Copying Equipment 28
 The Pentax 52 (H2), SI (HI) and    Extension Bellows         28  SIa                                tli"#tttoscope Attach-  Loading         n                              29
 Unloading        13    Right-Angte Finder Eye-
 Shooting         13      Piece                    29
The pentax K                      Focusing Magnifier        29
 Loading         14    AccessorY Shoe            29
 Unloading        14    Cassette                 29
 Shooting         11  The Pentax Exposure Meter
The Pentax and Pentax S            Fixing the Meter to the
  Loading                     I7      Camera                 30
  Unloading                  t7     Taking the Meter off the                                 Camera                  30
  Shooting                   t7                                  Using the Pentax Meter    30
The Pentax Nocta                    Testing and Replacing
  Construction               20        Battery                  32
View original page 17Page 19 · Read text
www.butkus.us
2. Set the exposure. The shutter speeds may be set before or after
   cocking the shutter. Turn the speed dial either way to bring the
   required speed opposite the line in the centre of the dial. For time
   exposures, set the shutter speed to B; the shutter will remain open
   as long as the release is depressed.
3. Focus and determine the picture area by looking through the finder
   eyepiece. Turn the.focrrsing ring on the lens mount until the micro-
   prism zone image in the centre of the viewfinder is clearly in focus.
4. Switch on light meter. Push up the switch button which is situated
   on your left on the side wall of the front of the camera body. The
   small cut out window above the switch will turn to red indicating
   that the meter is in the switched on position. Obscrve through the
   viewfinder the movement of the metei's needle which is on the right
  hand side of the ground glass; and
5. Set diaphragm. As you rotate the diaphragm ring the needle moves
  up and down. When it comes to rest at the centre you have set
   the correct exposure. If the needle does not reach the centre no
   matter how far you turn the diaphragm ring, that indicates that the
   shutter speed requires changing. With the needle off centre towards
   the "f " mark it means too much light and the shutter has to be                                                6'-" 64116 1fu41   set to a faster setting. If the needle is close to the
   indicates under exposure and a slower shutter speed setting has to
   be chosen.
6. Release the shutter. When the shutter is released the meter switch
   will automatically turn off and the needle remain fixed at the
   centre. The diaphragm n'ill re-open to its full aperture and the
   image will look brighter.
SeIf-Timer
  The self-timer setting lever is situated on the camera front panel. If
the lever is pushed down fully it produces a delay of 13 seconds,
pushing  it down only partly a varying delay of 5 to the full 13 seconds
is obtainable. The cocked self-timer is released by pressing the small
button which is normally hidden behind the self-timer lever in the
"out of action" position. If you have set the self-timer, but change
your mind and do not want to use it, you only need to press the shutter
release button on top of the camera and the shutter will be immediately
released without delayed action.
Flash
  The Pentax Spotmatic has a shutter slightly different to the other
models which makes it possible to use electronic flash at 1/60th second.
Points to Note
  The Super Takumar/1.4 50 mm. is only suitable for the Spotmatic
and the latest SV and SIA models which have an orange coloured
                                                             I  5 PENTAX SPOTMATIC
View original page 19Page 20 · Read text
'"R" marking on the film rewind knob, When removing this lens from
the camera body the rear portion has to be protected by a rear mount
cup to avoid scratching its rear element.
  Tripod bush: The length of the tripod screw should not exceed the
standard 3ll6thin. (4* mm.) otherwise the camera base might be
damaged.
  Pentax cassette: The reloadable metal cassette supplied for Pentax
cameras cannot be used with the Spotmatic. A special cassette is in
preparation.
  Exposure meter: The meter should be kept switched off when not
actually taking readings otherwise the battery will rapidly be exhausted.
To replace the battery, open battery housing in the base plate of the
camera marked "BATT" remove the old battery and replace by a new
one with its "+" side down. Use Mallory PX400 or equivalent battery.
  To check battery turn the shutter speed dial until its index turns to
red and then turn on the meter switch. When the battery is still in
good condition the needle rapidly drops to the minus side. If it does
not drop rapidly the battery should be replaced by a new one.


I  6 PENTAX SPOTMATIC
View original page 20
Page 21 · Read text
www.butkus.us
     THE PENTAX 53 (H3), SV
         AND SI]PER 52

  The Pentax 53 (I{3) is also known in the U.S.n. as the Honeywell
Pentax.
  These models have an interchangeable lens with fully automatic
diaphragm operation worked by the shutter release. A diaphragm
release lever on the base of the mirror housing pushes a pin on the
back of the automatic diaphragm lens which causes the diaphragm
 to close down to the pre-selected opening. The aperture of this fully
automatic lens opens up immediately after the shutter has run down.
A serrated lever on the rear of the lens mount can be set from "A"
(automatic) to "M" for manual setting of the diaphragm.  The Pentax S3 (fB) is fitted with the 55 mm. Auto Takumar/1.8.
  The Pentax Super 52 is fitted with the 55 mm. automatic Super
Takumar /2, otherwise identical to 53. This model is produced for the
Japanese home market only.
  The Pentax SV is fitted with the 55 mm. automatic Super Takumar
/1.8 or the 55 mm. automatic Super Takumar f 2 and has in addition
to the features of the 53 a built-in self-timer and a self-zeroing exposure
counter.
  THE FOCAL PLANE SHUTTER has speeds of 1, ], +, *, l/15, ll30, tl60, lll25, ll250, 1/500 and U1000 sec, B and T. All speeds
are on one single shutter speed dial which does not revolve while the
shutter is being released. It is synchronised for flash bulbs and elec-
tronic flash.
  THE FRAME OF THE MAGMFYING EYEPIECE behind the
pentaprism has grooves to accept a right-angle finder, focusing mag-
 nifier, accessory shoe and Pentax exposure meter.
  THE MICRO-PRISM ZONE in the centre of the Fresnel screen
of the viewfinder permits ultra fine focusing. It consists of minute
triangular prisms forming a pattern of dots when the subject is out
of focus.
 A WINDOW in the camera top shows a red dot when the film and
shutter have been wound, ready for the next exposure. This disappears
when the shutter has run down.
 THE REVERSING BUTTON in the base plate of the camera
disengages the transport sprocket for rewinding. It will stay down
when depressed, and pops up automatically on working the film
transport lever.
  THE STANDARD LENS accepts 49 mm. screw-on filters and lens
hood.
  FOR CLOSE-UP PHOTOGRAPFIY at distances below the normal
focusing range of 17 in. a set of extension tubes is available for lens-
to-subject distances between 20 and 3.5 in., and a bellows unit for a
                          PENTAX 53 SV, SUPER 32 7 r
View original page 21Page 22 · Read text
THE PENTAX 53 (H3), SV, SUPER 52


                                                        Film counter
                                                   Speed dial

                                                          Eye piece
                                               Rewind knob
                                                   with crank
                                                   Film indicator
                                                                       lris "Auto-
                                              Manual" lever
                                                           Pre-selector
                                                    aperture ring
                                                          Flash sockets
                                                  Focusing mount

                                         Digitally signed by mike butkus
                               DN:                                 cn=mike butkus, mike                                o=orphancameras,                                                 ou=29,            Reversing button
                                 email=mike@butkus.org, c=US
                                    Date: 2018.04.11 17:58:49 butkus        -04'00'
The film counter, fitted in the rapid winding lever, counts exposures forward and shows the number
of pictures taken. Ihe speed diol on top of the body sets the shutter speeds from  l-l /1000 second.
The viewfinder eye-piece has a special mount to take accessories  (see page  | 8). Ihe re-wind knob incor-
poratesafoldingcronklor fastrewinding.  Theftlmindicotor isadial belowtherewindknobandcan
besetindependently.  Theiris"Auto-Monual"  /everonthelensopensthediaphragmfullyforviewing,
closes it down automatically while taking, then opens the diaphragm up again. Alternatively, on
"M"  setting, the lens is always at the aperture selected. Ihe pre-selector operture ring sets the lens
stop to be used for the exposure. The flash sockets serve for focal plane bulbs and electronic flash
respectively. The focusing mount moves the whole lens forward and back and carries a distance scale
marked in feet and meters. The rewinding button in the camera base disengages the transport mech-
anism when rewinding the film.


Shooting with the Pentax 53, SV and Super 52, From left to right: Advance film and tension shutter with
rapid winding lever; set the exposure time on the shutter speed dial; pre-select the lens ap-erture,on
the lcns mount; set the iris "Auto-Manual" lever to "A";  finalf focus the lens with the front ring
on the mount and press the release button to take the picture.
I  8 PENTAX 53, SV, SUPER 52
View original page 22Page 23 · Read text
www.butkus.us
 continu-ous_range gt clo_se--up work down to 2| in. with the standard
 lens. The Pentax No. I clole-up lens permits focusing rrom iaf io l1 in.
  OTHER ACCESSORIES include a microscope adapter, copying
 stand, focusing magnifier, right-angle finder, reliradable-cadsette ani
 accessory shoe.

 Loading
 1. _open the camera back by pulling down the sliding latch in the side
 2. Insert the film cassette.
 3. Fix the film to the take-up spool.
 4. Close the camera back.
 5. Make two blind exDosures.
 6. set the film countei 1o                                                         e tgrr (not on Sv model, where the counter is
    self-setting).
7. Set the fiIm indicator.
 (Inloading
 l. set for rewinding by depressing the reversing button marked R in
   the base of the camera. It will remain depressed automatically until
_ the transport lever is moved on insertinf the new film.2. Rewind the film.
3. Open the camera back and remove the cassette.

Shooting
1. \ilork the film transaort by moving the transport lever as far as it
   will go. when the shutter is tensioned a small window next to thti
  shutter speed dial shows a red signal. when this signal disappears,
  you know you must advance the film and tension thl shutteibefor6
  the next shot.
2. set the exposure. The shutter speeds may be set before or after
  cocking the shrrtter by turning the speed diil either way to bring the
  required speed opposite the line in the centre of the dial.
    For short time exposures, set the shutter speed to B: the shutter
   will remain open as long as the release is depiessed.
  _-FoI long time exposures set the shutter speed-ttre  to T and release.  The shutter will remain open until you turn     dial away from the
  T setting.
3. set the aperture by turning the rear ring of the lens mount until the
   re_quired aperture-clicks into position opposite the red dot in front
  of this ring Half stops are indicated 6y white dots between two
  apertures. To utilize the fully automatic aperture setting of lenses
  so ltted pusb the black lever behind and t6 the left of tfr-e aperture  scale_upwards so that the letter A, engraved in white, is visible.
  This keeps the aperture open for focusing and viewing at-full bright-
                         PENTAX 53 SV, SUPER 52 t   I
View original page 23Page 24 · Read text
ness and also re-opens the aperture automatically immediately the
  shutter has run down.
   To observe the depth of field on the reflex screen with the lens
  stopped down, the aperture can be set manually by pushing dovn
  the black lever behind the aperture scale so that the letter "M"
  ensraved in red is visible.
4. F6cus and determine the picture area by looking through the finder
  eyepiece. Turn the.focgsing ring olthe lens mount until the micro-
  prism zone image in the centre of the viewfinder is clearly in focus
  and completely free from distortion.
5. Release ihe shutter gently. On releasing, the diaphraern will auto-
  matically close down to the pre-selected-again      aperture bpfore the shutter  runs down, and will open       immediately afterwards to full
  aperture.

Self-Timer
  The Pentax SV has a self-timer built-in with a delay adjustable
between 5 and 10 seconds.
1. Set the self-timer cocking wheel on the top plate of the camera below
  the rewind knob by turning it in a clockwise direction as far as it
   will go.
2. Rele-ase the self-timer by pressing the selfitimer button which is
   situated in the top plate between the rewind knob and the penta-
  prism housing.
  the self-timei cocking wheel can be set before or after the rapid
winding lever of the camera has been cocked. When the shutter is in
the reldased position the V mark on the rim of the self-timer wheel
comes to the front, indicating that it requires winding to be able to
take a picture.
  To pioduce a shorter than l0-second delay time, press the self-timer
releas6 button after the self-timer wheel has been wound about 50".
This will give about 5 seconds delay.


                                                                                                                                                                                                                                                                                                                                                                                          .{
                                                                                                                                                              )
                                                                                                                                                                     x


                                                                                                                                                                                                                                                                                                                                                                                                  'rl


t  t0 PENTAX Sl, SV, SUPER 52
View original page 24From the M. Butkus archive. Original publisher and archive notices are retained.
Check the model and edition against your equipment.
PDF verified 2026-10-10.