Film cameras
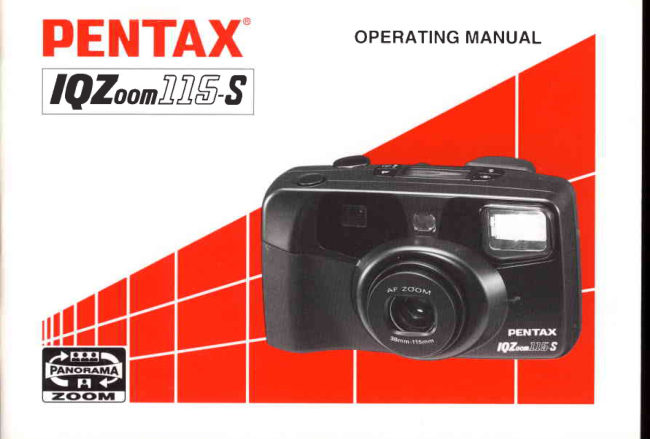
Pentax IQ Zoom 115-S User manual
User manual for Pentax IQ Zoom 115-S. 46 pages in English. Read the original PDF, download or print a copy without registration.
46 pagesEnglish4.9 MB PDF
Loading your manual…Open PDF directly
Document details
- Brand
- Pentax
- Model / document
- Pentax IQ Zoom 115-S
- Document type
- User manual
- Language
- English
- Pages
- 46
- File size
- 4.9 MB
- Category
- Film cameras
- Document date
- Not specified in catalog
Search available document text
Find a term, then jump to its page in the original PDF. Image-only pages may not be searchable; check the PDF for exact wording and diagrams.
Page 2 · Read text
Congratulations on your purchase of the PENTAX  IQ     Icon indicators used in this manual
Zoom | 15-Sand welcome to the world of Pentaxzoom
compact photography! Your compact, light weight
camerais a great companion to preserveyour favorite      Operation direction               -
memories.Its built-in 38-l l5mm zoom lens gives you
the freedom to frame everything from breathtaking      Automatic operation                       f  rrrrf
landscapesto family portraits,even detailedclose-ups.
The built-in auto flash helps you capture subjects in                                                                                                                                             t  ldimly-lit places or photograph indoor scenes with       Attention
clarity and brilliance. Also included are panorama./
standardformat mid-roll switching capability, and a     Lamp lighted
wirelessremotecontrol is optionallv^ensurei available.Multi(6)-
segmentmetering system       very precise meter-
ing for optimum exposure under any given lighting     Lamp blinking
conditions. Since most of the operations - including
film     loading,                film speed                           setting,                               winding/rewinding,                                            Correctfocus     and exposure                     control                                       - are                                automatic, you can                                                                                                                                    l,
take great pictures effortlessly.
                                                    fncorrect                             Xo Please read this manual carefully before operating
  the camera to take consistently superior pictures.     The namesof the camera's working parts are listed on
. Pay specialattentionto the cautionsand notesin this     the front and back flaps of this manual. Keep the flaps
  Operating Manual. Picturesand illustrations shown    unfolded for quick referencewhile readingthe manual.
  herein may differ from the camera's actual appear-
  ance.
View original page 2Page 3 · Read text
Q  Strap lug
O  Shutterreleasebutton
@ Drive button
@ lnfinity-landscapebutton
@ LCD panel
@ Mode button
@ Red-eye reduction flash button
@ Autofocus window
I   Built-in flash
@ Lens
0) Viewfinder window
@ Self-timerlamp
(D Lieht sensorwindow
@ Remotecontrol receiver
View original page 3
Page 4 · Read text
OUTLINE OF BASIC OPERATIONS
                            e


Open the back cover (see  Load the film and close the  The film will automatically Push the Main Switch but-
page 8).                   back cover (see page 9).   advance to the first frame  ton to switch on power (see
                                                  (seepage 9.)            page 4).
  tr              A                          o
      rl     I
     :'  l.


                                                                                                                                                                                                                                   I G   ,      lrr-fl6rffiE__-J
        ll\___J|-++ry--9H+e:M

Frame your subject and Focus on your subject (see Depressthe shutterrelease When the film is finished,
operate the zooming lever  page l4).                   button. In dark conditions. the camera will automati-
to compose the shot (see                          the flash will  discharge cally rewind  it (see page
page 6).                                             automatically(seepageI 5).   I 8).
View original page 4Page 6 · Read text
Jf    STRAP ATTACHMENT

                                                  Attach the strap to the camera as illustrated. When
                                                  attaching an optional Remote Control Holder to the
PREPARATIONS BEFORB      asstrap,shownpassinthethestrapillustation.throughUsethetheRemotetab onControlthe clampHolder(see
TAKING PHOTOGRAPHS         illustration) to open the battery chamber cover.
                                                                                          .  To prevent the camera from swaying a lot whileFor  optimum  performance  you  should
familiarize    yourself   with   certain           walking, adjust the strap so the camerarides above                                                  your waist.fundamentals   before   taking   any
photographs.


 Remote Control Holder (Option)
View original page 6Page 7 · Read text
MAIN SWITCH AND BATTERY CHECK


Main  switch                                          Battery  check
To switch on, pushtheMainSwitchbutton. The lens     After you turn the Main Switch ON, the lens slightly
extendsslightly to the wide-angle38mm settingand the    extends and the lens cover opens.You are now ready
LCD panel is on. To switch off, push the main switch     to shoot. See page 36 when the battery exhaustion
button again. When not in use, ensure that the camera    symbol ( ! ) appears on the LCD panel.
is switched off.
                                                                                                  .   If the camerais on and left unusedfor over 3 minutes,
. Use one 3V lithium battery, type CR123A or the       the lens automatically retractsand the power switches
   equivalent.                                                        off to save battery power.
. The lens cover automatically opensand closeswhen         .   If the Main Switch is turned on within 60 minutes of
  the main switch is turned on and off. Never attempt       auto-power off, the previous setting will automati-
   to open the lens cover manually.                           cally return.


4
View original page 7Page 8 · Read text
ro H'LDrHE.ornu#&    "ow


    When shooting, hold the camera securely with both     Caution:
     hands.Keep the camera as still as possible,and gently    Do not hold the zoom lens becauseit moves back and
     depressthe shutterreleasebutton. (If too much force     forth while in operation.
        is applied, the camera is likely to shake,andthe picture
        will be blurred.) Try to braceyour elbows againstyour     Note:
      body, or support yourself and the camera against a         . Make sure not to obstruct the autofocus window.
      stable,stationaryobject, such as a wall.                      lens, light sensorwindow or the built-in flash with
    When using the flash with the camera positioned ver-       your fingers or hair.
        tically, hold the camera so that the flash is above the
      lens.
View original page 8Page 9 · Read text
.i;.;,rt:,-,.,r;1'1-,1,."fiii;
    /,
3f   OPERATING 38-115mmZOOM LENS


                                      When you move the zooming lever to the right ( |  ), the lens moves
                                               towards the  I l5mm telephoto setting and frames the subject
                                          more closely. When you move the zooming lever to the left
                                                                              (lll),   the lens moves towardsthe wide-angle 38mm setting.
                                     When the lenszooms to the desiredsetting,releasethe zooming
                                                      lever and depressthe shutterreleasebutton fully to take pictures.
View original page 9Page 10 · Read text
USABLE FILM

  TAKING PHOTOGRAPHS     DX FILM           Perforations   Filmcartridee


   After  reading this instruction manuat you
  should be familiar  with the functions available
  on the camera, and you're ready to insert the
   film.


                                                       Film speed(ISO rating)
Notes:
  When buying DX-coded films, ensurethat the pack-    Automatic   film speed setting
  age bearsthe "DX" mark.                           This camera is designed to use DX-coded films with
  Non-DX coded film cannot be used.               ISO ratings from 25 to 3200. When any of thesefilms
  Use high-speedfilm with an ISO rating of 1000 or     are loaded, the proper film speedis automatically set
  higher mainly for shooting indoors or in dimly-lit       for the camera.
  conditions.
  A film with ISO400 film speedis recommendedto
  get less image blur and to cover more of the photo-
  graphic situations.
View original page 10Page 11 · Read text
FILNI  LOADING     rEnsurerhe por+eris off beforeinsertingthe film.rCf


            I  Slide the back cover release lever down in the     Notes:
         direction of the arrow to open the back cover as        .  Ensurethe film is placedproperly betweenthe guide
          illustrated.                                                   rails G).
        Placethe film cartridgein the film chamberby fitting         .   If there is dirt on the film detector @ , film cannot be
            its flat side on top of the rewind shaft first and then      wound properly.
          slide the top end into the camera.
          Pull the film leaderout far enoughfrom the cartridge
          to reach the take-up spool Q.  Align the tip of the
          film with the film leader end mark O.


                                                               x Slack  NO!       C Flat   YES!
View original page 11Page 12 · Read text
5 When " | " appearsin the exposure counter on the
                                      LCD panel, the fllm automaticallysropswinding.
                                             The indication appearsas shown above. If (; ) does
                                                       not appear on the LCD panel, it indicates that the
                                                                film is not properly loaded.Ifthis occurs,reload the
                                                                   film.
After     the back            cover                        is                     closed,the film automatically                                                                                         If ( E ) blinks on the LCD panel, it meansthe film isadvances          to the                     first                   frame.                                                       not properly loaded.
Even          if       no            film                    is loaded,                         the                         motor                                operates                                                  for a         .  The exposurecounterindication will remain on evensecond        or         two               after                  the back                         cover                                          is                                   closed.                                                                                                  if the main switch is turned off.

Ensurethe film is taut as illustrated on the previous page. Take up any slack in the film by pushing it back intothe cartridge.
If the end of the film leader is extremely bent, straightenit or cut off the bent portion.
View original page 12Page 13 · Read text
VIEWFII\DER DISPLAYS AND SHOOTING RAI\GES

o                                                     First,ton.  switch on power by depressing the Main Switch but-
                                           Ordinary photography (standard format)@                             O  Autofocus frame
                                          Focus on the subject with this frame.
                       @ Close distancecompensationframe
                                   When the camera-to-subjectdistance is between 0.65m       t"l                             (2.1ft) and l.2m  (3.9ft), compose the scene within this
                                                frame.
                                                  €) Pictu re area
                                   When taking a normal picture, composethe scenewithin this
                                                frame.


                                         Panoramic format picture
                             O  Autofocus frame
                                          Focus on the subject with this frame.
                             O  Picture area
                                   When taking panoramicformat pictures,composethe scene
                                                    within this frame.
                                When taking panoramic format pictures at a distance
                                      between 0.65m(2.1ft)and 1.2m (3.9ft),keep in mind that as
                                   when taking ordinary pictures the picture area will shift
                                    downwards slightly. Autofocus is referred to as "AF".
                                           Shooting ranges(effective camera-to-subjectdistance)
                                                                                   .  The ordinary setting and panoramic mode allow a shooting
                                           range from co (infinity) to 0.65m (z.Ifil in wide 38mm,
                                       0.85m(2.8ft)in tele 115mm.
View original page 13Page 14 · Read text
-z=
tr    LAMPINDICATIONS

                                                        Notes:
                                                                                                            .   If the subject is too close, the green lamp blinks.
                                                            Adjust the camera-to-subjectdistanceso that the
   o                                                greenshutter.lampThe lightsshuttercontinuously,cannot be releasedthen releasewhile ittheis
                                                                blinking.
                                                                                                            .   If the subjectis evencloser,the greenlamp may light
   o                                                    continuously.In this case,keep in mind that the
                                                               shutter will be releasedwhen the shutter release
                                                            button is depressedfully.


    When you depressthe shutterreleasebutton halfway
     down, the lamps O, @ and/orG) tigtrtsup orblink as
     shown above.
    O Green lamp: When the subjectis in focus, it will
                          light up to indicatethat you can take
                     the picture;when the subjectis not in
                     focus, it will blink, indicating that
             il'J;H#:,T*,,1::.i'.::H:ff ij:
                     close.
   @ Rea lamp:  When the flash is ready to discharge,
                                      it will  light up. When the flash is
                         charged'it will blink'
     G) tnfiniry-ronar.bf;ng
        lamp:     When the infinity-landscapemode is
                       set,it will lighr up.                                                     1 1
View original page 14Page 15 · Read text
ORDINARY PHOTOGRAPHY


When the power is switchedon by depressingthe main
switch button, the camera automatically selectsthe
A uto and Single-Frame Shooting modes and the
exposurecounterindicationremainson asshownabove.
Thesemodesare usedfor taking ordinary pictures.The
built-in flash will dischargeautomaticallywhen the
subjectis poorly illuminatedor backlit.

. When the LCD panel display is different from the     When the built-in flash automaticallydischarges,
  one shown above (which indicatesthe other modes       the camera usesa shutter speedin the range from
  are set),switchingpower OFF and then ON restores      approx. I l4}th (wide-angle) to 1/60th sec. (tele-
  the Auto and Sinsle-FrameShootinsmodes.            position)when ISOl00 film is used.


1 2
View original page 15
Page 16 · Read text
DIOPTER AT}JUSTMENT


Aim the cameratoward a bright subject.While looking
through the viewfinder, adjust the diopter by moving
the diopter adjustmentlever to the right or left until the
AF frame appearsclearest.


                                                                               1 3
View original page 16Page 17 · Read text
TAKING   PICTURES    Shootingdistance:0.65m(z.lft) - "" (infinity)


                                                 2 Checking  the lamp  indication
                                               Depressthe shutterreleasebutton halfway down. When
1 Composing the scene                           the subjectis in focus,the greenlamp will light up. If the
After zoomingthe lensand composingyour scene,   subject is closer than 0.65m (2.1til in wide 38mm
focus on the subject with  the autofocus frame  in the    and 0.85m (2.8ft)in tele 115mm, the green lamp
center of the viewfinder.                                        will  blink to warn you. In this case,extend the
                                                 camera-to-subjectdistance until the green lamp is
                                                                                           lit continuously. The shutter cannot be released
                                                  while it is blinking.
                                                                                                  . When the red lamp lights up, it indicatesthat the
                                                                  built-in flash will discharge.Ensure that you are
                                                             within the flash effective rangebefore shooting.(see
                                            page 15.)

1 4
View original page 17Page 19 · Read text
rocus-LocKsHoorING&


          If you shoot without positioningthe autofocusfiame         I Focus on the subject with the autofocus frame
         ( tl ) on the main subjectof the picture as shown above,          ( O ) .
      only the background will be in focus. When the main     When you wish to focus on the face, which appears
      subject is off the autofocus frame in the center of the       very small in the viewfinder, fbcus on the chest
      viewfinder,use the focus-locktechnique.                 instead to  fill  the focus frame with more of the
         ( Focus lock is the function to lock foius.)                  subiect.
                                             When the shutterreleasebutton is depressedhalfway
                                                       down, the green lamp on the left-hand side of the
                                                               viewfinder lights up and the exposureand focus are
                                                               temporarily locked.


     1 6
View original page 19Page 20 · Read text
Hard-to-autofocus subjects
                                                        Like many other autofbcus cameras,the camera's
                                                     autofocussystemis highly precise,but not perfect.
                                        Some subjectsmay not be focused as you wish. In
                                                such a case, use the focus-lock technique on a
                                                        subjectnear the actual one and equidistantfrom the
                                                          lens. Subjectswhich may fool the systeminclude:

                                                              1. Black objectslike hair, which don'treflect much
                                                                       light (and therefore don't reflect infrared auto-
                                                      focus beams).3 While depressingthe shutterreleasebutton halfway,                                                               2. Wire netting, latticework, iron exercise-bars,etc.  re-aim the camera or recompose the picture, then                                                             3. Flickeringlight sourcessuchasneonsigns,fluo-  releasethe shutter.                                                    rescent lamps, TV images, sunlight coming
                                                       through trees, etc. and subjects illuminated byNotes:                                                     theselight sources..  You can releasefocus lock simply by lifting your                                                               4. Glossy and reflective surfaces like glass, mir-   finger from the shutter releasebutton.                                                               rors. car bodies.etc,o Focus lock function does not work in the Consecu-                                                               5. Fast-moving objects, like trains or automobiles   tive Shootinemode.                                                                    in motion.
                                                               6. Water jets, water surface, smoke, flame, fire-
                                                     works, etc.,which have no distinctor consistent
                                                        form, or a subjeclin mist.


                                                                               1 7
View original page 20Page 21 · Read text
uNLoADTNGFrLM :ffft";'"'fffiil.ti"''the camera in the shade or use your body to


I  Rewinding  the film                             2 Unloading  the film
After you have exposedthe last frame of the roll, the    To unload thefilm, open the backcover,andremovethe
lens retractsand the film rewinds automaticallv. Then.     cartridge from the chamber by pulling the top out first
the motor stops,and (C) blinks as shown to indicate    with your finger.
that the film has been rewound.
                                                  Notes:
o 424-exposure roll of film takesabout 20 secondsto         . The shuttermay be releaseda frame or two even after
  be rewound.                                           the specifiednumber of frames have been usedup as
.  During rewinding,the exposurecountercountsframe       indicated by the number of shots shown on the film
  numbers in reverse.                                      canister.If this occurs,theseextra framesmay be lost
r The entire roll of film including the film leader is         in the processing.
  always rewound into the cartridge to prevent any         .  Never open the back cover until the whole film roll
   part of the film being exposedto light.                        is rewound.

1 8
View original page 21Page 22 · Read text
{                                                                          .t


Rewinding  a film  in mid-roll                      2 While depressingthe drive mode button, depressthe
If you wish to unload a film before exposing all the        shutterreleasebutton. Film rewindins starts.When
frames, follow proceduresdescribedbelow.               a roll of film is rewound to its end, thl motor stops
                                                and ( fl ) blinks, indicating that the back cover may be
I  Turn the main switch ON and hold down drive      opened safely.
  button for more than 3 seconds.( 32@) appearson the
  LCD panel, indicating that the mid-roll film rewind-
   ing mode has been set.


                                                                               1 9
View original page 22Page 23 · Read text
HOW TO SELECT MODES/RBT}. I
TAKING BETTERPHOTOGRAPHS   EYE REDUCTIONFLASH MODE

                                 a To set various required modes, depressthe buttons O and/or @.
                            - ' . - \ l                                                .  For normal use, set the Auto and Single-FrameShooting modes as
                    I       z-:r                  lll                                                            {        shown on the right. When the main switch is turned ON, this mode is
                                      automaticallyset.   l.__ptffi
r To set various exposuremodes, depressthe Mode Button.
       Itt   -                         o               o                                  r LFl-[-;l        -[-                             l-l-                                        l-   f-                                                 l-   [I--J       |        |      |        I    ls     I    la      |      | B   |      | B  I
        Auto        Davrisht-svnc                               Burb        Burb-svnc
                                               31""1;ttxi.",l-"r'  ilil"liiifr"""
. When the button O  is depressedafter the shutter is released in any exposure mode, the Auto mode will
  automatically return.

Red-Eye Reduction Flash Function
To reduce the red-eye phenomenonin the picture, depressthe red-eye reduction flash button (o)  O. With this
mode,the flash dischargestwo consecutivetimes,reducingthe appearanceof the red-eyeeffect significantly.To
cancel the mode, depressthe red-eye reduction flash button again.


20
View original page 23From the M. Butkus archive. Original publisher and archive notices are retained.
Check the model and edition against your equipment.
PDF verified 2026-10-10.