Film cameras
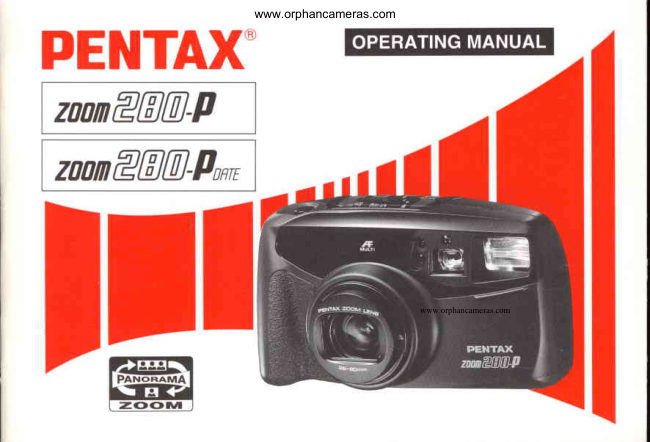
Pentax IQ Zoom 280-P User manual
User manual for Pentax IQ Zoom 280-P. 50 pages in English. Read the original PDF, download or print a copy without registration.
50 pagesEnglish3.5 MB PDF
Loading your manual…Open PDF directly
Document details
- Brand
- Pentax
- Model / document
- Pentax IQ Zoom 280-P
- Document type
- User manual
- Language
- English
- Pages
- 50
- File size
- 3.5 MB
- Category
- Film cameras
- Document date
- Not specified in catalog
Search available document text
Find a term, then jump to its page in the original PDF. Image-only pages may not be searchable; check the PDF for exact wording and diagrams.
Page 2 · Read text
www.orphancameras.com

Congratulationson your purchaseof the Pen-   lcon indicators used in this manual
tax Zoom 280-P and welcome to the world of
Pentax zoom compact photography! Your
compact, light weight camera is a great com-     Operation direction              -
panion to preserveyour favorite memories.
Its built-in 28-80mm zoom lens gives you the     Automatic operation              frrrrffreedom to frame everythingfrom breathtak-
ing landscapesto family portraits, even de-
tailed close-ups.The built-in auto flash helps     Attention
you capture subjects in dimly-lit places or
photograph indoor scenes with clarity and    Lamp lighted
brilliance.Also included are Programmed-
lmage-Sizetracking,interval shooting, pano-                                                    '.:..
ramic modes and a wireless remote control    Lamp blinking
feature.Since most of the operations- includ-
ing film loading,film speed setting,winding/     Correct
rewinding,focus and exposure control - are
automatic,you can take great pictures effort-                                            Incorrectlessly. The DATE model makes it easy to                          Xremember the dates when you took pictures.
                                      The names of the camera'sworking parts are
. Please read this manual carefully before    listed on the front and back flaps of this man-
  operating the camera to take consistently    ual. Keep the flaps unfolded for quick refer-
  superior pictures.                      ence while readingthe manual.. Pay special attention to the cautions and
  notes in this Operating Manual. Pictures
  and illustrationsshown herein mav differ
  from the camera'sactual appearanie.
View original page 2Page 6 · Read text
www.orphancameras.com
                                  T. STRAP ATTACHMENT

PREPARATION$BEFORE
TAKING PHOTOGRAPHS

For optimum performance you should  j
familiarize yourself with certain funda- i
mentals before taking any photographs.,j
                                                       i,


                                                    Fit the strap on the camera as illustrated.Use the
                                      clamp's protrusion@ to depressthe film auxil-
                                              iary rewind button, and ADJUST button on the
                              DATE model. Use the clamp's protrusion @ as a
                                         screwdriverto open the battery chamber cover.
                                                                             .  To prevent the camera from swaying a lot while
                                           walking, adjust the strap so the camera rides
                                      above your waist.
View original page 6Page 7 · Read text
www.orphancameras.com
2. MAIN SWITCHAND BATTERYCHECK
  ,re\\
        /\__-__\l/\
       .-\  ffiFUFATAIu-lxru!!!!!!u-./


Main switch                               Battery check
To switch on, push the main switch button. The     After you turn the main switch ON, the lens
lens extends slightly to the wide-angle 28mm      slightly extends and the lens cover opens. You
setting and the LCD panel is on. To switch off,     are now ready to shoot. (See page 40 when the
push the main switch button again. When not in     battery exhaustion symbol  (fl)    appears on
use, ensure that the camera is switched off.         the LCD panel.)
                                                                     *   lf the camera is on and left unused for over 3 . Use two 3V lithium batteries, type DL123A or
  CR123A. Do not remove the batteries before       minutes, the lens automatically retracts and
   they are exhausted, since they are used by the        the power switches off to save battery power.
                                                                      *   lf the main switch is turned on within 30 min-   date function on the DATE model to keep con-
   stant track of time.                                 utes of auto-power  off, the previous setting
o The  lens cover  automatically opens and         will automatically return.
  closes when the main switch is on and off
  Never attempt to open the lens cover manu-
    allY.4
View original page 7Page 8 · Read text
www.orphancameras.com
3. HOW TO HOLD THE CAMERA


When shooting, hold the camera securely   Caution:
with both hands. Keep the camera as still as   Do not hold the zoom lens becauseit moves
possible,and gently depressthe shutter re-    back and forth while in operation.
leasebutton. (lf too much force is applied,the
camera is likelyto shake,and the picturewill    Note:
be blurred.)Try to brace your elbows against       . Make sure not to obstruct the autofocus
your body, or support yourself and the cam-     window, lens, light sensorwindow or the
era against a stable, stationary object, such       built-inflash with your fingers or hair.
as a wall.
When using the flash with the camera posi-
tioned vertically, hold the camera so that the
flash is above the lens.
View original page 8
Page 10 · Read text
www.orphancameras.com
                                            1. USABLE FILM

    TAKING PHOTOGRAPHSPHOTOGRAPHS?'i#     DX FILM
       After reading this instruction manual#
      you should be familiar with the func- ",
       tions available on the camera, and.1$
       you're ready to insert the film.          t;|H$                                             DX mark
                                             Filmbpeed (lSO rating)

       Notes:                                      Automatic   film speed setting
             . When buying DX-codedfilms, ensure that    This camera is designed to use DX-coded
         the packagebears the "DX" mark.             films with ISO ratings from 25 to 3200.When
             . Non-DX coded film cannot be used.         any of these films are loaded,the proper film
             . Use high-speedfilm with an ISO rating of    speed is automaticallyset for the camera.
        1000or higher mainly for shooting indoors
          or in dimly-lit conditions.
View original page 10Page 11 · Read text
.                .             _ - _ ' i        www.orphancameras.com
2. FILM LOADING {Ensurethe poweris off beforeinsertingthe film.}
                                                                           at


1 Slide the back cover release lever down in    Notes:
  the direction of the arrow to open the back    o Make sure not to touch the lens with your
  cover as illustrated.                            fingers.
2 Placethe film cartridge in the film chamber       . Ensure the film is placed properly between
  by fitting its flat side on top of the rewind      the guide rails @.
  shaft first and then slide the top end into        .   lf there is dirt on the film detection section
  the camera.                         @, film cannot be wound properly.
3 Pull the film leader out far enough from the
  cartridge to reach the take-up spool O.
  Align the tip with the film leaderend mark
 @ .

                                                      x Slack NO!       O  FlatYES!
I
View original page 11Page 12 · Read text
www.orphancameras.com

                                         E

                                                                                            I
                                                         lu

                                                5 When ( l) appearsin the exposurecounter
                                              on the LCD panel, the film automatically
                                                   stops winding. The indication appears as
                                            shown above. lf ( i) does not appear on the
                                       LCD panel, it indicatesthat the film is not
                                                   properly loaded.lf this occurs,reload the
      4 After the back cover is closed, the film auto-       film.  lf  (t  ) Olinfs on the LCD panel, it
         matically advancesto the first frame.         means the film is not properly loaded.
         * Even if no film is loaded,the motor oper-     * The exposure counter indication will re-
I       coverates foris closed.a second or two after the back        off.main on even if the main switch is turned

       Ensurethe film is taut as illustratedon the previous page. Take up any slack in the film by
        pushing it back into the cartridge.
                lf the end of the film leader is extremely bent, straightenit or cut off the bent portion.
View original page 12Page 13 · Read text
www.orphancameras.com
3. VIEWFINDERDISPLAYSAND SHOOTINGRANGES

o                                                    ton.First, switch  on power  by depressing  the main  switch  but-
                                                  Ordinary  photography  T                              O  Autofocus frame
                                               Focus on the subject with this frame.
           6-l               @ WhenClose distancethe camera-to-subjectcompensationdistanceframe   is between 0.56m
                                                           (1.8ft) and 1m (3.3 ft), compose the scene within this       TJ                              frame.
                                   O  Picture area
                                       When  taking a standard picture, compose  the scene
                                                        within this frame.
                                              Panoramic format  picture
                                   O  Autofocus frame
                                               Focus on the subject with this frame.
                           @ Panoramic format close distance compensation frame
                                       When taking panoramic format  pictures at a distance
                                                   approx. 0.56(1.8ft)-1m(3.3ft),compose the scene within

                                                       Picture area   66-lo                        O  this frame.                                       When taking a panoramic format picture, compose the
                                               scene within this frame.           \J
                                     When taking panoramic format pictures, sliding the pano-
                                           rama mode selector lever switches the picture area to the
                                                   horizontal panoramic format frame.
                                                Autofocus  is referred to as "AF".
                                               Shooting range (effective camera-to-subject distance)
                                                                                                   .  The effective shooting range  is from  ". (infinity) to 0.56
                                                meter (1.8ft).
1 0                                              o  Subjects closer than 0.56 meter (1.8ft) cannot be focused
                                                      properly.
View original page 13Page 14 · Read text
www.orphancameras.com
4. GREEN/REDLAMPS            5. ORDINAHY'PHOIOGRAPHY

                  When you depress the                          When the power
                         shutter release button                                              is switched on,
                       halfway down, the lamps      7             f  o      the camera                       $ and/or                  @ light                                   up or                l        lexvt    automatically                           blink                           as shown                                    above.                                                                                       selects the
                                                                          Auto and
                                                                       Single-Frame
                                              Shooting modes and the exposurecounter indica-
                                                          tion remains on as shown above. The built-in flash
                                                               will discharge automaticallywhen the subject is
                                                    poorly illuminated or backlit.
                                                o When the LCD panel display is different from the
O Greenlamp: When the subjectis in focus, it will      one shown above (which indicates the other
                 light up to indicate that you can     modes are set), switching power OFF and then
               take the picture; when the subject    ON restoresthe Auto and Single-FrameShooting
                   is not in focus, it will blink, indicat-     modes.
               ing that you cannot take the pic-               '                ture becausethe camera-to-subject                                Diopter
               distance is too close.                                           adjustment
@ Red lamp: When the flash is ready to dis-                           Aim the camera
             charge,it will light up. When the                              toward a bright
               flash is being charged,it will blink.                                 subject. While
                                                                              lookingthrough
Notes:                                                                         the viewf in.der,
.   lf the subject is too close,the green lamp blinks.                                adjust the diopter
  Adjust the camera-to-subjectdistance so that the                              by moving the di-
  green lamp lights continuously,then releasethe                                opter adjustment
  sh utter.                                                                        lever to the right
.   lf the subject is even closer, the green lamp may                                   or the left so until
   light continuously.                                                             the AF frame ap-
                                                                           pears clearest.                                                                                          1 1
View original page 14Page 15 · Read text
www.orphancameras.com
6. TAKING  PICTURES  Shootins distance:0.56m {l.sft} - *  (infinity}


                                          2 Ghecking the lamp indication
                                       Depressthe shutter release button halfway1 Gomposing  the scene
After zooming the lens and composing your    down. When the subject is in focus, the green
scene,focus on the subject with the autofo-   lamp will light up. lf the subjectis closerthan
cus frame in the center of the viewfinder.       0.56 meter (1.8ft),the green lamp will blink to
                                        warn you. In this case, extend the camera-to-
* This camera uses multi-beam AF to focus    subject distance until the green lamp is lit
  the lens on the subject. Even if the subject   continuously.
   is slightly off the AF frame, the subject will
  easily be brought into focus.                o When the red lamp lights up, it indicates
* To focus on a particular spot in the AF       that the built-inflash will discharge.Ensure
  frame, selectthe AF spot mode.                  that you are within the flash effectiverange
* When the power is turned on, the multi-      before shooting.(see page 13.)
  beam AF mode is automaticallyset.
1 2
View original page 15Page 16 · Read text
www.orphancameras.com


                                                  Automatic Flash Emission
                                                                                                                                           -ffiI  -                  When taking picturesin low light or in a backlitsitu-
                                                       ation, the flash will automaticallydischarge.When
                                                    the shutter release button is depressed halfway
             @    downing theinflashlow light,is readythe toreddischarge.lamp will lightlf theup,redindicat-lamp
                                                       blinks,this indicatesthat the built-inflash is being
                                              charged and the shutter cannot be released.There-
                                                        fore, ensure that the red lamp lights continuously
                                                  before taking pictures.
                                              Red-eye
                                                Shooting portraitswith the flash may result in "red-
                                                     eye", (the red dot in your subject'seye). This cam-3 Shooting                                                 era includes a red-eye reduction flash function,Depressthe shutter releasebutton fully, and                                               which suppressesthe red-eye phenomenon by us-
the shutter will release.Then, the film auto-     ing pre-flash.See page 17 for details.matically advancesto the next frame.
                                                   Flash effective ranges {Nega-colorfilm used)
Notes:                                                                                                           "                                                 rso   roo'     200          40il. When the shutter is released,the self-timer     Lens
  lamp momentarilylights up to indicatethat       Wide-angle
  a picturehas been taken.                     28mm       0.56-5.0m  0.56-7.0m  0.56-10.0m
.   lf you wish to focus on another subject, lift           tlf lr  your finger off the shutter release button
  and depress the shutter release button         Telephoto80mm        0.56-2.7m   0.5S3.8m  0.56-5.4m
  halfway down again.                                   ( l )o The shutter cannot be releasedwhile the
  lens is zooming.                                                                      1 3
View original page 16Page 17 · Read text
(Removewww.orphancameras.comthe film from the camera in the shade or use your body
 7. UNLOADING    FILM  to shade the camera.l
                il


Rewinding  the  film                             Rewinding a film  in mid-roll
After you have exposed the last frame of the roll, the         lf you wish to unload a film before exposing all the
lens retracts and the film rewinds automatically.   frames, push the auxiliary rewind button with the
Then, the motor stops, and ( c u   I blinks as shown     clamp's protrusion.The lens retractsautomatically
to indicatethat the film has been rewound. To un-    and film rewinding starts.
load the film, open the back cover. Removethe car-
tridge by pulling the top first.                        Notes:
                                                                                 r The shutter may be releaseda frame or two even
o A 24-exposureroll of film takes about 20 seconds       after the specified number of frames have been
   to be rewound.                               used up as indicated by the number of shots
o During rewinding,the exposure counter counts     shown on the film canister.lf this occurs,these
  frame numbers in reverse.                        frames may not be developed.
o The entire roll of film including the film leader is    o Never open the back cover until the whole film  always rewound into the cartridge to prevent any                                                                        roll is rewound.   part of the film being exposedto light.
1 4
View original page 17Page 18 · Read text
TAKING BETTER-FFr PHOTOGRAPHSFrr .A_AAF www.orphancameras.com- _r __ i,6'niHOW riisHTO SELECTMoDEMODES/RED-EYE REDUC-

To select various exposure modes, depress the mode button O.
                                   Slow-Shutter
         Auto        Daylight-Sync
   frol-*               l- .-_l*l-@-l--'l-lspeed (Flash-OFF) o--l:elBulb    I       t   I               l,     |   o                                 lil          (Red-eye                        Daylight-Sync     Auto                                          A
      reduction flash   (Red-eye reduc-                        |
     mode)               tion flash mode)                        | '[TB]_F=] |

o Depressingthe red-eyereductionflash button O  in the Auto or Daylight-Syncmode alternatesthe normal
  mode (indicatedby black line) with the red-eyereductionflash mode (ind'rcatedby red line).
o Depressbuttons O and/or O  in successionto set the required modes. To switch to the next mode from the
   Bulb, Bulb-synchro,Intervalshooting mode, depressthe button O or G), then promptly depress it again
  while the exposurecounter indicationis blank. For normal use, set the Auto and singte-Framemodes]
o When the power is switched on, the Auto and Single-Frame-Shootingmodes which are selectedfor normal
  use are automaticallyset.

To select  the  desired  shooting  modes,  depress  the  drive  button  @.
                  f-to       *,    E     rNr  A-l   -     i-*l      t-i        i-l      i-+t     l---,
  T    Single.-Frame   Self-Timer     Consecutive  Multi-Exposure  IntervalShoot-  I
       Shooting       Shootinga      Shooting     Shootind        ing      I                                                                                                                                                                    I
                                                                               1 5
View original page 18Page 19 · Read text
www.orphancameras.com


  In the Slow-Shutter speed                      In the Bulb mode, if the red-
  mode, if the red-eyereduc-                 eye reduction flash button
  tion flash mode button (t)                               (rl @  is depressed,the de- @ is depressed,the desired  [o-l         sired flash mode is set as  @-t  mode is set as shown at   lsl         shown at right.                  I  Bl                               '''Y;:!:n"'  right.                                                      'j'
                 F-tY                     FI                    tsl                                               I  Bl                                    Slow-speed                                            Bulb-synchro
                                       syncnro
                                    Y                                                                                   i
                 Fl                           lTo.l                   tsl                                        I  Bl                                     Slow-speed-syn-                                         Bulb-Synchro
                          '."xl,""{.,x?t;i":?                                    tion(Red-eyeflash reduc-mode)                                          mode)
                                                                                   V

   In the Slow-Shutter Speed, Slow-Speed-Synchro, Bulb or Bulb-Synchro mode,  if the mode button
  Q  is depressed,the exposure mode changes as shown in the normal mode (indicated by black line).
   In the Slow-Speed-Synchroand red-eye reduction flash modes or the Bulb-Synchro and red-eye
  reduction flash modes,   if the mode button tl) is depressed, the exposure mode changes as in the
  red-eye reduction flash mode (indicated by red line).
1 6
View original page 19Page 20 · Read text
www.orphancameras.com

To set the desired focusing modes, depress the tmage button @.


* In the infinity-landscapeshooting mode, the multi-beamAF mode will automaticallyreturn
   after the picture is taken.
x When the power is switched from OFF to ON, the multi-beam AF mode will automatically
   return.
* Holding down the lmage button for two seconds sets the exposure compensationmode (See
  page 31.).

Red-eye reduction flash function
To reducethe red-eyephenomenon in the picture,depressthe red-eyereductionflash button
(O)  O' With this mode, the flash dischargestwo consecutivetimes, reducingthe possibilities
of the red-eyeeffect significantly.To cancel the mode, depressthe red-eye reduction button
again.


                                                                               1 7
View original page 20Page 21 · Read text
www.orphancameras.com                                              f

                       Depressthe
                    mode button
                       ,  o      until the (t)    ?')             lex9t      appears on the
                  LCD panel. The
                          flash  will  dis-
                       charge both  in
dark and bright conditions.When the portrait
is taken even if the subject is not in a backlit
situation,the front of the subject may be cast
in shadow. In such a case, use the Daylight-
Synchro Shooting mode (Flash-ONmode)
within the flash-effectiverange to take pic-
tures.This will ensurethat a picture is well    Without Daylight-Sync
exposed without any shadow. When you
wish to dischargethe flash, use this mode. In
this mode, the flash will be discharged.
Notes:
o Ensurethat the red lamp on the right-hand
  side of the viewfinder eyepiecelights up
  when the shutter release button is de-
  pressed halfway down before shooting. A
  red lamp blinkingindicatesthat the flash is
  being charged.
. Ensure you're within the flash effective
  range even when you use the built-inflash
  as a fill-in flash in daytime.                With Daylight-Sync
1 8
View original page 21Page 22 · Read text
i&.rril1ii#,!;.:.
 fiir.''r                                    www.orphancameras.com$[riii      T#|GIS[Gl,.,p|i||  ';ffiE$ffi',',ffi,ffiffil.l19fil.gffiH..H$:i

                             Slow   Shutter                           Slow-Speed-
                           Speed  (Flash-                          Synchro
                   lo       OFFI                         lo       Shooting                                                                        l')                              I us,     Depressthe                                                     Iu*,     (Flash-ONl
                         mode button                             Depressthe red-
                                     until the (E| @ )                           eye   reduction
       symbol appears on the LCD panel. In this     flash mode button  in the slow-shutter-speed
       mode, the flash does not discharge, and a    mode  to set a slow-speed-sync mode  until
         picture is taken at a slow shutter speed up to     the  (g  +) symbol appears on the LCD panel.                                                                                            It  is possible to photograph  subjects and
       approx. 115 second. Use  it in places where    background in a balanced way (as shown  in
        flash photography is prohibited, such as in     the photo) by using the built-in flash to prop-
       theaters and museums. Furthermore, this     erly expose the foreground  subject and a
      mode is also useful for a natural existing light    slow-shutter-speed to expose the low  light
         effect in photography.                        backg rou n d.

        Note:
               . When  shooting  in darkness, the  shutter
        speed gets slower, and camera shake is
            likely to blur your picture. Use of a tripod is
        recom mended.
View original page 22Page 23 · Read text
U.U l.,l.lUr  ##ffi.HiffiH.,.i'1il,.Higgfiru.C.www.orphancameras.com

                      Bulb mode                            Bulb-synchro
                  (o Bl                         mode (t B  I                        I  o     Depressthe                                                                lf the red-eye
              lu  {,t     mode button                               reduction f lash
                             until (Q B   I                                  Il    1,,:  button ( l)  is
                      appears on the
                  LCD panel. The
shutter remains open up to 10 minutes as    panel and the Bulb-synchromode is set. This
long as the shutter release button is held     lets you use the flash in additionto the Bulb
down. This mode is useful for long exposures   mode, so you can take a portrait photograph
required for shooting fireworks and night    with a night scene in the background,for ex-
scenes,for instance.When using this mode,   ample.
the camerashould be mounted on a tripod so
that the camera will be steady.


Bulb mode, approx.4 sec. (lSO100)

2 0
View original page 23Page 24 · Read text
www.orphancameras.com


                                      Moving the zooming lever to  ( f ) advances
                                             the digit up to the 10 min. setting.
                                     Moving the zooming lever to (lll)  counts
                                               the digit down to the 1 sec. setting.
                                                                                     . When the timer settingis blank in the Bulb-
                                          Timer mode, it indicatesthat the camera is
                                                        in the Bulb mode.
                                           o To switch the exposure mode from the
                                          Bulb (B) or the Bulb Synchromode (t B  )
                                                       to the ne)d, depressthe mode button twice
                                                        in quick succession.Bulb-Timer mode                                                                                     . To cancelthe Bulb-Timermode before theWhen shooting in the Bulb or Bulb-Synchro                                                shutter is releasedcompletely,depressthem o d e ,a s h u t t e sr p e e do f 1 , 2 , 3 , 4 , 5 , 6 , 7 , 8 ,                                         main switch. In this instance,the power is10,15,20,30,40,50, 60,90 sec.,2,3,4,5, 6,7,                                                 not switched off.
8, 10 minutescan be set. (Example:1S=1sec.,      . Consecutiveshooting mode does not work2M=2 minutes)                                                         in the Bulb mode: use the Bulb-Timermode
                                                                                    if you wish to take consecutivepicturesinTo set the desired shutter speed in the Bulb or                                               the Bulb mode.Bulb-Synchromode, first selectthe Bulb or
Bulb-Synchromode. Then, while depressing
the mode button and while the symbol ( B  )
is blinkingon the LCD panel,move the zoom-
ing lever.Holdingthe zooming leverwill ad-
vancethe digit continuously.
                                                                      2 1
View original page 24From the M. Butkus archive. Original publisher and archive notices are retained.
Check the model and edition against your equipment.
PDF verified 2026-10-10.