Film cameras
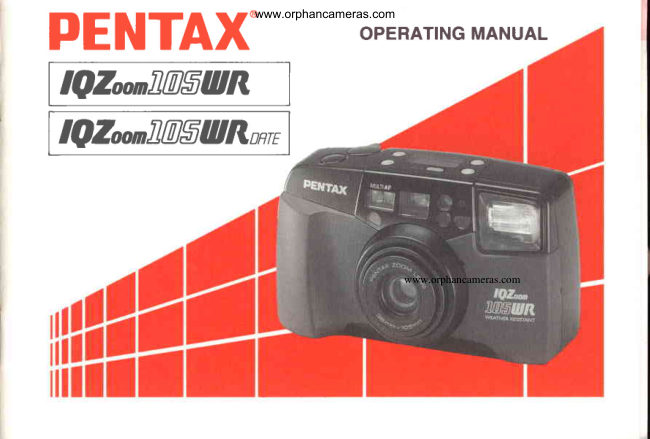
Pentax IQZoom 105-WR / IQZoom 105-WR User manual
User manual for Pentax IQZoom 105-WR / IQZoom 105-WR. 53 pages in English. Read the original PDF, download or print a copy without registration.
53 pagesEnglish2.4 MB PDF
Loading your manual…Open PDF directly
Document details
- Brand
- Pentax
- Model / document
- Pentax IQZoom 105-WR / IQZoom 105-WR
- Document type
- User manual
- Language
- English
- Pages
- 53
- File size
- 2.4 MB
- Category
- Film cameras
- Document date
- Not specified in catalog
Search available document text
Find a term, then jump to its page in the original PDF. Image-only pages may not be searchable; check the PDF for exact wording and diagrams.
Page 1 · Read text
www.orphancameras.com.PERATINGMANUALPENTAX'

 lQzounil@SURorulI


                                                                www.orphancameras.com
View original page 1Page 2 · Read text
www.orphancameras.com


Congratulations   on   your   purchase   of   the     Icon indications used in this manual
PENTAX  IQ Zoom l05WR  and welcome  to the
world   of  Pentax zoom  compact  photography!      0peration direction               -
Your  compact,  light  weight  camera  with  a
weather-resistance capability  is a great companion     Automatic operatron                    f  rrufto preserve your favorite memories.
o Please read this manual carefully before opcrat-      Attention   ing the camera to take consistently superior pic-                                 i-:
   tures.
o Pay special attention to the cautions and notes     L a m p  l i g h t e d
                                                      illustra-                                and                   Manual.                              Pictures   in      this         Operating                                                                                                       ..:..                                 from                                          the                herein                 may  differ   tions       shown                                      cam-     L a m p b l i n k i n g   era's actual appearance.                                                                               ..:'.
o Illustrations   in  this operating manual  are the
  DATA  MODEL.                             Correct                     o
                                                                                       I ncorrect                             X
                                             The name of the camera's working  parts are listed
                                               on the front and back of  this manual. Keep the
                                                             flaps unfolded  for quick  reference while  reading
                                                      the manual.
View original page 2Page 4 · Read text
www.orphancameras.com
OUTLINE OF BASIC OPERATIONS
                                                             .)
                    ,,1                 lEl                                 tr)- . -

Open  the  back  cover  Load the film and close  The film  will automati-   Set   the   Power      ./
(see page l4).             the  back  cover  (see   callv  advance  to  the  Panorama switch to the
                     page 15).                        firsf  frame  (see page  ON  position. (see page
                                                                                                                      l 6 ) .


Frame your subject and  Focus on your  subject  Depress the shutter  re-  When  the  film  reaches
operate the zoom lever   (see page l9).             lease button.   In  dark    its end, the camera will
to  compose  the  shot                              conditions,  the   flash   automaticallv  rewind   it
(see page 13).                                                 will   discharee   auto-   (see page 22).
                                                    matically (seipage 2l).
View original page 4Page 5 · Read text
www.orphancameras.com


          Although  we have carefully  designed  this camera  for safe operation,  ptease be sure  to follow  precautions
          given  in this page.
      /\wenune       This mark indicates precautions that if not followed, could result in se-
                              rious injury to the operator.
      Acnurroru    This mark indicates precautions that,  if not followed, could resutt in
                         minor or medium injury to the operator or damage to the equipment.
       A  wlnnrrc               A  cnurron
                     . The  electric circuits  inside the  camera     o Do not use the flash near anyone's eyes, as
            contain high voltage working parts. Never           it may hurt them. Be particularly careful with
            attempt to disassemble the camera your-      the flash around infants.
               self .                                         o Never try to disassemble, short or recharge
           o Never touch internal parts of the camera if       the battery. Also, do not dispose of the bat-
            they become exposed from dropping the       tery in fire, as  it may explode.
           camera or for some other reason, as there         I Remove the battery from the camera imme-
                is danger of electric shock.                      diately if it becomes hot or begins to smoke.
                     . Be sure to store batteries out of the reach     Be careful not to burn yourself during  re-
              of children. Seek medical assistance im-      moval.
            mediately if accidentally swallowed.
rl
View original page 5Page 6 · Read text
www.orphancameras.com
PRECAUTIONS FOR YOUf,. CAMERA


Precautions when taking pictures                     Precautions for storage
o Do not drop the camera or allow  it to hit a solid     o Avoid  leaving the camera for extended periods
   object.  If the camera suffers a severe shock or         in places where temperature and humidity  are
  impact, take  it to a Pentax service center for in-       high such as in a car.
  spection.                                      o Do not store the camera in a closet with moth-
o Be careful not to subject the camera to strong        balls or in a case where chemicals are handled.
   vibrations, shock or pressure. Use a cushion to       Store it in a place with good air circulation  to
  protect the camera when carrying  it in a motor-       prevent fungus growth.
  cycle, car, boat, etc.
o Condensation on the interior or the exterior of     Precautions  for proper care
  the camera may be extremely harmful  to the     o Use a blower and lens brush to remove dust ac-
  camera  mechanism   :rs   it  may  cause  rust.       cumulated on the lens or the viewfinder  win-
  Furthermore,   if the camera is taken from warm       dow.
  temperature to a subfreezing one or vice versa,    o Never use solvents such as paint thinner, alco-
   the formation  of icelets may cause damage. In        hol or benzeneto clean the camera. To clean the
  such a case,put the camera into a case or plastic        external camera surfaces, - but not glass sur-
  bag so that any changes in temperature differ-        faces; using a dry or silicone-treated cloth is rec-
  ence is minimized. Do not remove  it from the      ommended.
  bag until temperature has stabilized.
r Regular size color prints may cut  off what ap-
  pears on the extreme edges of the  film  frame.
  Compose your picture with a margin  of safety
   at the edges.
View original page 6
Page 7 · Read text
www.orphancameras.com
                             PRECAUTIONSFOR BATTBRY USAGE

 Other precautions                                                      r  IJse one 3V lithium  battery, type CR-123A  or
 o The temperature range at which  this camera       the equivalent.
   functions properly is 50t  to -10 "C (l2Z"F  to        r Misuse of a battery can cause hazards such as
   l4"F).                                              leakage, overheating, explosions, etc. The bat-
 r To maintain optimum performance, it is recom-        tery should be inserted with  the  " t,,  and ,,-,,
  mended that the camera be inspected every one       sides facing correctly.
   or two years. If the camera has not been used    o Never try to disassemble,short or recharge the
   for.an extended period, or is being prepared for        battery. Also do not dispose of the battery in a
  an important photographic session, it is recom-          fire, as it may exploded.
  mended that you have the camera inspected or         .  Battery performance may be temporarily  hin-
   test shoot with  it.                                 dered in low temperatures, but  will  recover in
o The PENTAX  warranty provided only  for  the       normal temperatures.
   lepair of defects in materials or workmanship.     o Keep a spare battery on hand  for replacement
  Damage of any kind cannot be repaired at no       convenience when shooting outdoors or while
  qlarge under the term of the warranty.  If the        traveling.
   difficulty  is caused as a direct result of the prod-     o When the camera is in a bag, make sure the
   uct being used in conditions as out lined in the      main switch is OFF. Otherwise, battery power
  other operation contrary to the instructions out-      may be wasted if the shutter release button  is
   lined in this manual, charges will be assessedor        accidentally pushed.
  a repair quotation will be provided.
LCD  (Liquid-crystal  display)
o When the LCD  is exposed to high temperatures
  over about 60 "C, it may blacken, but when the
  temperature normalizes,   it  will  return  to  nor-
  mal.
o The LCD may also slow down  in response to
  lower temperatures, but this is a normal charac-
   teristic of an LCD.
View original page 7Page 9 · Read text
www.orphancameras.com


                                                  Never use solvent such as soapy water, deter-
                                                       gent or alcohol to clean the camera. Otherwise,
        e                                                    the camera's weather-resistant capability  will be
                                                          impaired.
     caz                                             Only  the external camera housing  is weather-
                         0                                                   resistant. The camera will be damaged  if sand,
                                                         dust or water enters the camera while changing
o  If there is dirt or saltwater droplets on the cam-        the film  or replacing the batteries. Note that in
  era after use, remove them with  a dry,  clean         this  case repairs  of  such damages  will  be
   cloth or wash the camera in clean slowly  run-       chargeable to you even during the warranty pe-
  ning water, or in a basin filled with water after         riod.
  making sure that the main switch  is turned  off
  and back cover and battery chamber cover are
  closed. Wash the camera in water for a maxi-
 mum of 2-3 minutes. NEVER  move the zoom
  lever to zoom the lens while the camera is sub-
  merged in water.
o This camera is not designed to water pressure.
  Never leave the camera in water for a long
  time or wash it clean in a vesselswhere the hy-
  draulic pressure is high.
View original page 9Page 10 · Read text
PRACTICAL SHOOTING  GUIDBwww.orphancameras.com


     Taking a picture through a window...                                          ...........p.33
     Focusing on a particular spot.                                                   ...........p.34


             Flash  photography

    Taking a picture in low light situations.........                         ....'........:...p.27
     Minimizing the red-eye effect.                                                ....p.24,25
     Taking a portrait when the subject is in the shade.                              .'.......p.26
     Taking a picture of people with sunset scenery in the background           ...........p.27
     Taking a picture of people with night scenery in the background            ...........p.28


     Making a subject larger or smaller.
View original page 10Page 11 · Read text
www.orphancameras.com


        Taking  pictures of people in various situations

Taking a portrait when the subject is in the shade.                              .........p.26
Taking a picture of people with sunset scenery in the background                   '..... ..p.28
Taking a picture of people with night scenery in the background                     . ... ... . .p.28
Putting yourself into a picture.                                                     '.............. .p.29


       Landscape photography

Taking a picture of people with sunset scenery in the background        ...'..........p.27
Taking a picture of night scenery...                                           ...'.........p.28
Taking a picture of people with night scenery in the background                    ... ... ..p.28
View original page 11Page 12 · Read text
www.orphancameras.com
T-1B1.9I.ggNTBNTS

o Names of working parts """"""""""'Flaps        TAKING  BETTER PHOTOGRAPHS
o Introduction               """"'Front    fold out    How to select Flash, AF and Drive mode """24
o Outline of basic operations  """"'Inside    cover     Daylight-sync shooting                 """""'26
o For safe use of your camera  """"   """"""'l         Taking a picture at a slow shutter-speed""""'27
o Precautionsfor your camera """""'"""""2          o Slow Shutter Speed (Flash-OFF) """""""'27
o Precautionsfor battery usage """"""""""'3          o Slow-Speed-SyncShooting (Flash-ON)   """27
e Weather-resistance capability              """4      Bulb shooting"""'                       """"28
o Practical shooting guide """               """6      Bulb-sync shooting'                         ""'28
o Table of contents                      .'""".'"'8        Self-timer photography " " " " "_" " " " :"'  " " "''29
                                                Using wireless remote control (option)  """"'30
PREPARATIONS   BEFORE   TAKING     Infinity-landscape shooting        """"""""33
PHOTOGRAPHS                               Spot AF shooting                        """34
Strap attachment """"                """"""".'9        Focus-lockshooting             """""""""35
Turning on the power              """""""'10         Hard-to-autofocus subjects               """"'36
Holding the camera            """""""""12         Taking Panorama format picture"  "'  " " " " " "'37
Operating 38 - lO5mrn zoom lens  """""""'13      DATE MODEL...                          ......4O

TAKING PHOTOGRAPHS                    MAINTENANCE   CONSIDERATIONS
F i l m  l o a d i n g " " " " "                    " " " " " " " " ' 1 4        Battery exhaustion warning         """""""42
Diopter adjustment                           ""'17       lnstalling/Replacing    battery               """43
Lamp indications                         """17      Troubleshooting""""               """"""""4
Viewfinder displays             """""""""18          Specifications""".'"'                        ""'46
Taking pictures                       """""'19       Warranty policy                          """"'48
o Flash effective range """'              """"21       L C D p a n e l                     . . ; . " , . . . . . .      . . . . . : . . . . . 5 1
Unloadingfilm  """"              """"""""22


8
View original page 12Page 13 · Read text
www.orphancameras.com               STRAP ATTACHMENT


PRBPARATIONS
BEFORE
TAKING
PHOTOGRAPHS
For  optimum   perform-
ance you should familiar-
ize yourself  with  certain
fundamentals before tak-
ing any photographs.
                                    F
                                   Fit the shap on thEcamera using the following procedures.
                         1 Pass the strap through the hoops O and the clamp €) as illus-
                                 trated 1.
                        2 Pass the strap end O trough the camera's strap lug as illus-
                                   trated 2.
View original page 13Page 14 · Read text
www.orphancameras.com                           TURNING ON THE POWER


  Pass the  strap  end G) hough  the clamp O     To switch ON, set  the Power,/Panorama   switch
  and hoop (O as illustrated  3.                         to the ON  position.
  Use the illustrated part A  for pushing the mid-        r  When the camera is not in use. ensure that the
    roll rewind button to rewind a film  before ex-       Power/Panorama  switch is set to the OFF po-
   posing all the frames. Use the illustrated  part          sition.
 @ for opening the battery chamber cover.         o   If the camera is ON and left unused for over 3
                                                      minutes. the lens automatically retracts.


10
View original page 14Page 15 · Read text
www.orphancameras.com


 When the power turns ON,  the lens slightly  ex-
 tends to the wide-angle 38mm setting and LCD
 panel is on. The camera is now ready to shoot.
 o See page 43 when the battery exhaustion sym-
    bol  (  !  ) appears on the LCD  panel.
 r  Battery performance may be temporarily  hin-
   dered in low temperature, but  will  recover in
   normal temperatures.

b


                                                                      11
View original page 15Page 16 · Read text
www.orphancameras.com
HOLDING THE CAMERA


Keep the camera as still as possible, and gently de-     Notes:
press the shutter release button.  If too much force     o When  using the flash with  the camera  posi-
is applied, the camera is likely  to shake, and the        tioned vertically, hold the camera so that the
picture  will be blurred. Try  to brace your elbows        flash is above the lens.
against a stable, stationary object such as a wall.      o Do not hold the zoom lens because it moves
                                                  back and forth while in operation.
                                                o Make sure not to obstruct the autofocus win-
                                                                                                  . dow, lens, light sensor window  or the built-in
                                                             flash with your fingers, hair or other object.


12
View original page 16Page 17 · Read text
www.orphancameras.com
OPERATING 38-105mmZOOI'{ LENS


    VV    AA                                  When you move the zoom lever to the right  (  |  ), the lens
                                    moves towards the l05mm  telephoto setting and frames
                                               the subject m.o-reclosely. When you move the zoom lever
                                                   to the left  (f f f),  the lens moves towards the wide-angle
                                  38-mm setting. When the lens zooms to the desired setti;g,
                                              release the zoom lever and depress the shutter release bul-
                                               ton fully  to take pictures.
                                                                                 .                                          ?o not apply force to the zoom lens as doing so causes
                                      damage to the camera.

                                                                      1 3
View original page 17Page 18 · Read text
www.orphancameras.com
                         FrrMT0ADNG(ff#:',1[ffiif;fl. )


TAKING PHOTOGRAPHS

After   reading  this  instruction  manual  you
should be familiar  with the functions  available
on the camera, and you're ready to insert the
frlm.


                                                1 Slide the back cover release lever down in  the
                                                               direction  of the arrow to open the back as illus'
                                                                 trated.


                                                                                             , d r
                                                                ;:b


14
View original page 18Page 19 · Read text
www.orphancameras.com


2 Place the film  cartridge  in the film chamber by     Notes:
   fitting  its flat side on the top of the rewind shaft     o  If there is dirt on the film detector tD, film can-
    first and then slide the top end of the film  car-        not be wound properly.
   tridge into the camera.                                            r Ensure the film  is taut as illustrated on the illus-
3 Pull the frln  leader out far enough from the car-         tration. T_akeup any slack in the film by push-
   tridge to reach the take-up spool. Align the tip of      11g it bact  into the cartridge.
  the film with the frlm leader end mark O.                r   If the end of the film  leadel is extremely  bent,
4 Close the back cover as illustrated.  The  frlm        straighten  it or cut off the bent portion.
  automatically advances to the first frame.
                                                                   \ \\)6n.rrAftt H \ / ,        \\atvreq]1 t - = / H                   LIEF                                      htr   t--)
                                           X Shck No!               (JFlat  Yes!
                                                                      15
View original page 19Page 20 · Read text
www.orphancameras.com

                       a
   @.Q--=,,@   o%o-rr l.  grl
                                                        =-aE-G_| .rF.jO           g         rD\7':      [    @[*",'l:l

5 When  (  I ) appears in the exposure counter on     Automatic  film speed setting
  the LCD  panel, the  film  automatically  stops     This camera is designed to use DX-coded  films
  winding. The indication afpears as shown above.     with ISO rating from 25 to 3200. When any of
                                                     these films  are loaded, the proper  film  speed is
                                                         automatically  set for the camera.
o The exposure counter indication will remain on
  even if the main switch is turned OFF.             Notes:
                                                o Non-DX  coded films cannot be used. If Non-
6  If  ( t  )  ttints  on the LCD  panel,  it means the     DX coded film  is used, the film  speed is auto-
   film  is not properly loaded. Reload the film.            matically set to the ISO 25.
                                                o A  film  with  ISO 400  film  speed  is recom-
                                           mended to get less image blur and to cover
                                              more of the photographic situations.

16
View original page 20Page 21 · Read text
DIOPTER ADJUSTMENT   www.orphancameras.comLAMP INDICATIONS


                                                                   \ilhen  you depress the shutter release button  half-
Aim  the camera toward a bright  subject.  While     way down, the lamp 6  and,/or @  lights up or
looking through the viewfinder, rotate the diopter      blinks as shown above.
adjustnent   dial  to the  right  or  left  until  the AF     6  Green lamp (Focus status)  :
frame appearc in the sharpest focus.              When the subject is in focus, it will  light up to in-
                                                       dicate that you can take the picture; when the sub-
o pe sure to adjust the diopter  before use.             jects not in focus, it will blink, indicating that you
                                                 cannot take the picture.
                          @ nea hmp  (Flash status)  :
                                        When the flash is ready to discharge,  it  will  light
                                                      up. When the flash is being charged, it will blink.
                                                    Shooting ranges (effective camera-to-subject dis-
                                                       tance)
                                             The standard format and panorama format  allow
                                                a shooting range from oo (infinity)  to O.6Sm (Z.t
                                                              ft).                                                                                                                     r
View original page 21Page 22 · Read text
VIEWFINDER DISPLAYS   www.orphancameras.com


 Standard format                       When the autofocus frame in the viewfinder  is not clearly
                                              seen, adjust the diopter by moving the diopter adjustment
                                                       dial.
                                                   Five-point AF Frame (O and @)
            ---O---1                       For normal photography, compose the scene within  the
                                    AF frame.       L(                )j   )             When the lens is set at 38mm setting, compose the scene
                                                  within  the AF  frame O. When the lens is set at the
                                                                       AF  frame                    tls                       l05mm  setting, compose the scene within  the                              o.
                                           o For other focal length, the range widens as the focal
                                                  length increases from 38mm to l05mm.
Panorama format
                                              Spot AF Frame O
                                                 Select the Spot AF frame to focus on a particular  spot in
                                                 the frame.

                                            Close distance compensation frame @
                                           o When  the camera-to-subject-distance  is  closer  than
                                              1.2m, compose the scene within  this frame.
                                           o When the camera-to-subject distance is less than 1.2m,
                                                    the panorama format  is not recommended due to a sub-
                                                           stantial difference between what you see through  the
                                                    viewfinder  verses the image you will  obtain the actual
                                                       picture taking area.
View original page 22From the M. Butkus archive. Original publisher and archive notices are retained.
Check the model and edition against your equipment.
PDF verified 2026-10-10.