Film cameras
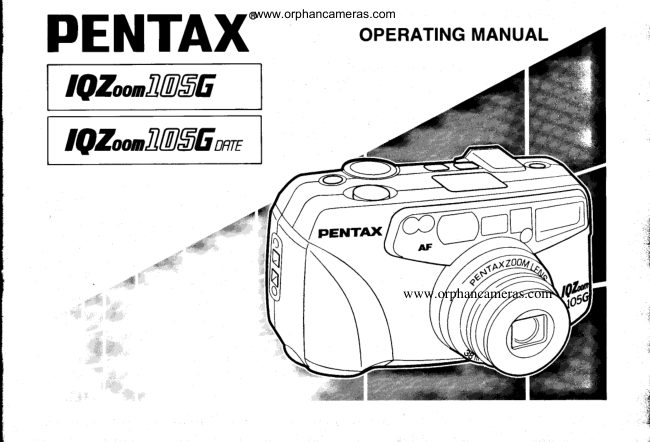
Pentax IQZoom 105G / IQZoom 105G date User manual
User manual for Pentax IQZoom 105G / IQZoom 105G date. 32 pages in English. Read the original PDF, download or print a copy without registration.
32 pagesEnglish1.7 MB PDF
Loading your manual…Open PDF directly
Document details
- Brand
- Pentax
- Model / document
- Pentax IQZoom 105G / IQZoom 105G date
- Document type
- User manual
- Language
- English
- Pages
- 32
- File size
- 1.7 MB
- Category
- Film cameras
- Document date
- Not specified in catalog
Search available document text
Find a term, then jump to its page in the original PDF. Image-only pages may not be searchable; check the PDF for exact wording and diagrams.
Page 3 · Read text
www.orphancameras.com


Congratulations on  your  purchase of  the    Icon indications used in this manual
PENTAX IQ Zoom 105G and welcome to the
world of Pentax zoom compact photography!      Operationdirection         €
o Pleaseread this manual carefully before op-     Automatic operation            furrf
  erating the camera to take consistently supe-
  nor prctures.
. Pay special attention to the cautions and     Attention                   i-:
  notes in this Operating Manual. Pictures and
  illustrations shown herein may differ  from    Lamp lighted
  the camera's actual appearance.
o Illustrations in this operating manual are the     L a m p b l i n k i n g
 DATA MODEL.                                                                                                                                                      .':i
                                           Correct                     o
                                                                             I ncorrect                             X
View original page 3Page 4 · Read text
www.orphancameras.com
TABLE OF CONTENTS

Names of working parts'           """"""2      TAKING  BETTER PHOTOGRAPHS
LCD panel                            """3    How to selectthe Exposure Modes, AF and
For safe you of your camera            """'4     Drive Modes                """"""""'21
Precautionsfor your camera             """'5      Daylight-syncshooting           ."..".....'22
Precautionsfor battery usage          """"6      Taking pictures at a slow shutter speed
                                          o Slow Shutter Speed(Flash-OFF)  """"'Zl
PREPARATIONS BEFORE TAKING           o Slow-Speed-SyncShooting (Flash-ON) "'Zg
PHOTOGRAPHS                            o Bulb shooting                   """"24
Strapattaclment                          '...'....7    o Bulb-syncshooting                 """'24
Installing/Replacing battery            ........8    Self-timerphotography"""       """"""'25
Batteryexhaustionwarning             ."'.'..8     Infinity-landscapeshooting          .........26
M a i n s w i t c h . . . . . . . . .                        . . . - . . . . . . . 9  Date Model  ""               ""'."""""'26
Diopter adjustment                   """"9      Troubleshooting                 """""'28
Holding the camera          """"""""10        Specifications""'                 """""'30
Operating38-105mmzoomlens """"'.'.'.'11      Warranty policy                          "'..32

TAKING PHOTOGRAPHS
Film loading""'                    """"'12
Viewfinderdisplays          """"""""15
Lamp indications                     "'."'15
Taking pictures                    """"16
Hard-To-Autofocus Subjects           ""17
Focus-lockshooting                     .."""  18
Unloadingfilm "          """"'..........'..'19
View original page 4Page 6 · Read text
www.orphancameras.com
                             LCD PANEL

 O Strap lug (p.7)                                                dppear simultaneously as shown. @ Main switch (p.9)
  (O Shutter releasebutton (p.10)
 @ AF,/ infi nityJandscape
     /Drive  button (p.21)
 @ Mode button (p.21)
 O LCD panel
 O Red-eye reduction lamp button
  G) Built-in flash
  9  Self-timer lamp (p.21,25)
 @ kns
  (D Viewfinder window
 @ Autofocus window
 @ Light sensorwindow
 @ Diopter adjustment dial (p.9)' @ Viewfinder eyepiece
 @ Zoom lever (p.11)
 @ nnm information window
 @ Back cover releaselever (p.12)
 @ Battery chamber cover (p.8)
     Tripod @            socket                o*:H&1.iction nash   tt61?jv-LandscapeMode    Back cover  {D
 @ Mid-roll rewind button (p.20)          exhaustionwarning
                                  "(B;lr5"                  8i1tfi"6t!r.zs)                                   OSlow-Speed Shutter (p-23)   @Flash on (p.22,23,24)
                                  @Exposure counter (p.14)     @Flash off (p.23,24)
View original page 6Page 7 · Read text
www.orphancameras.com
FOR SAFE USE OF YOUR CAMERA


Although we have carefrrlly  designed this camrcra for safe op€rstion,  please be sure to  follow  precautions  given  in thb
page.

    WARNING           lhis  mark indicates prrcautions  that  if not followed,  could result in serious iqiuryA                      to the operator.
     CAUTION        This mark indicates precautions that  if not followed" could result in minor or me-A                 dium injury  to the operator  or damage to the equipment.
 A  wlnNrNc                  A cluuoN
o The electric  circuits  inside  the carnera contain     o I)o not use the flash near anyone's eyes, as  it
  high voltage working  parts. Never  attempt  to       rnay hurt them. Be particularly  careful with the
  disassemble the camera yourself.                           flash around infants.
r Never touch internal  parts of the camerr   if they     o Never  try  to disassemble, short or recharge  the
  become exposed from dropping the camera or        battery. Also, do not dispose of the battery  in
   for some other reason, as there is danger of elec-          fire, as it may explode.
   tric  shock.                                                                           . Remove the battery  from  the camera  immedi-
o Be sure to store batteries out of the reach  of        ately  if   it becomes hot or begin to smoke. Be
   children. Seek rnedical assistance imnediately   if        careful not to burn yourself during removal.
   accidentally swallowed.

                                                                          : *
View original page 7Page 8 · Read text
www.orphancameras.com
PRECAUTIONS FOR YOUR CAMERA

h,eceutions when taking pictures                  Precautions for prcper ctrre
o Do not use the camera where it may come in    o LIse a blower and lens brush to remove dust
  contact with rain, water or any other liquid,      accumulated on the lens or the viewfinder
  becausethe camera is not weather, water, or      window.
   liquid  resistant. Should the camera get wet    o Never use solvents such as paint thinner, al-
  from rain, splashing water, or any other liq-       cohol or benzene to clean the camera. To
   uid, wipe it off immediately with a dry soft      clean the external camera surfaces,- but not
  cloth.                                           glass surfaces;using a dry or silicone-treated
o Do not drop the camera or allow  it to hit a       cloth is recommended.
  solid object. If the camera suffers a severe   o The electric circuits inside the camera con-
  shock or impact, take it to a Pentax service       tain high voltage working parts. Never
  center for inspection.                           attempt to disassemblethe camera yourself.
o Be careful not  to  subject the camera to
  strong vibrations, shock or pressure. Use a    Precautions for storage
  cushion to protect the camera when carrying    o Avoid leaving the camera for extended peri-
    it in a motorcycle, car, boat, etc.               ods in places where temperature and humid-
o Condensation on the interior or the exterior         ity are high such as in a car.
  of the camera may be extremely harmful  to    o Do not store the camera in a closet with
  the camera mechanism as it may cause rust.      mothballs or in a case where chemicals are
  Furthermore,  if the camera is taken from       handled. Store it in a place with good air cir-
  warrn temperature to a subfreezing one or       culation to prevent fungus growth.
  vice versa,the formation of icelets may cause
  damage. In such a case,put the camera into
  a case or plastic bag so that any changes in
  temperature difference is minimized. Do not
  remove it from the bag until temperature has
  stabilized.
View original page 8Page 9 · Read text
www.orphancameras.com
                          PRECAUTIONS FOR BATTERY USAGE

Other precautions                              Misuse of a battery catrtause hazards such as
. The temperature range at which this camera      leakage, overheating, explosions, etc. The
  functioni^properlyis-50'C to - lo  " C (122      battery should be insertedwith the "*"  and
  "F to 14 "F).                                              "-"  sidesfacing correctly.
o To maintain optimum performance, it is rec-      Never try to disassemble,short or recharge
  ommended that  the camera be inspected      the battery. Also do not dispose of the bat-
  every one or two years. If the camera has not       tery in a fire, as it may explode.
  been used for an extended period, or is being      Battery performance may be  temporarily
  prepared for an important photographic ses-     hindered in low temperatures, but  will  re-
  sion, it  is recommendedthat you have the      cover in normal temperatures.
  camera inspected or test shoot with  it.          Keep a spare battery on hand for  replace-
o The PENTAX  warranty provided only  for      ment conveniencewhen shooting outdoors
  the repair of defects in materials or work-       or while traveling.
  manship. Damage of any kind cannot be re-     Be sure to store the battery out of the reach
  paired at no charge under the term of the       of children. Seekmedical assistanceimmedi-
  warranty. If the difficulty is caused as a di-       ately if accidentally swallowed.
  rect result of the product being used in con-     When the camera is in a bag, make sure the
  ditions as out lined in the other operation     main switch is off; otherwise, battery power
  contrary to the instructions outlined in this     may be wasted if the shutter releasebutton is
  manual, charges will be assessedor a repair       accidentally pushed.
  quotation will be provided.


                                                                                                                                :.d
View original page 9Page 10 · Read text
www.orphancameras.com
                                ATTACHMENT                        O,TRAP

                                                          Fit the strap on the camera as illustrated.
PREPARATIONS BEFORA          o LJsethe illustrated part ofthe strap for open-
TAKING PHOTOGRAPHS               ing the battery chamber cover, adjusting the
                                           data on the Date model, or pushing the mid-
                                                              roll rewind button.
View original page 10Page 11 · Read text
www.orphancameras.com
ag      INSTAILING,/REPTACING BATTERYUseone3V lithiumbattery(CR-123Aor equivalent)


                                                                  Battery  exhaustion warning
                                             When the battery  is nearly exhausted, the battery
                                                       symbol  (a)   appears on the LCD  panel to warn
                                                             you. Replace the battery as soon as possible. When
                                                                                          ( s)    starts blinking,  no operations can be per-
                                                           formed.
      Ensure that the power is off before replacing the                                                               Battery  life (using 24-exposure film  rolls):       battery.                                                          Approx.  15 rolls  using  flash 5O%  of  the  time        1. Open the battery chamber cover by using the                                                             (using the CR123A battery and under Pentax test-          strap clarnp's protrusion.
       2.Insert  onelithium  battery with the plus/minus       ing conditions).  Actual  battery  life/  Wrformance
            (+,/    -  ) sides matching the indications  in the    may vary drastically depending on usage of Power                                                   Zoom, Flash and external conditions such as tem-          battery compartment.                                                              perature and freshness of the battery.        3. Close the battery  chamber  cover.  Ensure  that
         the cover is locked with a click.                                                         Notes on replacing  the battery:
      o Ifthe  battery  is correctly loaded, the zoom lens     After  opening the battery chamber cover, correct                                                               the time and data. See page 26       moves slightly and the motor operates for a few
         second.
      o On the DATE  MODEL,  the data is initialized
       when the battery chamber cover is opened.
     8
View original page 11Page 12 · Read text
DIOPTER ADJUSTMENT6t      \IAI\- s\rlrcH        www.orphancameras.com


    When the main switch button is depressed,the    Aim the camera toward a bright subject. While
     power turns ON. When the power turns ON,     looking  through  the  viewfrnder,  rotate  the
      the lens extends slightly for opening the lens     diopter adjustment dial to the right or left until
      ciover.                                            the AF frame appears in the sharpest focus.
     o When not in use, ensure that the camera is
        switched off.
     o  If the camera is ON and left unused for over
       3 minutes, the lens automatically retracts.
View original page 12Page 13 · Read text
HoLDr\c rHE cr\rER{www.orphancameras.comA


     Keep the camera as still as possible steadying it     Notes:
      against your face.                            o Do not hold the zoom lens becauseit moves
                                                  back and forth while in operation.
     Depress the shutter release button gently.  (If     o When using the flash with the camera posi-
      too much force is applied, the camera is likely       tioned vertically, hold the camera so that the
       to shake, and the picture will be bluned.)             flash is above the lens.
      Try to brace your elbows against a stable, sta-
       tionary object such as a wall.

        I)o not to obstruct the autofocus window, lens,
        light sensor window or the built-in  flash with
      your fingers, hair or other object.

     1 0
View original page 13Page 15 · Read text
www.orphancameras.com
                        OFILML'ADING


TAKING PHOTOGRAPHS


After   reading   this   instruction   manual  you
should be familiar  with  the functions  available
on the cameru, and you're  ready  to  insert  the
film.


                                                       1. Open the back coyer as illustrated.

                                                                                                       ":


12
View original page 15Page 19 · Read text
www.orphancameras.com
)F--t7       TAKING   PICTURES    lshooting distance:0.65m (2.1ft) - oo (infinity)  ]


                                           the main   Lamp on                Blinking               *
                                                o The lamp blinks one of the following  red
                                                     sons.
            l. Composingthe scene                                                            4
       After  zooming the lens and composing your                                  O the subject is too close. Extend the camera-      scene, focus on the  subject  with  autofocus                                                             to-subject distance until the green lamp is lit       frame.                                                           continuously.      o When the main subject is off the autofocus                                  O The flash is being charged. Lift your fihger        frame in the center of the viewfinder, use the                                                      from the shutter releasebutton for a few sec-         focus-lock technique. See page 18.                                                  onds until the flash is fully charged.       2. Checking the lamp indication
      Depress the  shutter  release button  halfway    o  If you wish to focus on another subject, lift
      down. lVhen the subjec't is in focus, the green      your finger from the shutter releasebutton  ,
      lamp will light up.                            recompose and then depressthe shutter but-      o The green lamp blinks  if the subject is too                                                          ton halfway down again.
        close or the flash is being charged.            o  If  the  autofocus window   is  dirty,  the
                                                       autofocus may not function properly.
      1 6
View original page 19Page 21 · Read text
www.orphancameras.com
AFocus-LocK   sHoorrNc


         If you shoot without positioning the autofocus    1      on the subject with the autofocus frame                                                              flocns     frame ([])  on the main subject, only the back-      (LJ,).
     ground will be in focus. When the main subject                                               2 lVhen the shutter release button is depressed       is off the autofocus frame in the center of the                                                        halfway down, the green lamp in the view-      viewfinder,  use  the  focus-lock  technique.
     (Focus lock is the function to lock focus.)            finder lights up and the exposure and focus                                                       are temporarily locked.
                                                                                                                                                                                                                  i


    1 8
View original page 21Page 22 · Read text
www.orphancameras.com
                  &,*llo"in";il
                                                                                                     I      F{l-t

                                                                l--n    I
                                             I  "l
3 While depressing the shutter release button
  halfway, re-aim the camera or recomposethe    1 Rewinding the frlm
  picture, then releasethe shutter.                  After you have exposed the last frame of the
                                                                     roll, the lens rehacts and the frlm rewinds auto-
Note:                                                  matically. Then, the motor  stops, and  ( 0  )
o You can releasefocus lock simply by lifting      blinks as shown to indicate that the film  has
  your finger from the shutter releasebutton.     been rewound.
                                                                                    .  ( 0 ) blinks for approx. 5 sec. after the whole
                                                            film  is rewound.
                                          o Remove the film  from  the camera in the
                                           shade or by using your body to shade the
                                          camera
                                          o l}4-exposure  roll of film takes about 20 sec-
                                            onds to be rewound.
                                                                      1 9
View original page 22Page 23 · Read text
www.orphancameras.com
DAYLIGHT-SYNC SHOOTING


Depress the mode button until  (  I ) appearson
the LCD panel.
In this mode, the flash will discharge in both
dark and bright conditions. When a portrait is
taken with the subject in a backlight situation,
the front of the subject may be cast in shadow.    Without Daylight-Sync
In such a case,use the Daylight-Sync Shooting
Mode  (Flash-ON mode)  within  the  flash-
effective range to take pictures. This will en-
sure that a picture is well exposedwithout any
shadow. When you wish to use the flash, use
this mode and the flash will always discharge.

Note:
o Make sure you're within the flash effective
  range even when you use the built- in flash as
  a fill-in flash in daylight.

                                             With Daylight-Sync
22
View original page 23Page 24 · Read text
www.orphancameras.com
     TAKING PICTURES AT A SLOW SHUTTER SPEED


       Slow Shutter Speed (Flash-OFF)               Slow-Speed-SyncShooting (FIash-On)
        I)epress the mode button to set the mode until     Depress the mode button until (lED  appear onIFl,l#    (CID   appearc on the LCD panel.                the LCD panel.
         In this mode, the flash does not discharge, and       It is possible to photograph subjects and back-
       a picture is taken at a slow shutter speedup to    ground in a balanced way (as shown in the
        approx. l/3   geconds.Use it  in places wfrere    photo) by using the flash to properly expose
        flash photography  is prohibited, such as in     the foreground subject and a slow-speedto ex-
        theaters and museums.Furthermore, this mode    pose the low light background.
          is also useful for a natural existing light effect
         in low ambient photography.                     Notes:
                                                 o When shooting in low light, the shutter sped
                                                         gets slower, and camera shake is likely  to
                                                                 blur your picture. Use of a tripod  is recom-
                                                 mended.
                                                 o Make sure you are within the flash effective
                                                     range even when you use the flash as a fill-in
                                                                flash in daylight. Seepage 17 or 29.

                                                                            23
View original page 24Page 25 · Read text
www.orphancameras.com
BULB, BULB*SYNCHRO  SHOOTING

                          Bulb Mode (eB)
                           This mode is use-
                                    ful for long expo-
                          sures required for
                           shooting      fire-
                        works and night    Bulb-Synch Mode (f  g)
scenes,for example. When using this mode, the
camera should be mounted on a tripod so that     This lets you use the flash in addition to the
the camera will be steady.                      Bulb Mode, so you can take a portrait photo-
                                            graph with a night scenein the background, for
Depress the mode button until (O B)  appears   example.
on the LCD panel.
                                                    I)epress the mode button until  (  I B ) appears
Note:                                     on the LCD panel.
The camera should be mounted on a tripod so
tlrat the camera will be steady.                  Notes:
                                                                                     . Make sure you're within the flash effective
                                              range even when the Bulb-Sync Mode in use.
                                       Seepage 17 or 29.
                                          o Use of a tripod is recommended.


24                                        Bulb Mode, approx. 3sec. (ISOaO0)
View original page 25Page 26 · Read text
www.orphancameras.com
                   -      SELF TIMER PHOTOGRAPHY


           Self-timer
        Use the self-timer if you wish to get in the pic-
           ture. Use of a tripod is recommended.
        To use
                                                        on                                                                      the                                                                                   self-timer                                                                                  shooting          button until  (t))  appearson the LCD panel.      Noteslr#r :       Depress  the   AFr/inn*V-landscape/Drive                                                                                                  is recommended.                                                   o IJse                                                                         of a                                                                             tripod
? :       Assure that the subject is within the AF frame    o  If you are standing directly in front  of the
            in the viewfrnder. Depress the shutter release     camera when starting the  Self-Timer, the
          button fully.                                 camera will be focused in you, not the main
         o The shutter will be releasedin about 10 sec-      subjects.Be sure that you are behind, or next
           onds. When the Self-Timer is working, the       to the camera when starting the Self-Timer.
            Self-Timer symbol (t))  blints on the LCD    o When you want to use the flash with the self-
            panel, and the Self-Timer lamp lights up. The       timer, ensure that the red lamp is lit indicat-
          lamp starts blinking 3 seconds before the       ing  the  flash has been charged  before
             shutter is released.                              operating the self-timer.
        To cancel
        To cancel the self-timer at any time after  it's
        been activated, depressthe main switch button.
                                                                             25
View original page 26Page 28 · Read text
www.orphancameras.com


Correc'ting the date                          o  If you releasethe shutter while the blinking
Use the shap clamp's protrusion to depressthe      data is being corrected, the data cannot be
SELECT and ADJUST  buttons.                    imprinted.
1. To select the category of digits that you want                                                Operational precautions
  to change,depressthe SELECT button @ re-        . As you releasethe shutter, the bar( - ) mark  peatedly until the digits on the LCD  panel                                           on the display blinks for a few seconds,indi-  that you want to changebegin to blink.                                                     cating the data has been imprinted.
2. Depress the ADJUST  button (O to change   o If there is a white or yellow object in the cor-
  digts of the specifiedcategory you chosewith       ner of the picture where the data  is im-
  the SELECT button O.  nigits increase by       printed, the data may be difficult  to read.
  one each time you depressthe ADJUST  but-     When composing your photographs, try  to
  ton (O. Holding down the button will advance      avoid brightly-colored subjects in that cor-
   digits continuously.                               ner.
3. After the data has been adjusted, depress the
  SELECT button O until blinking stops. The
  bar mark (-) appearson the LCD panel, indi-
  cating that data imprinting choices are possi-
   ble.
o The blinking  ":' allows precise fine-tuning of
  the internal clock to the beginning of a speci-
   fied minute. To do so, depressthe mode but-                 'Day-Hour-Minute"  ton O   until                            digits
  appear and then depressthe SELECT button
  (D to make the ":" blink. Then depressthe     x The date in the picture above is
  adjust button G) in sync with a time signal.       simulated.                      27
View original page 28
Page 29 · Read text
www.orphancameras.com
TROUBLESHOOTING

What appears troublesome may be easily remedied. Here are some problems that may occur and
their remedies.
          Symptoms                          Causes and Remedies
 1. The shutter cannot be released.    a  Is the main switch turned offl  If so, turn  it on. See page
                                       9.
                                                              a  Is the battery exhausted?Replace it or insert new battery
                                                                      if  it is exhausted.Seepage 8.
                                                  a  Is  ( 0 ) blinking on the LCD panel? If so, the film has
                                been used up. Insert a new rol1. See page 12.

 2.My  printed pictures don't look  o Did you position the autofocus frame on your subject?
   very clear.                   Seepage 16.
                               o Did you obstruct the autofocus window with your fingery
                                          hair or other object when you depressthe shutter release
                                     button? Seepage 10.
                               o Is the autofocus window dirty? Wipe  it off. See page 16.

 3.Zoom lens retracted automati-  o Did you leave the camera unused for over 3 minutes after
    cally  (the power  is turned  off     the main switch was turned on? The power is automati-
   automatically)                         cally switched off  if the camera is left unused for over 3
                                     minutes. Seepage 9.

28
View original page 29From the M. Butkus archive. Original publisher and archive notices are retained.
Check the model and edition against your equipment.
PDF verified 2026-10-10.