Film cameras
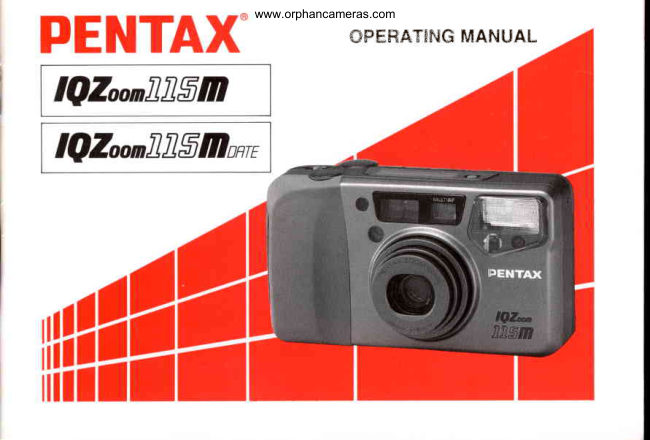
Pentax IQZoom 115M / IQZoom 115M date User manual
User manual for Pentax IQZoom 115M / IQZoom 115M date. 52 pages in English. Read the original PDF, download or print a copy without registration.
52 pagesEnglish4.0 MB PDF
Loading your manual…Open PDF directly
Document details
- Brand
- Pentax
- Model / document
- Pentax IQZoom 115M / IQZoom 115M date
- Document type
- User manual
- Language
- English
- Pages
- 52
- File size
- 4.0 MB
- Category
- Film cameras
- Document date
- Not specified in catalog
Search available document text
Find a term, then jump to its page in the original PDF. Image-only pages may not be searchable; check the PDF for exact wording and diagrams.
Page 2 · Read text
www.orphancameras.com


Congratulations  on  your  purchase  of   the     Icon indicators used in this manual
PENTAX  IQ ZOOM  ll5M  and welcome to the
world  of  Pentax zoom compact  photography!     Operationdirection                .(ts
Your compact,  light  weight camera  is a great
companion to preserve your favorite memories' Its     Automatic operation            frruf
built-in 38-1l5mm lens gives you the freedom to
frame everything from breathtaking landscapes to                                                                                                                 , tfamily   portraits,  even  detailed  close-ups. The     Attention
built-in  buto  flash helps you capture subjects in
dimlyJit  places or photograph indoor sceneswith      L a m p  l i g h t e d
claritv  and   brilliance.   Also   included   are
panoiama,/standard   format  mid-roll   switching                                                   ,.:..
iapability  and a wireless remote control  feature.     L a m p b l i n k i n g
Since most of the operation - including film load-
ing, film speed setting, winding/  rewinding, focus     Correct
and exposure control - are automatic, you can take
great pictures effortlessly.                                                                                       I ncorrect                             X
r Please read this manual carefully before operat-
   ing the camera to take consistently superior pic-    The name of the camera's working  parts are listed
   tures.                                        on the front and back flaps of this manual. Keep
o Pay special atteniion  to the cautions and notes     the flaps unfolded  for quick reference while read-
   in this Operating Manual. Pictures and illustra-     ing the manual.
   tions shown herein may differ from  the cam-
   era's actual appearance.
o Illustrations  in  this operating manual  are the
  DATA  MODEL.


                                                                                                                                                                                                                                                                        '--E                 l
View original page 2Page 4 · Read text
ourliNE' dF'ilAsiCopnRAtidNswww.orphancameras.com


                                    ,gE                              E   I         I,


Open  the  back  cover  Load the film and close  The film  will  automati-   Switch  on power  (see
(see page 1l).             the  back  cover  (see  cally  advance  to  the  page 8).
                       page 12).                         first  frame  (see page
                                               1 3 ) .
             re
Frame your subject and  Focus on your  subject  Depress the shutter re-  When--T-mthe  film  is  fin-
operate the zoom lever   (see page l7).             lease button.   In  dark   ished, the camera  will
to  compose  the  shot                               conditions.   the   flash   automaticallv  rewind   it
(see page l0).                                                     will   discharge   auto-   (see page 20).
                                                      matically (see page 19).
View original page 4Page 5 · Read text
www.orphancameras.com
PRECAUTIONS FOR YOUR CAMERA

Precautions when taking Pictures                   o Regular size color prints may cut off what ap-
o Do not use the camera where  it may come in       pears on the extreme edges of the film  frame.
  contact with  rain, water or any other liquid, be-      Compose your picture with a margin  of safety
  cause the cameta is not weather, water, or  liq-         at the edges.
   uid resistant. Should the camera get wet from                                                      Precautions for storage   rain, splashing water, or any other liquid, wipe
     it off immediately  with a dry soft cloth.           o Avoid  leaving the camera for extended periods
o Do not drop the camera or allow  it to hit a solid         in places where temperature and humidity  are
   object. If the camera suffers a severe shock or       high such as in a car.
   impact, take  it to a Pentax service center for in-        r Do not store the camera in a closet with moth-
   spection.                                                    balls or in a case where chemicals are handled.
o Be careful not to subject the camera to strong        Store it in a place with good air  circulation  to
   vibrations, shock or pressure. Use a cushion to       prevent fungus growth.
   protect the camera when carrying   it in a motor-                                                      Precautions for proPer care   cycle, car, boat, etc.
o Condensation on the interior  or the exterior  of     o IJse a blower and lens brush to remove dust ac-
   the camera may be extremely  harmful  to  the       cumulated on the lens or the viewfinder  win-
  camera  mechanism  as   it  may  cause  rust.       dow.
   Furthermore,   if the cameta is taken from warm     o Never use solvents such as paint  thinner,  alco-
   temperature to a subfreezing one or vice versa,        hol or benzene to clean the camera. To clean the    .{
   the formation  of icelets may cause damage. In        external camera surfaces, - but not glass sur-
  such a case, put the camera into a case or plastic        faces; using a dry or silicone-treated cloth  is rec-
  bag so that any changes in temperature  differ-      ommended.
  ence is minimized. Do not remove  it from  the
  bag until temperature has stabilized.


2
View original page 5Page 10 · Read text
www.orphancameras.comA**{P       -{rrAcH\rE\r


PREPARATIONS BEFORE
TAKING PHOTOGRAPHS
For optimum performance you should  fa-
miliarize  yourself with  certain fundamen.
tals before taking any photographs.


                                                                Fit the strap on the camera as illustrated.
                                            o Use the illustrated part @ for pushing the mid-
                                                                         roll rewind button to rewind a film  before ex-
                                                  posing all the frames. Use the illustrated  part
                         @  foi opening the battery chamber cover.
View original page 10Page 11 · Read text
www.orphancameras.com
   MAIN SWITCH

                          A


                                                                                                                            '#


                                                o See page 43 when the battery exhaustion symbolMain  switch
To switch ON, slide the main switch to the direc-           (f,t)    appears on the LCD panel.
tion of the arrow as illustrated. When the power     o IJse one- lithium  battery  (type CR-2  or  the
turns ON, the lens slightly extends and the lens       equivalent). The battery  is used by both  the
cover opens. The camera is now ready to shoot. To      cumera and the data function on the DATE
switch OFF, slide the main switch again.             model to keep constant track of time. After the
                                                          battery is replaced, correct the time. The date
o When  not  in  use, ensure that  the camera  is      and the no. bf frames are memorized and un-
  switched OFF.                                 changed even if the battery is replaced.
o  If the camera is ON and left unused for over 3
  minutes, the lens automatically retracts and the
  power is switched OFF  to save the battery.


8
View original page 11Page 12 · Read text
€"ow        ro H'LD rHE cA\rERAwww.orphancameras.com


    Keep the camera as still as possible, and gently de-     Notes:
     press the shutter release button.   (If  too much     o Do  not hold  the zoom lens because it moves
     force is applied, the camera is likely  to shake, and       back and forth  while  in operation.
     the picture will be blurred.) Try to brace your el-    o Make sure not  to obstruct the autofocus win-
    bows against a stable, stationary object such as a      dow, lens, light sensor window  or the built-in
      wall. When using the flash with the camera posi-        flash with your fingers, hair or other object.
     tioned vertically, hold the camera so that the flash
      is above the lens.

      rb
View original page 12Page 13 · Read text
'2d8uwww.orphancameras.com
  OPERATTNG38-115mfi       inNs",..


  VA
                             When you move the zoom lever to the right  ( |  ), the  VA                                        lens moves towards the 115mm telephoto setting and
                                    frames the subject more closely. When you move the
                               zoom lever to the left (f ll), the lens movestowards the
                                      wide-angle38mm setting. When the lens zooms to the
                                         desired setting, releasethe zoom lever and depress the
                                           shutter releasebutton fully to take pictures.     %Vr             {^:fr''&                o Do not apply force to the zoom lens as doing so
                                      causesdamage to the camera.
                                    o The shutter cannot be released while the lens  is
                                      zooming.
10
View original page 13Page 15 · Read text
www.orphancameras.com


2 Place the film cartridge  in the film chamber by     Notes:
   fitting  its flat side on the top of the rewind shaft     o Ensure the film  is placed properly between the
    first and then  slide  the  top end  of  the  film          film  guides.
   cartride into the camera.                        o  If the-re is dirt on the film detector lD, film can-
3 Pull  the  film  leader out  far enough from  the        not be wound properly.
   cartridge to reach the take-up spool. Align  the     o Ensure the film  is taut as illustrated on the illus-
   tip of the film  with  the  film  leader end mark          tration. Take up any slack in the film by push-
                                                                                                                  it back into the cartridge. o                                                       ing
4 After  the back cover  is closed, the  film  auto-     o  If the end of the film  leader is extremely  bent,
   matically advances to the first frame.                   straighten  it or cut off the bent portion.
\ \
                     '1-flr  i_EJ-
12  X SlackNo !       C  rlat Yes t
View original page 15Page 16 · Read text
www.orphancameras.com,,;,i.;,11                                                                                                            i i 1i i,                                     11|1i|i,; ;
  E               a
                                                    Automatic  film speed setting
                                                       This camera  is designed to use DX-coded  films
                                                          with ISO rating  from 25 to 3200. When any of
                                                     these films  are loaded, the proper  film  speed is
    '96                                            a        automatically  set for the camera.      q                t     t              aEa        Notes:
                                                 o Non-DX  coded films cannot be used. If Non-
                                        DX coded film  is used, the film  speed is auto-
                                                           matically set to ISO 25.
                                                 o A  film  with  ISO 400  film  speed  is recom-
                                             mended to get less image  blur  and  to cover
                                                more of the photographic  situations.
5 When  "  l" appears in the exposure counter on         . Us9 hig-h-speed films  with ISO 800 or higher
   the LCD  panel, the  film  automatically  stops       mainly  for shooting indoors or in dimly-lit  con-
   winding.  The  indication  appears  as shown         ditions.
  above.
6   If  ( E ) blinks on the LCD  panel,  it means the
   film  is not properly loaded. Reload the film.
o The exposure counter indication  will remain on
  even if the main switch  is turned OFF.


                                                                      13
View original page 16Page 19 · Read text
INDICATIONS    [shootingwww.orphancameras.comdistance:0.6s (2.1ft) - ""  (infinity)]4?LAMP

                                                         Shooting ranges (effective  camera-to-subject dis-
                                                          tance)
                                                     o The  standard  format  and panorama  format
                                                                allow a shooting range from  oo  (infinity)    to
                                                  0.65m Q.l   ft).

                                                    Focus aid illuminator
                                                                   In low light situations and/or   hard-to-autofocus
                                                                subjects, the focus aid illuminator  automatically
                                                           emits a striped pattern to assist the autofocus sys-      .#.,,!
                                                   tem when the shutter release button  is depressed
                                                          halfwav down.
    When you depress the shutter release button  half-
    way down, the lamp J   and,/or Q  lights up or
      blinks as shown above.
          I  Green lamp (Focus status)  :
    When the subject is in focus, it will  light up to in-
      dicate that you can take the picture; when the sub-
      ject is not in focus,  it  will  blink,  indicating  that
     you cannot take the picture because the camera-
      to-subject distance is too close or  is a hard-to-
     autofocus subject.
    C Red lamp (Flash status)  :
    When the flash is ready to discharge,  it  will  light
     up. When the flash is being charged, it will blink.
    16
View original page 19Page 20 · Read text
G7r-{K^--c   PI.T'RES    www.orphancameras.com

                                                                                                                   li


     This camera uses the  five-point AF  system to     o The green lamp blinks when the camera is not                                                                                                      lI     focus the subject. Even ifthe  subject is slightly off        able to obtain proper focus for one of the  fol-
     the center of the AF frame, the subject will easily       lowing reasons.
    be brought into focus.
                                                                (Dttre subject is too close.
     1 Composing the scene                                Ottre  subject is difficult  to autofocus. See page
        After zooming the lens and composing your       35.
       scene, focus on the subject with  the autofocus
       frame                                         o  If the autof,ocuswindow  is dirty, the autofocus
                                               may not function  properly.
    2 Checking the lamp indication
      Depress the  shutter  release button  halfway
      down. When the subject is in focus, the green
      lamp will  light up.

                                                                         1 7
View original page 20Page 21 · Read text
www.orphancameras.com


3 Shooting
  Depress the shutter release button  fully, and the
   shutter  will  be released. Then, the  film  auto-
   matically advances to the next frame.

Notes:
r   If you wish to focus on another subject, lift your
   finger from the shutter release button and de-
  press the shutter button halfway down again.
o The shutter cannot be released while the lens is
  zooming.


1 8
View original page 21
Page 22 · Read text
www.orphancameras.com


                                                     Flash effective ranges (Nega-color  film used)
                                                                l*-ns'{0        100     200      400
                                                 3 8 mm  ( l l l )   (2.1-0.65-4.7m15.4ft)(2.1-22.}ft',0.65-6.7m(2.10.65-9.4m-30.8ft)
                                                 1 1 5 m m( l )   0.65-2.0m(2.1-6.6ft)0.65-2.9m(2.1-9.5)  (0.65-4.0m2 . r - 1 3 . 1 f t )
                                                                                                                                                                                                                                                                                                     liln
                                            See page 45 when any other ISO films are loaded.

                                                Red-eye
                                                    Shooting  portraits  with  the flash may  result  in
                                                       "red-eye", the red dot in your subject's eye. This
Automatic Flash Emission                         camera  incorporates  a  red-eye  reduction  flash
When taking pictures in low  light, the flash will      function which  lights up the self-timer lamp  for
automatically discharge. When the shutter release    approx.  I second before the flash is discharged.
button is depressedhalfway down in low light, the     For setting the red-eye reduction flash function,
red lamp will light up, indicating the flash is ready    see page page 22.
to discharge. If the red lamp blinks, this indicates
that the built-in  flash is being charged and the
shutter cannot be released. Therefore. make sure
that the red lamp is lit continuously before taking
pictures.


                                                                      1 9
View original page 22Page 23 · Read text
www.orphancameras.com
ai|UNLOADING             FILM   (Removethefitn fromrhecamerain theshadeor W usineyourbodyto sarle thecamen)

           rl
             ,igl r>     t-'"T           fG-il]"9


        --=-j.1.'
             r  9 5 . r o ; o l i .      -
          -------qil.
                       a

    1 Rewinding the film                              2 Unloading  film
        After  you have exposed the  last frame  of the      To unload the film, open the back cover, and re-
          roll. the lens retracts and the film rewinds auto-      move the cartridge from the chamber.
        matically. Then, the motor  stops, and  ( 0  )
        blinks as shown to indicate that the film  has    Notes:
      been rewound.                                  o The shutter may be released a frame  or two
                                                      even after the specified number of frames have
    o A}4-exposure   roll  offilm   takes about 20 sec-      been used up. If  this occurs, these extra frames
      onds to be rewound.                          may be lost in the processing.
    o During  rewinding,  the exposure counter counts     o Never open the back cover until the whole film
       frame numbers in reverse.                                       roll  is rewound.
    o The entire roll of film  including  the film leader
          is always rewound into the cartridge to prevent
      any part of the film being exposed to light.

   20
View original page 23Page 24 · Read text
www.orphancameras.com


Rewinding a film  in mid-roll
If you wish to unload a film  before exposing  all
the frames, push the mid-roll rewind button with
the protrusion part of the strap ; the lens retracts
and then film  rewindins  starts. When rewind  is
completed, the motor stdps, and ( 0 ) Ulinks, indi-
cating that the back cover may be opened safely.


                                                                      21
View original page 24Page 26 · Read text
www.orphancameras.com


To set various shooting modes, depress the drive button O.
        tf*Fl*Ff*Fl-rl Single-Frame  Self-Timer  RemoteControllnfinity-Landscape
        Shooting      Shooting   Shooting      Shooting
o For normal use, set the Single-Frame Shooting Mode.
o In the Self-Timer Shootinglnd/or    the Remoie Control Shooting Mode,  if the button O  is depressed
   after the shutter is released, the Single-Frame Shooting Mode  is returned automatically.
What  is the red-eye phenomenon in flash photography
When a picture  is taken using a flash, a subject's eyes may appear red in the print. This phenomenon  is
caused by the reflection  of the electronic flash in the retina.  It can be reduced when the surrounding  of
the subjects are brightened, or shooting distance is shortened or by employing the red-eye reduction flash
feature.


                                                                 23
View original page 26Page 27 · Read text
www.orphancameras.comDAYLIGHT.SYNC SHOOTING


                                       the                                 mode    'i:,rt q                                                                 (  t )                           b u t t o n u                                   n t i l                t    I      Depress                            appears  on   the
                              A     LCD panel. In this
                         mode,  the   flash o@                            will  discharge  in                                 I
                             both   dark   and
bright conditions. When a portrait  is taken with
the subject in a backlight  situation, the front  of
the subject may be cast in shadow. In such a case,
use the Daylight-Sync Shooting Mode (Flash-ON
mode) within the flash-effective range to take pic-
tures. This will ensure that a picture  is well ex-
posed without any shadow. When you wish  to     Without Daylight-Sync
discharge the flash, use this mode. In  this mode,
the flash will always discharge.

Note:
o Make  sure  you're  within   the  flash-effective
  range even when you use the built- in flash as a
   fill-in  flash in daylight. See page 19.


                                                  With Daylight-Sync
24
View original page 27Page 29 · Read text
www.orphancameras.com
BULB, BULB-SYI\\TCSHOOTII{G

                             Bulb Mode (Q B)
                           Depress the mode               '   t      button until  (o B)  O'te)t  C A        appears  on   the
                      LCD panel.o@                     This mode  is use-
                                        ful  for long expo-
sures required  for shooting fireworks and  night
scenes,for example. When using this mode, the
camera should be mounted on a tripod so that the
camera will be steady.


                            Bulb-Sync Mode       Bulb Mode, approx. 3 sec. (ISO 400)
       \                 (+ B)      L       T   Y '          ,              V'                           Depress                                        the mode     o Make  sure you're  within  the  flash  effective
                               bution  until   (l  B)       range even when the Bulb-Sync Mode  in use.
                            appears  on   the      See page 19.o@               LCD panel.           o The shutter remains open as long as the shutter
                              This  lets you use       release button held down.
the flash in addition to the Bulb Mode, so you can    o Use of a tripod  is recommended.
take a portrait photograph with  a night scene in
the background, for example.


26
View original page 29Page 30 · Read text
www.orphancameras.com      SELF-TIMER PHOTOGRAPHY

                  1l
          'gE           q                    ;,5.  i
   o@

           Self-Timer
         Use the self-timer  if you wish to get in the picture.
ll       UseI  Depressof a tripodthe driveis recommended.button  until  (Q)) appears on
             the LCD  panel.


                                                                             27
View original page 30Page 31 · Read text
www.orphancameras.com


                                                  Notes on the self-timer shooting
                                                                                 r   If you are standing directly  in front  of the cam-
                                                      era when starting the Self-Timer, the camera
                                                                         will be focused on you, not the main subjects.
                                            Be sure that you are behind, or next to the cam-
                                                      era when starting the Self-Timer.
                                                o When you want to use the flash with  the  self-         -ffitif                            tlmer, ensure that the red lamp is lit indicating
                                                          the                                                                    flash has been charged before operating the    ffi,      O\WQ:                                                               self-timer.


2 Focus on the subjects first  by  depressing the
   shutter release button fully. The shutter will be
  released in about  l0 seconds. When  the  self-
   timer is working, the Self-Timer symbol  ( t)   )
   blinks on the LCD  panel, and the Self-Timer
  lamp blinks 3 seconds before the shutter  is re-
  leased, letting you know when to smile.

How to cancel
To stop the self-timer operation at any time  after
its been activated, slide the main switch. In this in-
stance, the power will  not be turned OFF.


28
View original page 31From the M. Butkus archive. Original publisher and archive notices are retained.
Check the model and edition against your equipment.
PDF verified 2026-10-10.